Dalpilot
Joe Nobody!
- Joined
- Apr 21, 2006
- Messages
- 11,373
I purchased DJ's fuel system pressure intensifier, and recently installed it. The following is the procedures I used for the installation. The total install can be done in less than 2 hours, however, it is a messy job, and you WILL get diesel fuel on you.
1. Remove the intake or Cold air intake and the cold side CAC tube to get more room to work. Removing the drivers side battery tray will make it easier, or you can work under the support for the intake that is attached to the battery tray.
I worked around it.
2. Remove the top cover of the fuel filter housing, and remove the fuel filter. Great time to change the filter, and to install DJ's fuel filter housing cover to replace the cheap plastic one it comes with. Once the cover is removed, drain the fuel out of the fuel bowl. I used a large turkey baster to suck it out.

3. Remove the 4 bolts on the regulator cover. They are a Torx bit (star pattern) T-25, and remove the regulator cover. It will look like this:

4. Remove and discard the regulator, (brass top hat looking thing with the spring hanging out of it), and the spring.

5. Reinstall regulator cover using the 4 torx bolts. Be careful not to strip it out. (this comes from experience). Just past snug works perfect.
6. Remove the existing fitting in the fuel regulator outlet, and install the # 2 fitting supplied with the Fuel + intensifier. Its the one connected to the regulator housing with the 4 bolts you removed earlier.

Look at the size difference, DJ's on the right:

7. Remove the two fittings on the sides of the fuel regulator housings that connect the fuel lines to the heads, and install 2 of the #3 fittings
 where you took out the existing fittings. To get to the one on the top rear side of the housing, you will have to remove the inlet fuel line.


8. Remove the Banjo bolts from the front of the heads. They are a little difficult to get to:

Here is what they look like removed:


VS the new fittings DJ's on the right:

9. Install 2 #3 fittings, (just like the 2 in step 7), in the heads where you removed the banjo bolts. The drivers side is a little more difficult to get to since there is a cooling hose in the way. Be sure to plan at this step how you want to run your hoses, and place the fitting accordingly. I had mine at about the 2 oclock position.

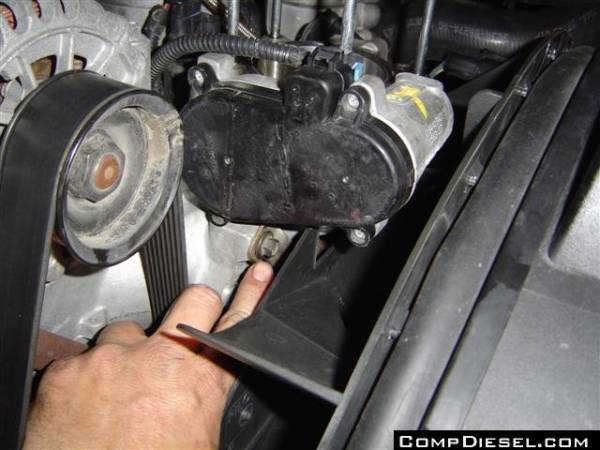
10. The most difficult part I found was removing the old lines. The passendger side is harder, and I would up cutting it in 2 places to get it out. You also have to remove this bolt:


11. Run your 22.5" hose from the passenger side to the fitting you installed on the left side of the regulator.
12. Run your 21" hose from the drivers side head to the right side of the regulator.

13. Now install your 34" line from the #2 fitting you installed in the regulator earlier in step 6 to the Fuel + intensifier's top fitting. NOTE*** Be sure to put some thread sealer on the fittings and the blue plugs in the intensifier****

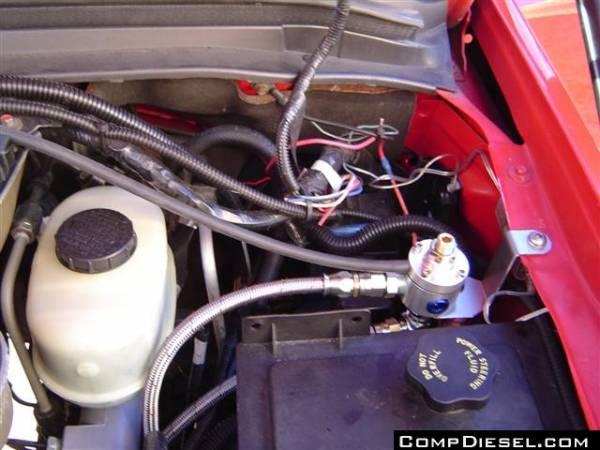
14 Now install the fuel + intensifier to the drivers side fender just aft of the brake fluid resevoir. I drilled a hole and used a bolt. Its a good idea to test fit the hose to the fuel pump to make sure its long enough where you want to mount before drilling the hole.

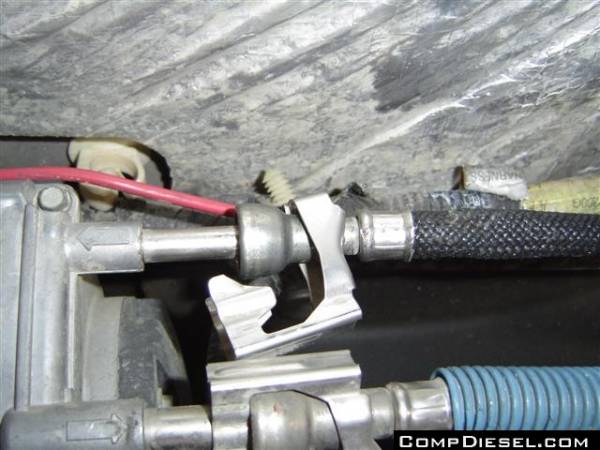
15. Install the 48" hose from the Fuel + intensifiers bottom fitting, (again, make sure its tight) to the upper fitting, (return line, has an arrow pointing to the rear of the truck) where the gray return fuel line is on the fuel pump on the drivers side frame rail. You will need a fuel line removal tool from any auto parts store. Remove the old line and slip on the new.


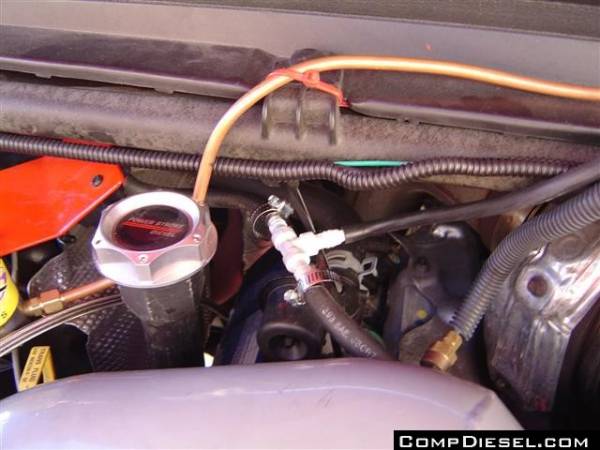
16. Tap the Map sensor line on the passenger side by cutting into the line and placing the T fitting supplied with the Fuel + intensifier.

17. Attach the vacuum line from the T you just installed to the brass fitting on side at the top of the Fuel + intensifier.

18. At this point the install is complete, but turn on the key and check good for leaks. At this point you need to set the Fuel pressure to 55 pounds in warm weather, and 45 pounds if its cold. To do this loosen the nut on the top fitting, and adjust the pressure by turning the allan head clockwise to incresase pressure and counter to decrease. Once its set, tighten the nut, and your done.
19. If no leaks turn off the key and re-install the CAC tube and the intake. Your done, congrats and enjoy the new fuel system.
1. Remove the intake or Cold air intake and the cold side CAC tube to get more room to work. Removing the drivers side battery tray will make it easier, or you can work under the support for the intake that is attached to the battery tray.
I worked around it.
2. Remove the top cover of the fuel filter housing, and remove the fuel filter. Great time to change the filter, and to install DJ's fuel filter housing cover to replace the cheap plastic one it comes with. Once the cover is removed, drain the fuel out of the fuel bowl. I used a large turkey baster to suck it out.

3. Remove the 4 bolts on the regulator cover. They are a Torx bit (star pattern) T-25, and remove the regulator cover. It will look like this:

4. Remove and discard the regulator, (brass top hat looking thing with the spring hanging out of it), and the spring.

5. Reinstall regulator cover using the 4 torx bolts. Be careful not to strip it out. (this comes from experience). Just past snug works perfect.
6. Remove the existing fitting in the fuel regulator outlet, and install the # 2 fitting supplied with the Fuel + intensifier. Its the one connected to the regulator housing with the 4 bolts you removed earlier.

Look at the size difference, DJ's on the right:

7. Remove the two fittings on the sides of the fuel regulator housings that connect the fuel lines to the heads, and install 2 of the #3 fittings


8. Remove the Banjo bolts from the front of the heads. They are a little difficult to get to:

Here is what they look like removed:


VS the new fittings DJ's on the right:

9. Install 2 #3 fittings, (just like the 2 in step 7), in the heads where you removed the banjo bolts. The drivers side is a little more difficult to get to since there is a cooling hose in the way. Be sure to plan at this step how you want to run your hoses, and place the fitting accordingly. I had mine at about the 2 oclock position.

10. The most difficult part I found was removing the old lines. The passendger side is harder, and I would up cutting it in 2 places to get it out. You also have to remove this bolt:


11. Run your 22.5" hose from the passenger side to the fitting you installed on the left side of the regulator.
12. Run your 21" hose from the drivers side head to the right side of the regulator.

13. Now install your 34" line from the #2 fitting you installed in the regulator earlier in step 6 to the Fuel + intensifier's top fitting. NOTE*** Be sure to put some thread sealer on the fittings and the blue plugs in the intensifier****

14 Now install the fuel + intensifier to the drivers side fender just aft of the brake fluid resevoir. I drilled a hole and used a bolt. Its a good idea to test fit the hose to the fuel pump to make sure its long enough where you want to mount before drilling the hole.

15. Install the 48" hose from the Fuel + intensifiers bottom fitting, (again, make sure its tight) to the upper fitting, (return line, has an arrow pointing to the rear of the truck) where the gray return fuel line is on the fuel pump on the drivers side frame rail. You will need a fuel line removal tool from any auto parts store. Remove the old line and slip on the new.


16. Tap the Map sensor line on the passenger side by cutting into the line and placing the T fitting supplied with the Fuel + intensifier.

17. Attach the vacuum line from the T you just installed to the brass fitting on side at the top of the Fuel + intensifier.

18. At this point the install is complete, but turn on the key and check good for leaks. At this point you need to set the Fuel pressure to 55 pounds in warm weather, and 45 pounds if its cold. To do this loosen the nut on the top fitting, and adjust the pressure by turning the allan head clockwise to incresase pressure and counter to decrease. Once its set, tighten the nut, and your done.
19. If no leaks turn off the key and re-install the CAC tube and the intake. Your done, congrats and enjoy the new fuel system.
