Disassembly for rebuild has started.

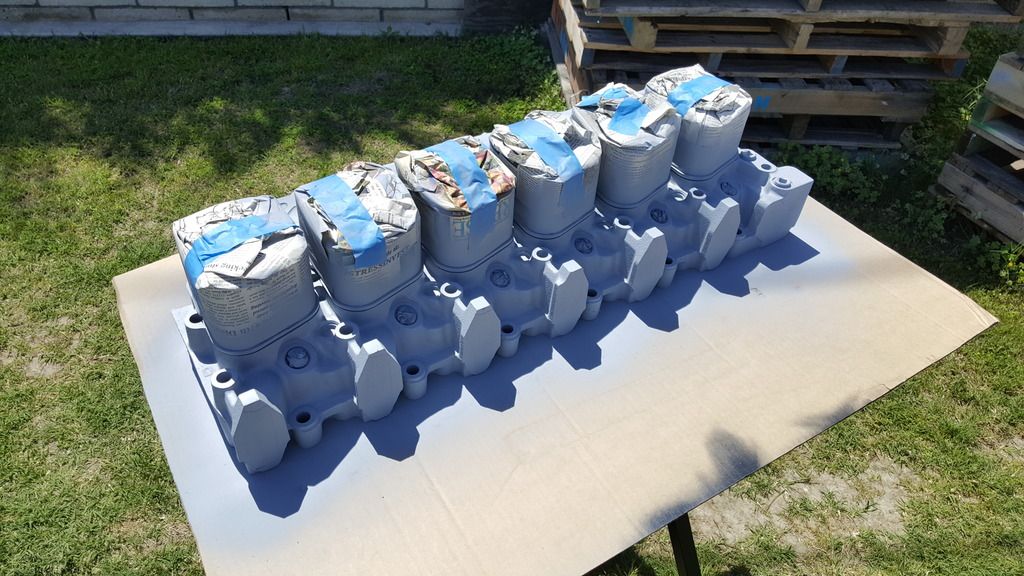
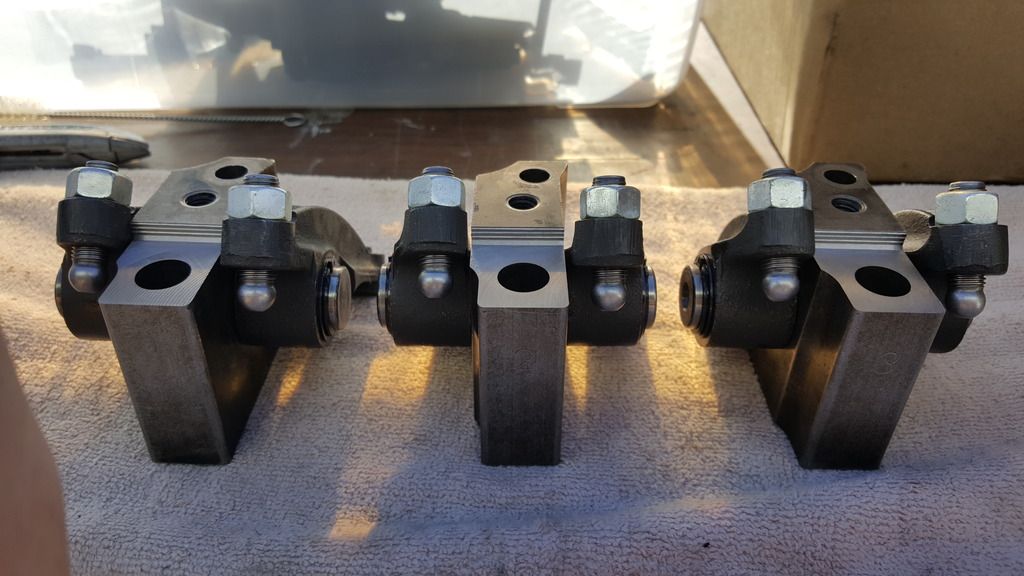
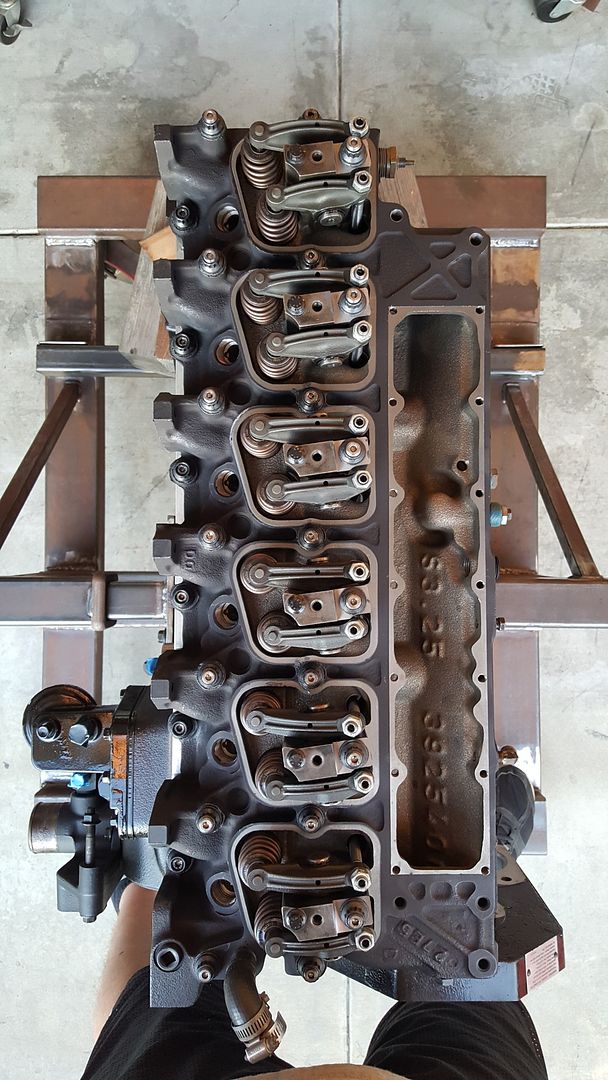
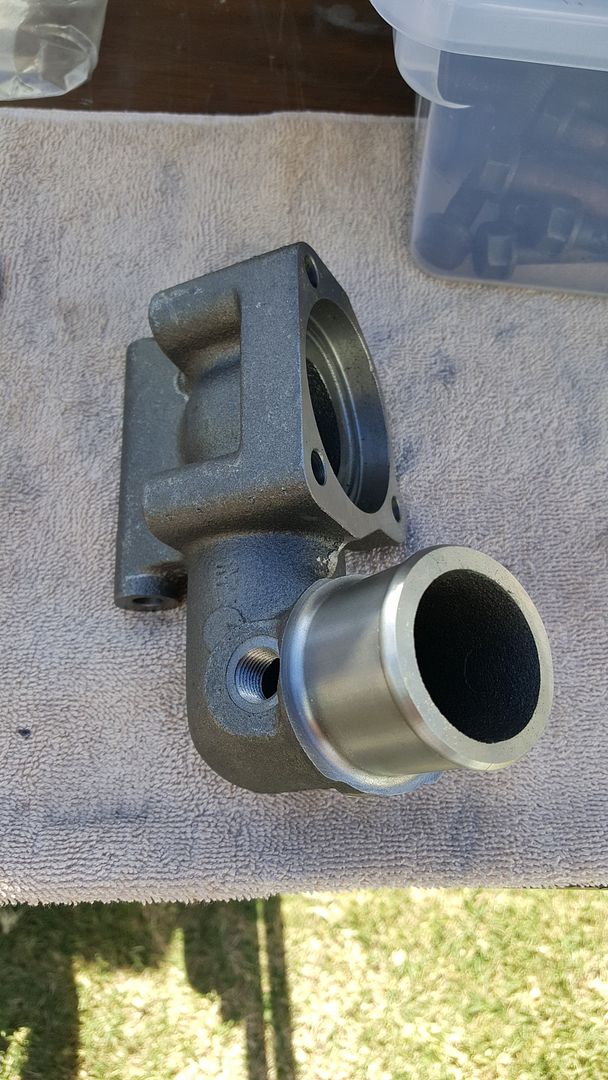
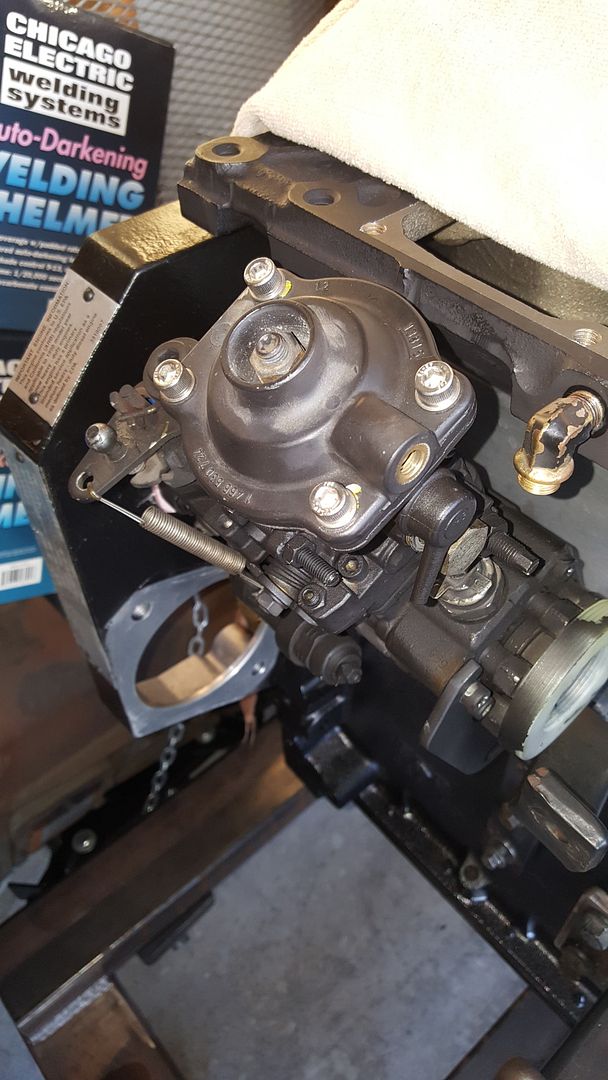
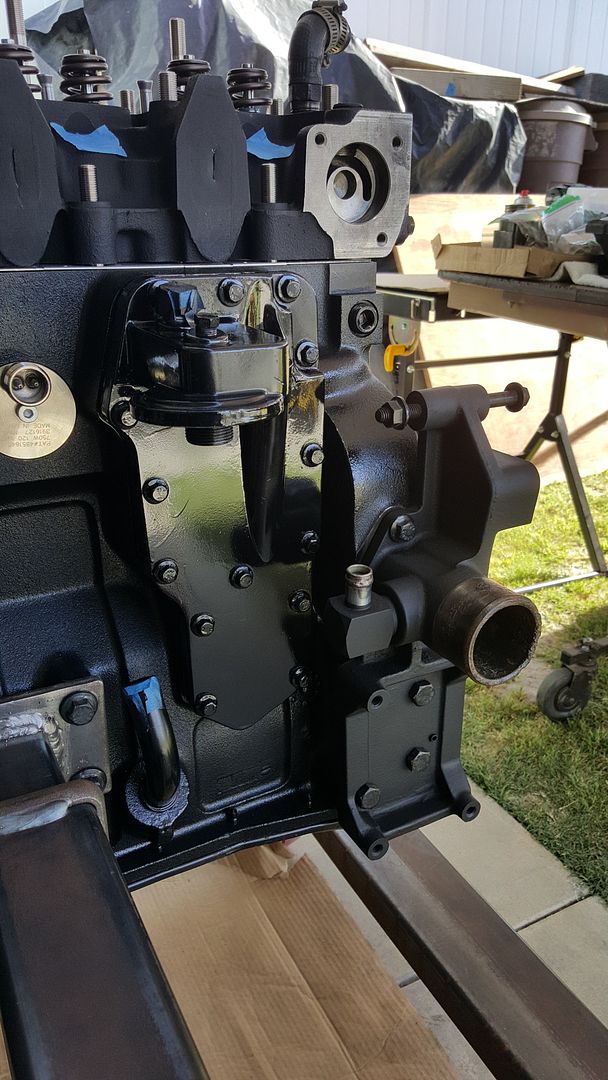
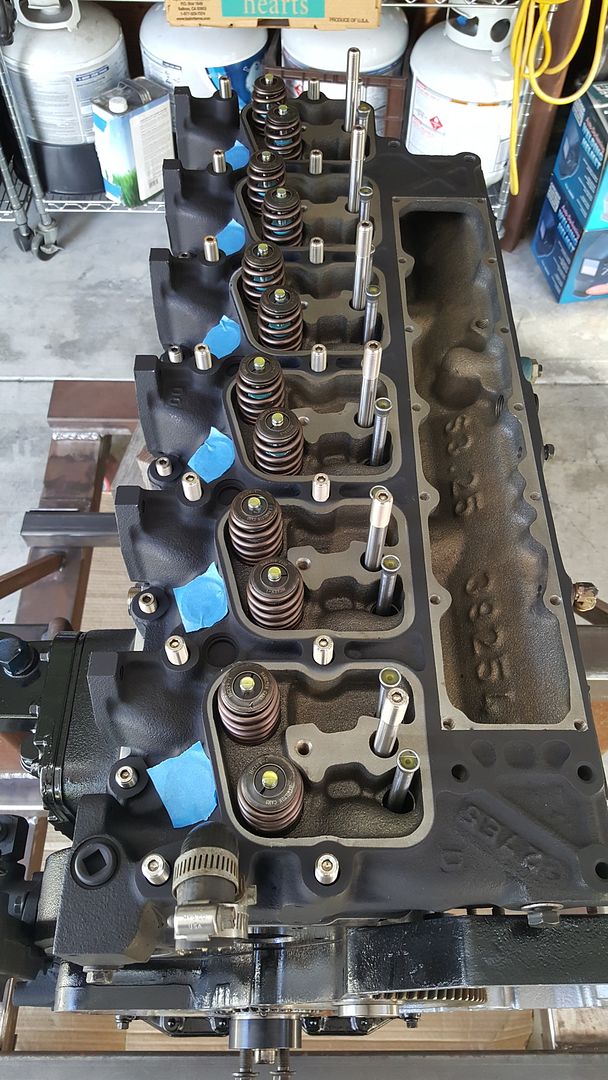
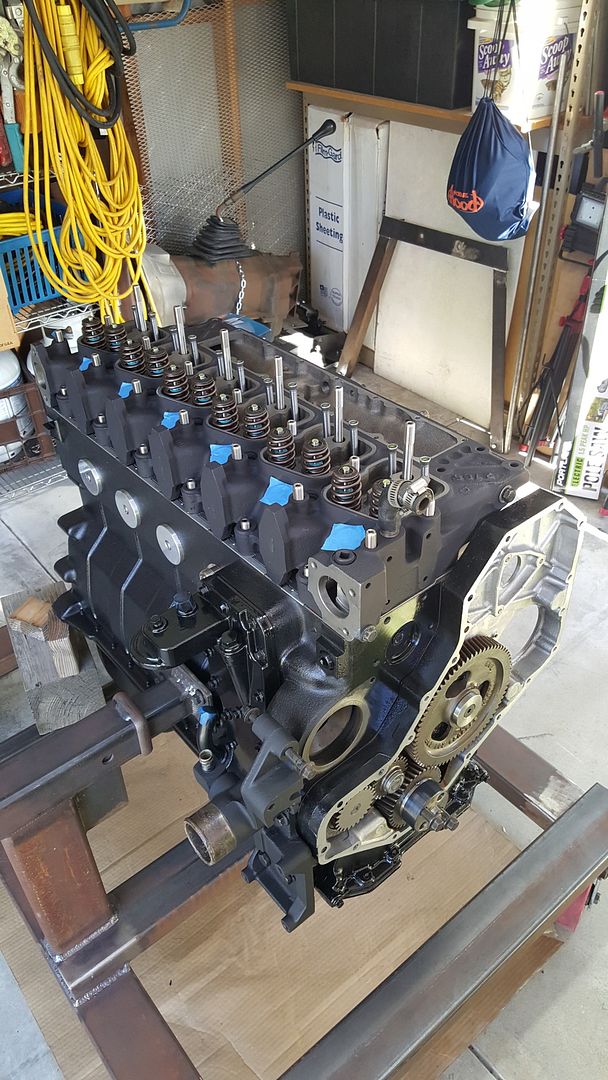
Finished assembling the remaining 3 rocker lever assemblies. Bolted on the oil cooler and filter head package and the water inlet connection.

20160420_164407_zpsqopeqnwy.jpg


20160420_164510_zpsb1ijjd09.jpg


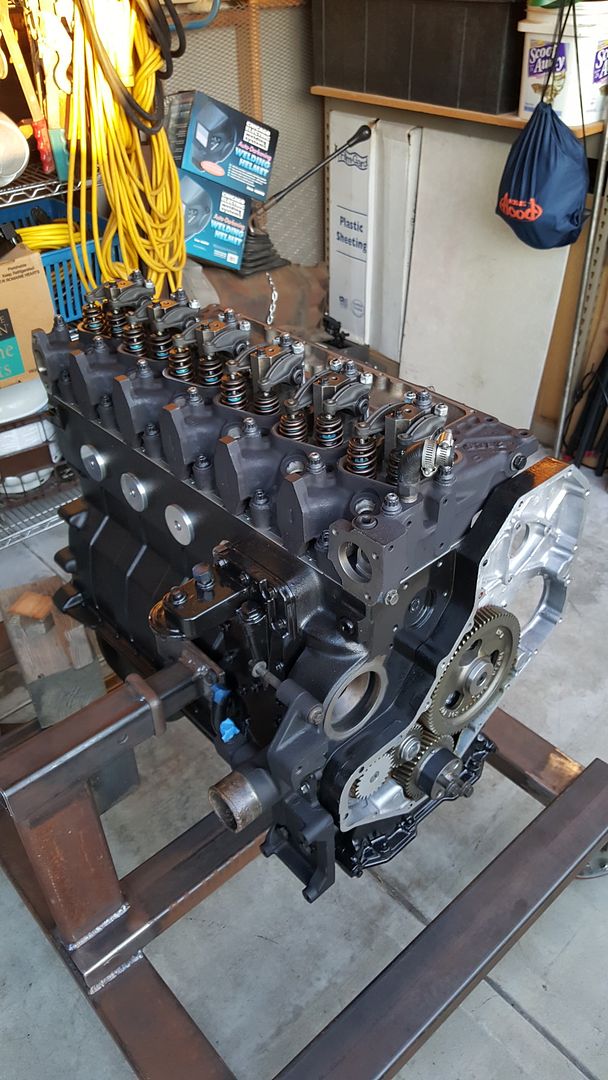
Set the head on the block and dropped in Hamilton's HD push rods, threaded in the ARP CA625 studs. Ran them in until hand tight as per their instructions.

20160420_164830_zpsaszqavwe.jpg


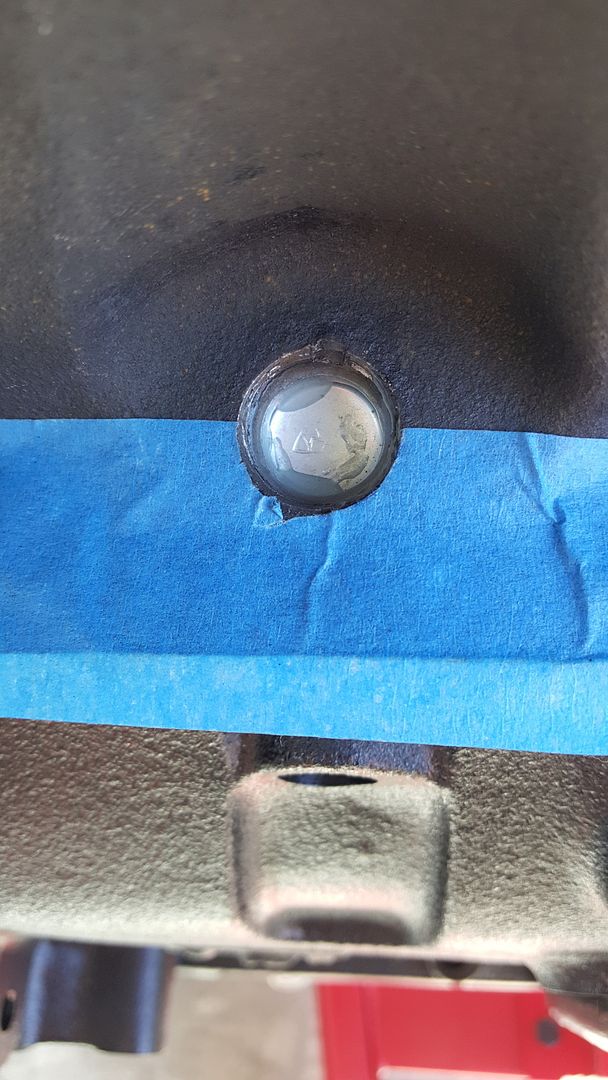
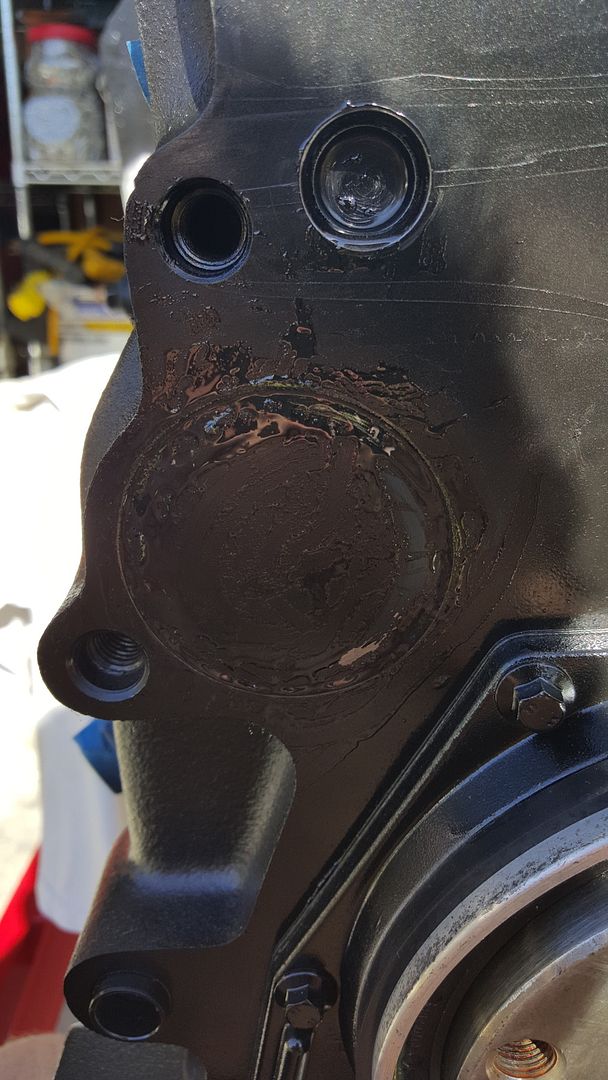
Something didn't look quite right with the shorties between the exhaust runners. But the head wasn't seated just yet so I waited.

20160420_164840_zps3at33e0m.jpg


Sure enough...

20160420_180310_zpsepw8nqpd.jpg


20160420_180240_zpsrscsdoml.jpg


received_1272215566140059_zpsqlj6x6fk.jpeg


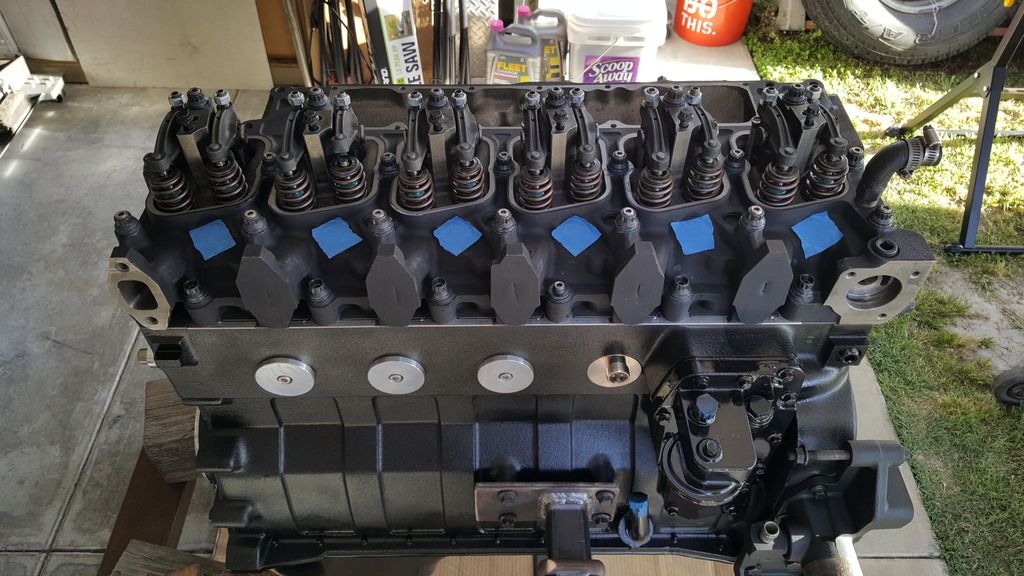
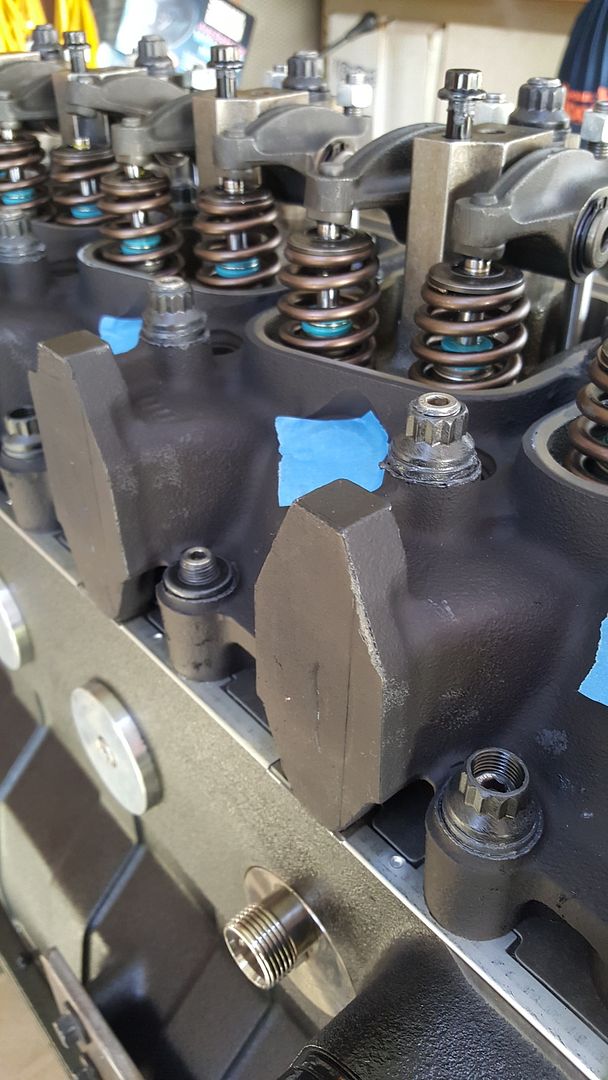
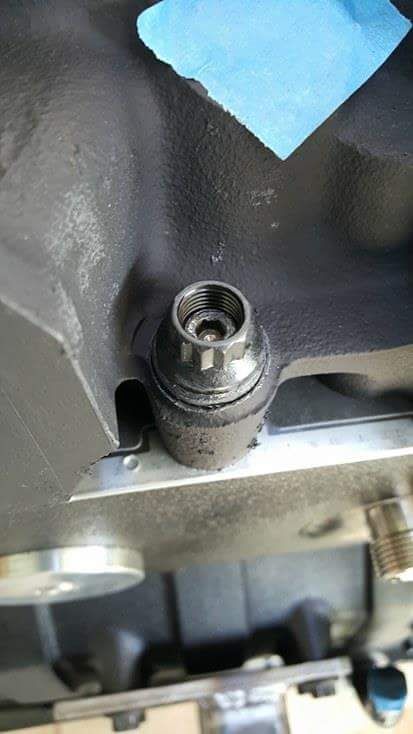
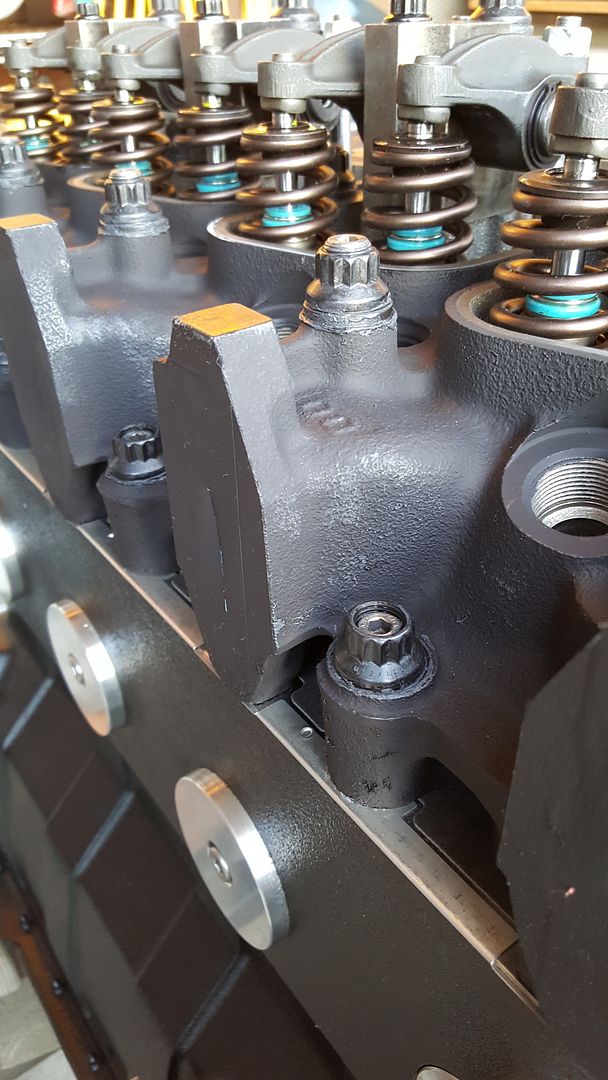
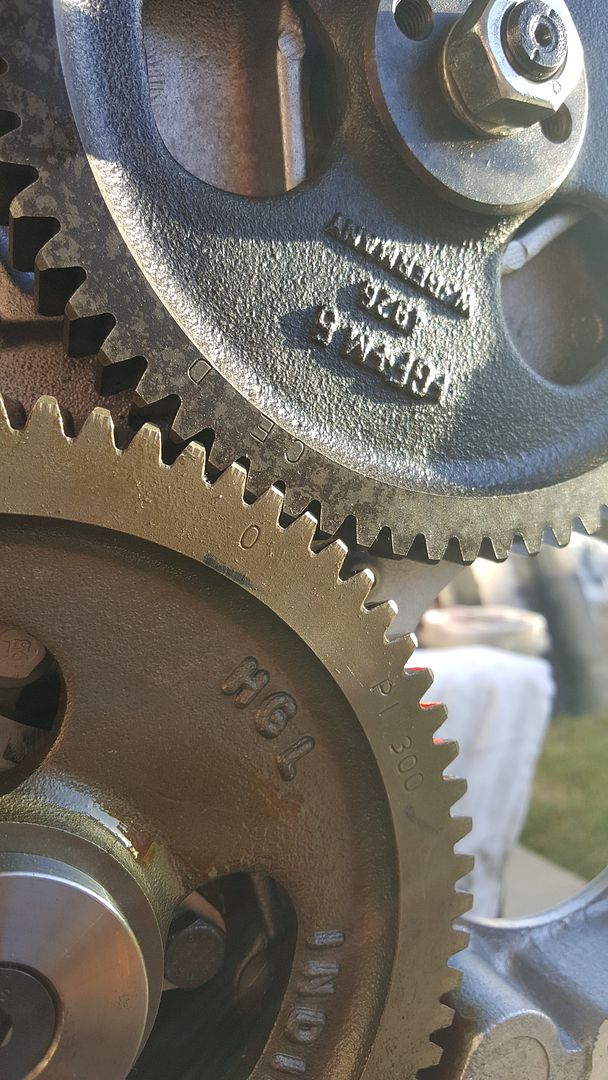
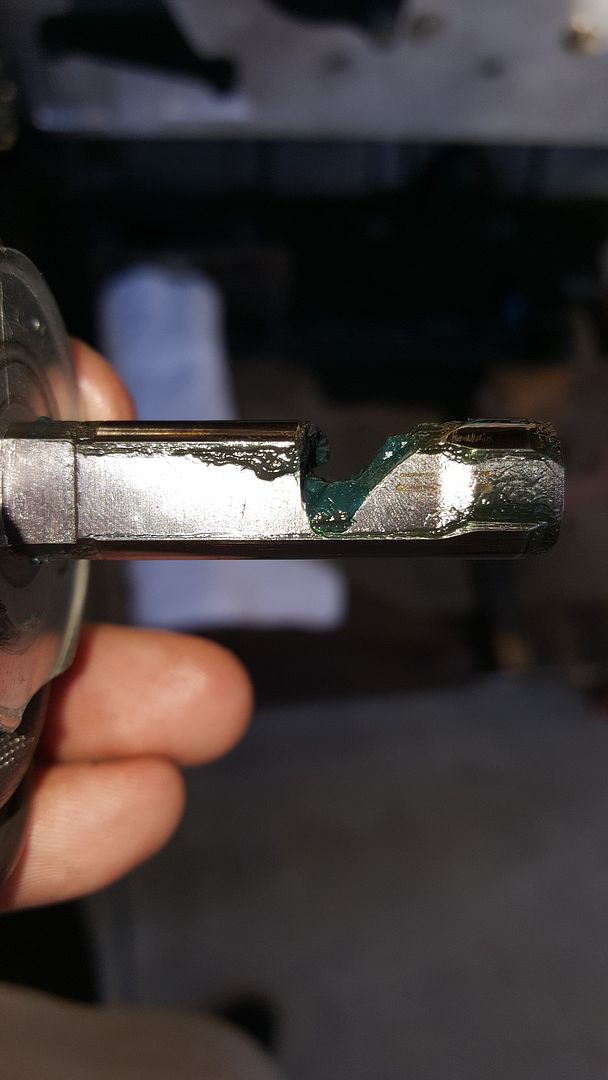
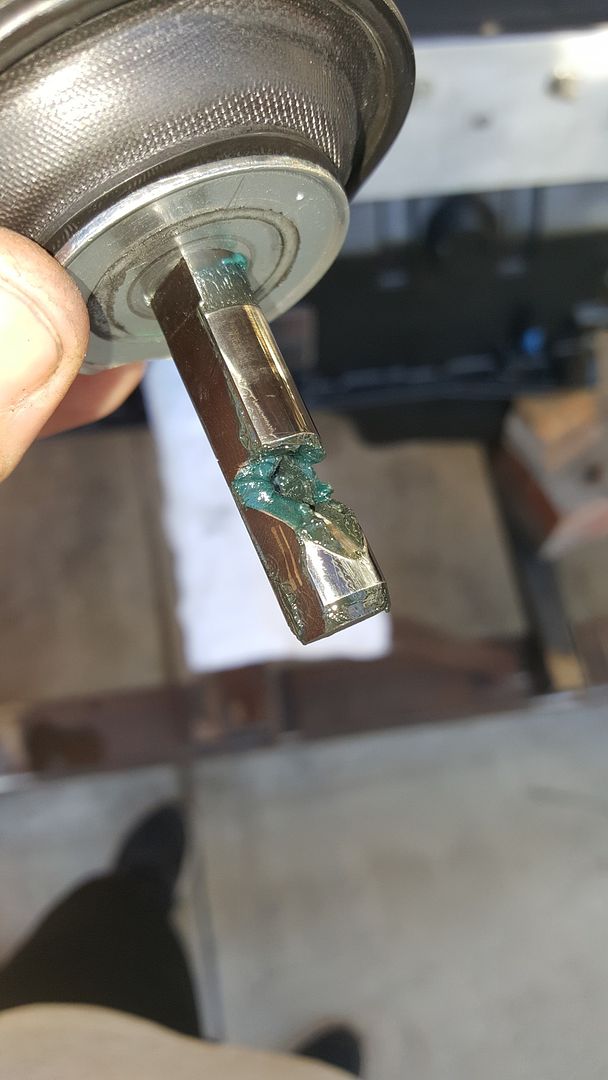
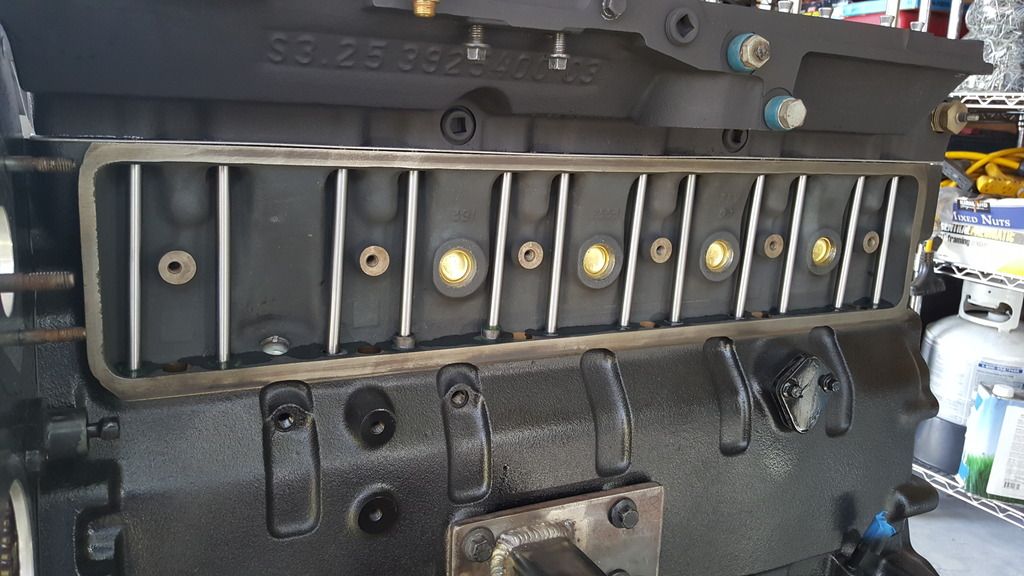
I did notice that while bottom tapping the bores, the 6 along the exhaust side were about 3/8" deeper than the rest of the bores. I started to think that maybe those didn't need to be tapped. But, after counting 14 threads on the stud and 14 turns until it stopped in the bore, that tells me that all of the threads wouldn't have been engaged if I hadn't tapped them deeper.

Some guys I've talked to said to back them out until they're flush or that ARP says to back them out 1/4 of a turn. None can provide an official ARP document stating to back these studs out 1/4 of a turn and the instructions found on their website and that came with the studs do not say anything about backing them out. Only stating to run them in hand tight only. Nothing more. I ain't about to back them out because then it would be as if I didn't bottom tap and therefore, all of the threads again would not be fully engaged. Is this common for the early 12 valve blocks?

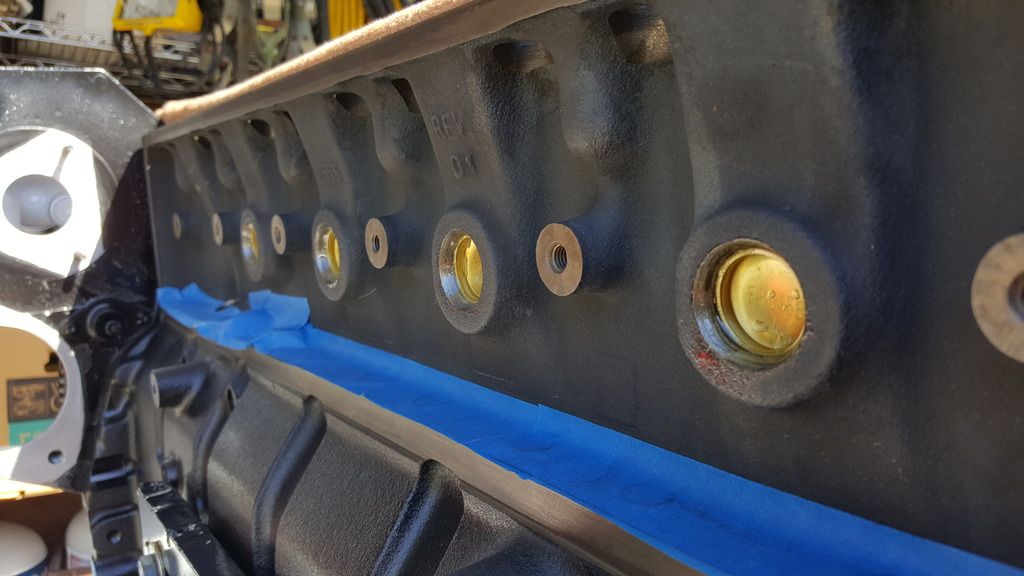
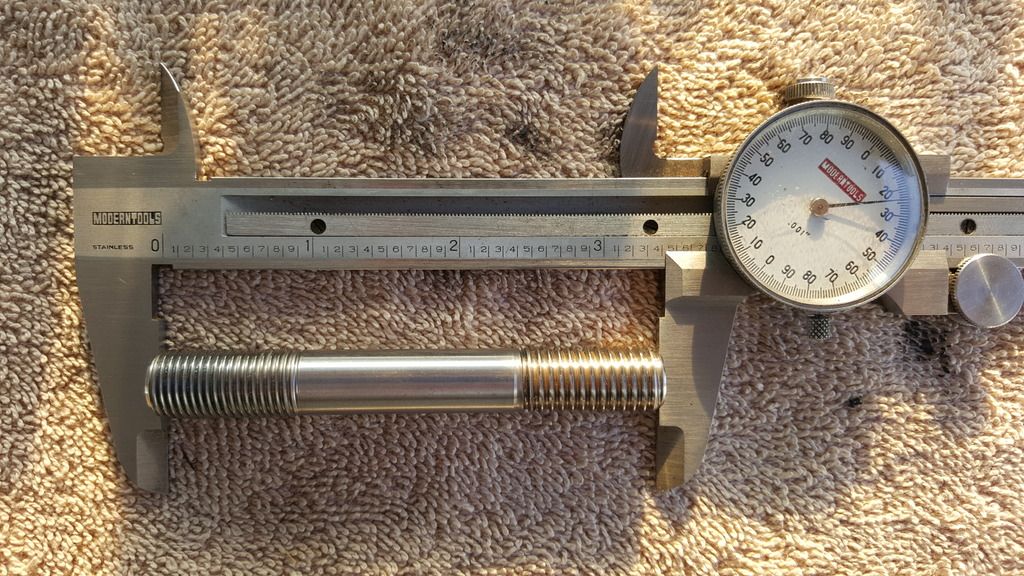
I measured one of the studs I took out with my calipers, 3.424". It appears they need to be 3/8-1/2" longer. Does anyone happen to have a 625+ set for a 12v and be willing measure the short stud for me? Kit #247-4205.

20160420_180936_zpsarmjgc0p.jpg


I'm gonna call ARP tomorrow and ask what happened. Before I go any further, I need to ensure that I can get the head seated fully before starting the torque sequence. I don't want to pull the head down with the studs.
 
Last edited:
According to Zach at ARP, there are variances with the early 12v blocks that they recently became aware of. They're currently working towards producing a kit for the early 12v blocks that will have longer shorties but they won't have them available for about another 6 months. He said a few guys he's spoken with about this have just removed the hardened washer and run only the nut. I mentioned that the washer isn't quite 3/8" of an inch and that the stud may still be a little short. He said that if the stud is 1 or 2 threads below flush, that is acceptable. He also said no to backing the stud out to make it flush for the same reason I suspected, not having full thread engagement in the block.

Once the new kits become available, I may see if they'd let me exchange these for the longer ones. At worst, I'd probably have to buy the new ones.
 
Last edited:
"Some guys I've talked to said to back them out until they're flush"
You want the nut threads in full contact with the stud before torquing. Good idea to make sure they are the right length. Engine looks good.
 
Primed and painted the new head today with VHT. Rated for up to 2000 degrees.

20160412_120110_zpsmijl1zzr.jpg


20160412_132401_zps0y10i4es.jpg


The cam gear was treated to a retainer from Hamilton.

20160412_151908_zpsoofjt6pv.jpg


Applied JB Weld to the remaining expansion plugs; oil rifle and coolant plugs in the tappet valley, oil rifle and cam plug at the rear of the block.

20160412_160018_zpssqtfedld.jpg


20160412_160035_zps00ndomf9.jpg


20160412_160122_zpselha8qie.jpg


I also bought new rocker levers, thrust washers and retaining rings. New levers weren't necessary as the existing levers were fine but a new set wasn't that expensive. However, Cummins only had half of the retaining rings on hand so I'll have to wait until next week to assemble the remaining 3. All of the rocker shafts maintained the maximum specified diameter of .747".

20160412_172100_zps56zrbn6s.jpg


How much were the new stands? Also how much were the rockers? Have a part number
 
"Some guys I've talked to said to back them out until they're flush"
You want the nut threads in full contact with the stud before torquing. Good idea to make sure they are the right length. Engine looks good.

Thanks. It just didn't sound like a good idea to me nor did I think ARP would recommend it.

How much were the new stands? Also how much were the rockers? Have a part number

By stands, you mean the pedestals? I didn't buy new, just had my existing ones milled. I also bought new thrust washers and retaining rings for the rockers.

Thrust (Plain) washer P/N: 3900245 - $3.10ea., $37.20 for 12.

Retaining ring P/N: 3900242 - $4.19ea., $50.28 for 12.

Intake rocker lever P/N: 3910811 - $32.81ea., $196.86 for 6.

Exh. rocker lever P/N: 3900810 - $32.81ea., $196.86 for 6.
 
According to Zach at ARP, there are variances with the early 12v blocks that they recently became aware of. They're currently working towards producing a kit for the early 12v blocks that will have longer shorties but they won't have them available for about another 6 months. He said a few guys he's spoken with about this have just removed the hardened washer and run only the nut. I mentioned that the washer isn't quite 3/8" of an inch and that the stud may still be a little short. He said that if the stud is 1 or 2 threads below flush, that is acceptable. He also said no to backing the stud out to make it flush for the same reason I suspected, not having full thread engagement in the block.

Once the new kits become available, I may see if they'd let me exchange these for the longer ones. At worst, I'd probably have to buy the new ones.

Thanks for posting arp's recommendation. Good to know.
 
This is a lot better. Between 1 and 2 threads from flush just as ARP said. Whew! Good shoulder workout pulling these down to 150ft. lbs.! Glad to have that out of the way. Also set the valve lash.

Picked up a thermostat housing from a '94-'98 motor which has a vent port and where the coolant bypass will plumb to. Looks like 1/4" NPT though so I'm not sure if that will allow sufficient flow for the bypass. If there's room, I could probably drill it out and tap it to 1/2" NPT.

20160421_190946_zpscfwyzohh.jpg


20160421_190959_zpshzaemkia.jpg


20160421_191024_zpscvj7hkez.jpg


20160421_162013_zpspyprnlih.jpg


I just placed an order for a Watts PRV, LF530C in 1/2".

530C.jpg
 
I would suggest not getting rid of that vent fitting. It helps with de air ration of the cooling system
 
I've never noticed an issue with the original t-stat housing which doesn't have the vent in it. I pull the plug in the head right next to the t-stat when filling the system so it can purge.
 
Perhaps I could run a T-fitting for both that and the bypass? Or would that have an adverse effect on the bypass?
 
Installed the billet tappet cover with a new o-ring. Advanced a tooth on the pump gear which allowed for clearance between the head and AFC housing. As well as room for more static advance should I choose to do so.

20160422_194403_zpsmltlfsvy.jpg


20160422_194434_zpsa6p6lksz.jpg


20160422_194519_zpsbqkjqyk9.jpg
 
I've never noticed an issue with the original t-stat housing which doesn't have the vent in it. I pull the plug in the head right next to the t-stat when filling the system so it can purge.


Hmm it should have had one from factory. That's strange.
 
I bet you can recheck your torque on those studs every other day and get the nuts to turn. I'd keep running them down to 150 until you do the warm up and hot torque, just to make sure your rings are crushing the gasket.
 
Hmm it should have had one from factory. That's strange.

To the best of my knowledge, the vent line didn't come around until '94.

I bet you can recheck your torque on those studs every other day and get the nuts to turn. I'd keep running them down to 150 until you do the warm up and hot torque, just to make sure your rings are crushing the gasket.

I did run around them a few more times yesterday at 150ft. lbs. and they hardly moved at all. ARP recommend cold retorques.
 
Last edited:
Set the internal, static/base timing of the VE pump. 1.3mm of plunger lift/travel at TDC #1 per Giles' recommendation.

20160423_161214_zpsnu5w36se.jpg


20160423_182441_zpsiojsbp8u.jpg


20160423_182528_zpsvdxmaqsy.jpg


Better view of the advance in the pump gear. Stock position is with the 'E' aligned with the '0'.

20160423_182536_zpsfmwhfask.jpg


Here is the fuel pin that Giles makes for his pumps and the spring he uses with it.

20160423_183325_zpsqpmvzken.jpg


20160423_183345_zps2e2eehzg.jpg


20160423_183427_zps8rm5fpps.jpg


Replaced the slotted head screws on the AFC with stainless socket head screws.

20160423_185007_zpsjttavier.jpg


This week I should be able to strip and repaint the valve covers, timing cover and other pieces that I painted Hemi Orange years back. I ordered some cans along with clear coat. They should be here later in the week.
 
I love bead blasters! Made very quick work of stripping all these parts in preparation for paint.

20160427_201116_zpsqoqls0fi.jpg


One thing that came to mind over the weekend, I figured out that the port in the '94 and up thermostat housing is 1/4" NPT. I'm wondering if this will be large enough to handle the potential flow of the coolant bypass. I've looked for specifications of the Watts 530C PRV in regards to flow but I couldn't source anything. In my mind and unless a high RPM is maintained, when the PRV opens, it may only be open for a very short time and therefore, may not need to pass a very large volume.

I thought of drilling and tapping it for 1/2" NPT but there doesn't appear to be quite enough room. As well, the existing hole is somewhat close to the shoulder around the circumference of the neck. I can take a better picture of this, from directly above. I certainly don't want to ruin a new thermostat housing.

20160421_162013_zpspyprnlih.jpg
 
Last edited:
Nice work! But I do have one question...Why didn't you go ahead and swap the VE for a P-Pump?

Just curious?
 
Thank you!

Just wanting to stick with VE. Obviously with what I spent on this pump, a lot of people would say and have said, "you could've done a p-pump swap for cheaper." There's something to say about an older pump that's capable of producing a reasonable and still respectable amount of power. A p-pump did cross my mind because this would've been the time to do it. The only difference would've been building the bottom end a lot stronger. Obviously, I tend to build things with more than they realistically need but I prefer knowing I have a larger buffer rather than running on the ragged edge of failure.
 
Last edited:
Thank you!

Just wanting to stick with VE. Obviously with what I spent on this pump, a lot of people would say and have said, "you could've done a p-pump swap for cheaper." There's something to say about an older pump that's capable of producing a reasonable and still respectable amount of power. A p-pump did cross my mind because this would've been the time to do it. The only difference would've been building the bottom end a lot stronger. Obviously, I tend to build things with more than they realistically need but I prefer knowing I have a larger buffer rather than running on the ragged edge of failure.

Fair enough...Regardless that is some awesome work!!
 
Back
Top