97' fc350

2 Micron

New member
First, I want to give thanks to my Wife and 5 daughters for tolerating me through this build, we all know how much time and money is involved in any build and the family has sacrificed the most.

Second, to all the Members on the forum who contribute their time, info, knowledge, and most of all the Pics! Thanks!

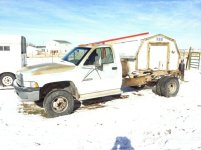
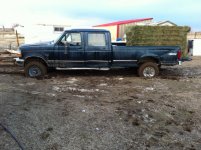
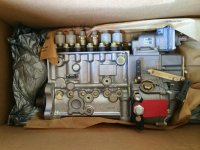
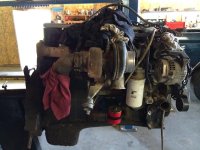
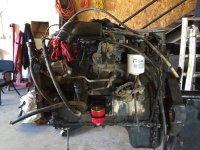
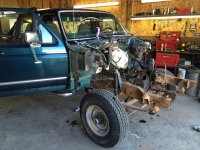
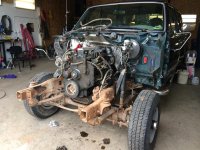
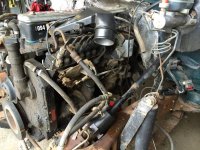
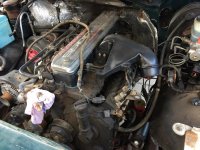
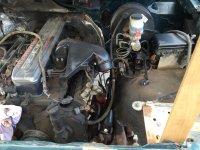
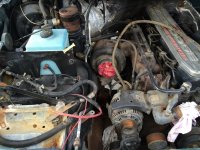
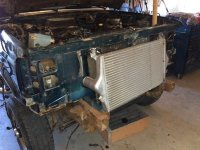
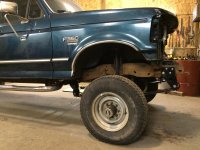
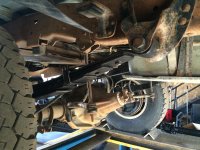
Ive been gathering parts for some time, and when deals present themselves. The engine and tranny donor was a 94' cab and chassis 2wd, new home is in this 97' crew cab long box. My favorite body style and model year for a long time.
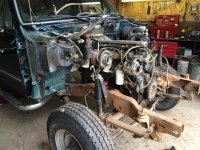
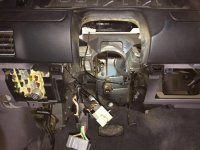
Initial plan is to get the truck driving down the road safe and follow up with the body off restoration. Main uses of the truck will be towing/hunting rig.
I started last summer (2014) using a long time friends shop and utilities, and the location is a distance from my hose so it makes the bigger jobs tough to accommodate.
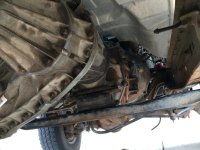
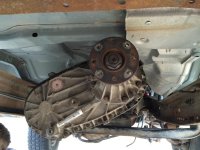
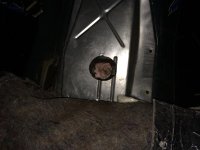
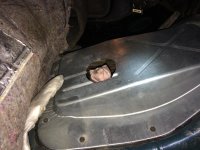
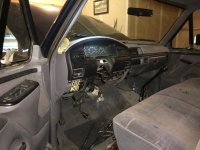
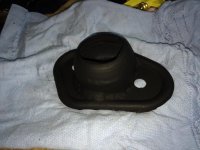
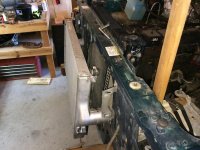
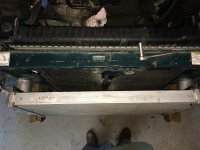
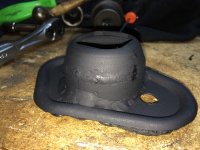
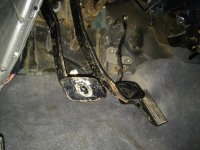
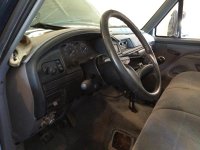
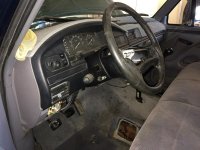
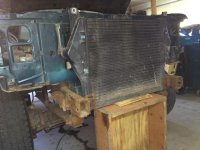
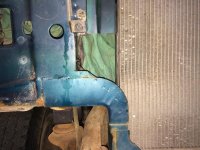
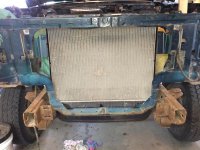
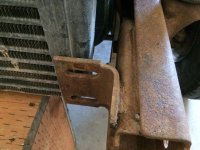
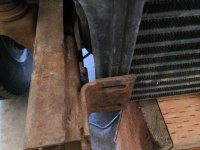
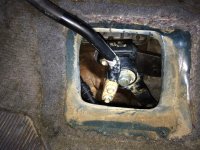
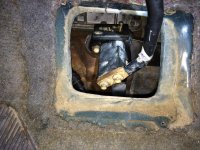
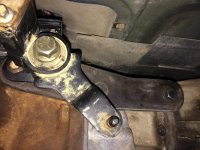
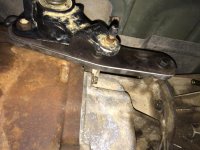
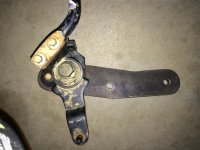
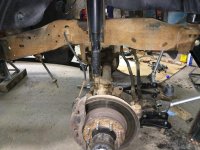
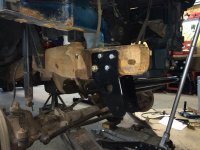
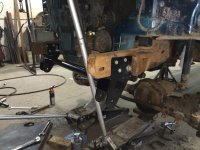
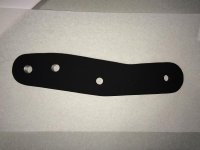
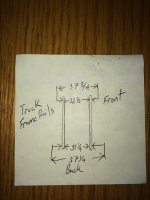
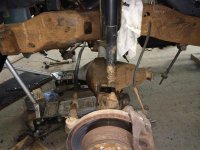
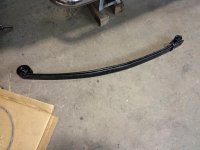
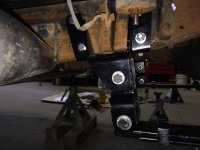
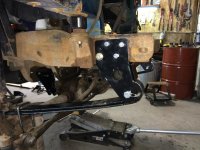
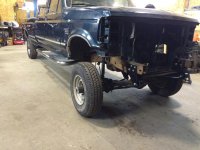
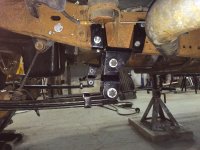
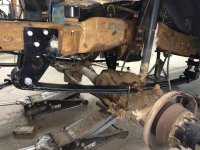
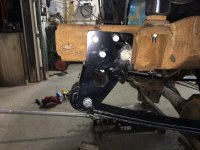
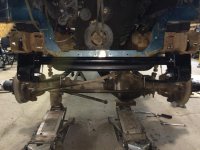
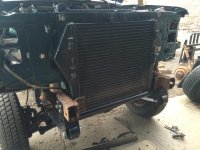
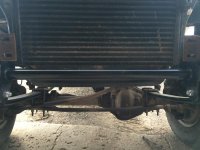
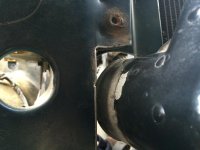
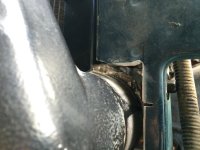
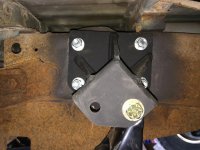
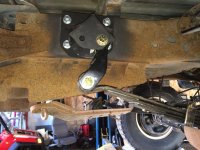
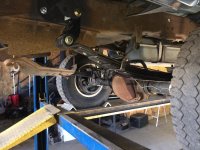
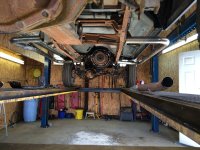
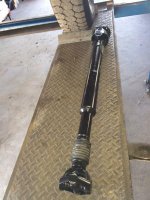
On with the pics!
 

Attachments

  • 1-20-14 007.jpg
    1-20-14 007.jpg
    59.4 KB · Views: 0
  • bobby's photos 075.jpg
    bobby's photos 075.jpg
    91.1 KB · Views: 0
I'm not figuring out how to post the pics like seen in other threads, I've searched but still missing it. Advice?
 
More Pics
 

Attachments

  • 07-11-14 024.jpg
    07-11-14 024.jpg
    68.4 KB · Views: 0
  • 9-29-14 016.jpg
    9-29-14 016.jpg
    100.5 KB · Views: 0
  • 9-29-14 015.jpg
    9-29-14 015.jpg
    66.8 KB · Views: 0
  • 9-29-14 014.jpg
    9-29-14 014.jpg
    82 KB · Views: 0
  • 9-29-14 013.jpg
    9-29-14 013.jpg
    90.6 KB · Views: 0
  • 9-29-14 012.jpg
    9-29-14 012.jpg
    96.1 KB · Views: 0
More pics
 

Attachments

  • 9-29-14 021.jpg
    9-29-14 021.jpg
    90.2 KB · Views: 0
  • 9-29-14 020.jpg
    9-29-14 020.jpg
    101.2 KB · Views: 0
  • 9-29-14 019.jpg
    9-29-14 019.jpg
    59.3 KB · Views: 0
  • 9-29-14 018.jpg
    9-29-14 018.jpg
    71.2 KB · Views: 0
  • 9-29-14 017.jpg
    9-29-14 017.jpg
    65.4 KB · Views: 0
  • 9-29-14 088.jpg
    9-29-14 088.jpg
    64.5 KB · Views: 0
  • 9-29-14 089.jpg
    9-29-14 089.jpg
    63.8 KB · Views: 0
  • 9-29-14 090.jpg
    9-29-14 090.jpg
    63.4 KB · Views: 0
  • 9-29-14 091.jpg
    9-29-14 091.jpg
    86.1 KB · Views: 0
  • 9-29-14 092.jpg
    9-29-14 092.jpg
    81.8 KB · Views: 0
  • 9-29-14 093.jpg
    9-29-14 093.jpg
    89 KB · Views: 0
looking good glad to see one more green four door fummins on this site lol

Be sure and get a good bit of sound deadner on that firewall i am redoing both of my trucks to quite them down
 
Thanks for the heads up!
 

Attachments

  • pics as of 2-17-15 005.jpg
    pics as of 2-17-15 005.jpg
    45.4 KB · Views: 0
  • pics as of 2-17-15 006.jpg
    pics as of 2-17-15 006.jpg
    65.8 KB · Views: 0
  • pics as of 2-17-15 007.jpg
    pics as of 2-17-15 007.jpg
    60.6 KB · Views: 0
  • pics as of 2-17-15 008.jpg
    pics as of 2-17-15 008.jpg
    57.9 KB · Views: 0
  • pics as of 2-17-15 009.jpg
    pics as of 2-17-15 009.jpg
    69 KB · Views: 0
  • pics as of 2-17-15 014.jpg
    pics as of 2-17-15 014.jpg
    74.7 KB · Views: 0
  • pics as of 2-17-15 013.jpg
    pics as of 2-17-15 013.jpg
    60.9 KB · Views: 0
  • pics as of 2-17-15 012.jpg
    pics as of 2-17-15 012.jpg
    73.3 KB · Views: 0
  • pics as of 2-17-15 011.jpg
    pics as of 2-17-15 011.jpg
    101.9 KB · Views: 0
  • pics as of 2-17-15 010.jpg
    pics as of 2-17-15 010.jpg
    66.1 KB · Views: 0
  • pics as of 2-17-15 015.jpg
    pics as of 2-17-15 015.jpg
    66.6 KB · Views: 0
  • pics as of 2-17-15 016.jpg
    pics as of 2-17-15 016.jpg
    76.3 KB · Views: 0
  • pics as of 2-17-15 017.jpg
    pics as of 2-17-15 017.jpg
    58.2 KB · Views: 0
  • pics as of 2-17-15 018.jpg
    pics as of 2-17-15 018.jpg
    72.1 KB · Views: 0
  • pics as of 2-17-15 019.jpg
    pics as of 2-17-15 019.jpg
    62 KB · Views: 0
And more
 

Attachments

  • pics as of 2-17-15 054.jpg
    pics as of 2-17-15 054.jpg
    87.9 KB · Views: 0
  • pics as of 2-17-15 053.jpg
    pics as of 2-17-15 053.jpg
    82.2 KB · Views: 0
  • pics as of 2-17-15 052.jpg
    pics as of 2-17-15 052.jpg
    83 KB · Views: 0
  • pics as of 2-17-15 025.jpg
    pics as of 2-17-15 025.jpg
    69.6 KB · Views: 0
  • pics as of 2-17-15 024.jpg
    pics as of 2-17-15 024.jpg
    66.4 KB · Views: 0
  • pics as of 2-17-15 076.jpg
    pics as of 2-17-15 076.jpg
    96.6 KB · Views: 0
  • pics as of 2-17-15 077.jpg
    pics as of 2-17-15 077.jpg
    101.4 KB · Views: 0
  • pics as of 2-17-15 078.jpg
    pics as of 2-17-15 078.jpg
    70.1 KB · Views: 0
  • pics as of 2-17-15 079.jpg
    pics as of 2-17-15 079.jpg
    72.4 KB · Views: 0
  • pics as of 2-17-15 080.jpg
    pics as of 2-17-15 080.jpg
    66.8 KB · Views: 0
  • pics as of 2-17-15 093.jpg
    pics as of 2-17-15 093.jpg
    81.7 KB · Views: 0
  • pics as of 2-17-15 092.jpg
    pics as of 2-17-15 092.jpg
    68 KB · Views: 0
  • pics as of 2-17-15 091.jpg
    pics as of 2-17-15 091.jpg
    72.9 KB · Views: 0
  • pics as of 2-17-15 082.jpg
    pics as of 2-17-15 082.jpg
    44.8 KB · Views: 0
  • pics as of 2-17-15 081.jpg
    pics as of 2-17-15 081.jpg
    28.3 KB · Views: 0
More
 

Attachments

  • pics as of 2-17-15 094.jpg
    pics as of 2-17-15 094.jpg
    75.3 KB · Views: 0
  • pics as of 2-17-15 095.jpg
    pics as of 2-17-15 095.jpg
    57.6 KB · Views: 0
  • pics as of 2-17-15 096.jpg
    pics as of 2-17-15 096.jpg
    53.5 KB · Views: 0
  • pics as of 2-17-15 097.jpg
    pics as of 2-17-15 097.jpg
    61.5 KB · Views: 0
  • pics as of 2-17-15 098.jpg
    pics as of 2-17-15 098.jpg
    72.1 KB · Views: 0
  • pics as of 2-17-15 103.jpg
    pics as of 2-17-15 103.jpg
    61.8 KB · Views: 0
  • pics as of 2-17-15 102.jpg
    pics as of 2-17-15 102.jpg
    71.5 KB · Views: 0
  • pics as of 2-17-15 101.jpg
    pics as of 2-17-15 101.jpg
    82.8 KB · Views: 0
  • pics as of 2-17-15 100.jpg
    pics as of 2-17-15 100.jpg
    64.4 KB · Views: 0
  • pics as of 2-17-15 099.jpg
    pics as of 2-17-15 099.jpg
    60 KB · Views: 0
  • pics as of 2-17-15 104.jpg
    pics as of 2-17-15 104.jpg
    68.3 KB · Views: 0
  • pics as of 2-17-15 112.jpg
    pics as of 2-17-15 112.jpg
    53.5 KB · Views: 0
  • pics as of 2-17-15 172.jpg
    pics as of 2-17-15 172.jpg
    66.7 KB · Views: 0
  • pics as of 2-17-15 173.jpg
    pics as of 2-17-15 173.jpg
    66 KB · Views: 0
  • pics as of 2-17-15 174.jpg
    pics as of 2-17-15 174.jpg
    48.8 KB · Views: 0
  • pics as of 2-17-15 175.jpg
    pics as of 2-17-15 175.jpg
    53.4 KB · Views: 0
Where I'm located there is a ton of public land and two tracks so it will see plenty of off road. Lion hunting, deer/elk, trap lines, and predator hunting. I'm going to build a flatbed for hauling the razor to piggy back the cab. Just your all around usable truck, also help keep the miles down on the 12'. Local dyno events, I would'nt mind doing a couple 1/4 passes just to see where it lands and I'm sure my buddies will have me talked into a few hooks.
 
Real nice work! I thought of doing a similar project with our shop truck, your pictures give alot of insight from someone who's been there.
 
Crew cab XLT-
Clean looking ride! Quite a bit of time in the Uintah's over the years, hunting, hiking, and camping. Our last house had a Blaze King wood stove so lots of time doin fire wood. Makes for a good afternoon taking the kiddos up to get a truck load.
Stock 73'-
Get on it! I hope I can take as many photos as possible because of how much the other member's pics have helped me.
All-
Thanks for the support!
 
Also, you can't really tell from the pictures that it has a 2" body lift. I know others may not like them but I opted for the extra clearance on everything and man am I glad I did!
Couple set backs I've had along the way:
First- When pulling the cummins out of the cab and chassis, I was pulling on the crank damper and slap! We know what that sound means (thrust washer had fallen). So off with the pan and install new mains. It had a couple small gall marks (1/16 X 1/4) in the thrust journal on the crank where it had been making contact but no dis-color or blue. I was able to clean it up with emery cloth using the radius on a phillips screw driver. Installed new Clevite bearings and new pan gasket. Felt good about the new bearings and gasket but worried about the contact. I spoke with a couple local shops for input and they said they just slap a new one in and run it. They could'nt speak of any coming back with a major fail. Its getting a rebuilt engine this fall so hopefully it will make it that long.
Second-
Couple weeks ago had the chance to start it and hopefully move on its own power, went to back out of the shop and NO reverse! *@#%!!! I had purchased a broken third gear tranny with 4x4 tail housing from friend ($200.00) and wanted to use the tranny out of the cab and chassis to make one good one. Wanting the "DIY tranny rebuild", I noticed upon assembly the castings were different but all the internals still fit using the other reverse gear, I tried all the gears after complete except reverse. Called Quad 4x4 and gained the knowledge that "That don't work", there is two different castings and counter shafts which will only work with the one intended. I hope this will help somebody in the future.
So tomorrow I will be fixing that. 5 hours backwards for a simple phone call I wanted to make.
Third- All the shipping delays and confusion involved in getting the right parts for the suspension upgrades.
Forth- Had to revamp the front clip more and move the Common Rail intercooler higher because of the new crossmember on the reverse shackle kit.

For those interested the reverse shackle kit is From Sky Off Road Design. NO extra lift, but just the way it's fabbed to work it gave my truck 4.5" (I actually measured this). The kit I chose utilizes the stock Super Duty springs (purchased new for $225.00 shipped) which are 5' longer than the OBS (old body style). Ultimately improving spring articulation and ride similar to the Super Duty's.
 
Last edited:
Took me thirty minutes to drop the tranny. Hoists and tranny jacks make for a very smooth job. More of the rear springs and hangers. Sky rear shackle flip kit, was supposed to be a 4" but only gave 3" probably because I replaced the factory springs with 4" springs is all I can figure. The goal was to get rid of blocks, but I'm still gonna have to add 3.5" more inches to sit level. So I'll be cutting the axle perchs off and fabbing new to the height needed. The advantage to that is that I'll be able to get the exact pinion angle I want.
 

Attachments

  • 007.jpg
    007.jpg
    83.8 KB · Views: 0
  • 008.jpg
    008.jpg
    64 KB · Views: 0
  • 009.jpg
    009.jpg
    78.9 KB · Views: 0
  • 010.jpg
    010.jpg
    76.1 KB · Views: 0
  • 011.jpg
    011.jpg
    88 KB · Views: 0
  • 012.jpg
    012.jpg
    44.9 KB · Views: 0
Im seaching for the info on the oil pressure sensor for the 7.3. Anybody that would be able to give any help? I'm wondering which sensor/and specific location on the 7.3 is for the in dash read out? All Data shows two oil pressure sensors and is not specific on which one is which. I would like to have the gauge in the dash work, also I'll be installing a gauge for actual read out. Thanks!

(Not Enough Smoke)- Could you give me more specifics on the recall for the fuse-able link for the master cylinder?
 
Last edited:
Back
Top