Worked on the wiring for about an hour and a half tonight. Got the engine harness stripped down and a few circuits removed to the EGR valve, intake air flow valve and intake air heater module. Under this fiber wrap is regular split loom. The wrap did a very good job protecting the wires. I'm used to gas harnesses where the adhesive in the wrap makes all the wires stick together and its a pain to remove wires. Once I got the wrap off, wires came out easy.

You are using an out of date browser. It may not display this or other websites correctly.
You should upgrade or use an alternative browser.
You should upgrade or use an alternative browser.
1967 C10 to LMM Duramax swap
- Thread starter busta9876
- Start date


Most of the plumbing is done on the engine, new coolant lines here for turbo feed, new rubber sections for return lines, and -8 feed to CP3 done. Using the stock fuel lines from back of engine down to rear of trans.
Slowly coming along with the wiring. Got some hours in it now. I've got it setup so the ECM will be located just under the drivers side headlight on the core support.
TCM has been relocated, shortened all the wires going to the TCM and installed new terminals into a new connector one at a time. I also was able to eliminate the C105 connector which only purpose was two speed sensor circuits, CAN wires, and trans fluid temp sensor wires. When TCM was relocated, those wires went straight to C101 which now goes back to the trans harness.
MAF and ALTERNATOR wires will be pinned to the X108 plug via some empty cavities there, and those two plugs will be part of the main engine harness. The main bundle going to X108 will go below the radiator across front of engine. This seems to be a little long, I may take 18-20 inches out of it, need to order some terminals.
Attachments


Last edited:
Got some work done on the fuse block tonight. I'm duplicating the factory wiring schematics for relay controls, starter circuit, neutral safety, and fuse labels. This should help in any future diagnostics.
GM has made wiring a little more complex than say the Gen 3 LS stuff. This harness has red/white wires that are both Battery HOT and Ignition Hot. Some key hot wires are Yellow. I've also found some that change colors at the CXXX connectors, which can get confusing. I would never attempt this without factory wiring schematics, which I use Identifix.
-Brendan.
Attachments


Just a quick update. It runs! I was very happy that the Dakota Digital VHX dash with the obd2 interface picked up every gauge over the CAN bus. I will run a wire for check engine light, wait 2 start, and that's it.
I got the upper and lower radiator hoses figured out, as well as to and from heater core.
So far I still have to clean up the accessory brackets, make power steering/hydroboost lines.
Biggest thing to address next is intercooler. There is not a lot of room up front on the c10 for intercooler, ac, and radiator. I am thinking toward a water to air cooler on the passenger side. Vintage air puts the heater core and a/c unit all under dash, so lots of room on that side. It should be easier to get a heat exchange for the water to air up front.
youtube video first startup 1967 C10 Duramax Swap - YouTube
Maaaaannnn, I'm really liking those gauges.
First start??? ...just plain amazing.
Well there was about 35 second of cracking. I had fuel rails and injector lines off so took a bit too get air out but that was maybe the second start.
Got the water to air heat exchange mounted and tubes made. I've went back to the van thermostat housing to gain clearance to the turbo inlet, now have 3.5" tube all way to the turbo. I've got the MAP sensor mounting in the tube connecting to the Y bridge.
Attachments


I've got most under hood stuff figured out. I still need to make some brackets for the heat exchange and a/c condenser, and plumb them. Still need to make something for air filter box, what's pictured is temporary until I make something. I'm now on to working on the American Auto Wire complete vehicle harness install. The duramax/trans controls are all separate from the rest of the pickup wiring. Two wires basically I can start and run the duramax, Key Hot, and Starter.
Attachments


You do good work! What source are you gonna use for the a/w?
I bought the heat exchanges from frozenboost.com I was unsure on size requirements so this may be an experiment. My circulation pump is an off the shelf pump for a 2000s ford lightning SVT supercharged.
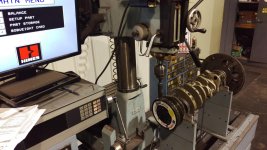
Well my engine ended up being hurt. Probably the reason the donor was parked. #2 a little melted and low on compression. Block is at the machine shop, looks like it will clean up at .010, got most of my parts in for the rebuild. Going to balance the crank and broach it for a real keyway.
Attachments


Red Sleeper
Active member
Wow! That piston took some heat.
Looks like a nice spread of parts going inside the engine. Any major upgrades while it's apart?
Looks like a nice spread of parts going inside the engine. Any major upgrades while it's apart?
Mostly stock rebuild. D-Max parts are so dang expensive and its a very slippery slope when you start doing performance modifications. Its not a truck pull or drag race thing so I think stock rods are going to be fine, probably going stock size injectors to. I just want good reliability out of it.
Chris Tobin
New member
Mostly stock rebuild. D-Max parts are so dang expensive and its a very slippery slope when you start doing performance modifications. Its not a truck pull or drag race thing so I think stock rods are going to be fine, probably going stock size injectors to. I just want good reliability out of it.
Look into the Wagler "as Forged" rods, they have less machine work and are less expensive than their high end rods, but are still stronger than stock rods...
If you are replacing injectors it would be advantageous to go with mildly bigger ones at least... It won't cost much if any more. Yet it will give you room to grow and expand and allow your tuner to go more conservative in the tune rather than pushing the stock injectors a little harder...
Just a quick update: The block is done, .010 and cleaned up ready to start on. I'm still waiting on machine shop to balance the rotating assembly. Heads are have been redone as well.