| Advertisement |
|
|
|
|
|
|
|
If this is your first visit, be sure to check out the FAQ by clicking the link above.
You may have to register before you can post: click the register link above to proceed.
To start viewing messages, select the forum that you want to visit from the selection below.
|
| Dodge Competition and Performance General Dodge Competition and Performance Discussion |
 09-19-2016, 12:15 AM
|
#1
|
Name: Mulboost
Title: Transmission Builder
Status: Not Here
Join Date: Feb 2016
Member`s Gallery
Posts: 11
|
Shop Truck Build
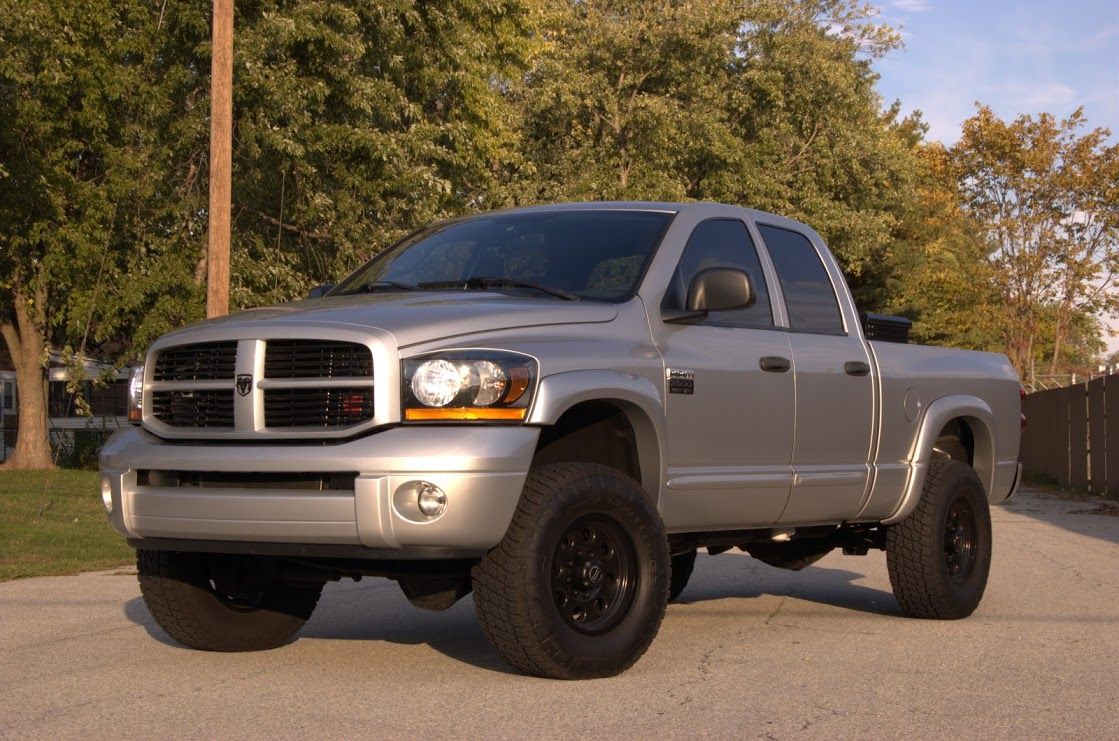
Hello yall. I wanted to start a thread that covered our shop truck build. I'll start with a quick synopsis of the truck. It's a 07 5.9 QQSB 48RE, we use it for our Diesel Shop here in Delaware and it does a pretty good job. The fastest we have had it is 10.94 @ 124. It's a total sleeper, there are no visible gagues and the exhaust appears stock. Estimated horsepower is in the ~900 RWHP area. Anyhow, a number of months back it was decided to take the truck to the next level and to ditch the 80% over injectors, single 10.6mm pump and 68mm Fleece charger.
An ats duel fueler setup, Exergy 150% over 143*injectors and a Fleece 71/87/.90AR charger were ordered. We also installed a Suncoast/PCS E-618 VB to try and work around the restricted oe shift strategies.
Initial test drive was good, although on some WOT highway pulls, the converter began to slip and the fluid got hot.  anyhow, the truck was parked and when we pulled it into the shop the next morning, there was also a dead cylinder miss. 
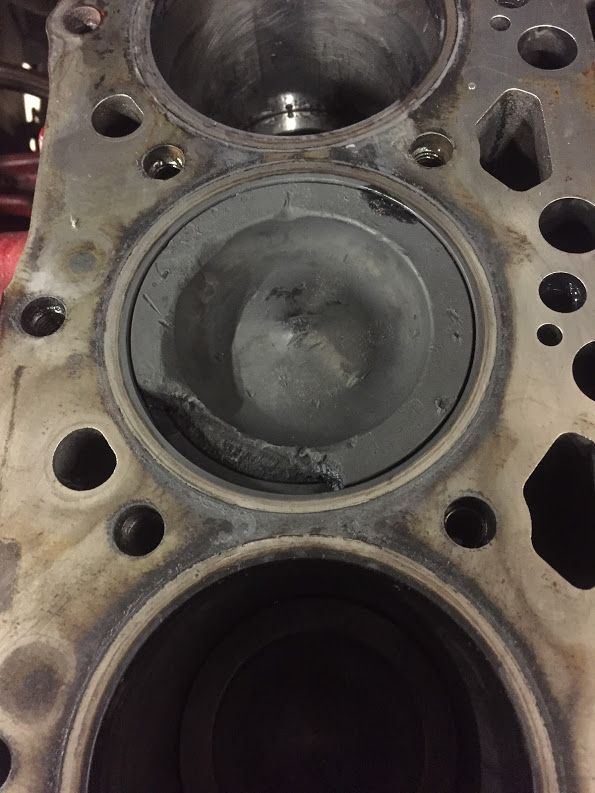
Upon initial inspection, compression was down 100 psi on cylinder number 2. I wasn't even worried about the converter at this point. Upon further inspection when we removed the cylinder head, there was a big chunk of piston missin'!
This was no deterrent, I decided it was time to start a new chapter in torque's book. (that's the trucks name - torque) The end goal is a 1000-1200 hp -nasty, fast spooling street machine. Here are some pictures from the tear down and build up process. I wanted to share this build with you guys because it's going to be a really good one with a lot of attention to detail.
Here is the melted piston on #2
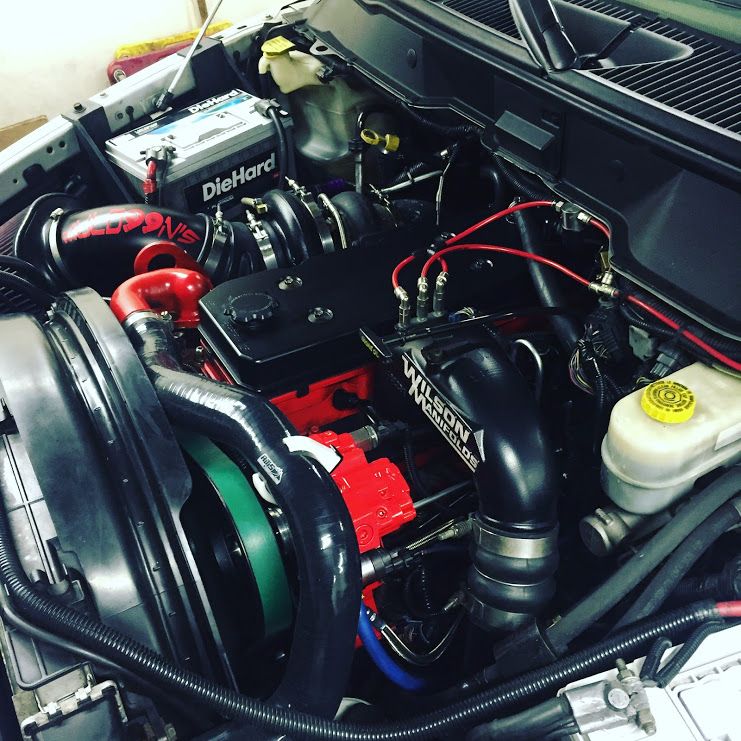
Here is the engine before disassembly
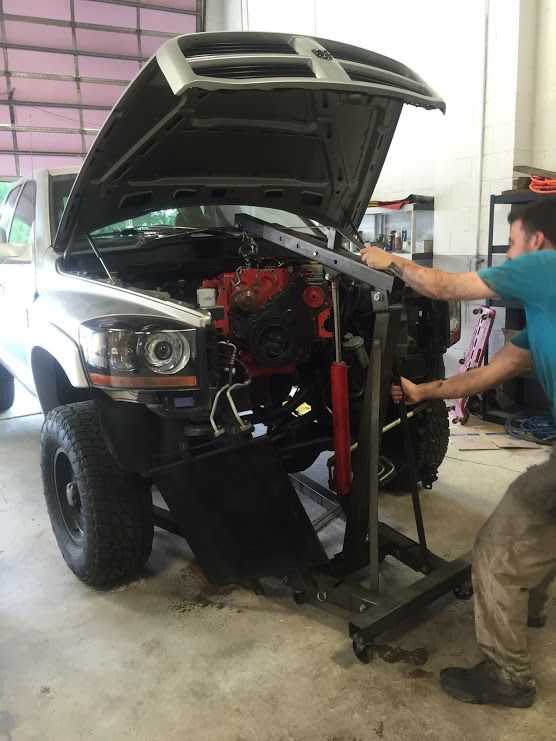
Extraction
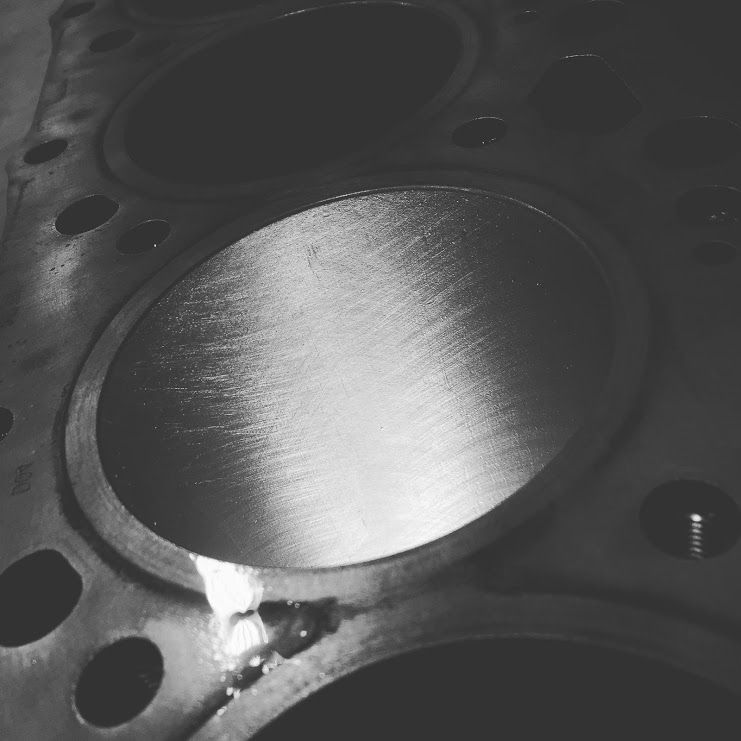
The cylinder wall surprisingly cleaned up nicely with a little muriatic acid soak and quick ball hone job, but it was decided to drop the engine off at Miller's Machine Shop for a pressure hone, walnut blast, new freezeplugs throughout, and hot tank. We are also replacing the cylinder head with a good used CR head, they are performing a mild port job, o-rings, tapping the freeze plugs and of course a deck resurface.
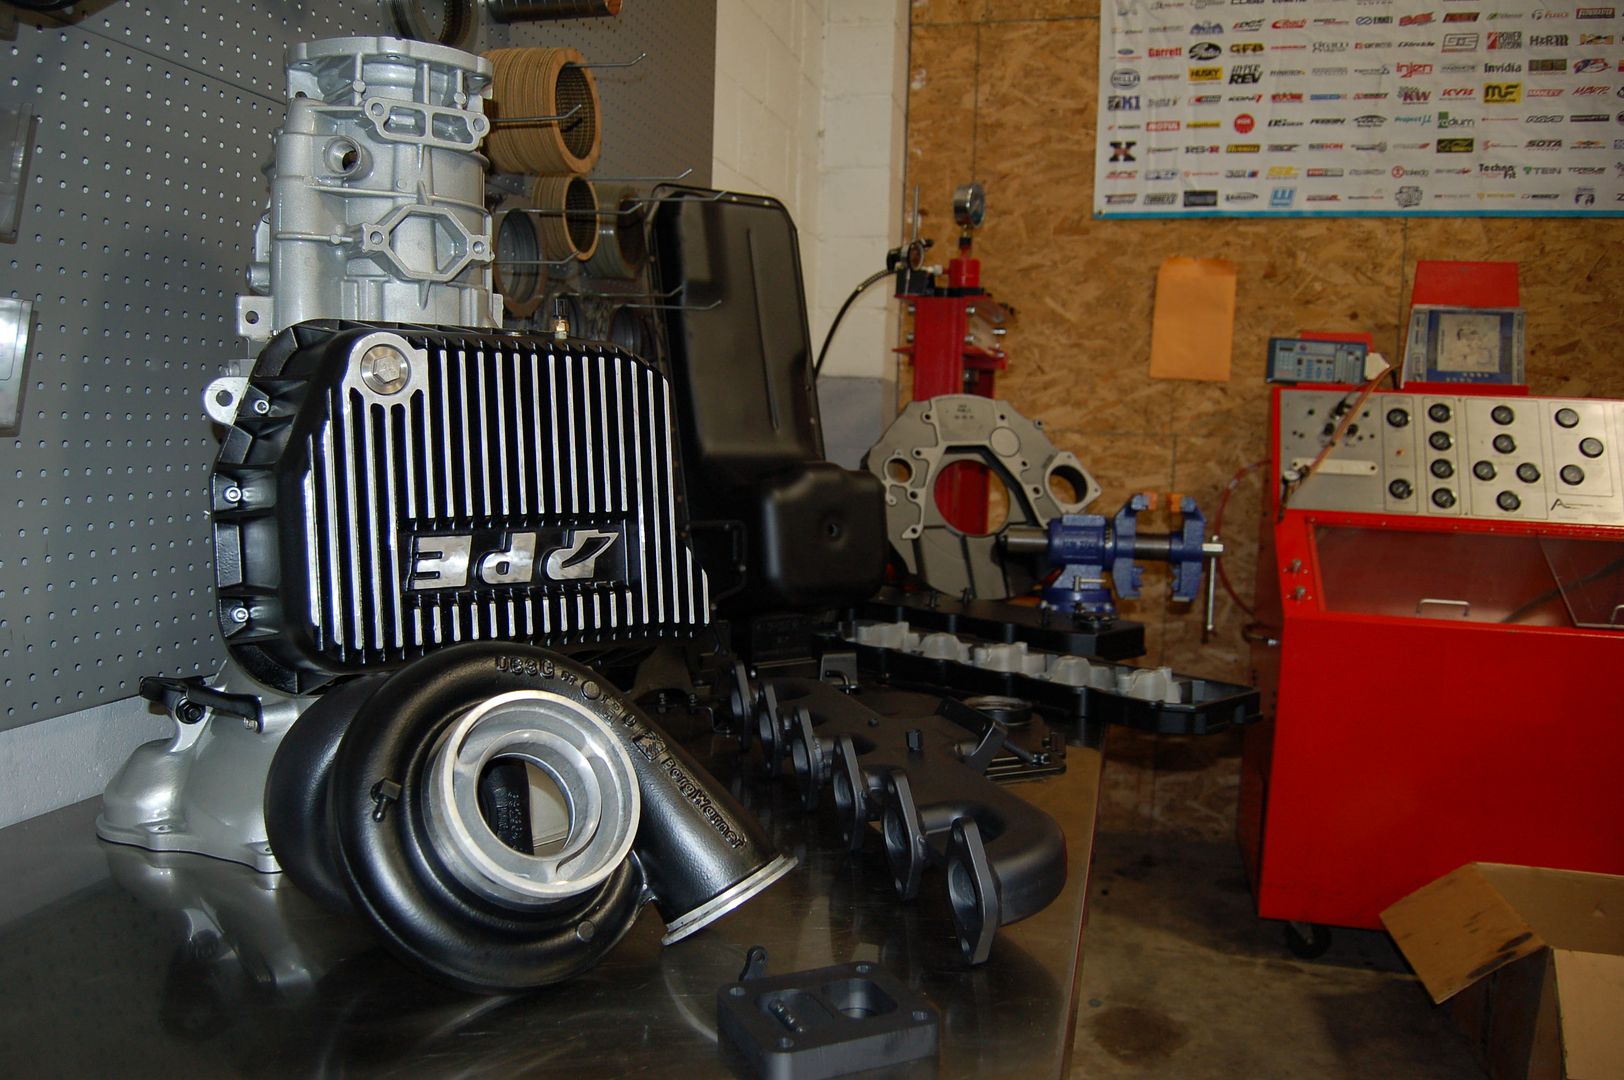
So moving forward, the color scheme will be all silver and black. I received some parts back from ceramic and powdercoating. Here comes the real candy.
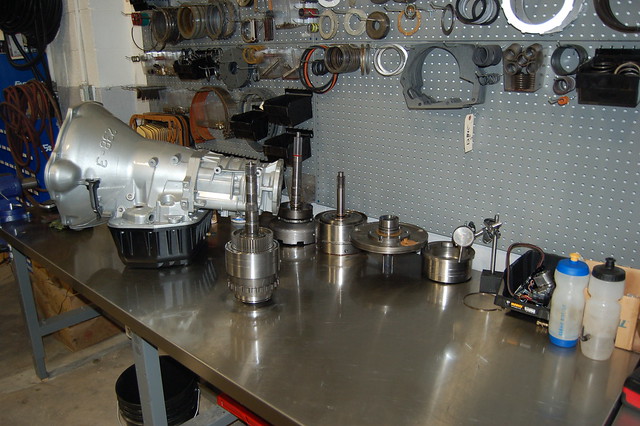
ARP Extreme Strength Hardware on the OD housing of our in house built Stage III.5 48RE
Powdered Case
Powdered and Ceramic Transmission and engine bits. (yes thats a valve body tester in the background) I build and test all of our valve bodies in house - with the exception of PCS setups.
Some of you may know this truck, it was featured in the January issue of Diesel Power.
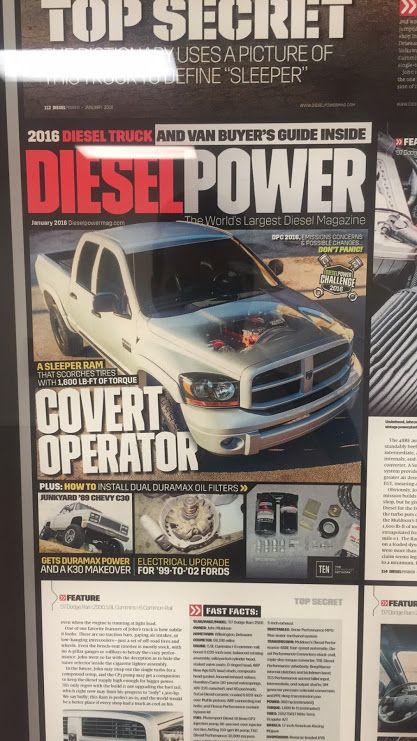
Here is a better shot of the truck
Underneath
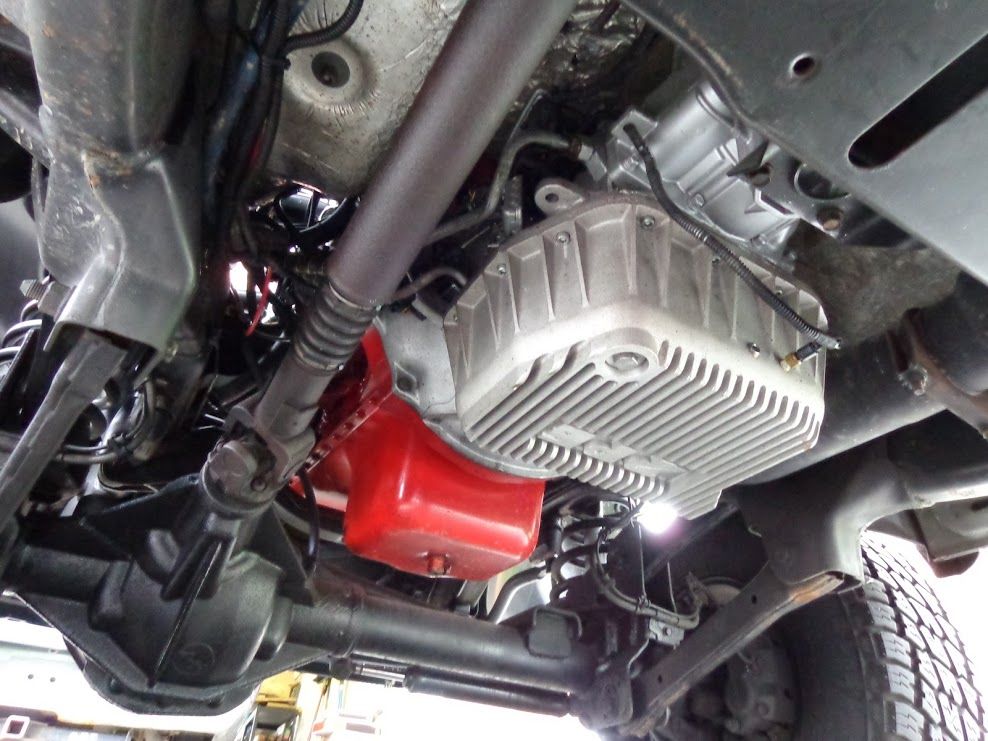
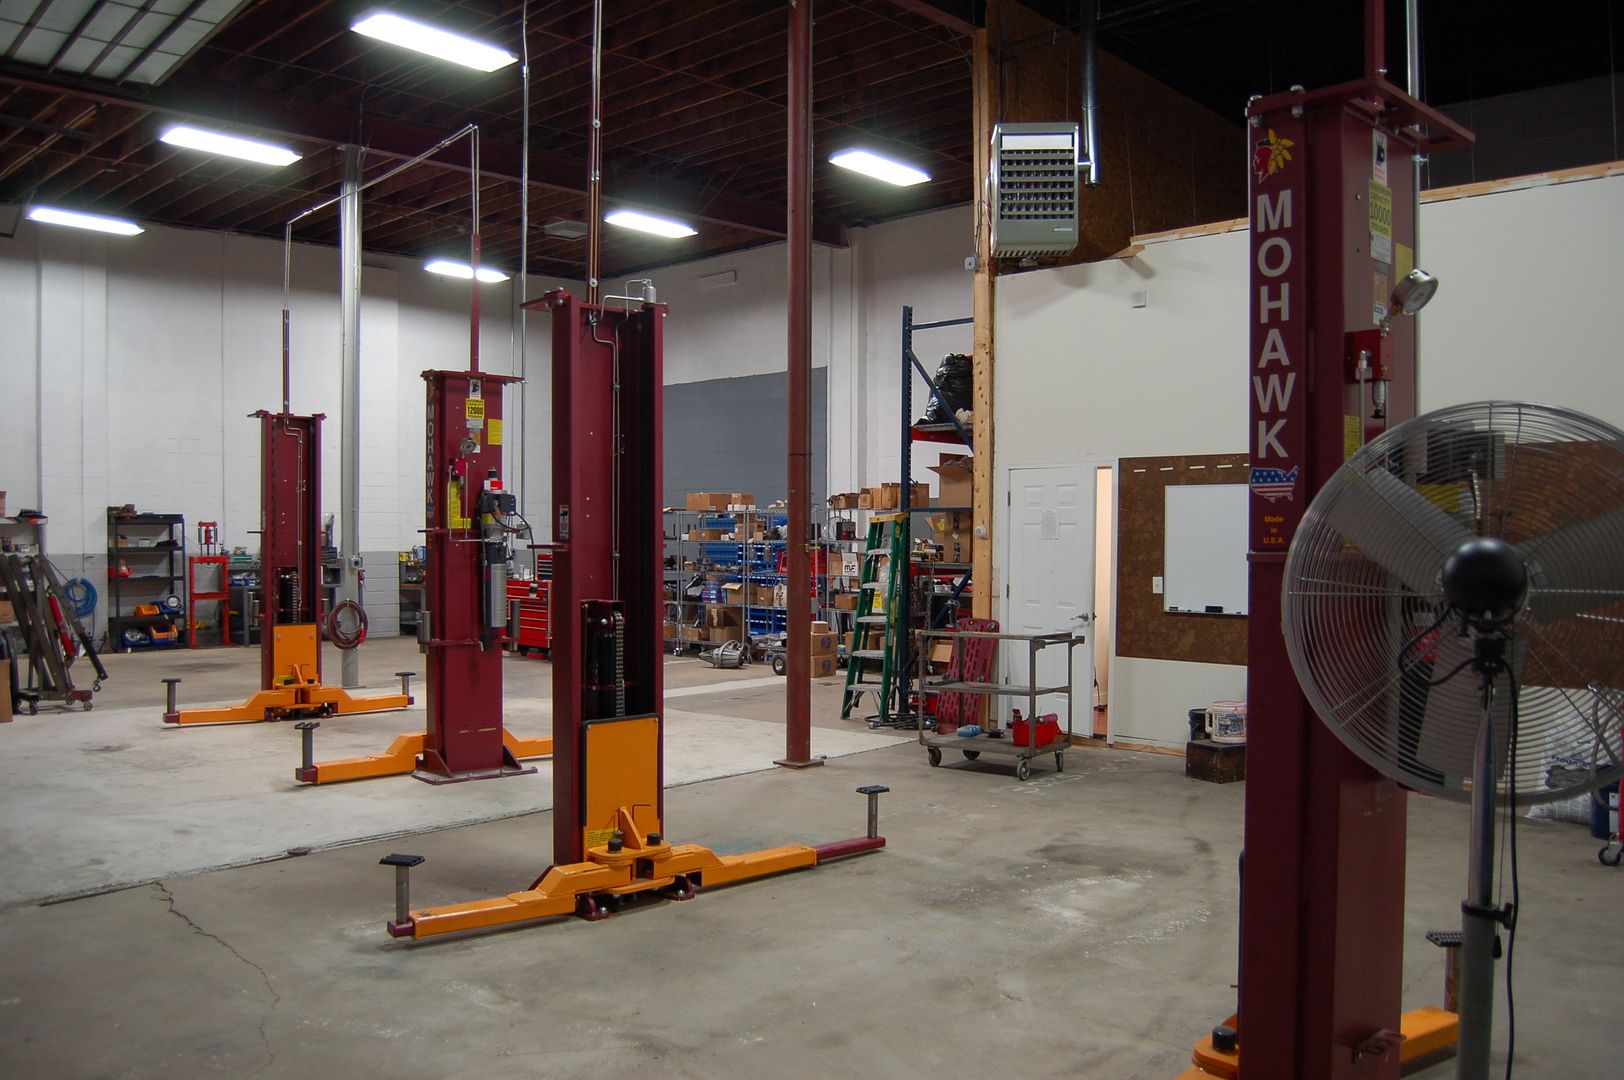
This is where the magic happens! Muldoon's Diesel Performance HQ!
So moving forward, we are going to implement a way to manually control this transmission, on calibration A of the PCS setup. Calibration B will be full automatic mode. I'm keeping the manual control behind the scenes, but I can promise you it will be worth watching. To the best of my knowledge we will be the first to implement peripherals to control a 47/48/ tf platform in this manner.
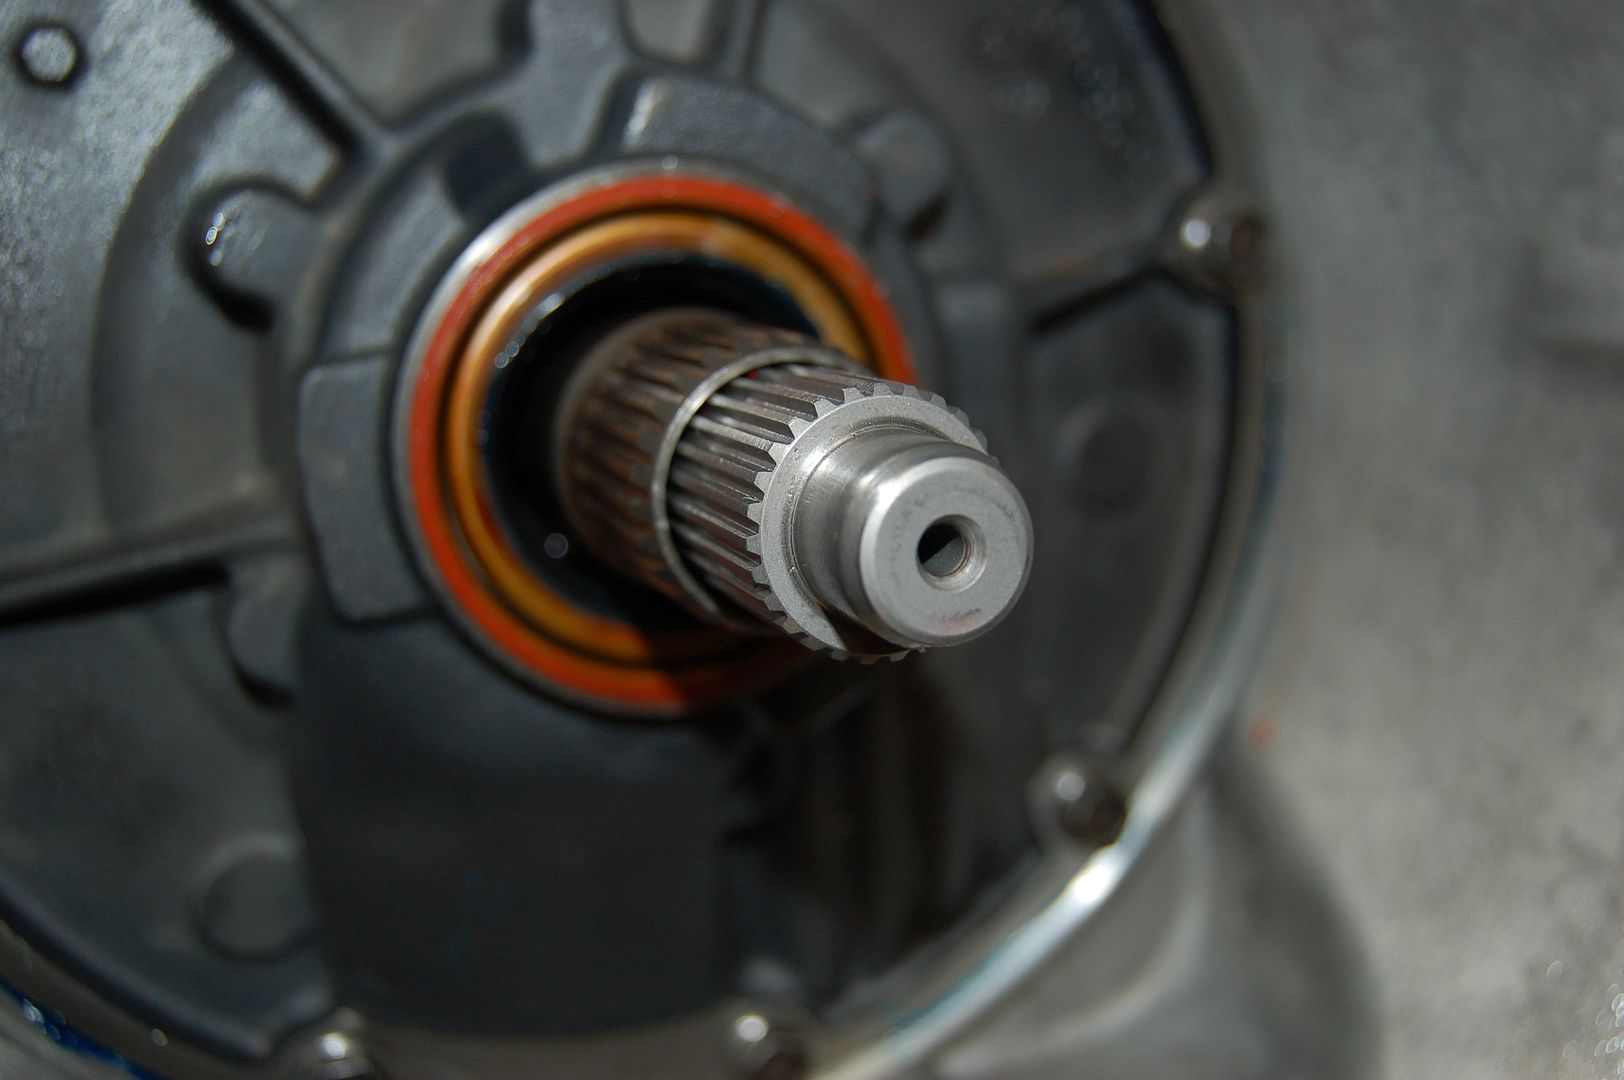
Originally we were going to use a Precision Industries 28 spline input shaft for this build, but upon further research we found we want something stronger. So a TCS 27 Spline is ready for install, accompanied with a stock stall quad disc DPC converter. We us no one else for converters, Phil builds a great one. As far as the trans goes, it will be a Stage III.5 48RE with aforementioned TCS AZ 27 Spline input, TCS CAD 300M Intermediate and TCS CAD 23 spline billet output.
The engine will receive a set of plain jane Mahle pistons, Carrillo rods, either a fleece powerflo750 or exergy 10.0mm bottom pump, stock duramax top pump and a bunch of other goodes. The engine will be built in house as well as the transmission.
So stay tuned, because we will be updating this thread with high res images and videos of the build!
|
|
|
|
|
09-19-2016, 07:28 AM
|
#2
|
Name: 40ray
Title: Too Much Time
Status: Not Here
Join Date: Aug 2012
Member`s Gallery
Posts: 400
|
Glad to see you made it over to comp d!
|
|
|
|
|
09-19-2016, 03:55 PM
|
#3
|
Name: Blueboy
Title: Too Much Time
Status: Not Here
Join Date: Aug 2006
Member`s Gallery
Posts: 993
|
I will be watching this one.
|
|
|
|
|
09-22-2016, 03:40 PM
|
#4
|
Name: apples24v
Title: Green Behind the Ears
Status: Not Here
Join Date: Mar 2012
Location: bradenton, FL
Member`s Gallery
Posts: 68
|
sub'd
__________________
06 QCLB 85% over ii pump under fleece cp3k, 130% ii injectors, 62 under s475, Suncoast Trans, efi, GDP Mega Rail, Fluidampr
01 QCLB 5-speed, Valair ceramic single disk, quad adrn, DDP 150's,Tunnel ram, pusher manifold, 3.5' piping, AEM intake, Fluidampr, 08+ steering
|
|
|
|
|
09-22-2016, 11:58 PM
|
#5
|
Name: Mulboost
Title: Transmission Builder
Status: Not Here
Join Date: Feb 2016
Member`s Gallery
Posts: 11
|
Didn't Make a whole lot of progress this week on the shop truck, mostly because I've been busy installing fass pumps, servicing trucks, building transmissions and testing valve bodies. I did get a full manual 48RE done that will be going in a 13-1400 hp truck, we used a TCS Arizona Fat Input shaft, and got the stator support machined to fit. We will be running the same input on the shop truck.
Here is one of the fat inputs
Here is the transfer case after painting it with eastwood ceramic silver and urethane activator.
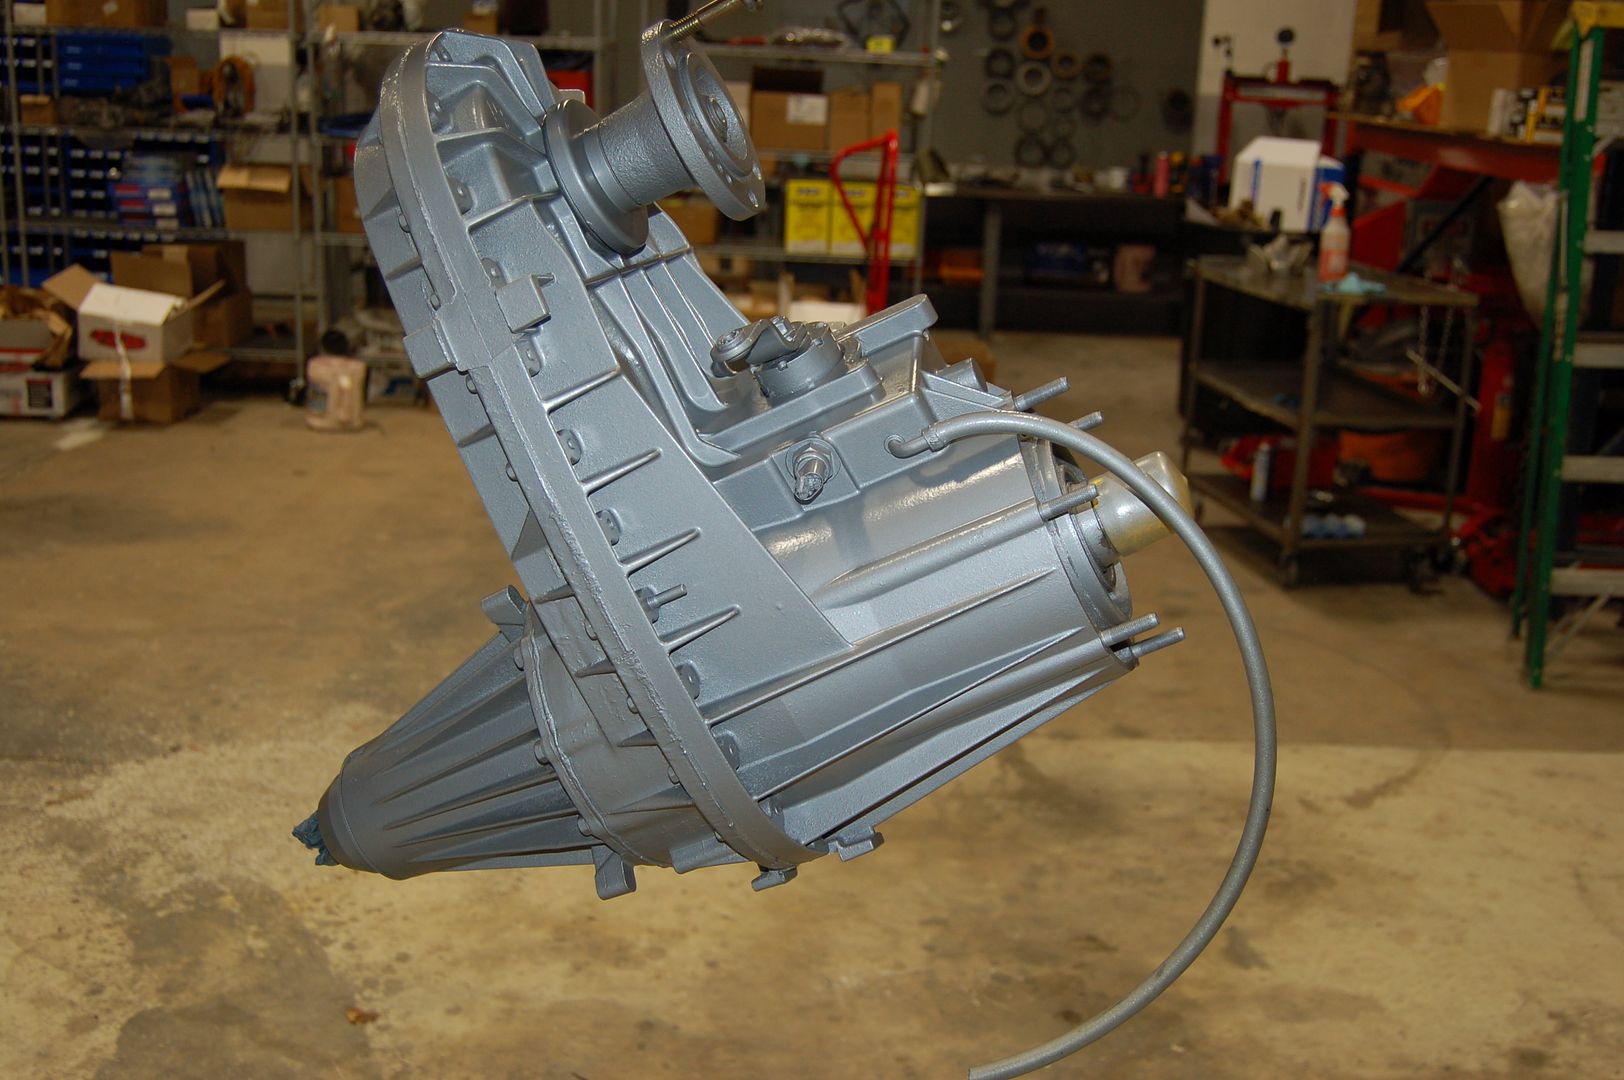
Close Up

This stuff seems pretty good and I will likely use it on my engine if it doesn't wash off with green brake cleaner. It seems that anything in a spray can is not chemical resistant or durable, so I tested this eastwood stuff on my transfer case.
In anticipation of the machine shop being done with the block soon, I am going to check connecting rod bearing clearances this weekend on my Carrillos. I'll be sure to take some pictures of that!
Last edited by Mulboost; 09-23-2016 at 12:04 AM.
Reason: messed up img hyperlinkzzzz
|
|
|
|
|
09-23-2016, 07:20 AM
|
#6
|
Name: RDPsmoker
Title: OUT TO LUNCH..
Status: Not Here
Join Date: Nov 2010
Location: Casper or Laramie WY
Member`s Gallery
Posts: 1,815
|
In for this build! Good looking truck.
__________________
-DUSTIN-
THANKS TO MAXTORQ
95 2500
-DPC
-SUNCOAST
03 3500
-Stock for now
|
|
|
|
|
09-24-2016, 09:13 AM
|
#7
|
Name: Got Smoke?
Title: Too Much Time
Status: Not Here
Join Date: Oct 2006
Location: Gallatin,TN
Member`s Gallery
Posts: 4,728
|
Been following you on Instagram awesome to see you made you're way here! 
__________________
Mark
2007 2500 Mega 68RFE FirePunk EFI/CSP5 & TCM tuning, Edge CTS II.
1997 2500 Jokerfab cyl head, PDR street cam, FDS benched pump, DFI 5x18's, HX35 63/67, FirePunk 47RE & anteater.
2003 Jetta TDI 5spd "DZL WGN" lot's of mods
|
|
|
|
|
09-26-2016, 07:10 PM
|
#8
|
Name: Mulboost
Title: Transmission Builder
Status: Not Here
Join Date: Feb 2016
Member`s Gallery
Posts: 11
|
Made a little progress tonight.
I didn't get as much completed this weekend on the truck, (dang females and dyno events) but I made up for it a little bit after today's work was done. Anyhow, here are some pictures from tonight's progress.
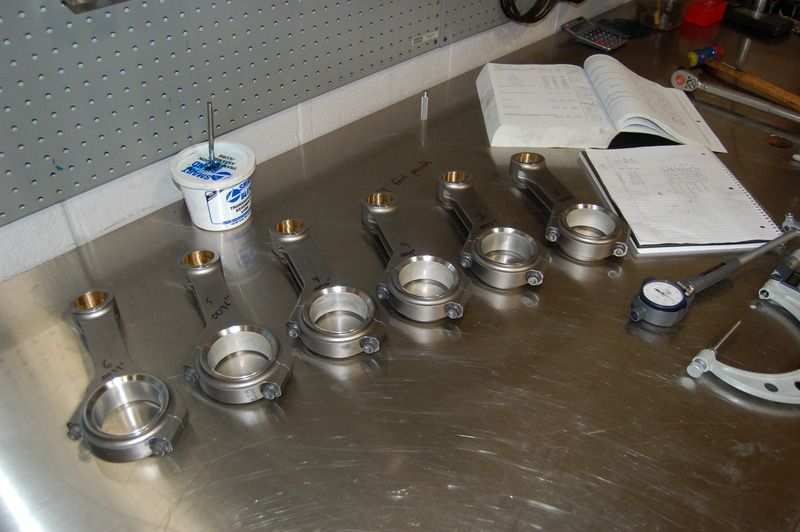
All lined up
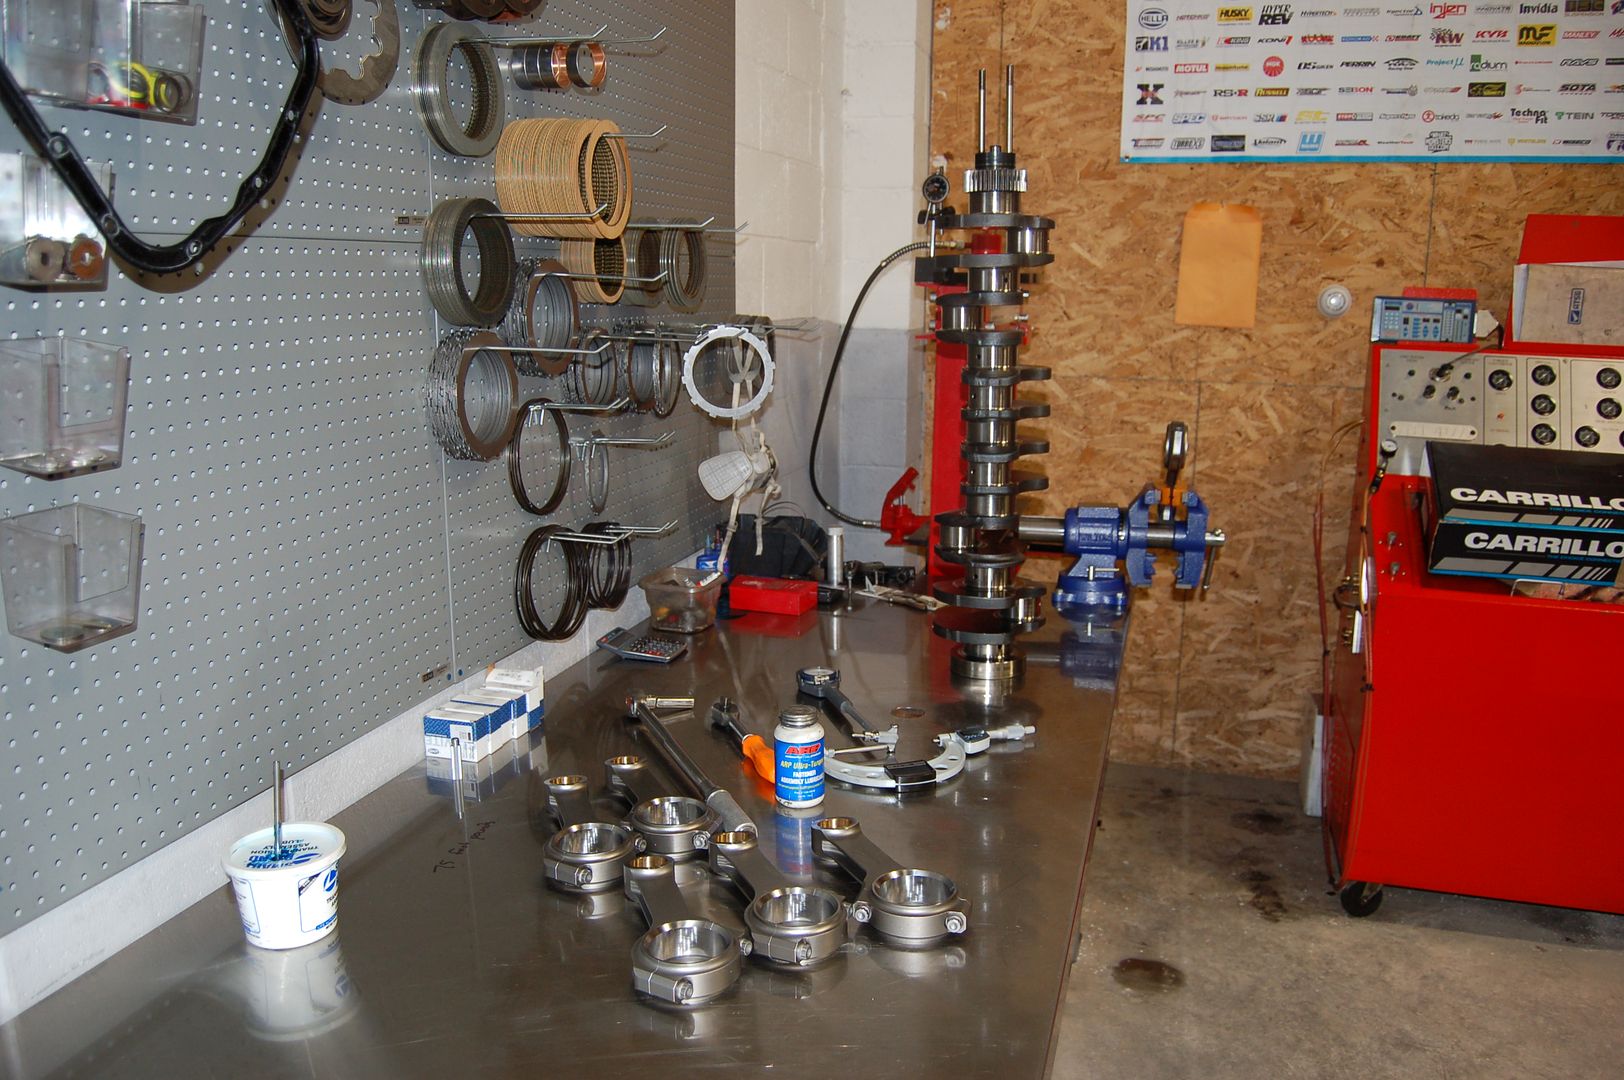
Put the bearings in the rods
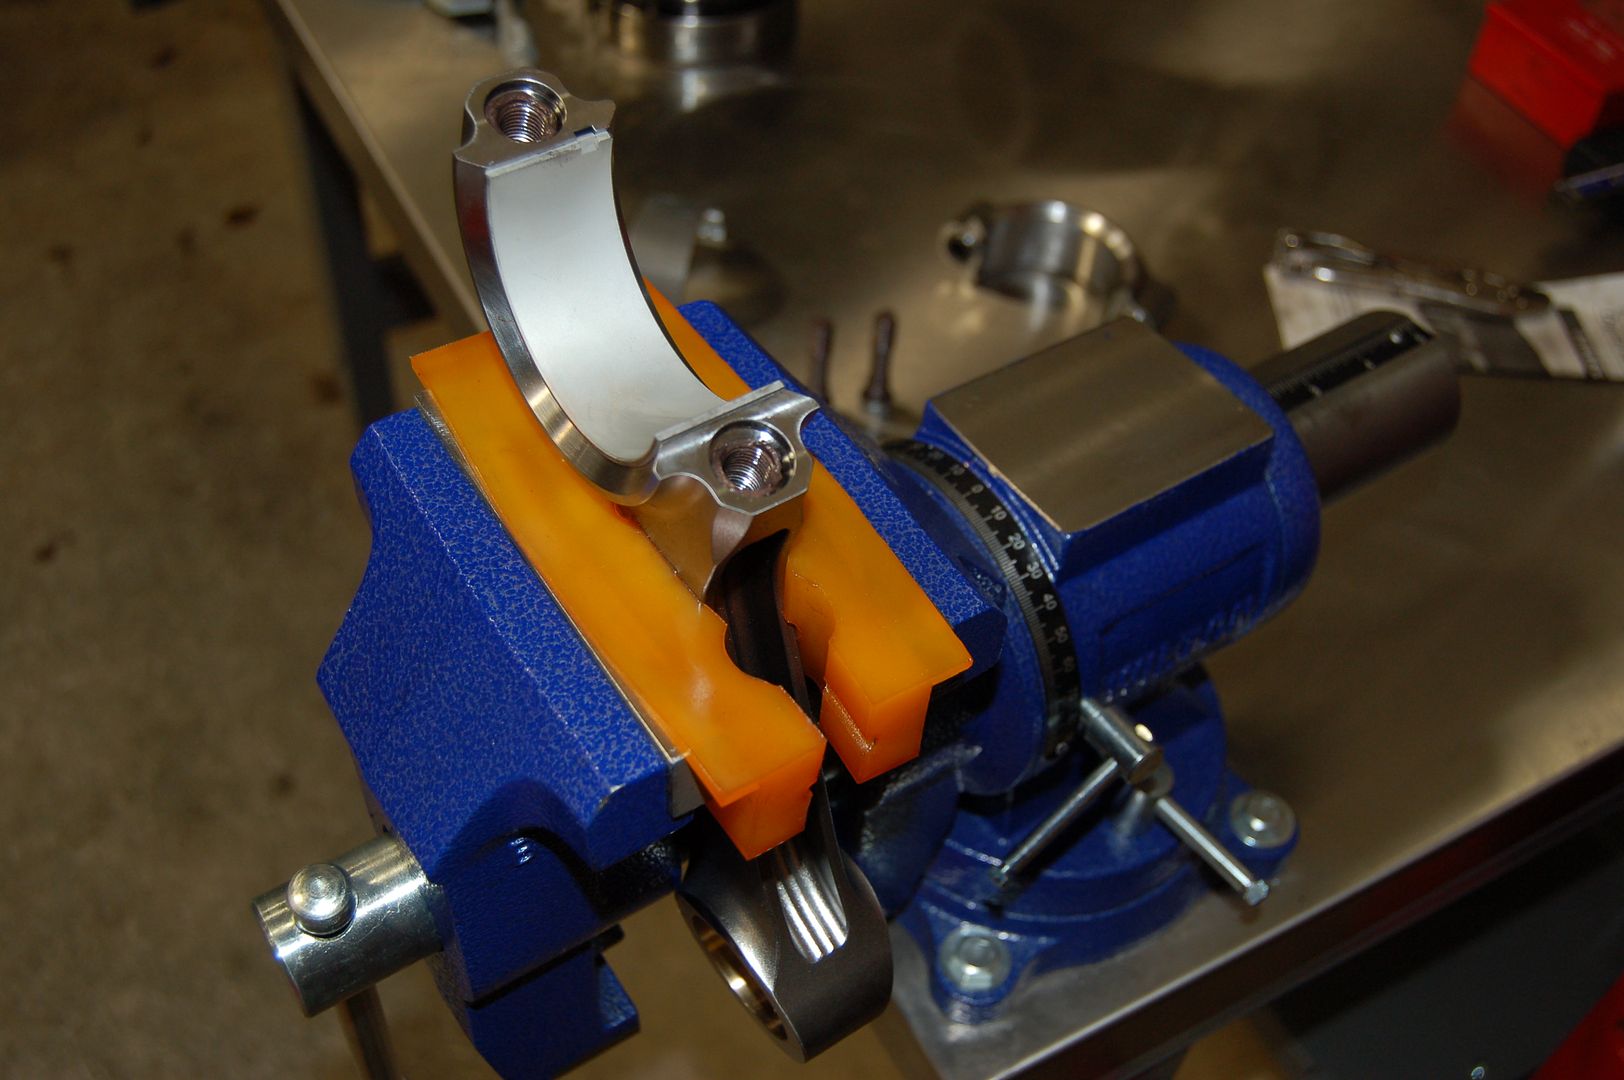
Torque the connecting rod caps (had to call carrillo, misplaced the directions)  also made sure to apply arp ultra torque. (love that stuff)

Measure the crank (measured quickly for the picture)
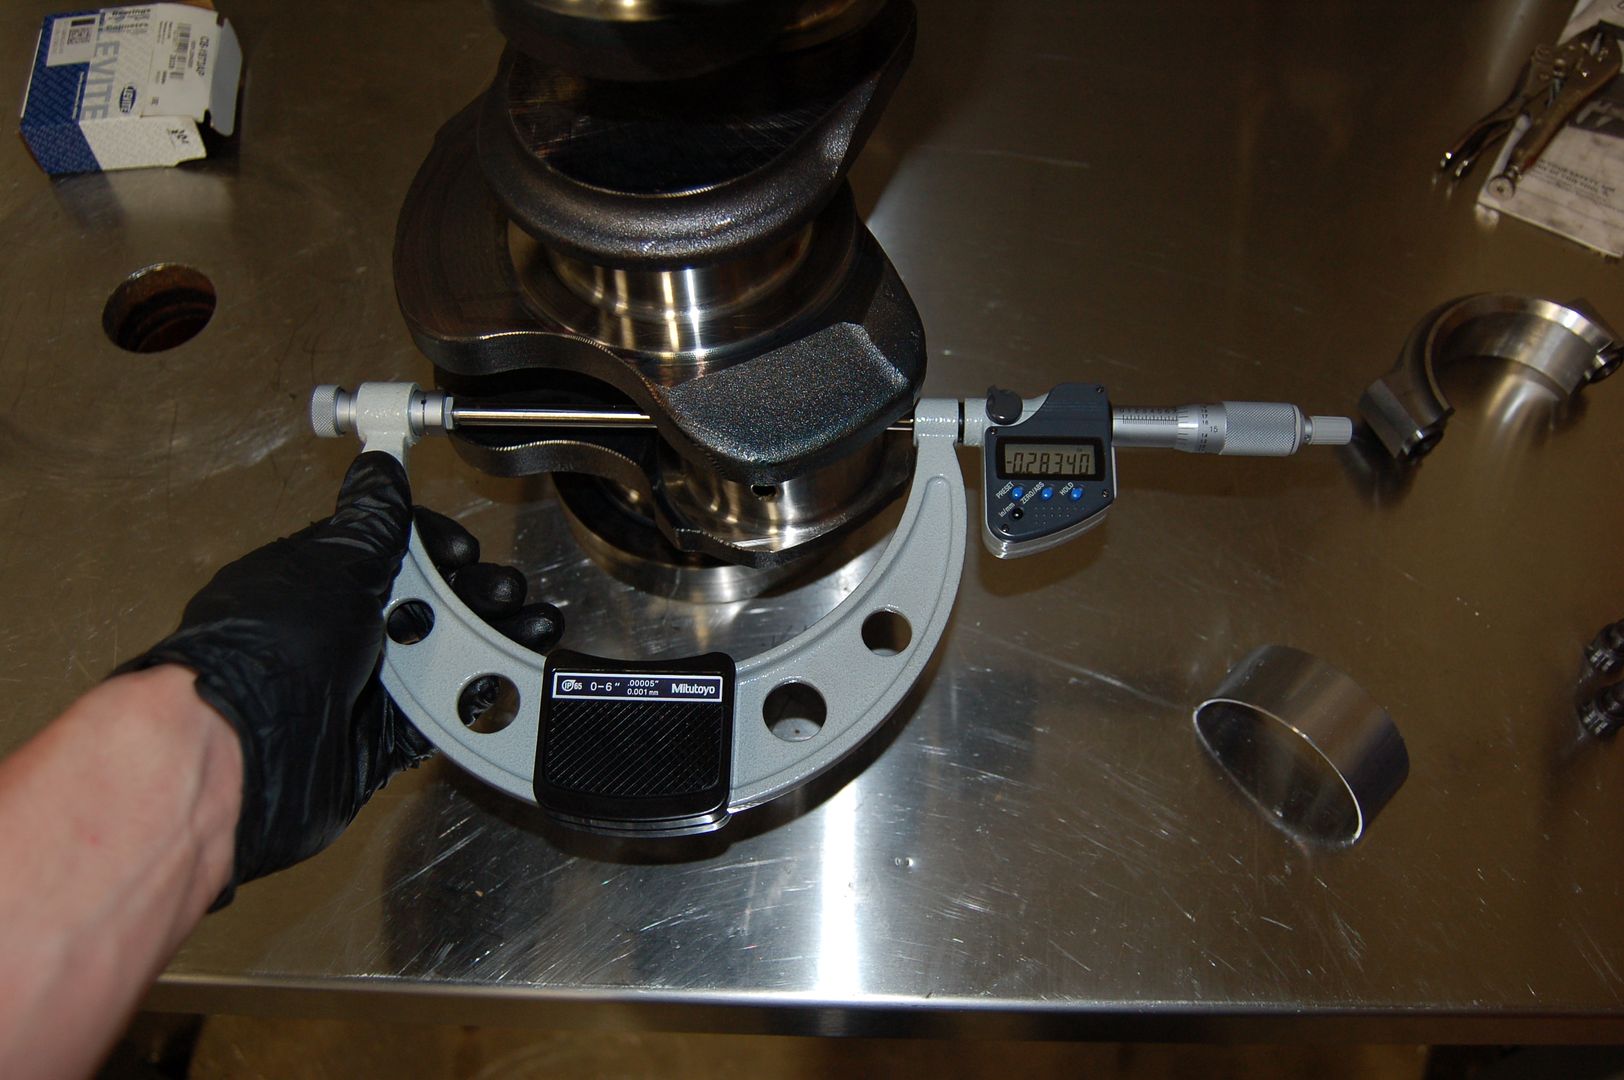
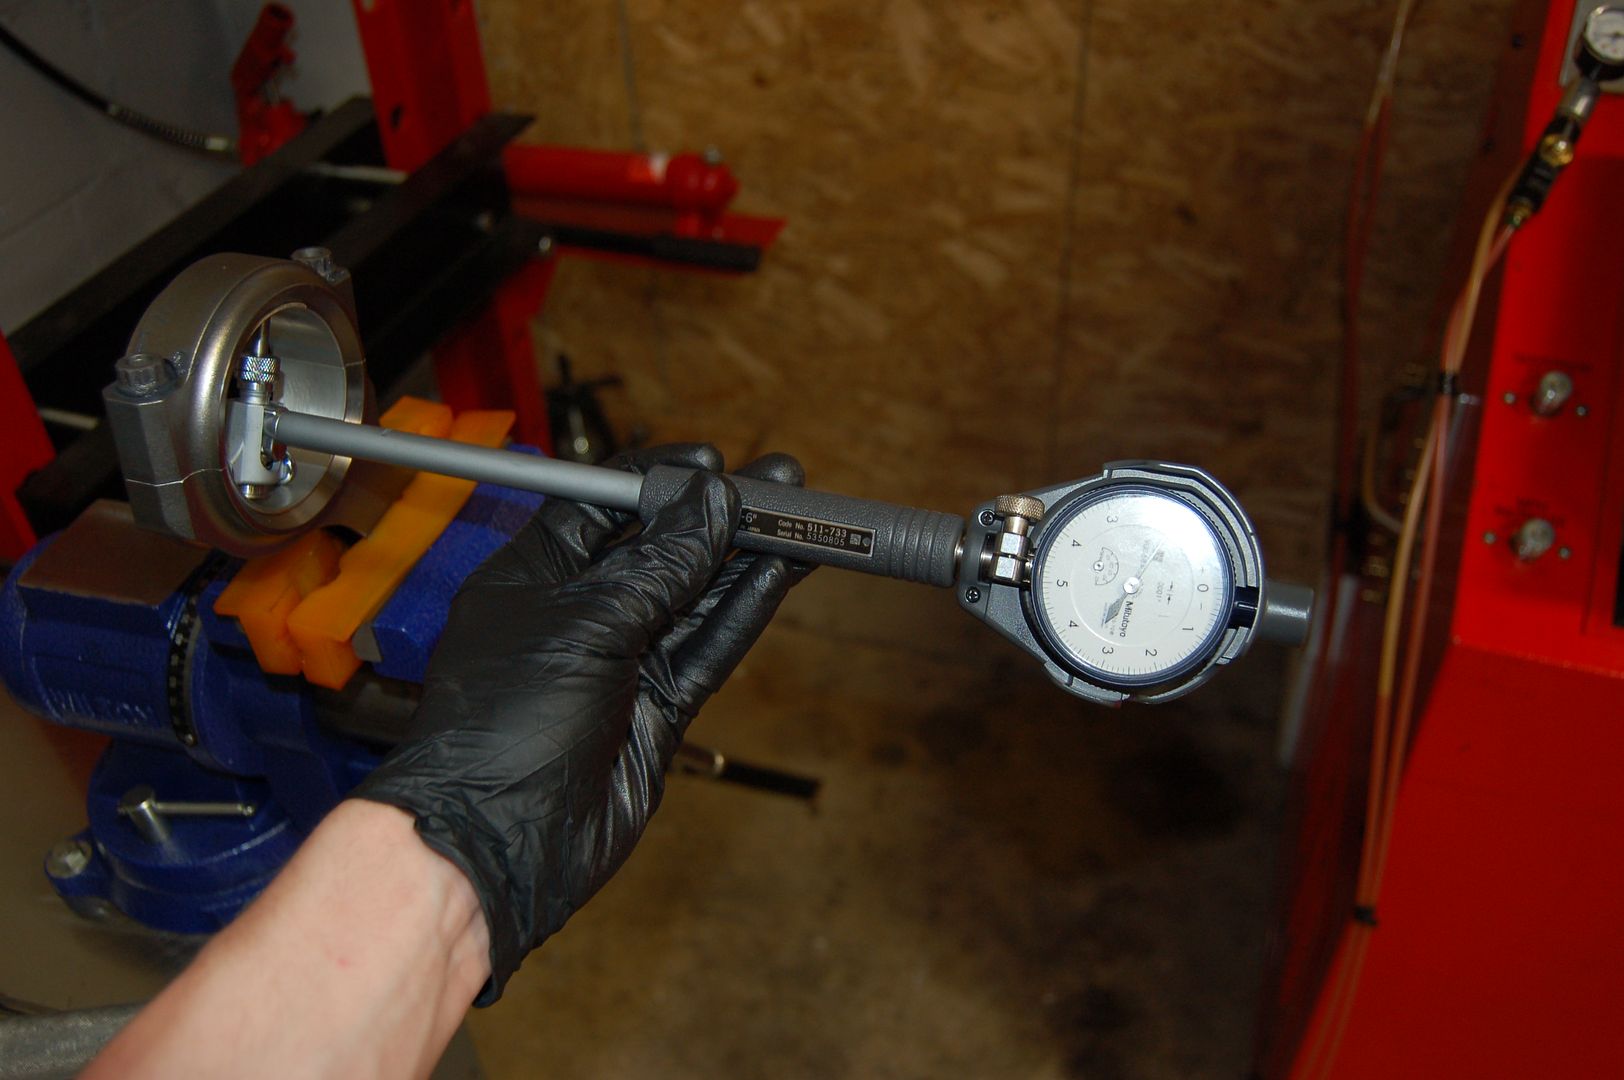
Zero out the bore gauge
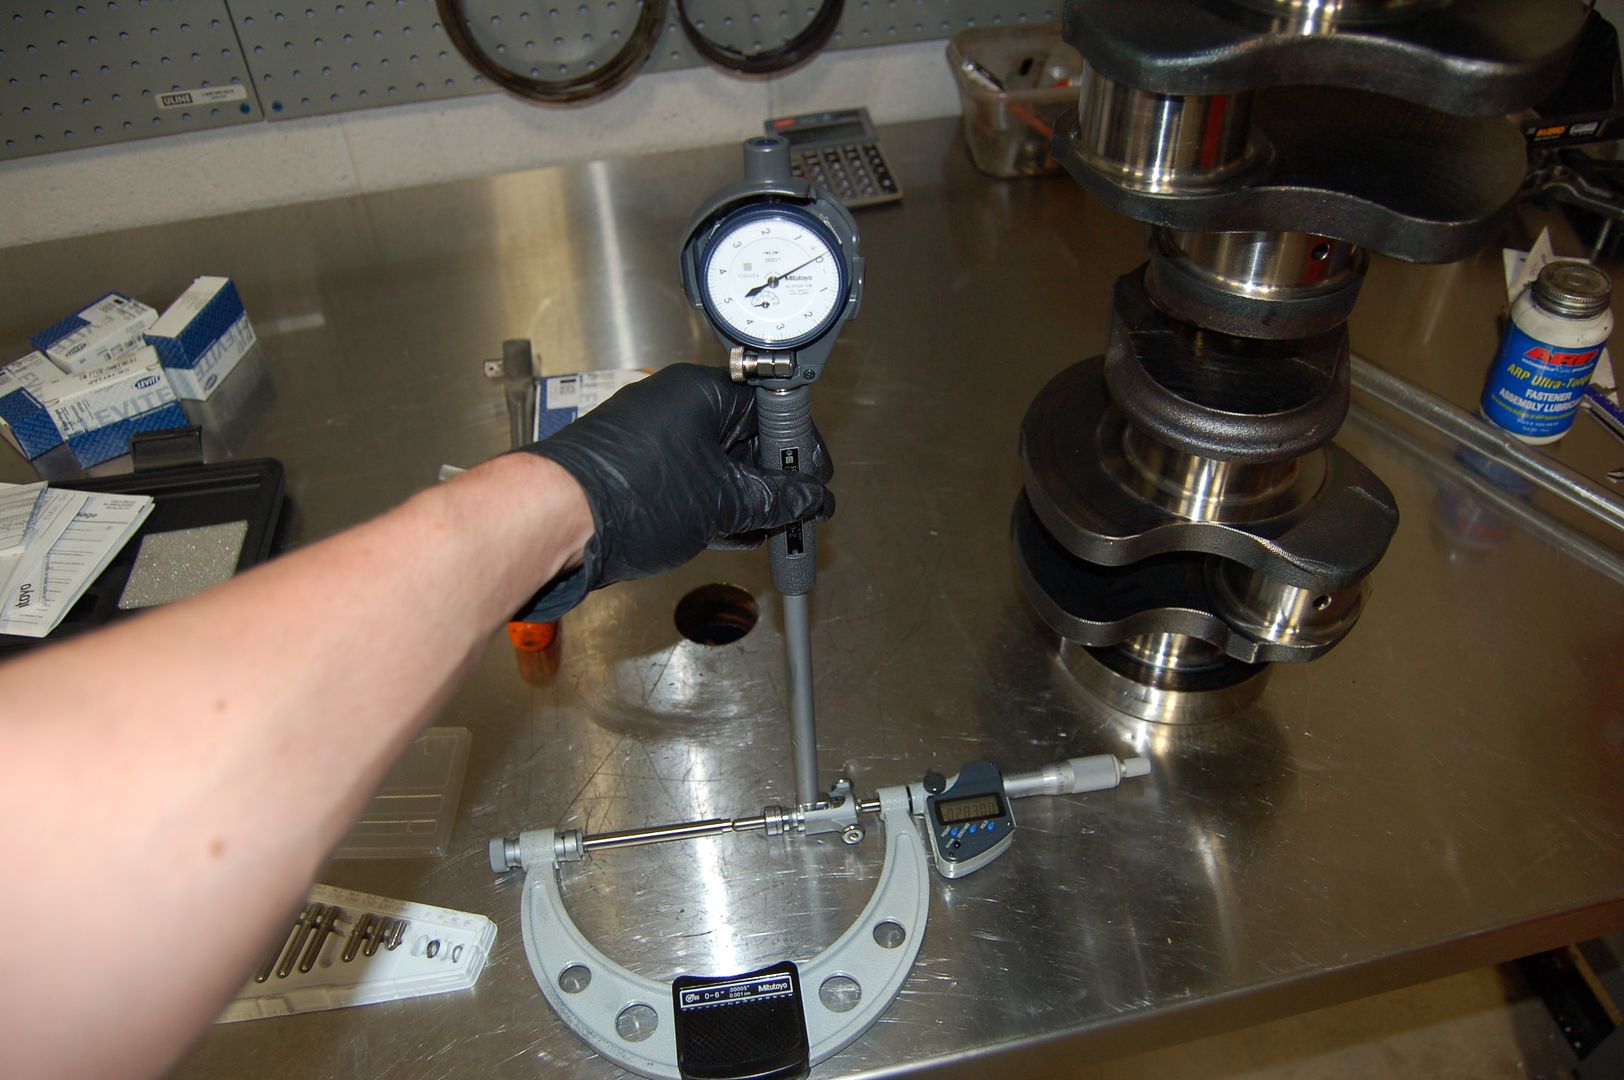
Check bearing clearance
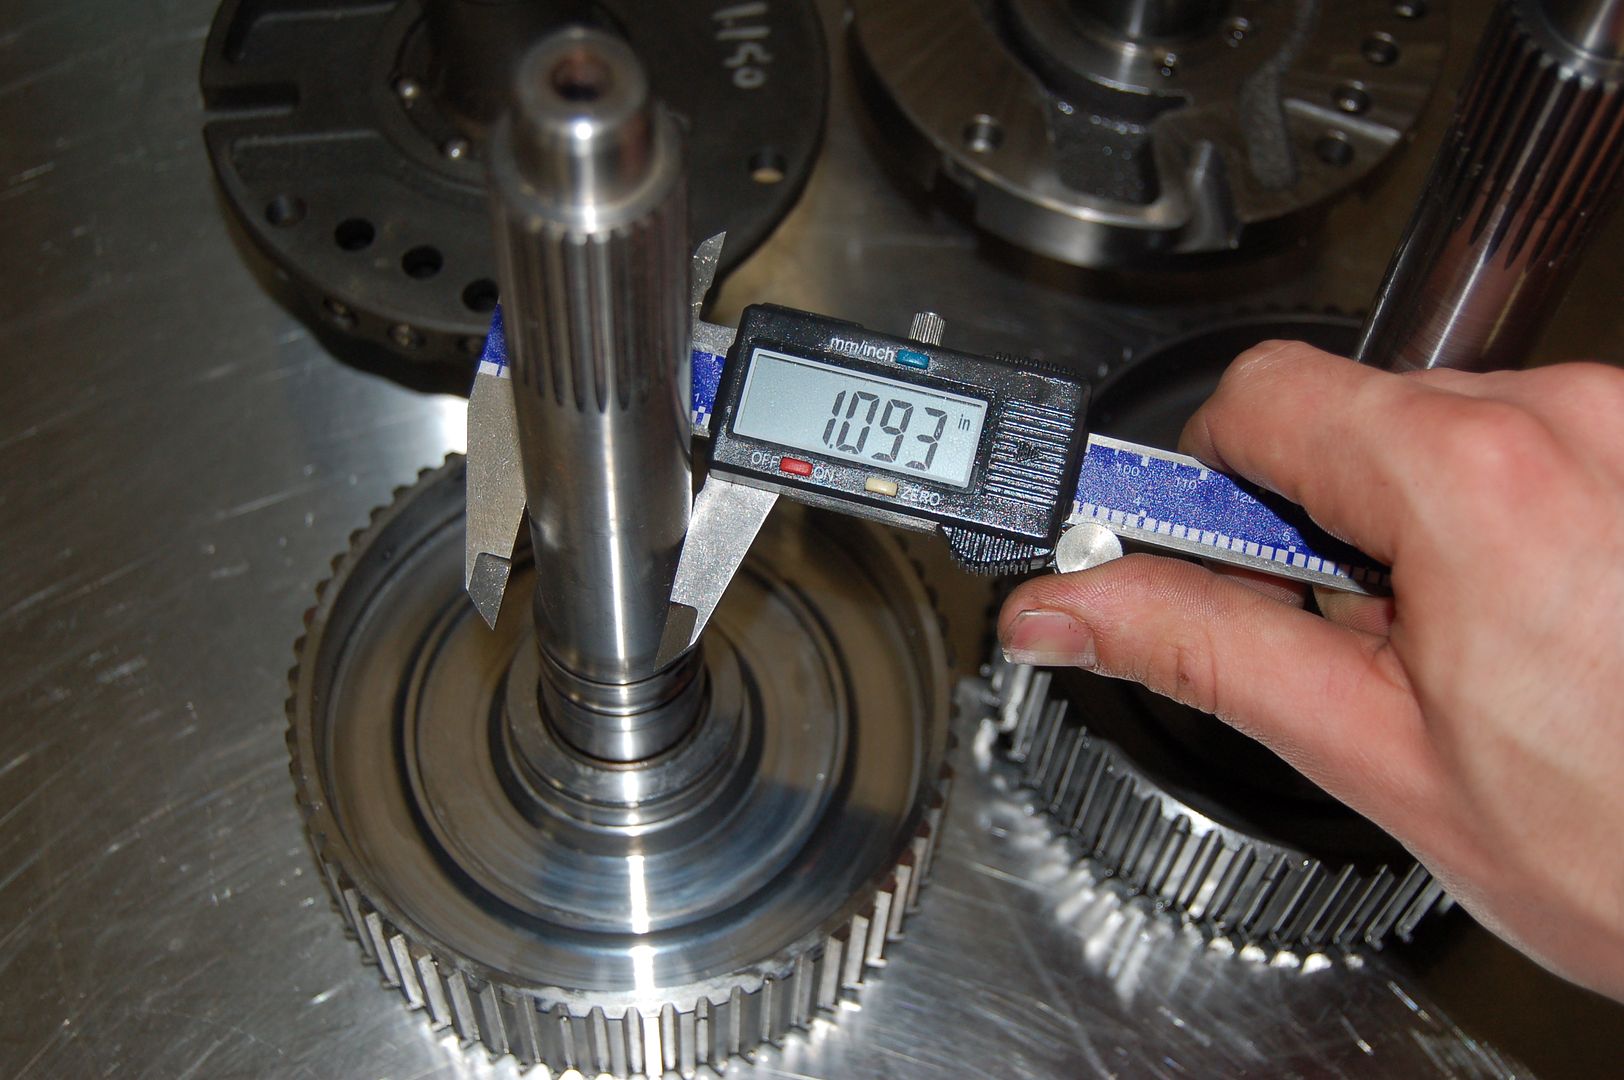
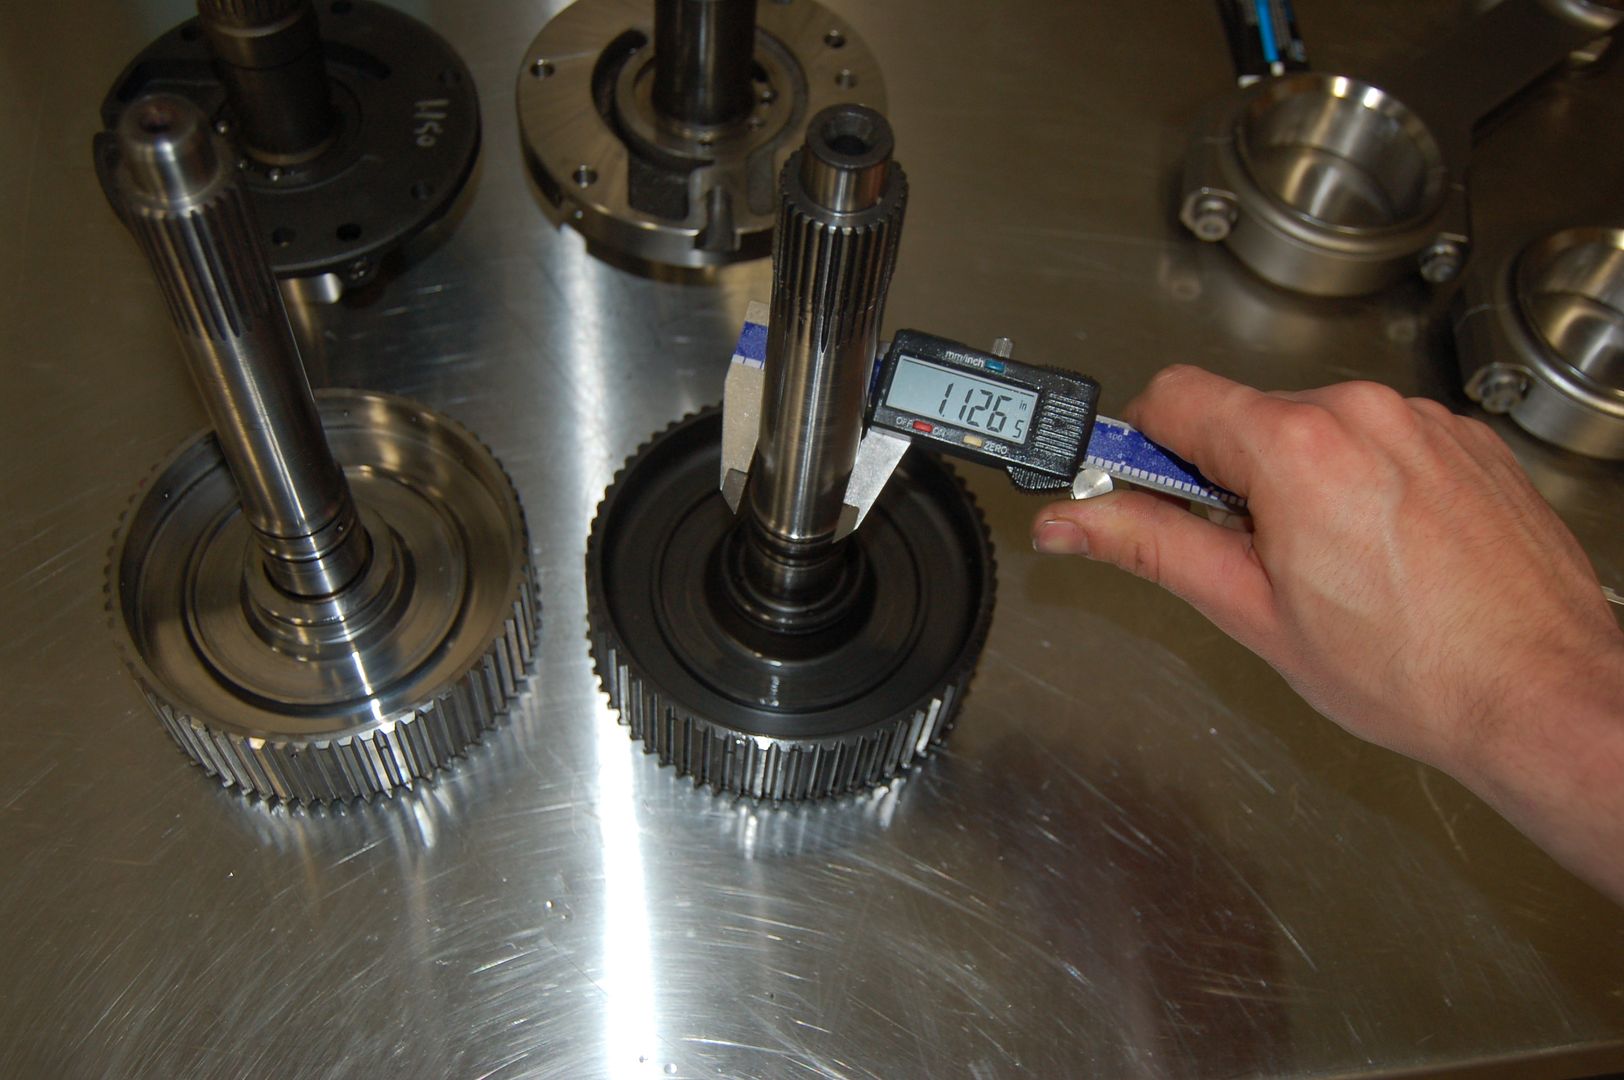
I also received my machined oe stator support in for the TCS Arizona 27 Spline input we will be running. I took some comparison shots next to the precision industries rhino shaft. Even though the rhino shaft is larger in diameter, I've heard too many accounts of it breaking to make me confident to use it. Here are some pictures of the shafts and stator supports.
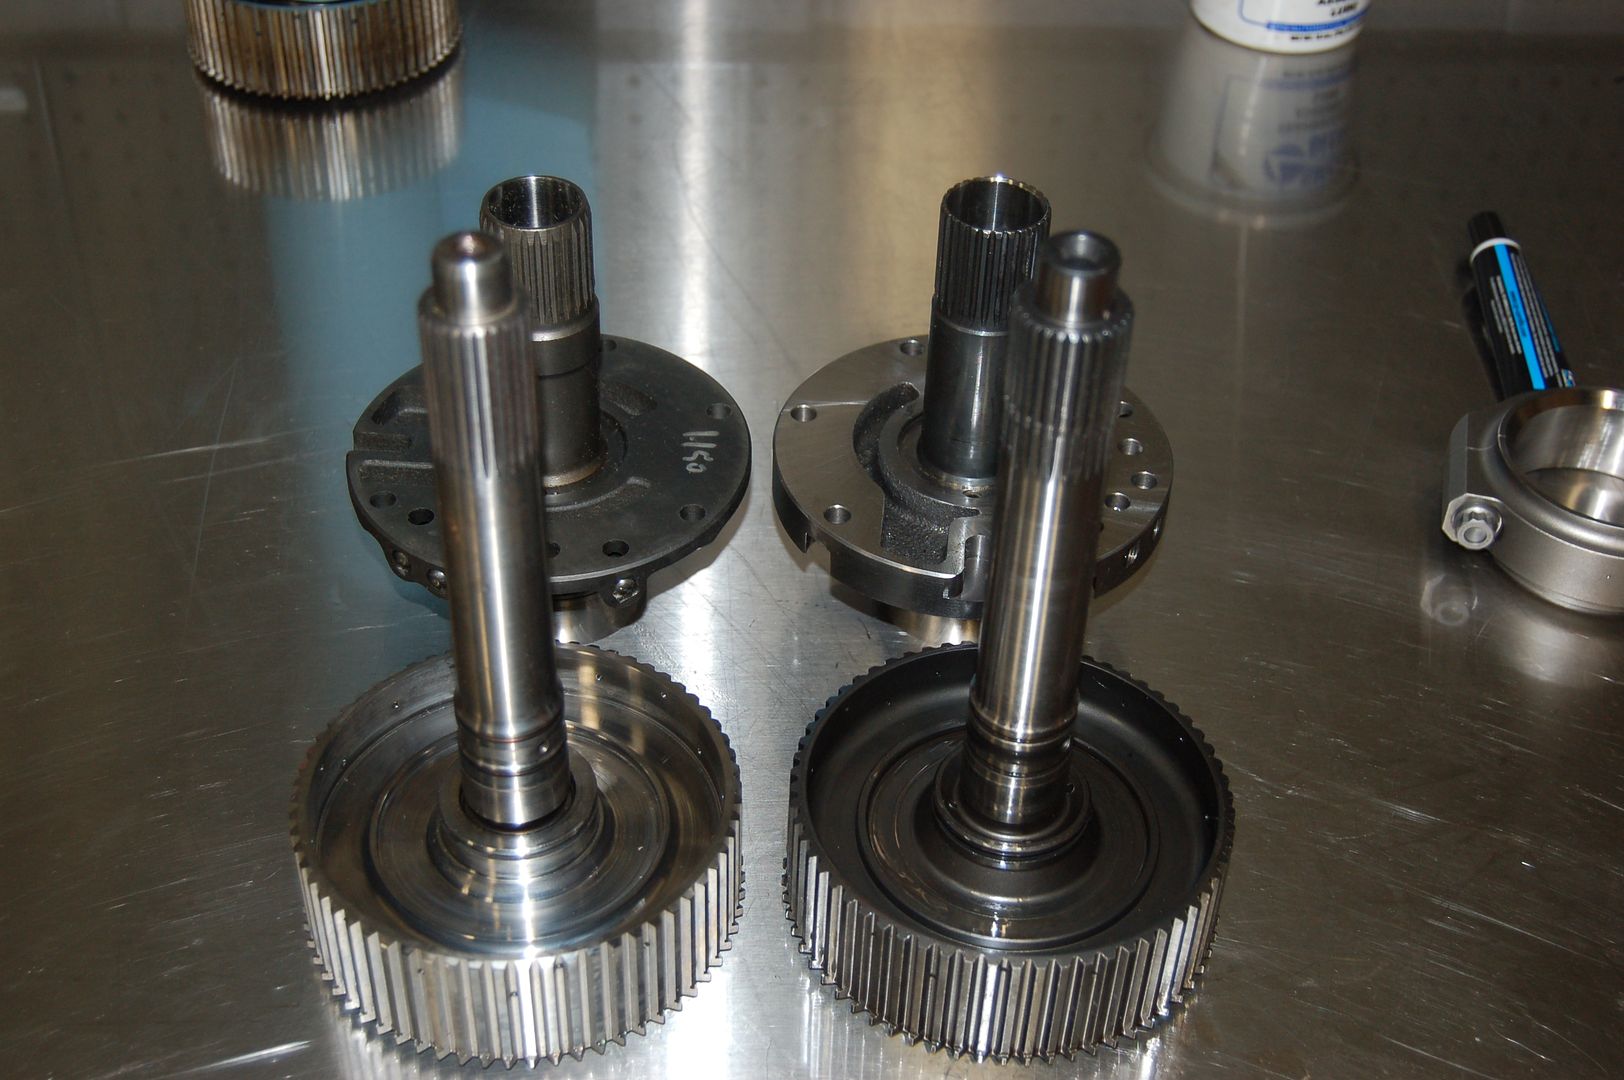
TCS AZ shaft OD
Precision Industries
Anyhow that is all for tonight. The block will be done very soon and I will start assembling the short block upon reception. (also have more clearances to check)
I also did some research for high temperature chemical resistant ceramic clear coats, and got in touch with a company called Cerakote. I asked if brake parts cleaner would touch their clear coat once it was cured, and they informed me it is completely chemical resistant to harsh chemicals and brake clean would not harm it. So I am going to order a quart of that to give the block and transfer case a little sheen on top of that ceramic silver.
|
|
|
|
|
09-29-2016, 04:12 PM
|
#9
|
Name: USARMY12V
Title: Rally round the Virginian
Status: Not Here
Join Date: Jan 2012
Location: Virginia
Member`s Gallery
Posts: 711
|
Quote:
Originally Posted by Mulboost

I also did some research for high temperature chemical resistant ceramic clear coats, and got in touch with a company called Cerakote. I asked if brake parts cleaner would touch their clear coat once it was cured, and they informed me it is completely chemical resistant to harsh chemicals and brake clean would not harm it. So I am going to order a quart of that to give the block and transfer case a little sheen on top of that ceramic silver.
|
It does hold up pretty well. I've seen lazy people use brake cleaner to clean firearms that are cerakoted and it holds up fine to it.
__________________
-Chris
"God gave them 24 for those too dumb to use 12."
Be a happy dinosaur
1998 QCLB 5.9 Auto Under the Knife
2010 MCSB 6.7 68RFE Draconian MCC soon to be EFI, Deleted
|
|
|
|
|
09-29-2016, 05:16 PM
|
#10
|
Name: Blueboy
Title: Too Much Time
Status: Not Here
Join Date: Aug 2006
Member`s Gallery
Posts: 993
|
I have been using Swain Tech coatings for yrs, never any problems.
|
|
|
|
|
10-03-2016, 11:43 PM
|
#11
|
Name: Mulboost
Title: Transmission Builder
Status: Not Here
Join Date: Feb 2016
Member`s Gallery
Posts: 11
|
So I got all of the clearances checked between the connecting rods and the crank, all Is well.
Also picked up the block from Miller's Machine shop today. They had some really high hp cummins engines in there that were full cam bearing, roller lifter setups. I was really impressed by some of those high hp engines. Anyway here is block after cleanup and pressure hone job.
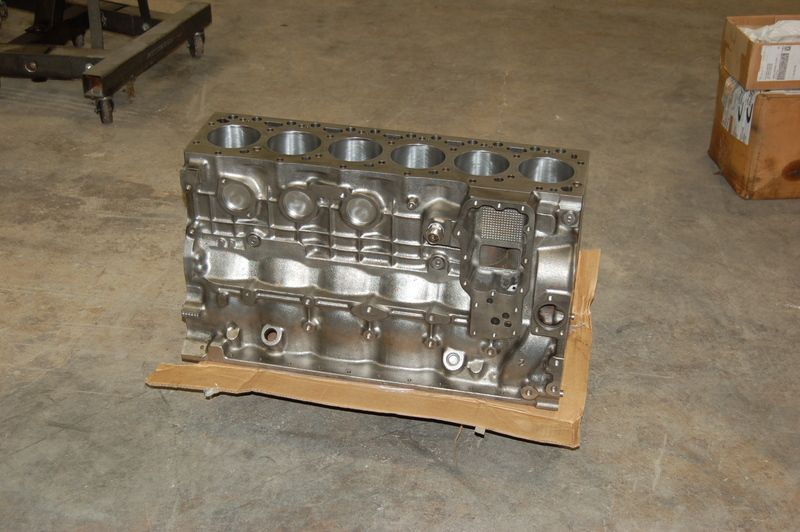
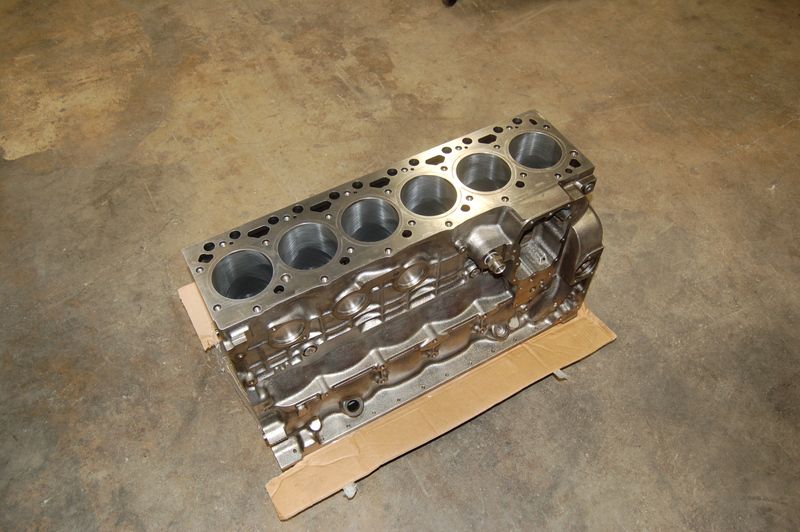
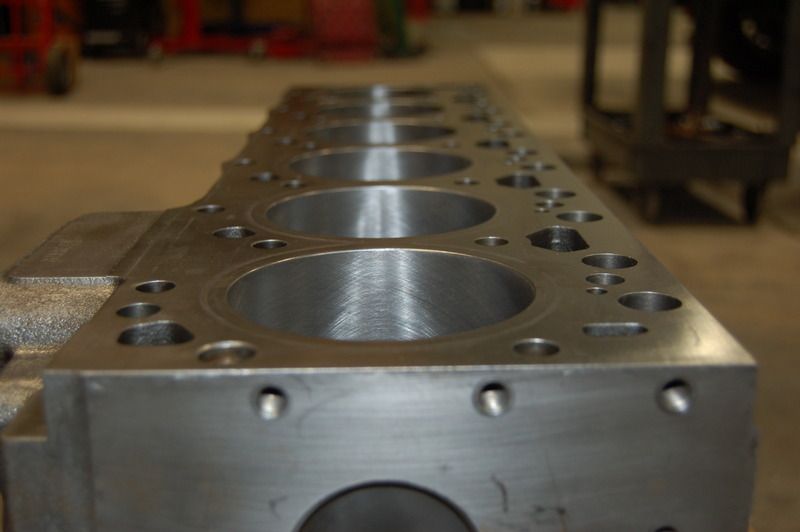
Here it is after paint. (Didn't want that fresh iron rusting, also threw the oil pan on just for the pic)
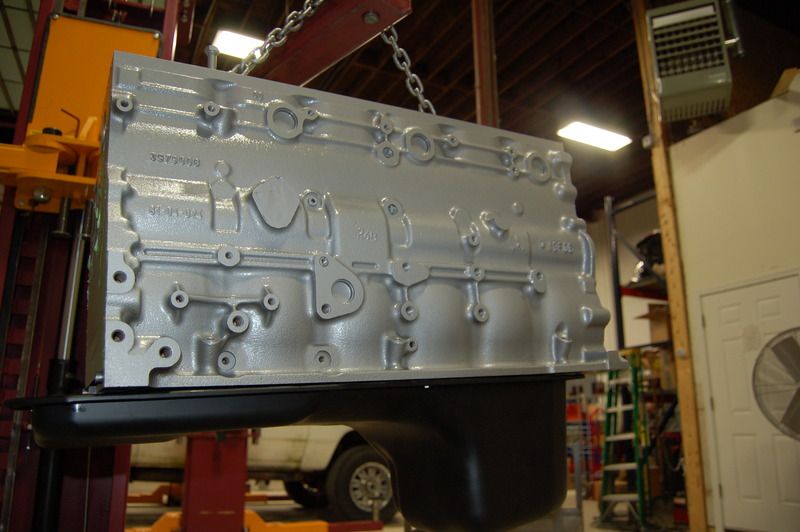
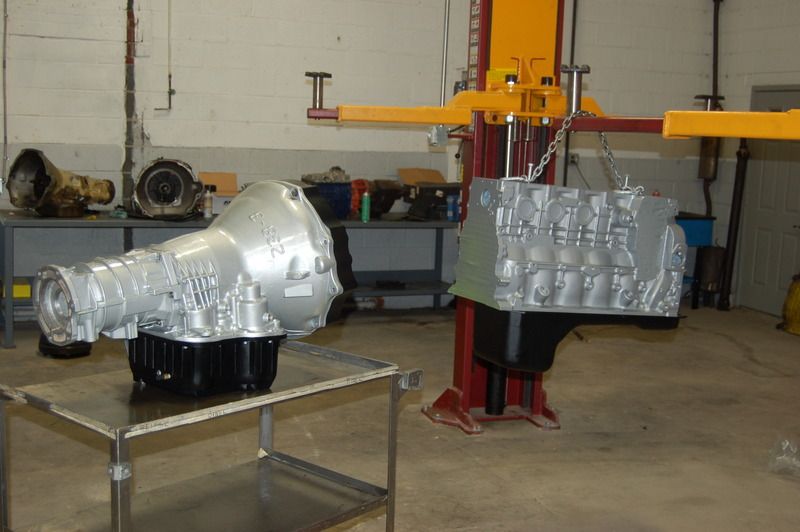
Here are the engine and trans together. It would be rather costly to get the engine powdered so I opted to paint it. I think when the cerakote gets a nice sheen on it, you will barely be able to tell the color difference in the engine bay.
That is all for tonight. I have a timing belt job to do on an alh tdi tomorrow. I'm getting really excited now that I have the block back. Also I am really trying to decide if I want to run nitrous on this engine or not. I don't want it to really run dirty (hazey smokey blowby), but I know damn well it is going to if I open up that top ring gap.(at least until it warms up) Decisions, Decisions. Either way the methanol is definitely coming out.
|
|
|
|
|
10-19-2016, 06:22 PM
|
#12
|
Name: EverydayDiesel
Title: I drink diesel
Status: Not Here
Join Date: Feb 2016
Location: $FCE2
Member`s Gallery
Posts: 196
|
Nice build!
Is there any advantages of getting mahle pistons over stock?
|
|
|
|
|
10-27-2016, 11:20 AM
|
#13
|
Name: Mulboost
Title: Transmission Builder
Status: Not Here
Join Date: Feb 2016
Member`s Gallery
Posts: 11
|
Not Really
Quote:
Originally Posted by EverydayDiesel
Nice build!
Is there any advantages of getting mahle pistons over stock?
|
It depends who you ask. Some say mahle makes the pistons for cummins. Some say OE cummins pistons are superior. The Mahle Pistons were cheap, and I ran them in my previous build for 2 years with no problems, well until one melted. Not sure if it was a tuning issue, injector issue or methanol issue. I'll be keeping a close eye on egts because I didn't get these ceramic coated.
Got the bottom end together the other night
[IMG] 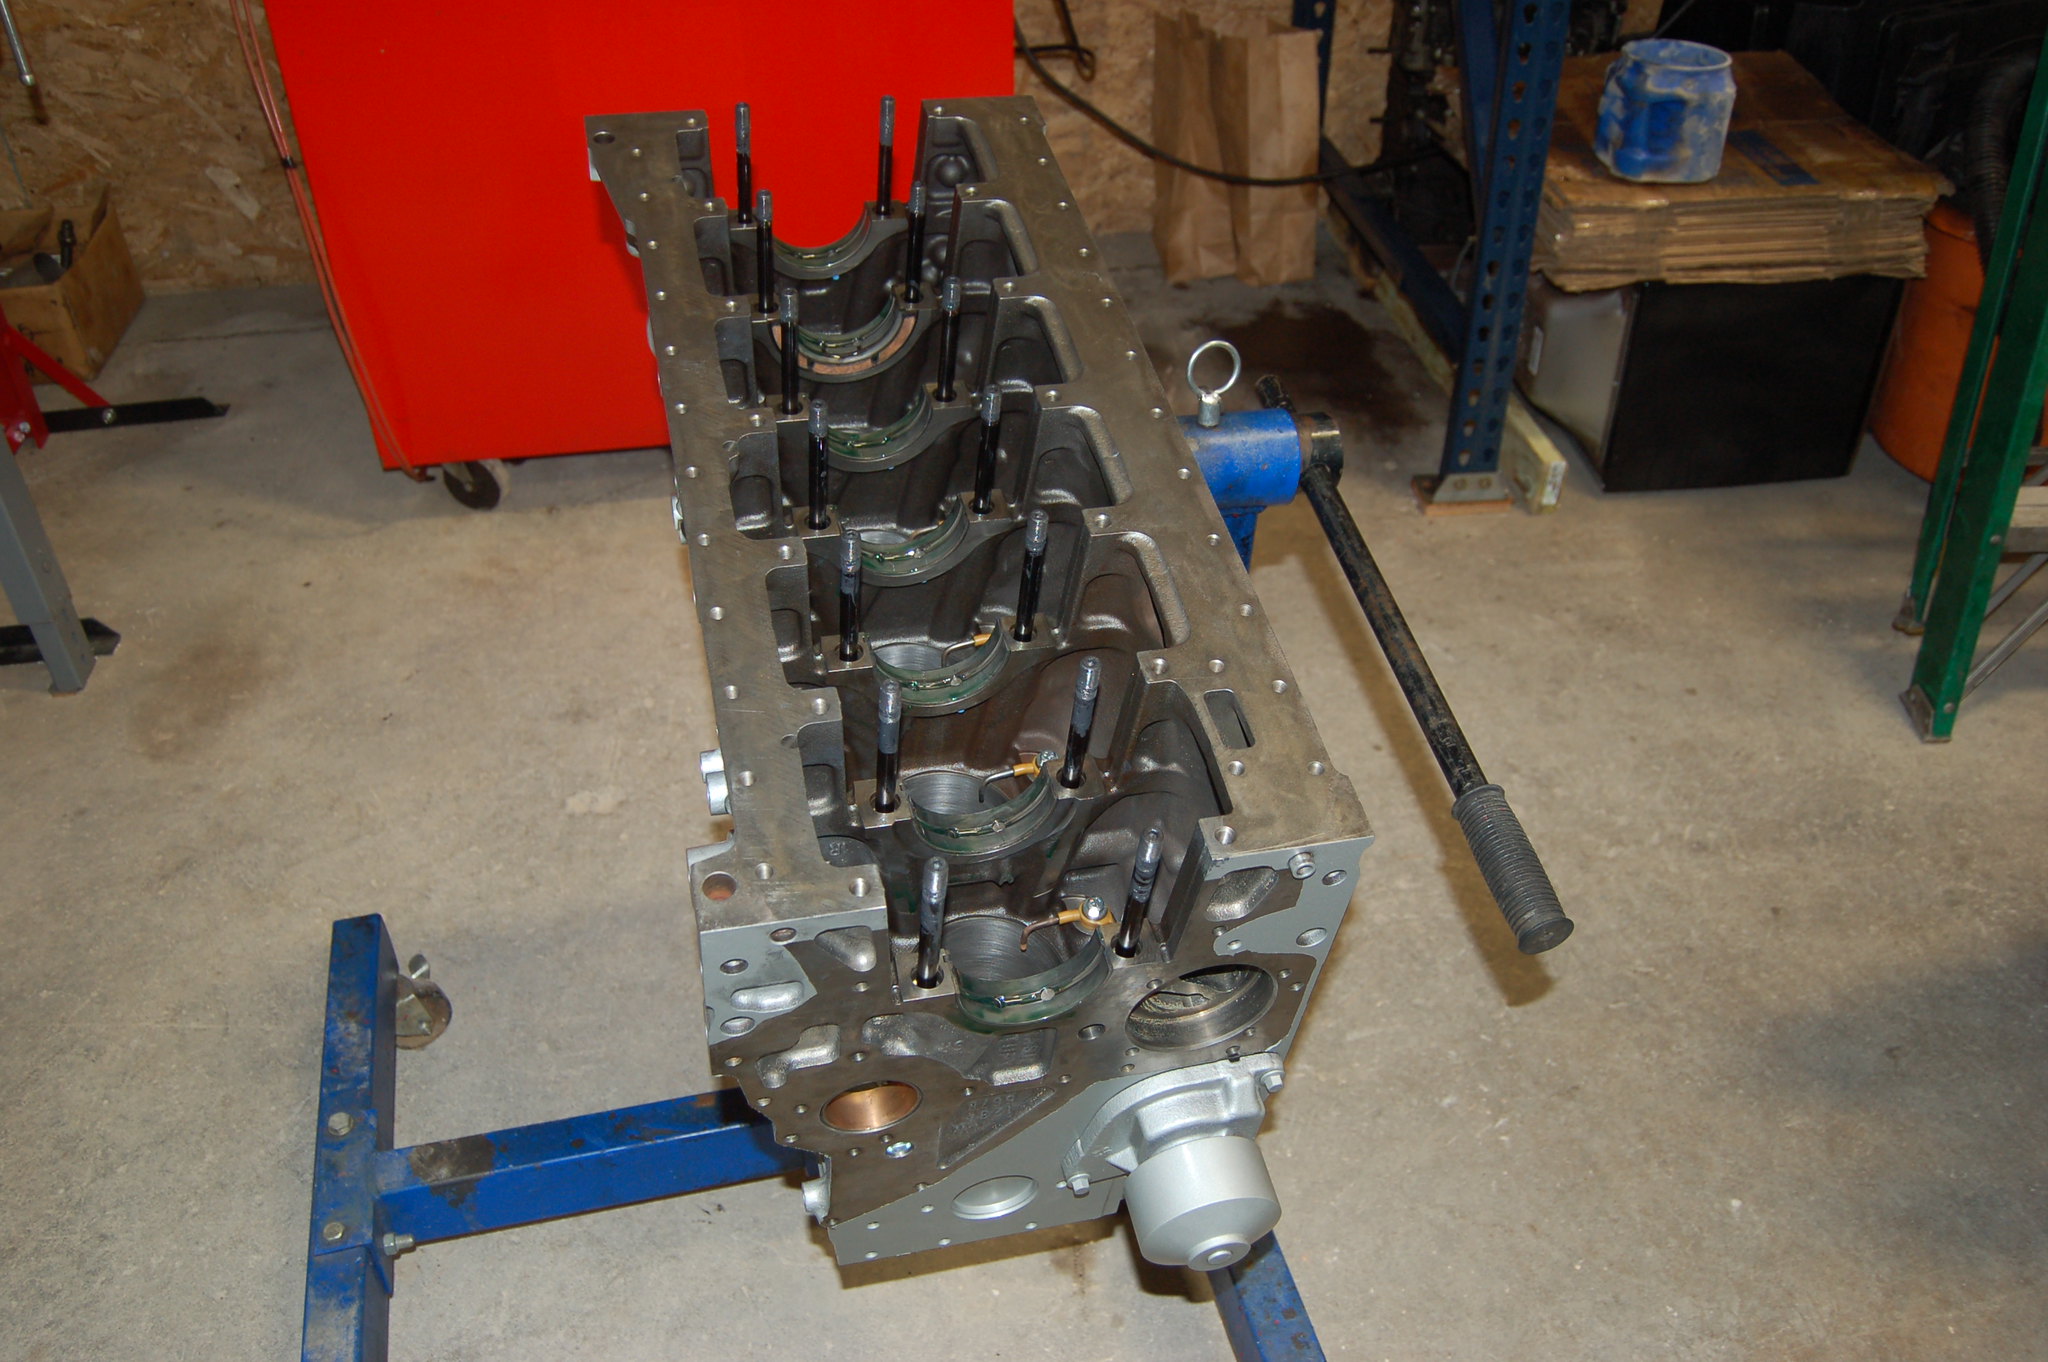 DSC_0271 DSC_0271
[IMG] 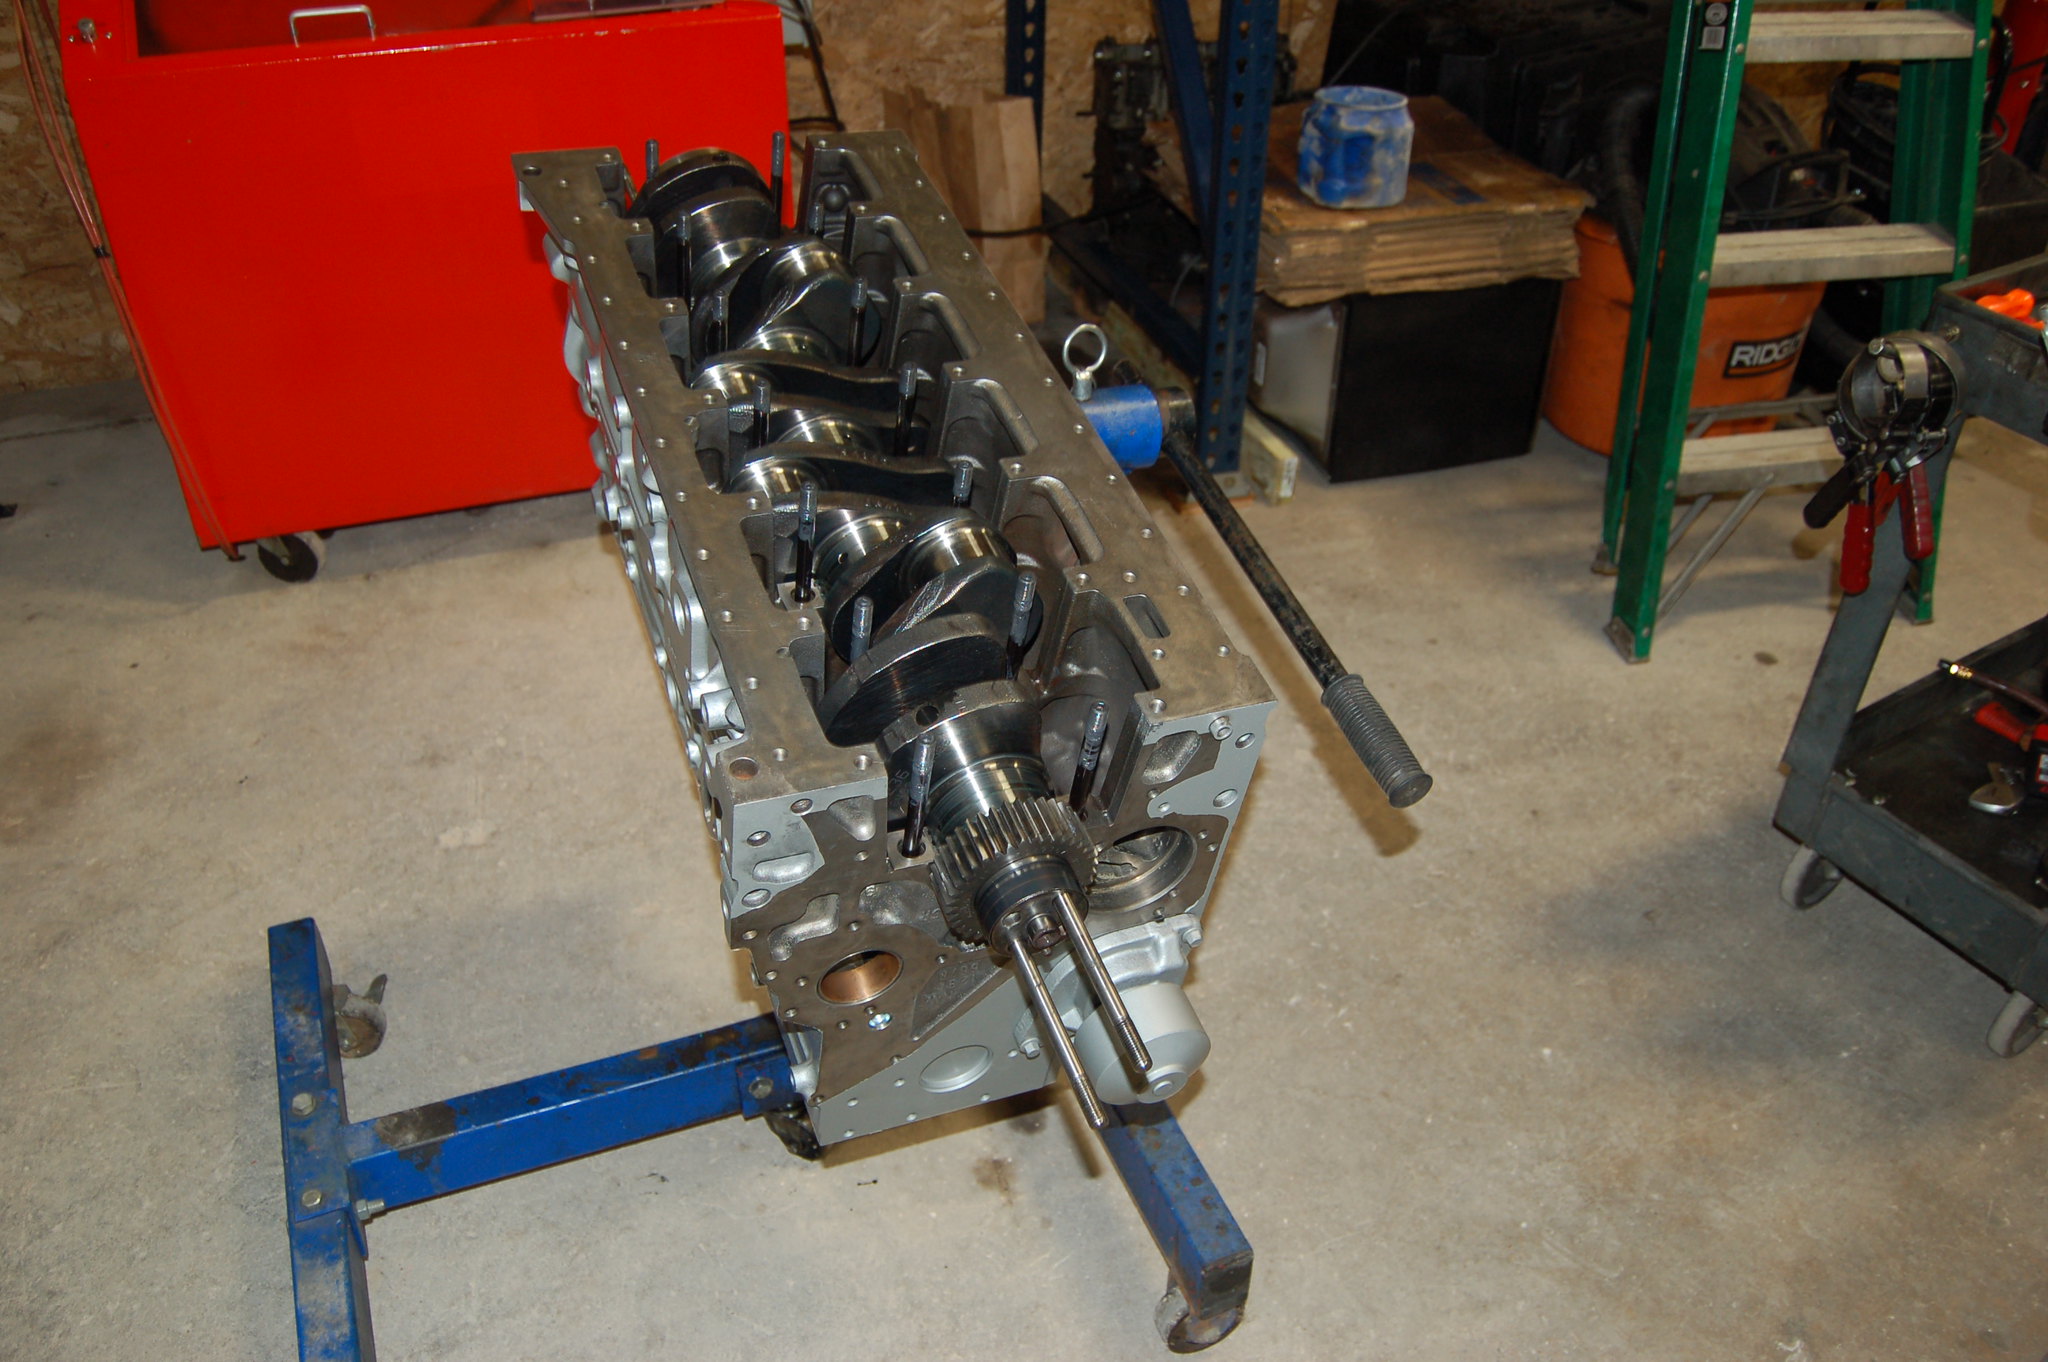 DSC_0273 DSC_0273
[IMG] 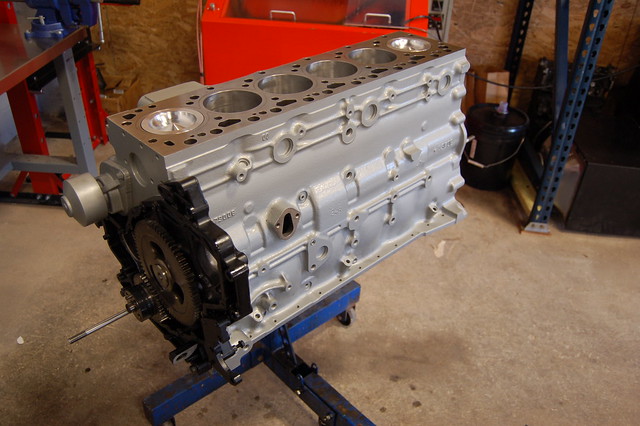 DSC_0295 DSC_0295
|
|
|
|
|
10-30-2016, 04:23 PM
|
#14
|
Name: BlackasCoal
Title: Too Much Time
Status: Not Here
Join Date: Sep 2011
Location: Camp Lejeune NC but grown in PA
Member`s Gallery
Posts: 628
|
Such clean work! Hope to stop in and see you in a month about some transmission work.
__________________
07.5 MCSB, Thuren/Carli/King, 35" Toyos MT's, 17" Methods, Millers Machine Shop 6.4 w/ Wagler long rods, QSB pistons, 188/220 cam, Ported/big valve head, Muldoons Phat shaft 48re w/ anteater, DDP 5.9 fuel, Firepunk 66/85, Firepunk EFI
|
|
|
|
|
01-15-2017, 12:41 AM
|
#15
|
Name: Mulboost
Title: Transmission Builder
Status: Not Here
Join Date: Feb 2016
Member`s Gallery
Posts: 11
|
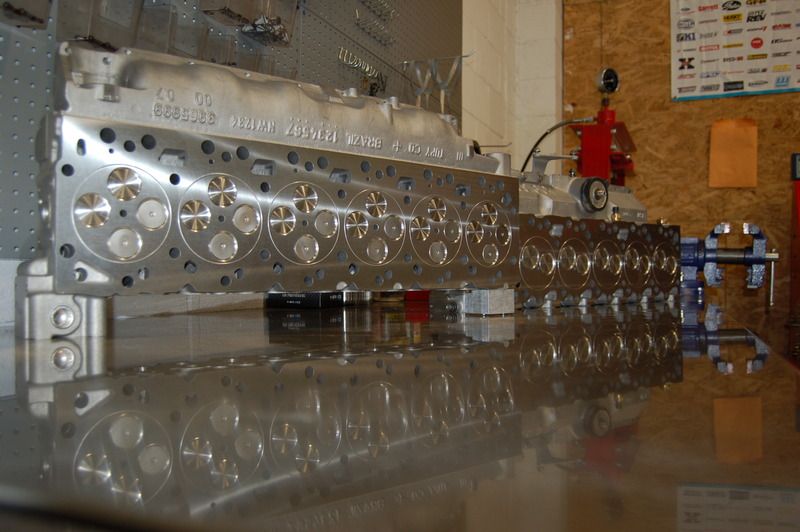
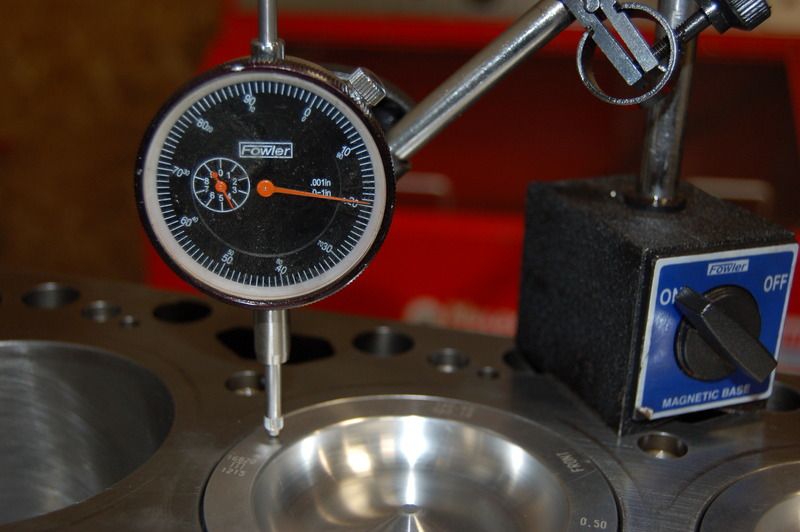
Man it's been 2 months of non stop work, but early this week I got a call from Charlie at the machine shop stating my cyl head was done. We performed a competition valve job, oversized seats, new exhaust guides, port and polish, o ring, resurface and glass bead. It came out really nice. I picked up the cylinder head today and got paint on it. I will cerakote it tomorrow and install it on to the bottom end. Checked piston protrusion and crankshaft endplay, everything is looking nice and I can start assembling the rest of the engine. Here are some pics.
My head on the left, customers 12v on the right.
Piston Protrusion
|
|
|
|
|
01-22-2017, 10:52 PM
|
#16
|
Name: Mulboost
Title: Transmission Builder
Status: Not Here
Join Date: Feb 2016
Member`s Gallery
Posts: 11
|
Made some more progress last week and this weekend between getting stuff done at the shop.
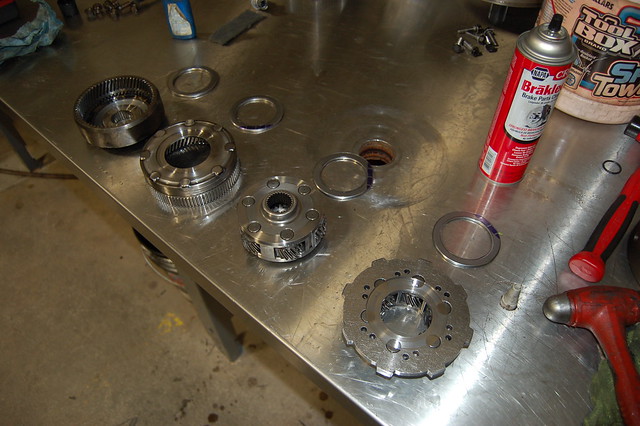
Trans clutches stacked, everything clearance checked and ready for assembly.
 DSC_0437 DSC_0437 by nhojdoon doon, on Flickr
Torrington bearing setup (eliminates thrust washers) Is it necessary? - No. Is it superior - YES!
 DSC_0435 DSC_0435 by nhojdoon doon, on Flickr
Trans built with VB. I have 2 extra wires with the PCS wiring harness so I am going to take advantage of that and use 1 for the CTS2 monitor and the other will likely be installed into the PCS standalone. (tapped 2 ports in the filter extension)
 DSC_0444 DSC_0444 by nhojdoon doon, on Flickr
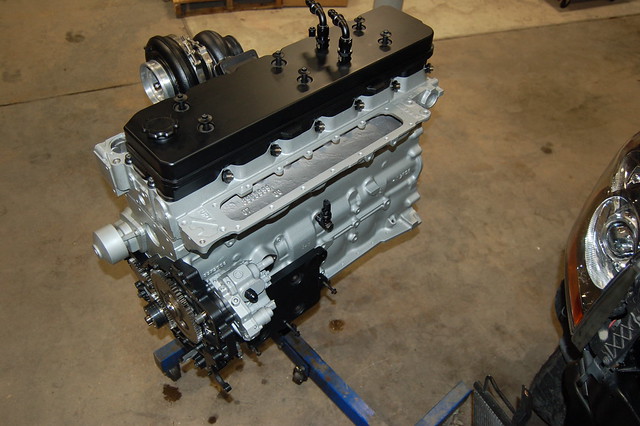
Cylinder head is painted, cerakoted, installed and torqued.
 DSC_0439 DSC_0439 by nhojdoon doon, on Flickr
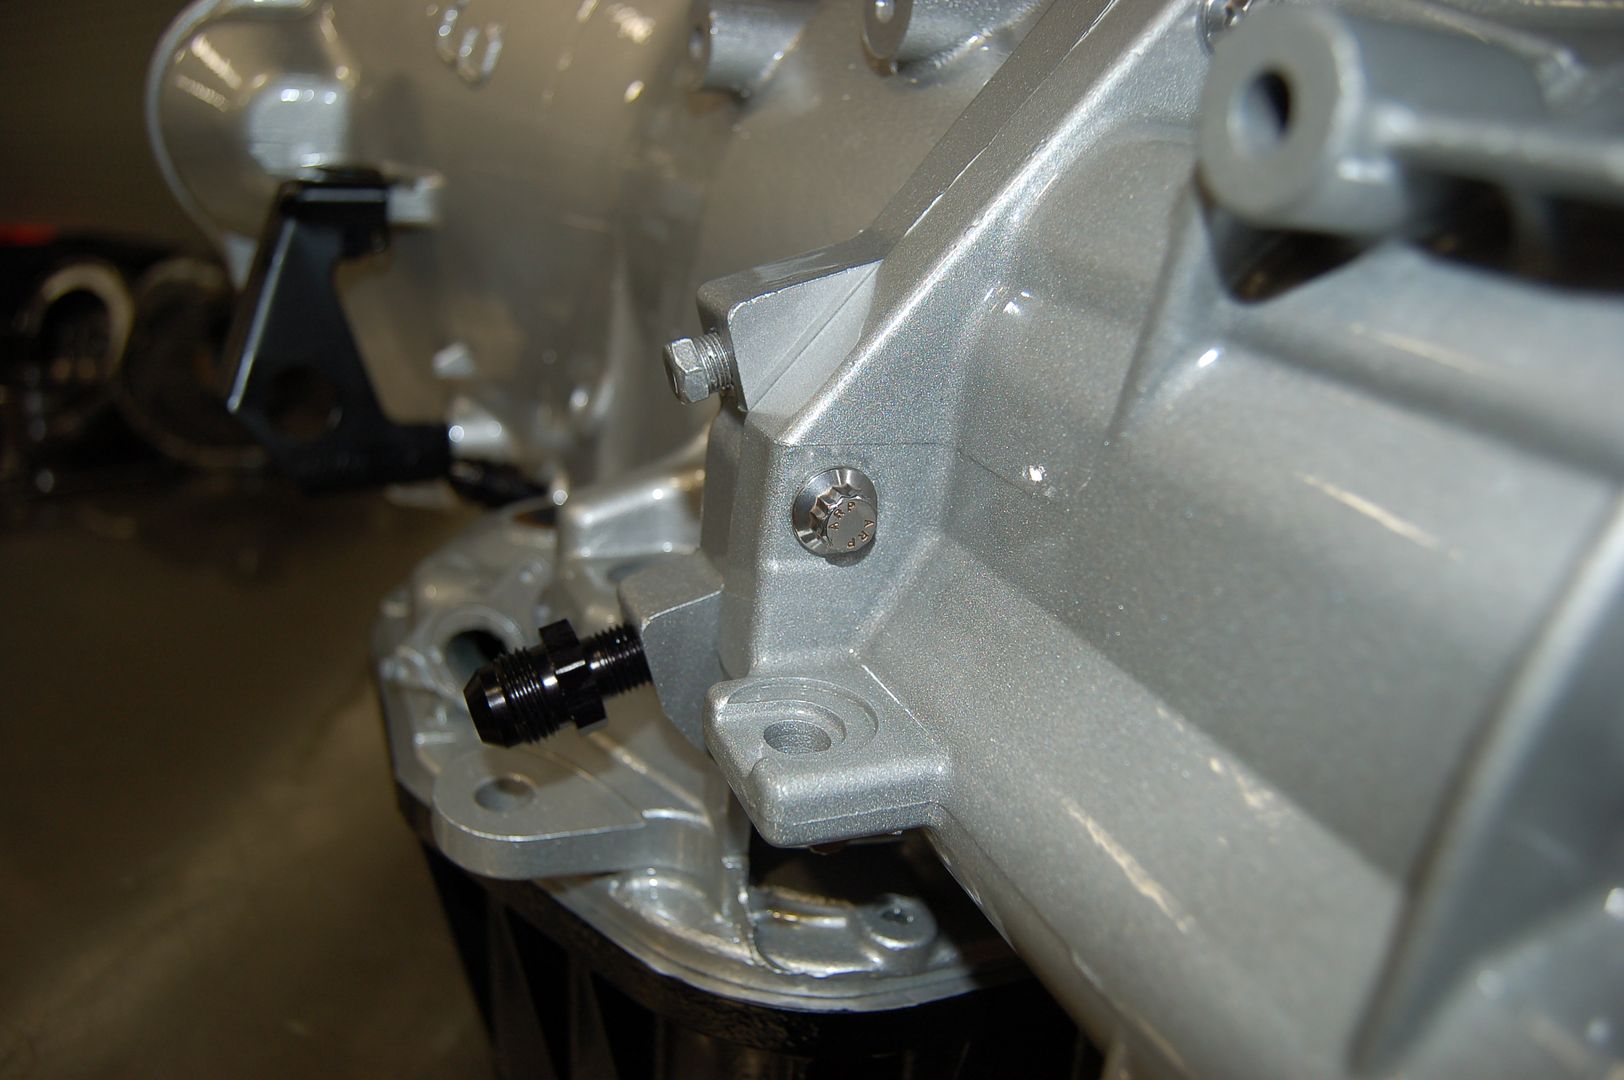
All black AN fittings on this build, on the trans, pumps, ccv off of the valve cover, fuel coming from the airdog. We are running a exergy 10MM under a Stock duramax pump, accompanied with some exergy 150% over 143* injectors.
 DSC_0442 DSC_0442 by nhojdoon doon, on Flickr
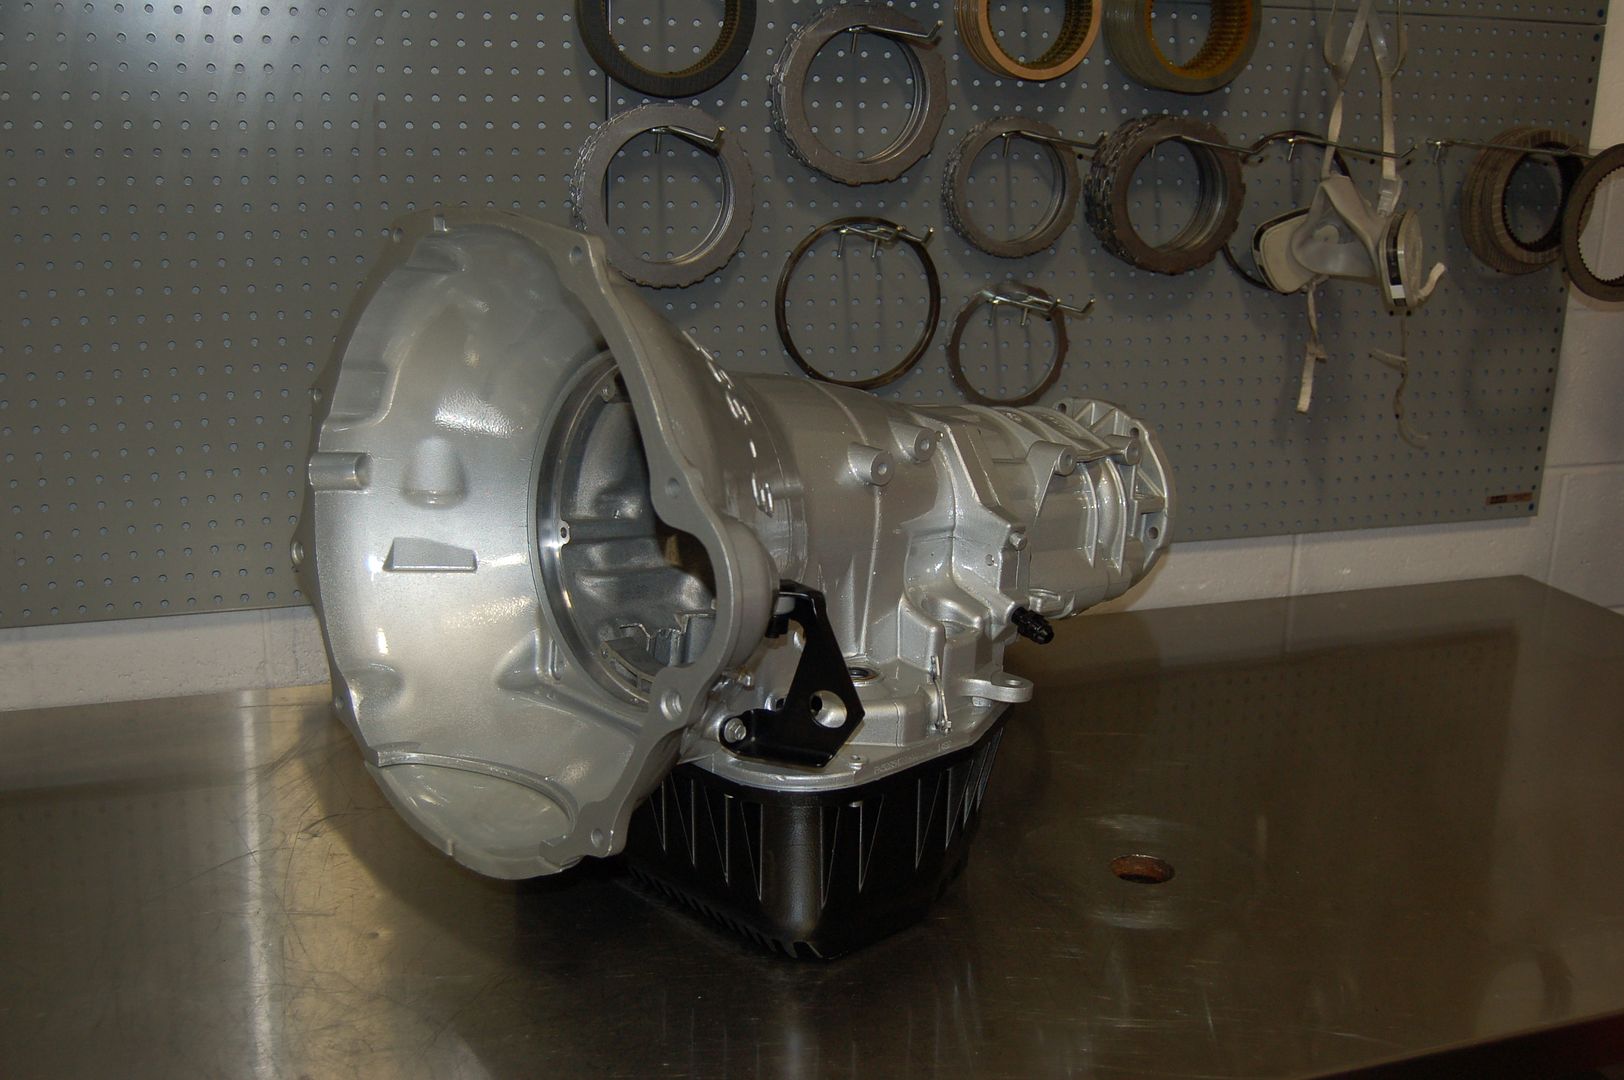
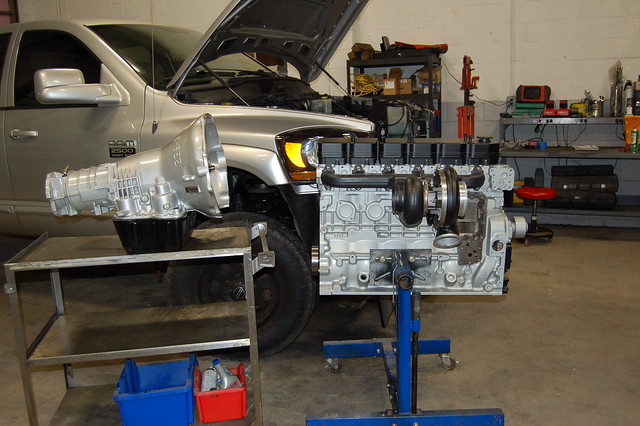
Trans and the engine together (mostly assembled!)
 DSC_0451 DSC_0451 by nhojdoon doon, on Flickr
So next up is installing the engine and the trans, building a dual transmission cooler setup under the tool box, wiring, and tuning. Nowhere over the hurdle but definitely made some progress this past few weeks.
Last edited by Mulboost; 01-22-2017 at 11:06 PM.
|
|
|
|
|
01-23-2017, 04:48 AM
|
#17
|
Name: C20ELEPHANT
Title: C20ELEPHANT
Status: Not Here
Join Date: Jul 2013
Location: Phoenix, Az.
Member`s Gallery
Posts: 10
|
You have one clean shop and build...
__________________
Mike H. 2006 2500HD LBZ EXT. CAB LONGBED
|
|
|
|
|
01-23-2017, 07:24 AM
|
#18
|
Name: biggy238
Title: Too Much Time
Status: Not Here
Join Date: Aug 2008
Location: Just North of Wrong
Member`s Gallery
Posts: 10,867
|
Enjoying the well written, thoughtful posts.
I wish I had seen the cerakote. I just dropped off some parts for powder coating.
Sent from my XT1575 using Tapatalk
__________________
Check out @bdmaximusworx
05.5 Campanella White TDi Jetta 5spd 45.5MPG
-Little Sexy
'10 Silver F250 CCLB 4X4 6.4L cummins Swapped
Insta @trash.panda250
|
|
|
|
|
01-23-2017, 07:25 AM
|
#19
|
Name: Red Sleeper
Title: Too Much Time
Status: Not Here
Join Date: Aug 2009
Location: Lone Star State
Member`s Gallery
Posts: 4,595
|
Looks like a little OCD has taken place. Awesome! It's therapeutic for some of us.
Can you elaborate on the Torrington bearing setup? I'm curious.
__________________
Nick J
'14 Silverado LTZ 5.3 4wd
'05 Cummins QCSB 4wd 48re
'91 Cummins w350 5spd
|
|
|
|
|
01-23-2017, 09:10 AM
|
#20
|
Name: biggy238
Title: Too Much Time
Status: Not Here
Join Date: Aug 2008
Location: Just North of Wrong
Member`s Gallery
Posts: 10,867
|
I was going to ask about it as well, and if it's in a place that will self contain if it fails.
Sent from my XT1575 using Tapatalk
__________________
Check out @bdmaximusworx
05.5 Campanella White TDi Jetta 5spd 45.5MPG
-Little Sexy
'10 Silver F250 CCLB 4X4 6.4L cummins Swapped
Insta @trash.panda250
|
|
|
|
 Posting Rules
|
You may not post new threads
You may not post replies
You may not post attachments
You may not edit your posts
HTML code is Off
|
|
|
All times are GMT -5. The time now is 02:31 AM.
|


