
You are using an out of date browser. It may not display this or other websites correctly.
You should upgrade or use an alternative browser.
You should upgrade or use an alternative browser.
4th Gen Ram install log
- Thread starter UNBROKEN
- Start date

UNBROKEN
Ezekiel 25:17
- Joined
- Apr 21, 2006
- Messages
- 17,158
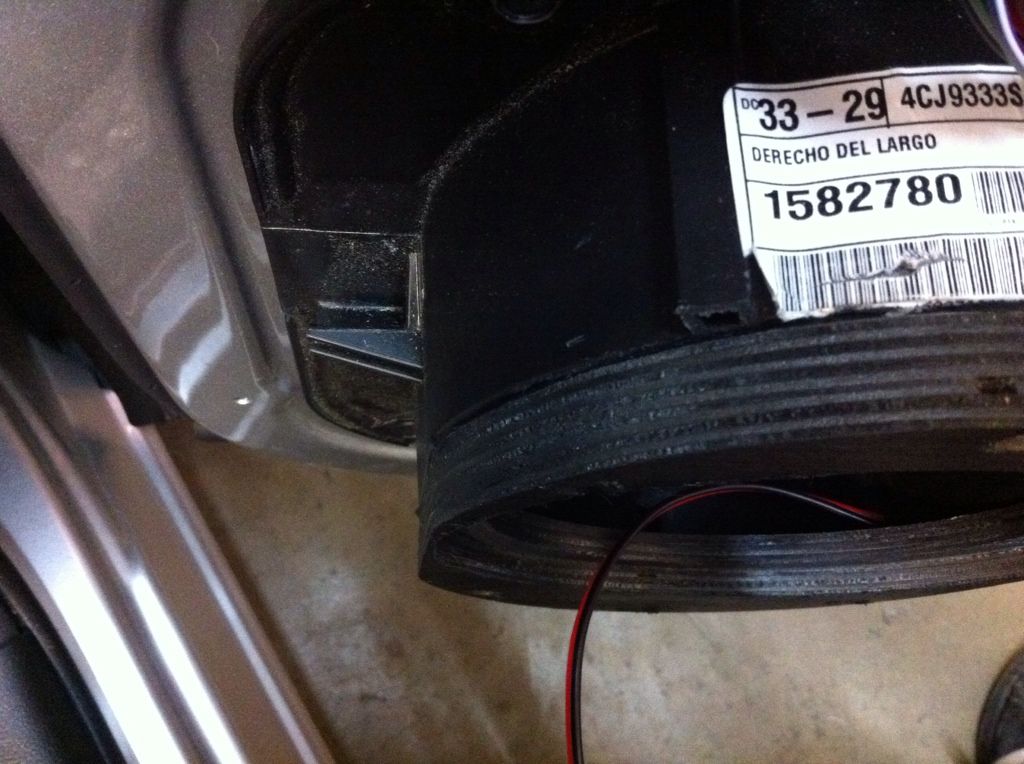
So back for week two I start with the doors. This is my first door install on the new Ram where the inner door removes but we recently had one in the bay that another installer worked on and there were clearance issues with the door card so I know going in that slim is the name of the game so my idea is to flush to the mounting ring edge.
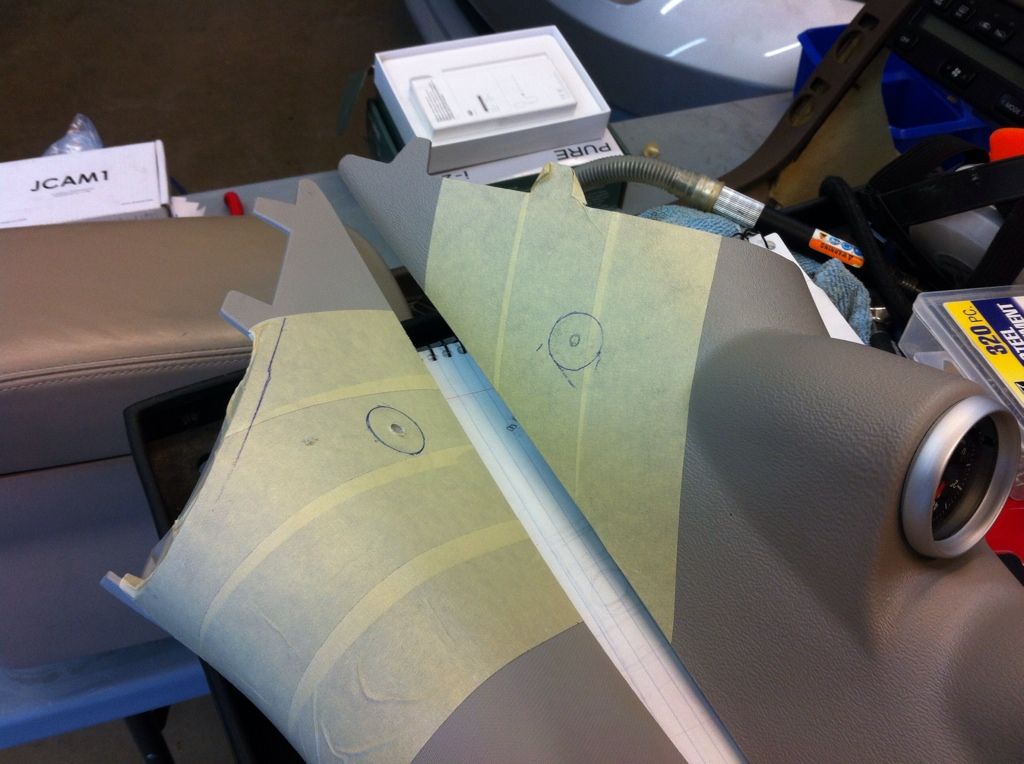
After a closer look I realize rear clearance is an issue as well, so I offset towards the top.
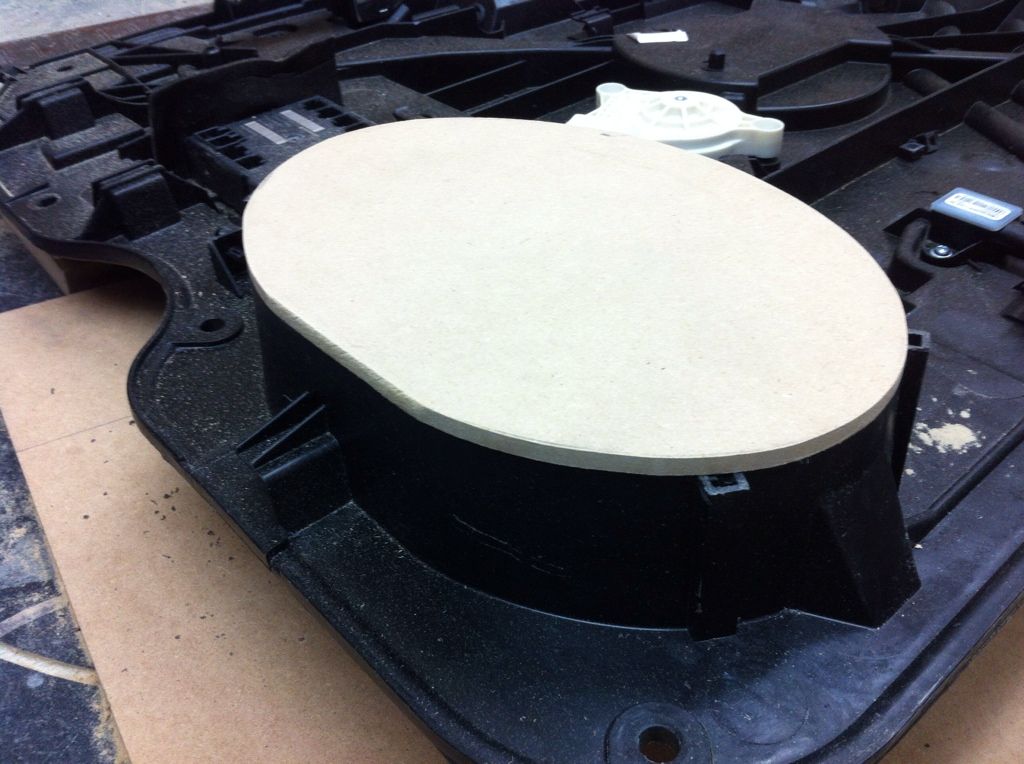
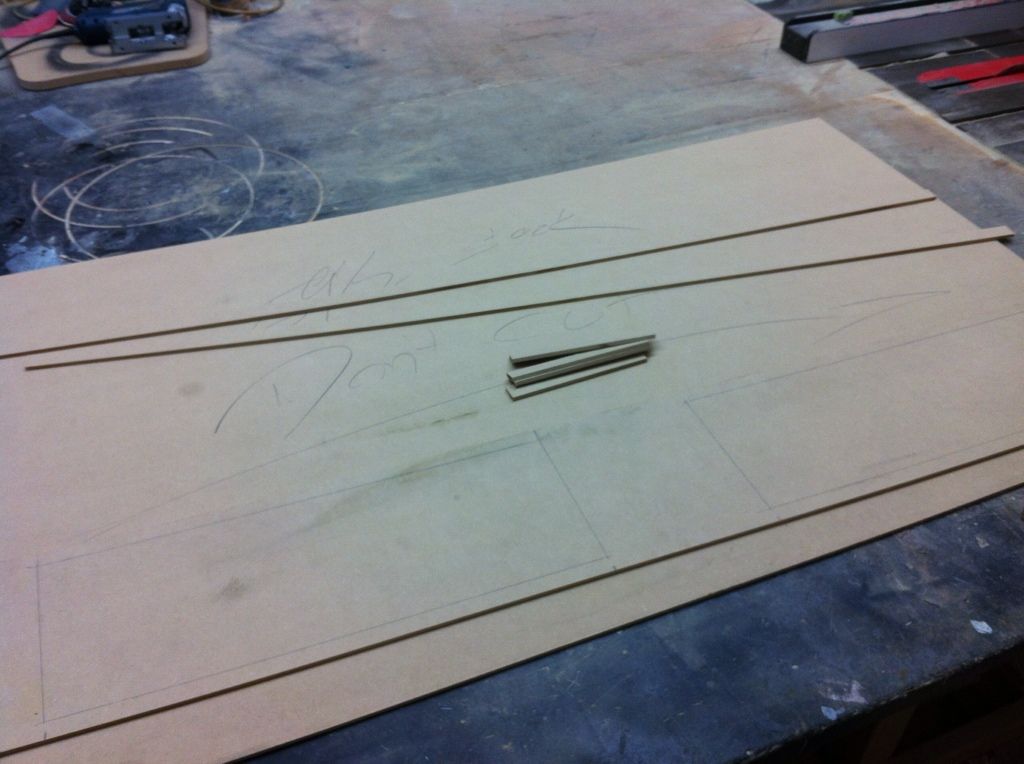
The 1/4" is for template purposes. Next came inner circle.
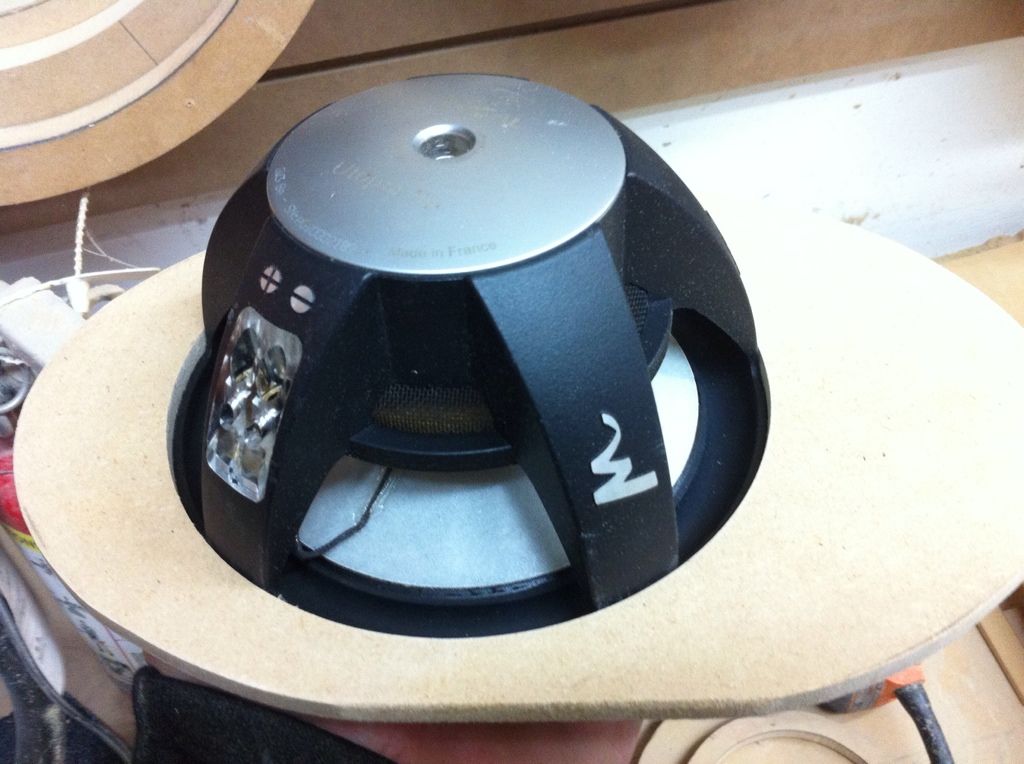
Back at the truck I put the carpet back in and looked at how this monster was going in! BTW these new v3w6 subs are incredible to look at. Coolest thing JL has ever made IMO. Build quality is through the roof!!
And here's where it stood on Friday.

After a closer look I realize rear clearance is an issue as well, so I offset towards the top.
The 1/4" is for template purposes. Next came inner circle.
Back at the truck I put the carpet back in and looked at how this monster was going in! BTW these new v3w6 subs are incredible to look at. Coolest thing JL has ever made IMO. Build quality is through the roof!!
And here's where it stood on Friday.
UNBROKEN
Ezekiel 25:17
- Joined
- Apr 21, 2006
- Messages
- 17,158
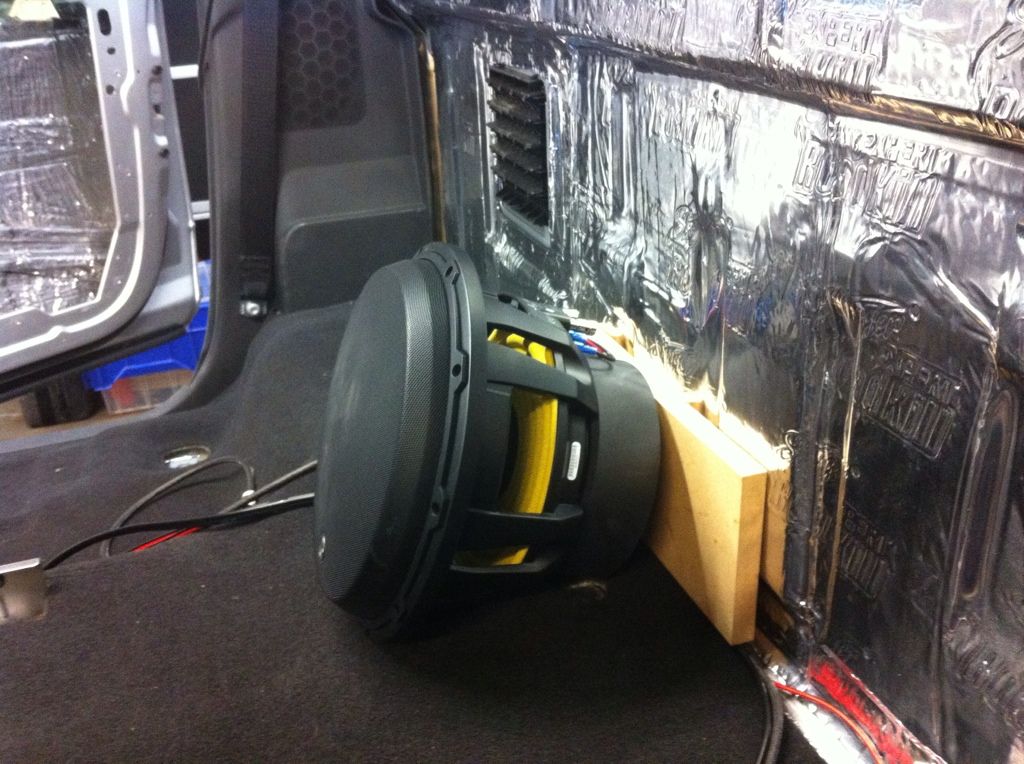
Regarding the last pic with the sub, I was just propping the sub up to see what it looks like in place. The new W6 is a beast! JL audio, as much as I love them, has had me yawning for years now. This new W6 reawakens passion for the company, I can't wait to hear this sub!
As far as damping goes, one bulk pack just in the front doors, and another on the floor/back wall. 1/2" Dynaliner was used in spots on the door card as well.
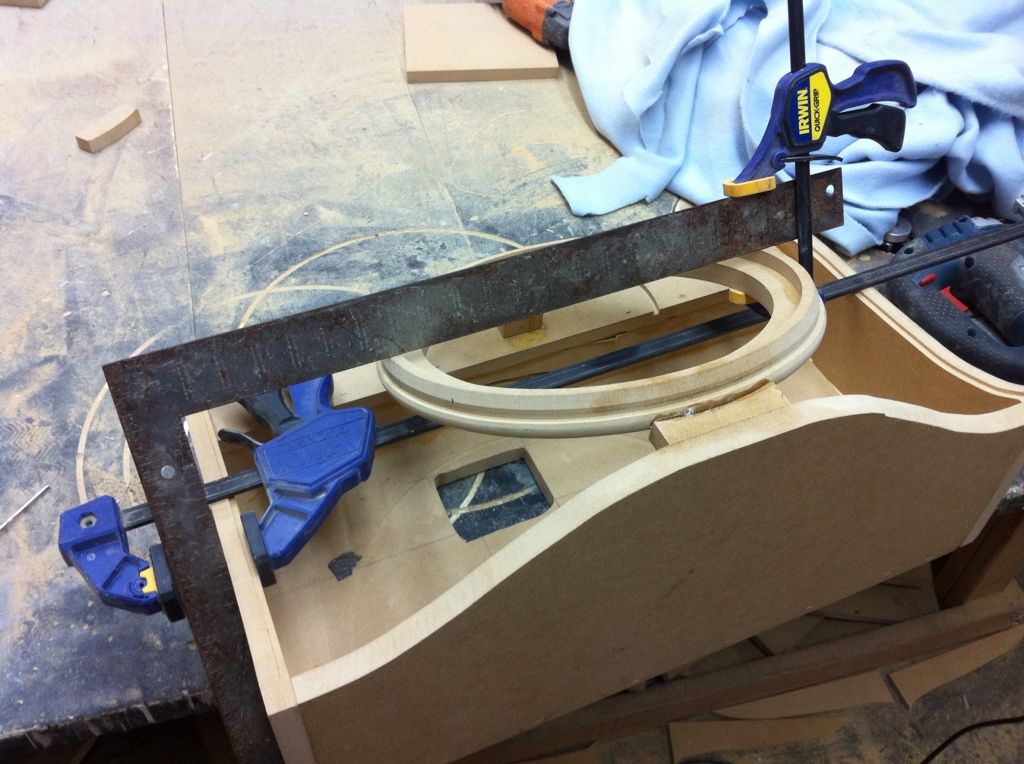
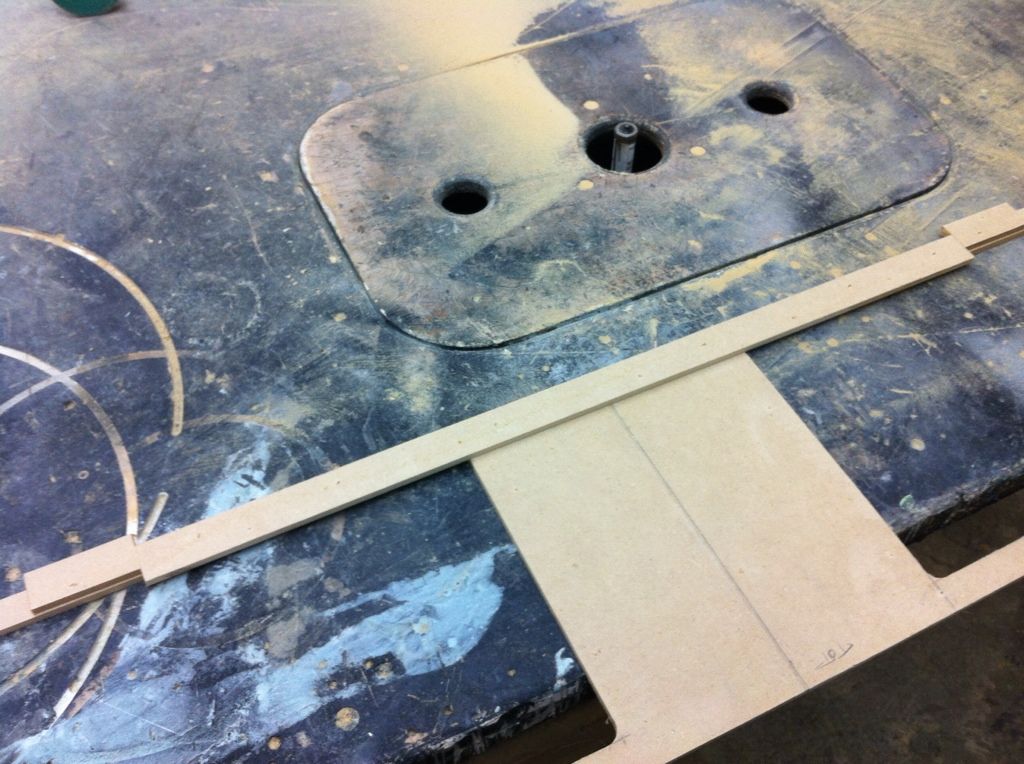
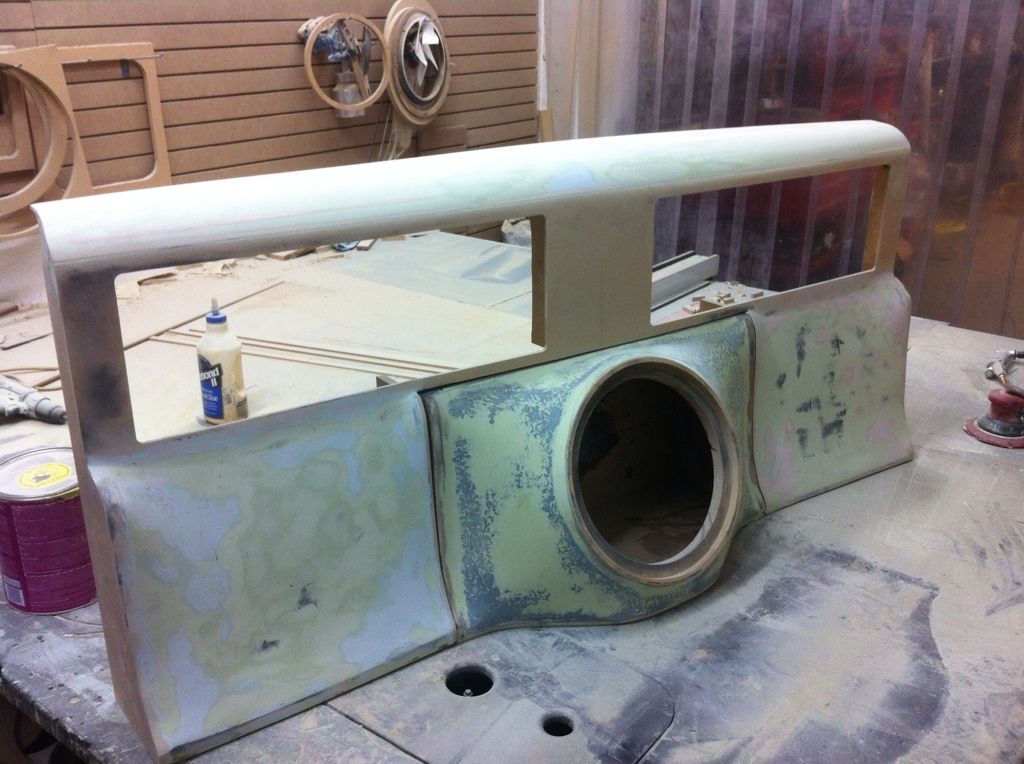
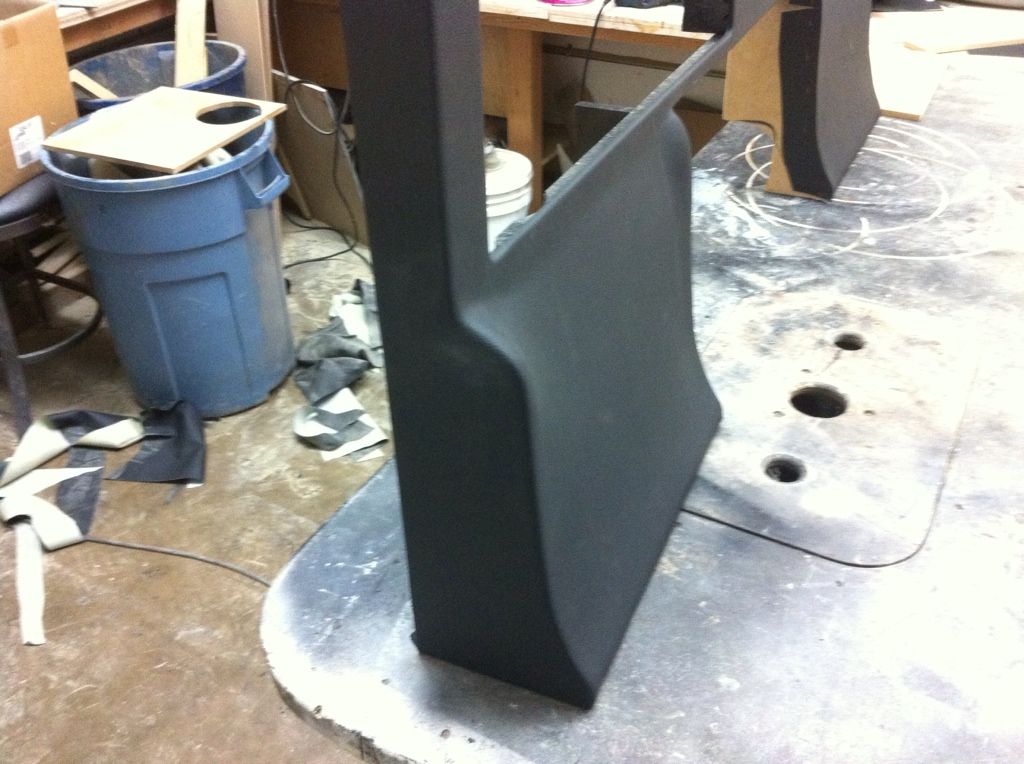
Continuing with progress from last week; I sized the sub for a ring. Originally we discussed a simpler design but with how far it would stick out I didn't think a wedge box would look good. I decided to 'glass the front so I could give some nice contour to the back wall.

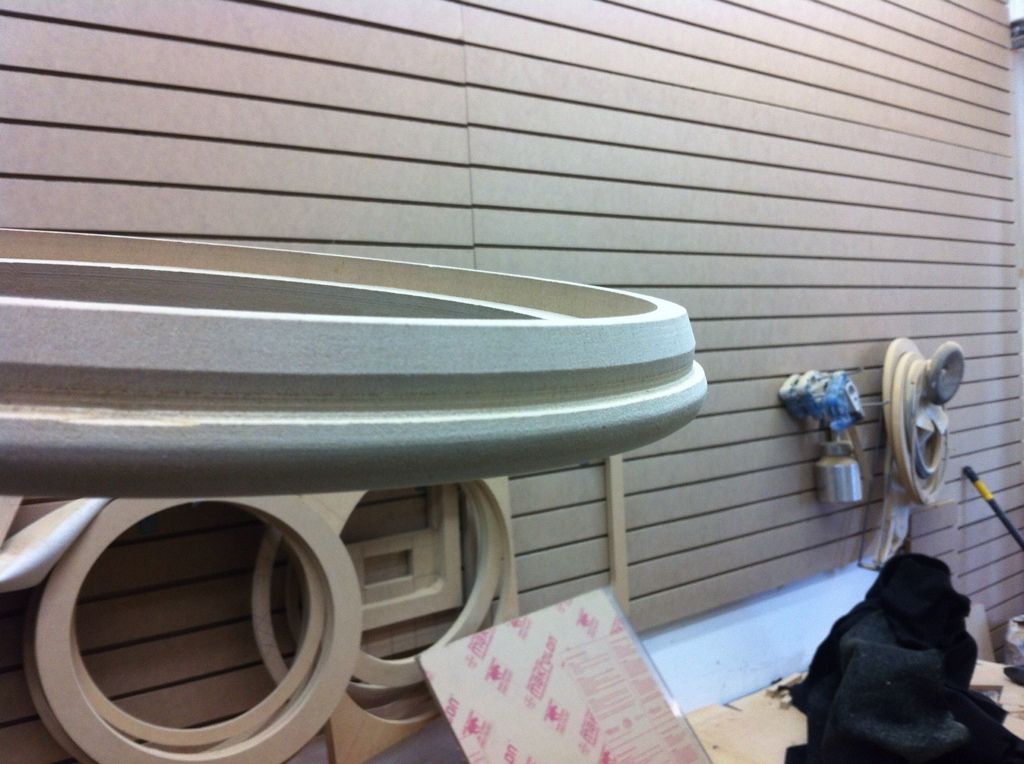
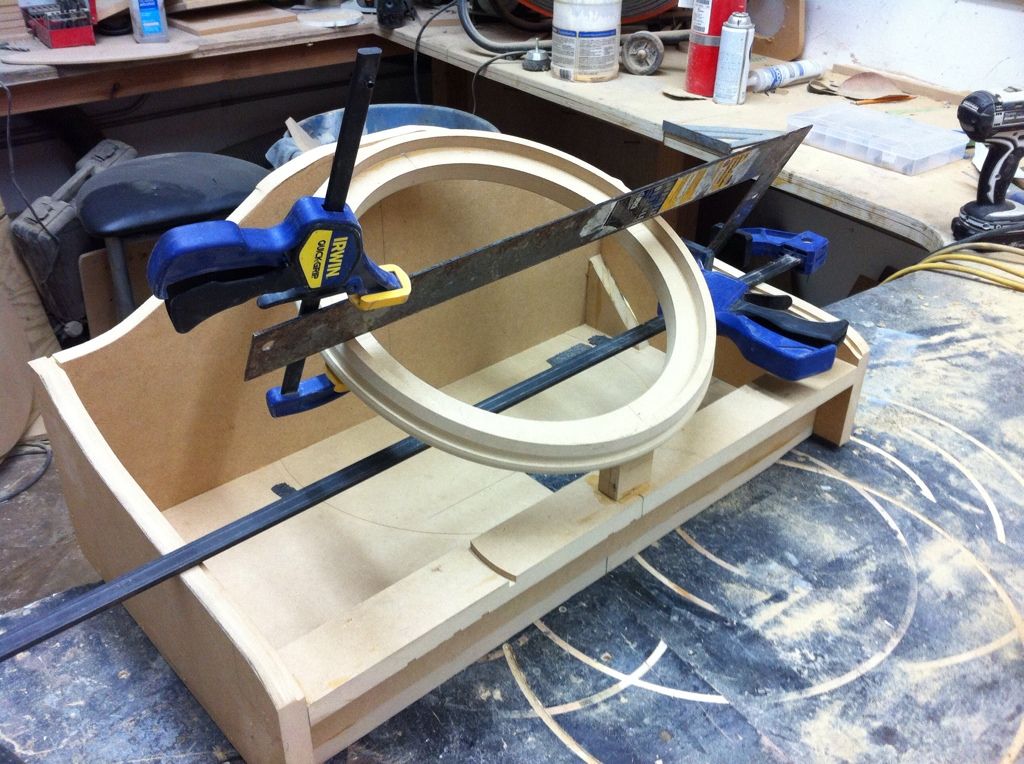
Here is the profile of the ring. The notch is for stapling so that the lip never has to be worked, that way it remains exact.
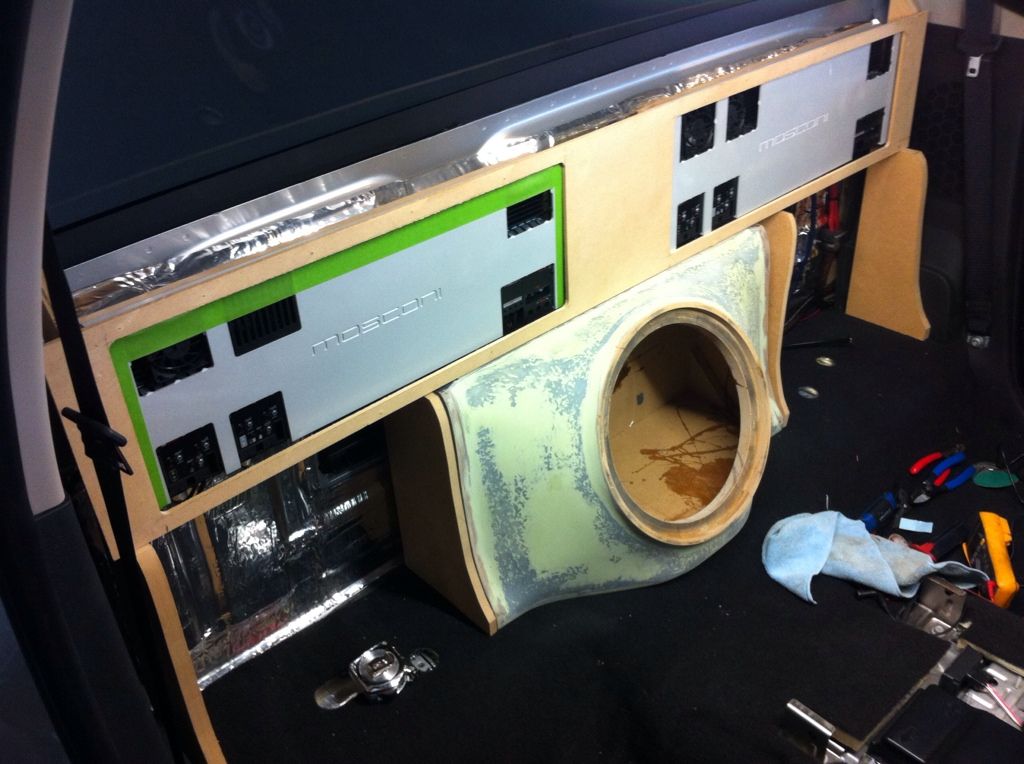
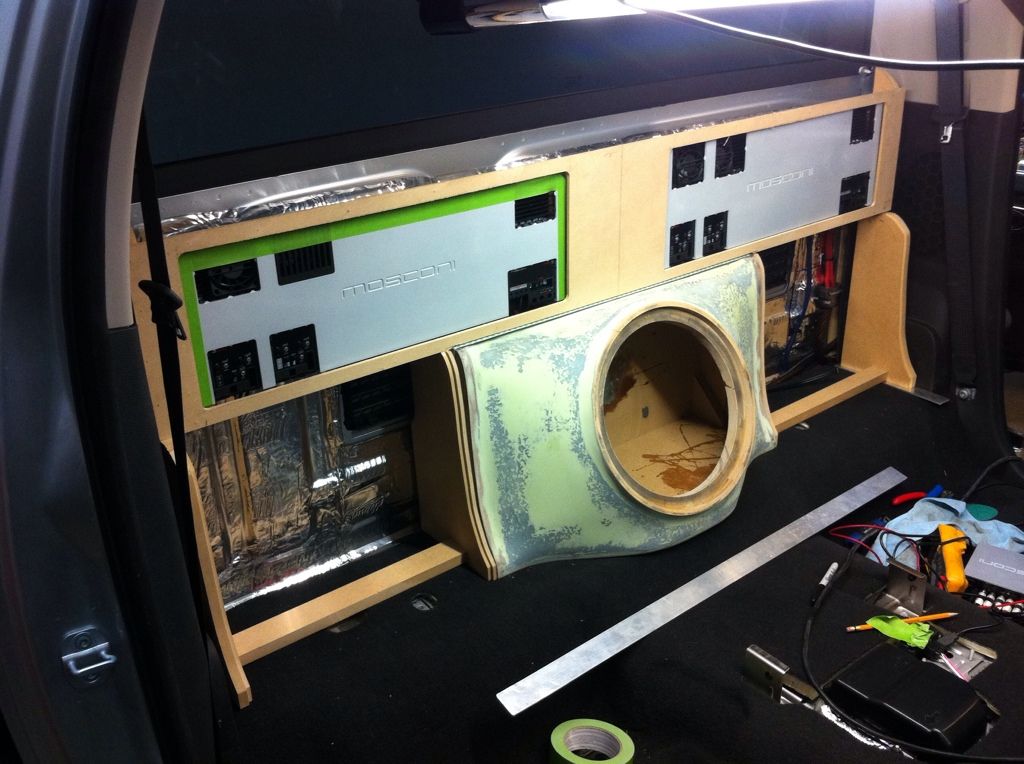
Two 1/2" MDF plates were made for the amps and then they were mounted to the wall so I could size the box properly.
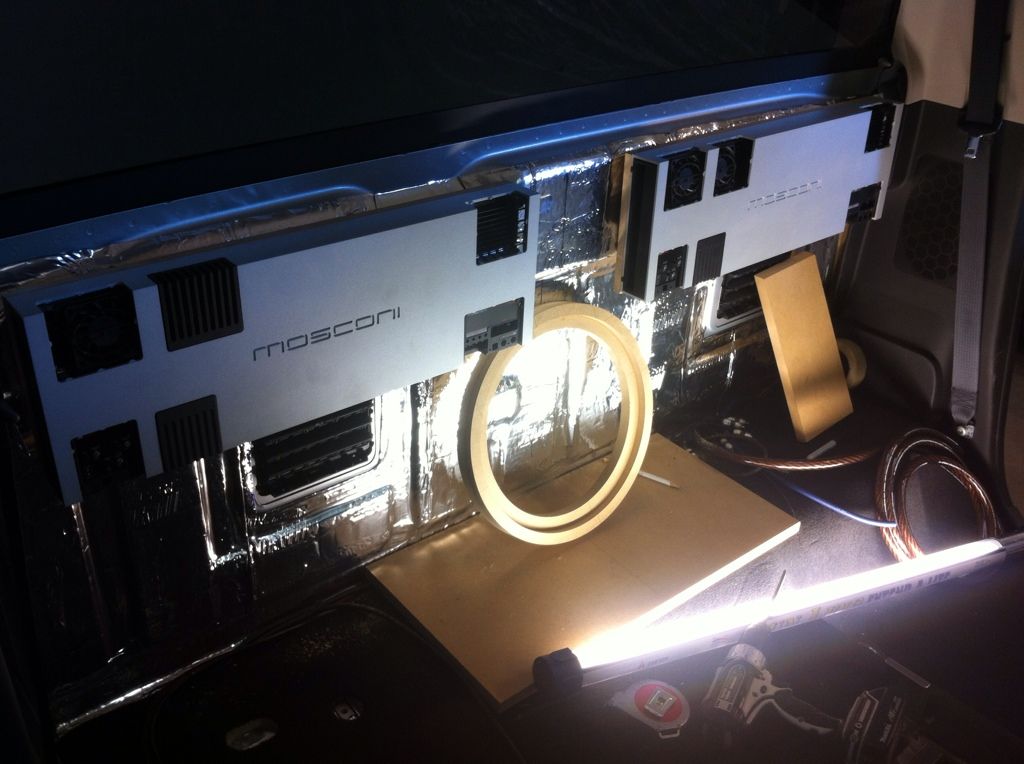
The sides were duplicated so the amp cover will have the same profile.
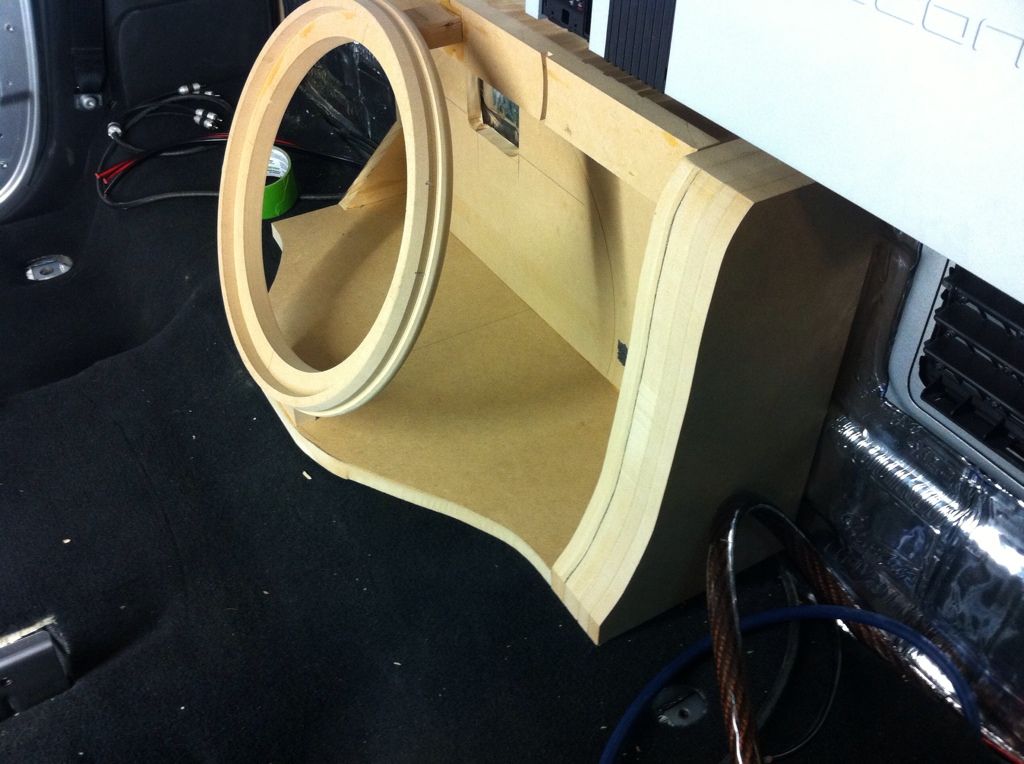
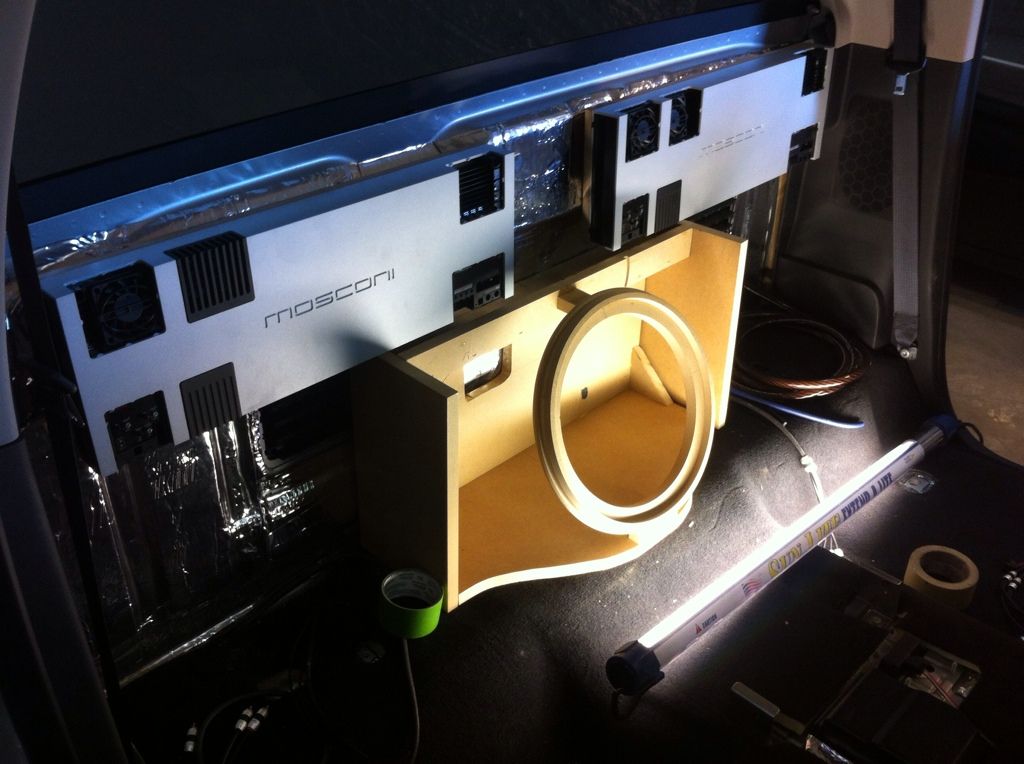
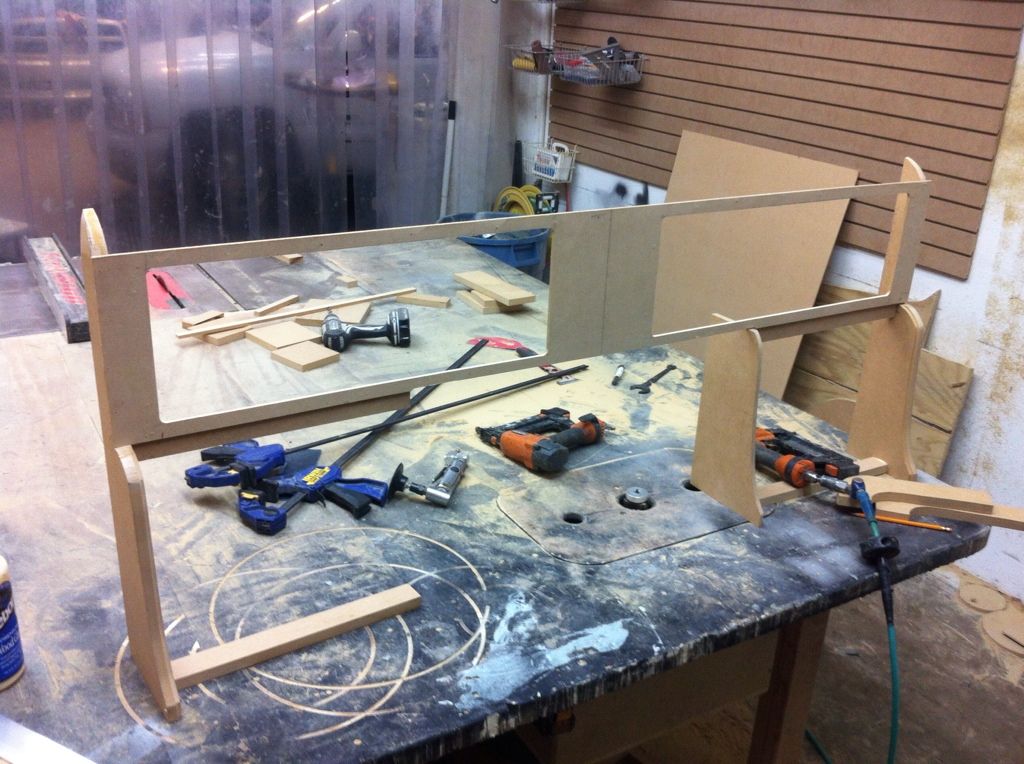
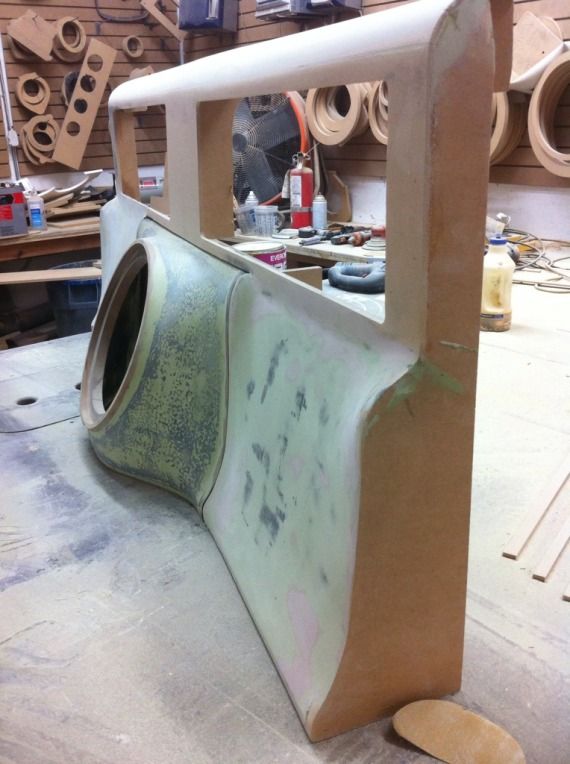
With the ring and base of the box made, it was time to square it all up and glue/staple in place.
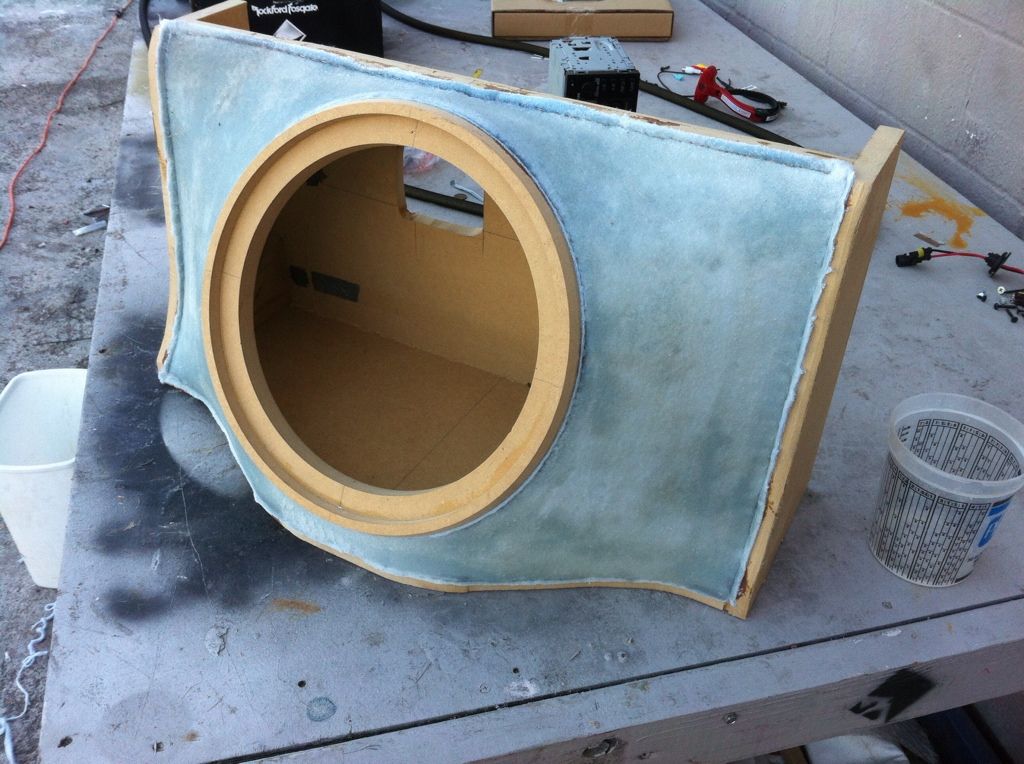
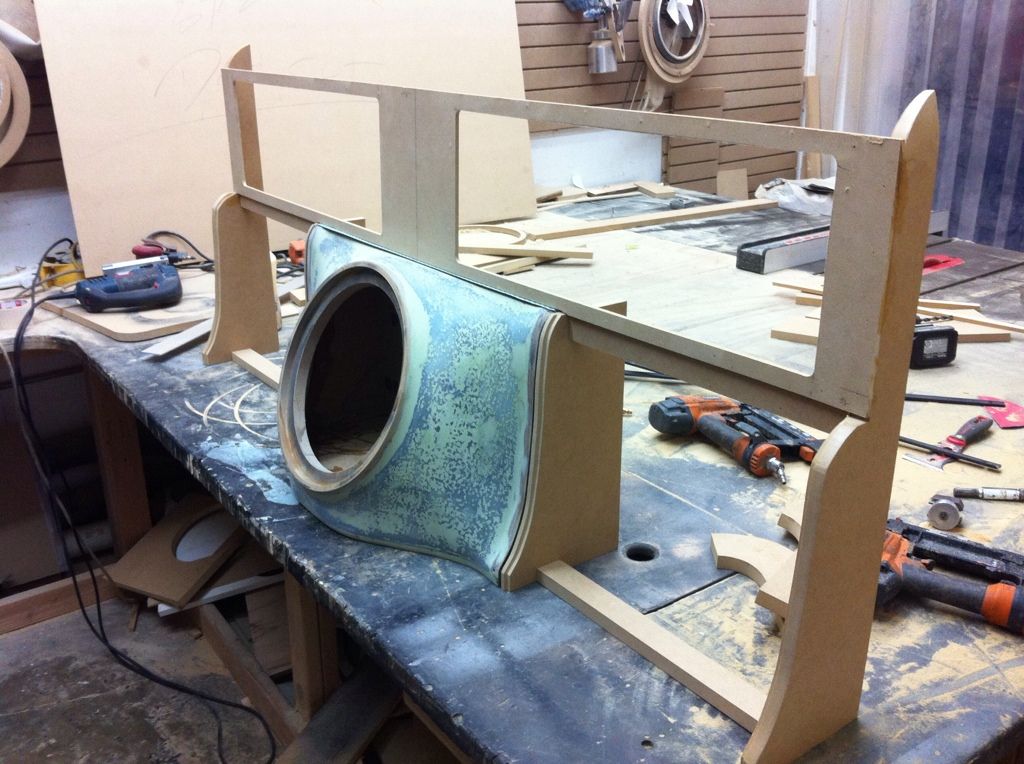
Time for resin!!!! here it is after the first layer and inside the truck.
As far as damping goes, one bulk pack just in the front doors, and another on the floor/back wall. 1/2" Dynaliner was used in spots on the door card as well.
Continuing with progress from last week; I sized the sub for a ring. Originally we discussed a simpler design but with how far it would stick out I didn't think a wedge box would look good. I decided to 'glass the front so I could give some nice contour to the back wall.
Here is the profile of the ring. The notch is for stapling so that the lip never has to be worked, that way it remains exact.
Two 1/2" MDF plates were made for the amps and then they were mounted to the wall so I could size the box properly.
The sides were duplicated so the amp cover will have the same profile.
With the ring and base of the box made, it was time to square it all up and glue/staple in place.
Time for resin!!!! here it is after the first layer and inside the truck.
UNBROKEN
Ezekiel 25:17
- Joined
- Apr 21, 2006
- Messages
- 17,158
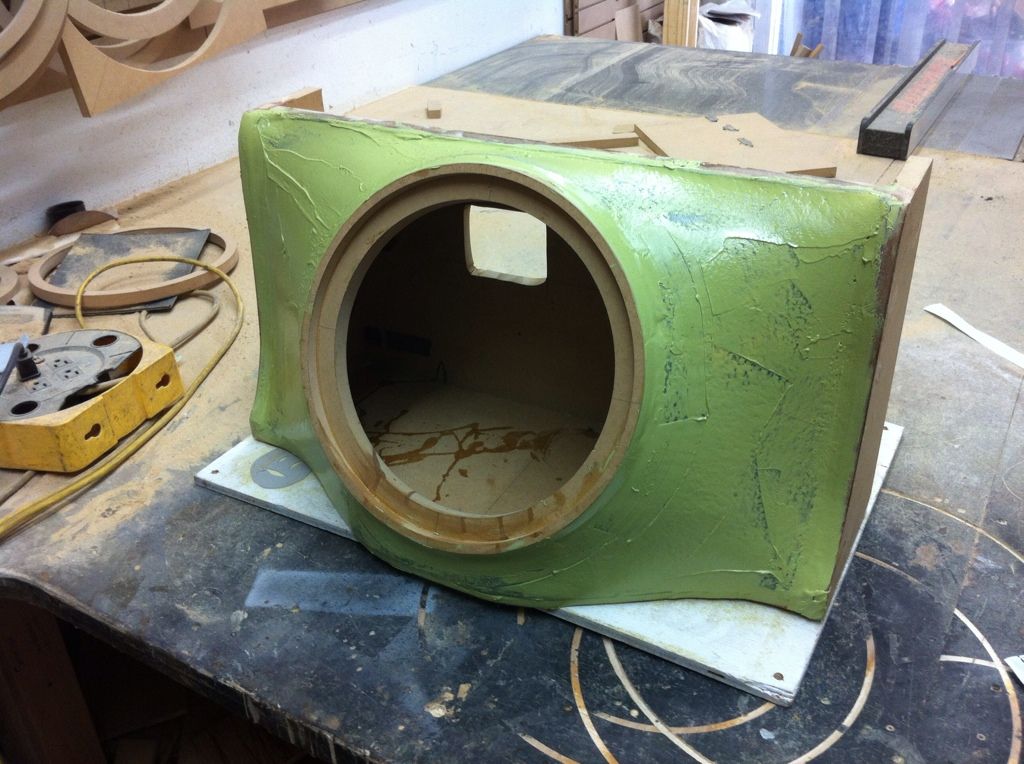
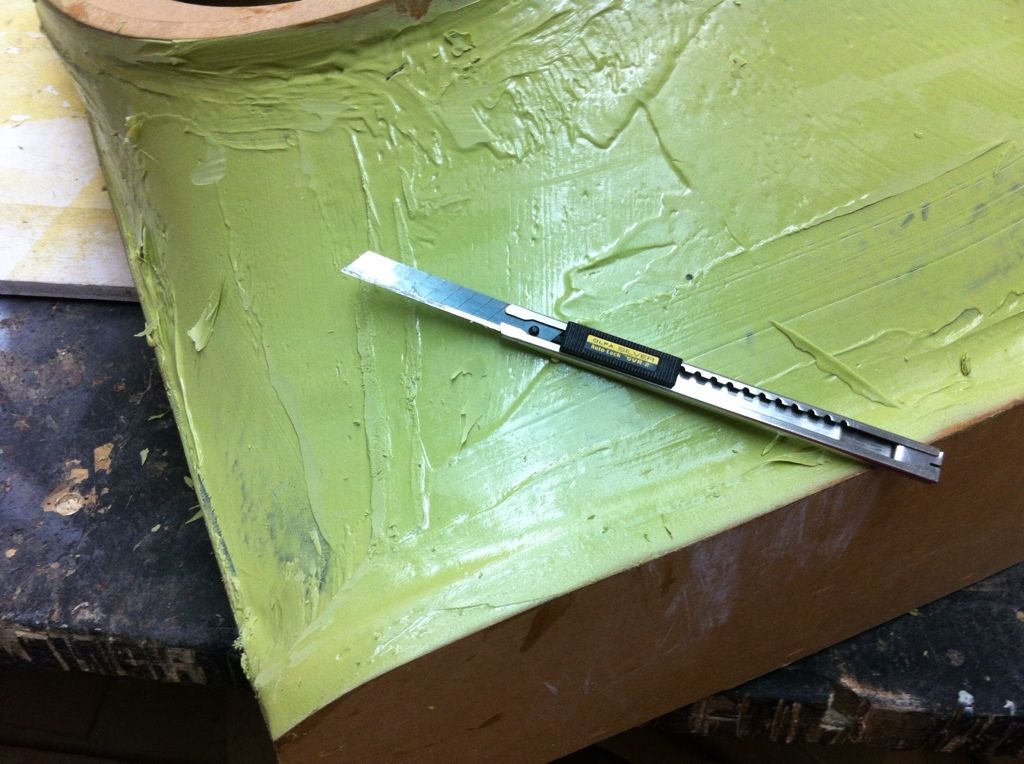
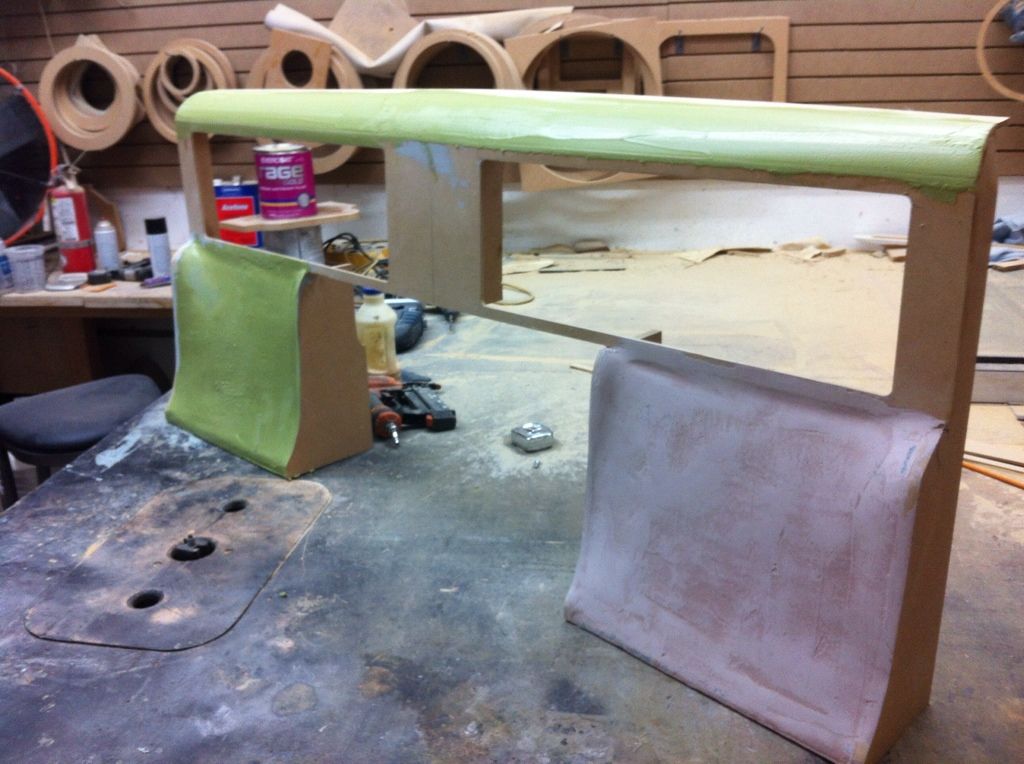
Lot of work for the last week of the build so I promptly get to it. Little rage gold to finish out the box. Catch it at the right time and you can work it easily, here I was shaving the ridges with a knife.
Here is an interesting topic. As a professional installer, I often find forks in the road where there are several different schools of thought. Problem is you never know which school of though your customer might prefer. Unless your willing to bug your customers all the time, sometimes you have to make executive decisions yourself. Several had already been made like; amp integration vs rewire whole truck. Based off of qualifying questions from UNBROKEN, I decided to spend the time and resources elsewhere than a complete rewire. This allowed the box and amp rack to be more complex.
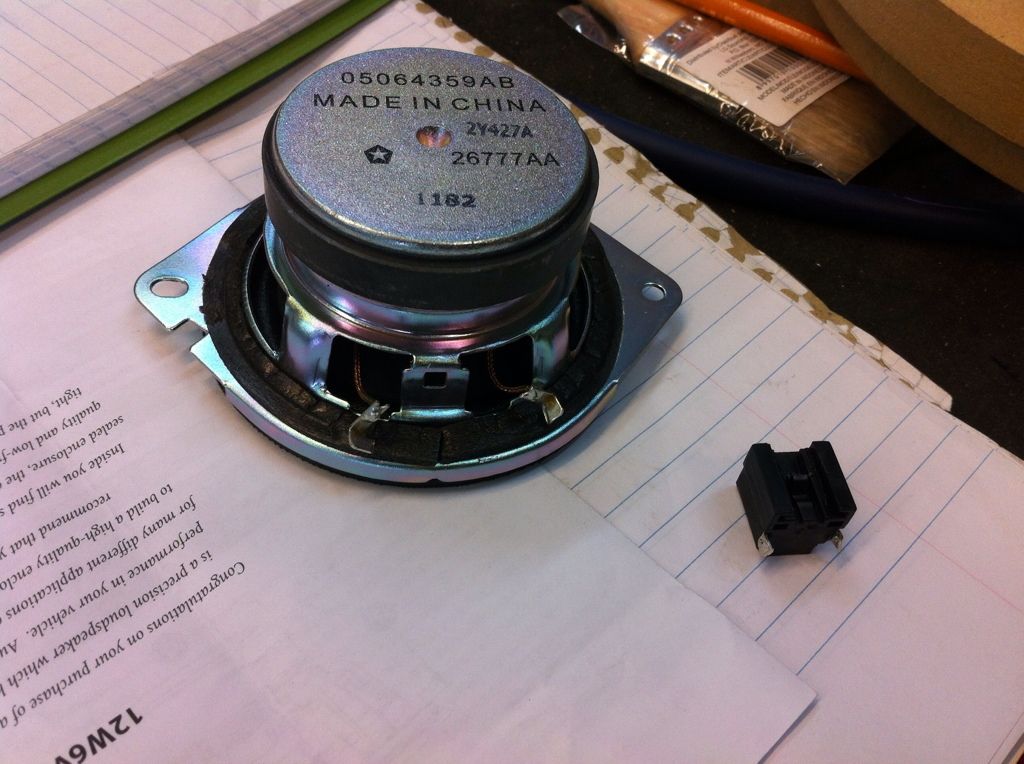
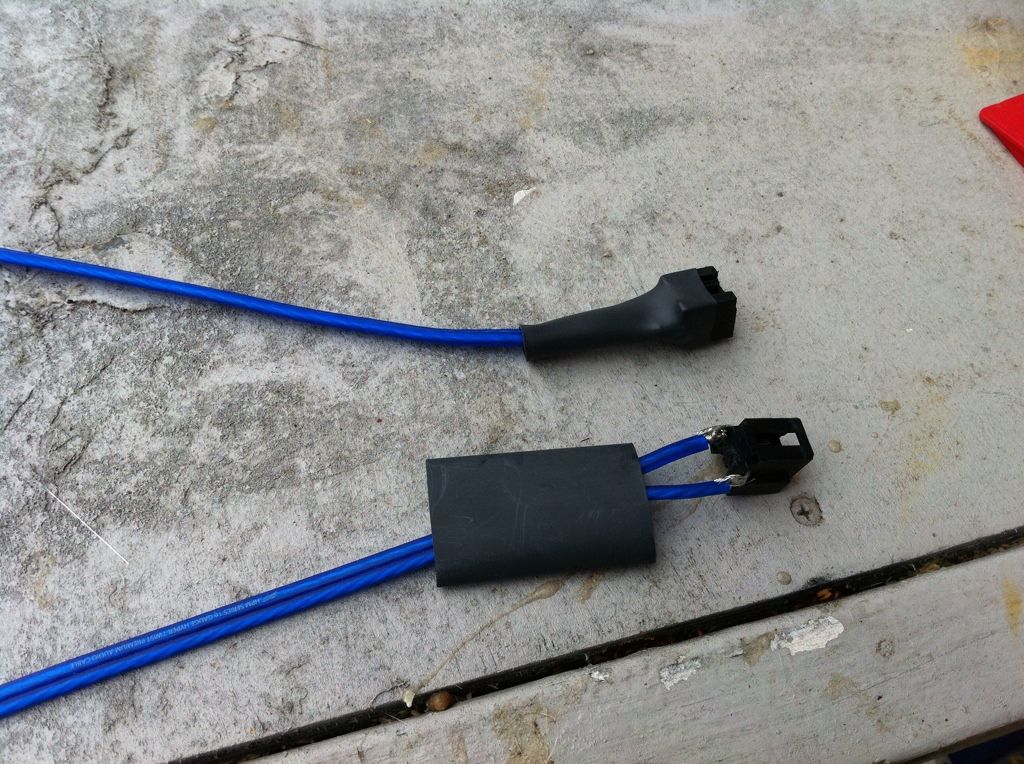
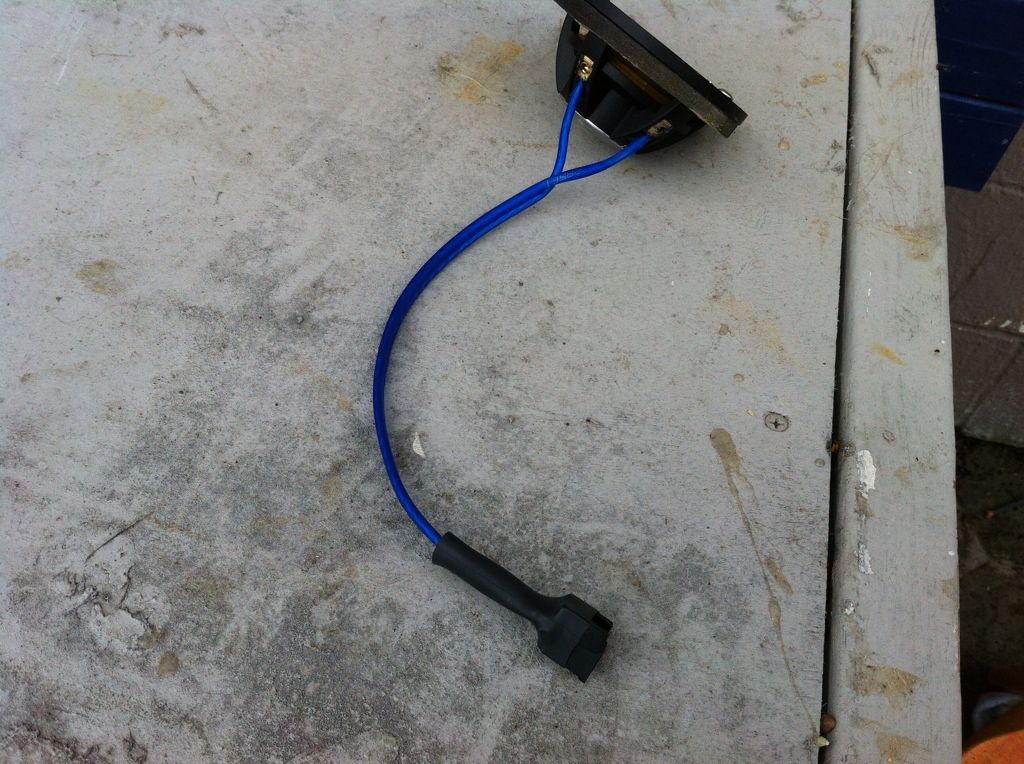
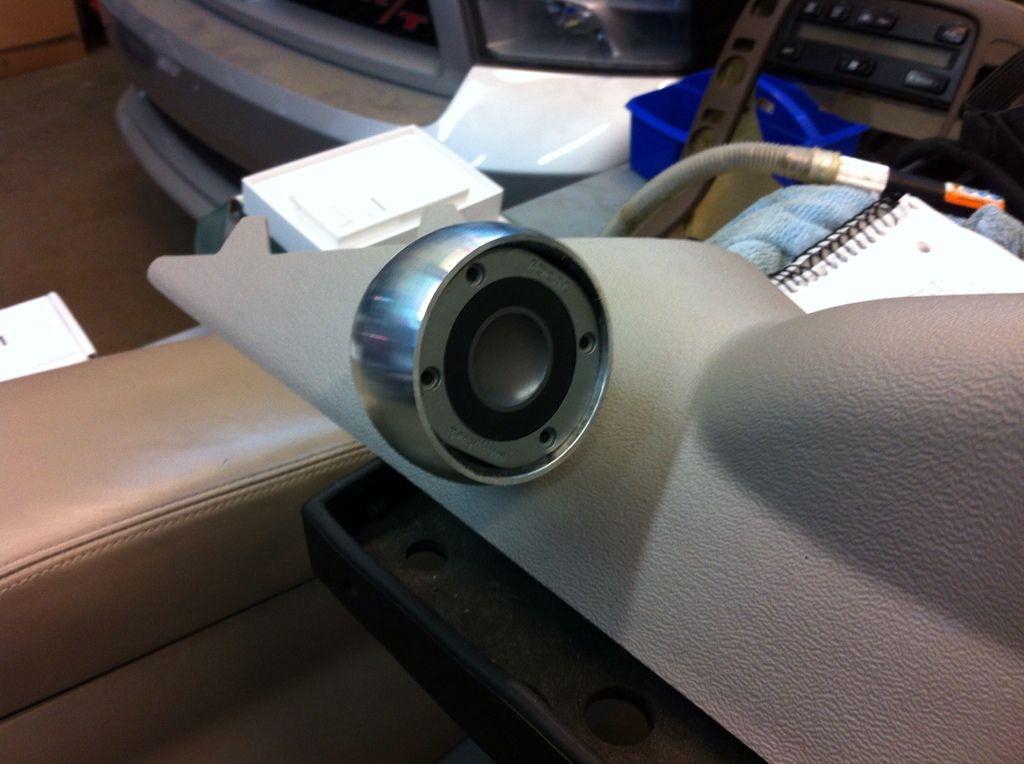
So here I am with the dilemma of a SHORT factory plug in the dash!! I could cut and solder making serviceability tough, vs slight dismantle of the factory speaker for clip retention. The only time I like to build something hard to get to is for security and this wasn't the case so I went for speaker dismantle. The process can be reversed if need be...
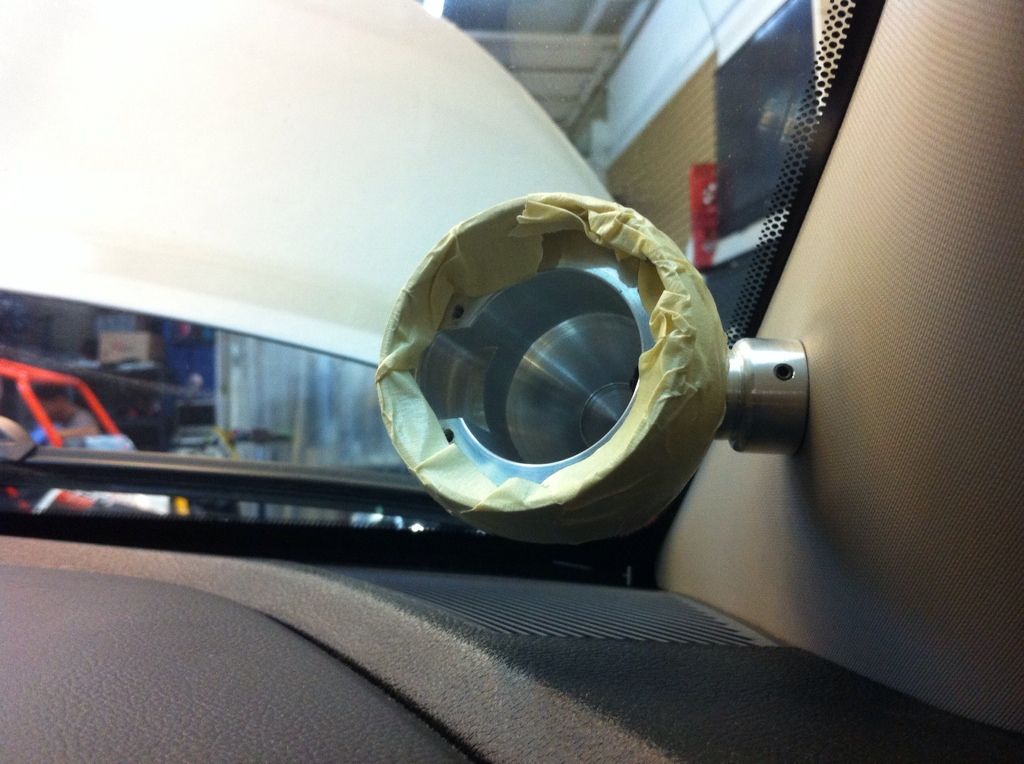
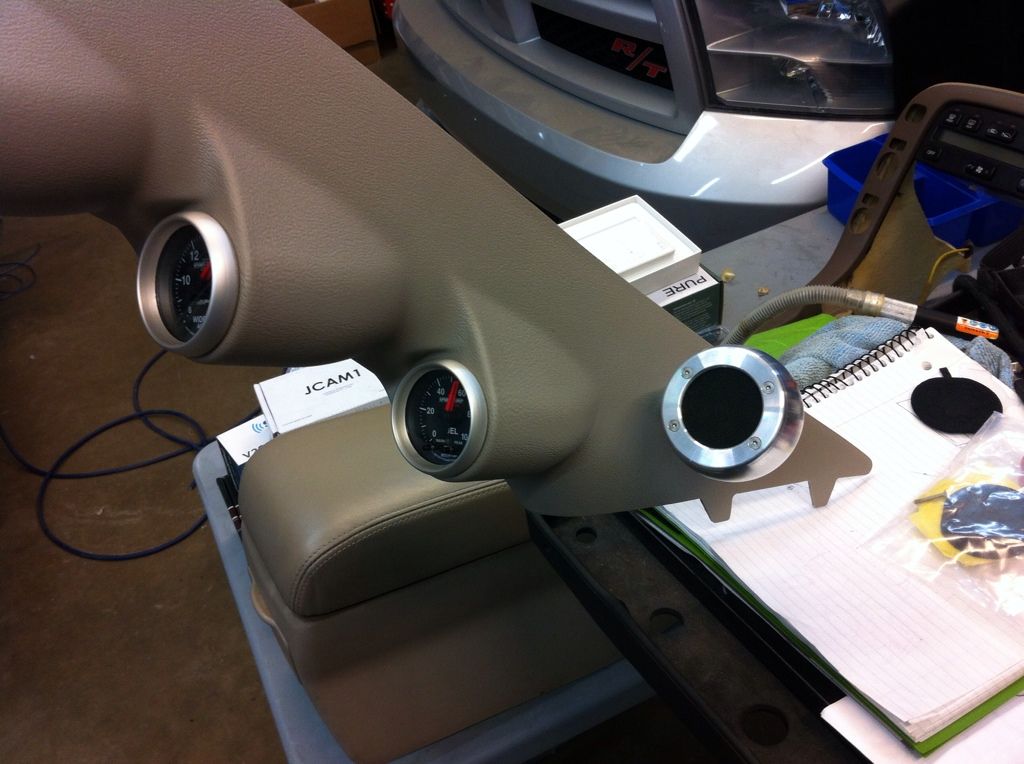
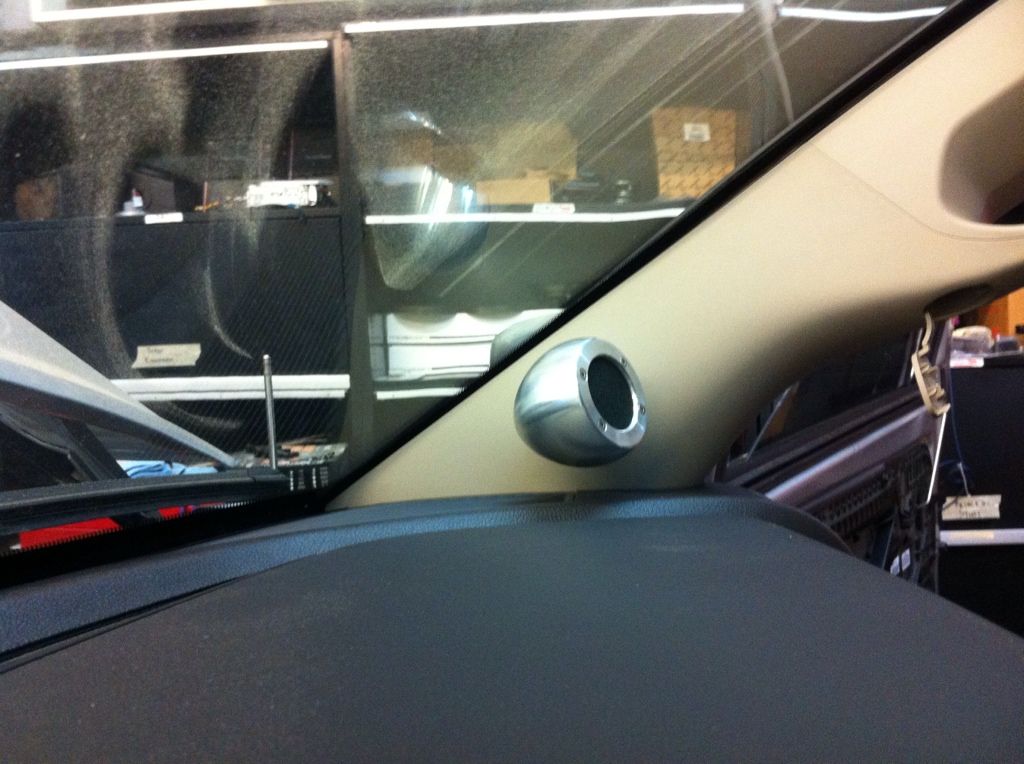
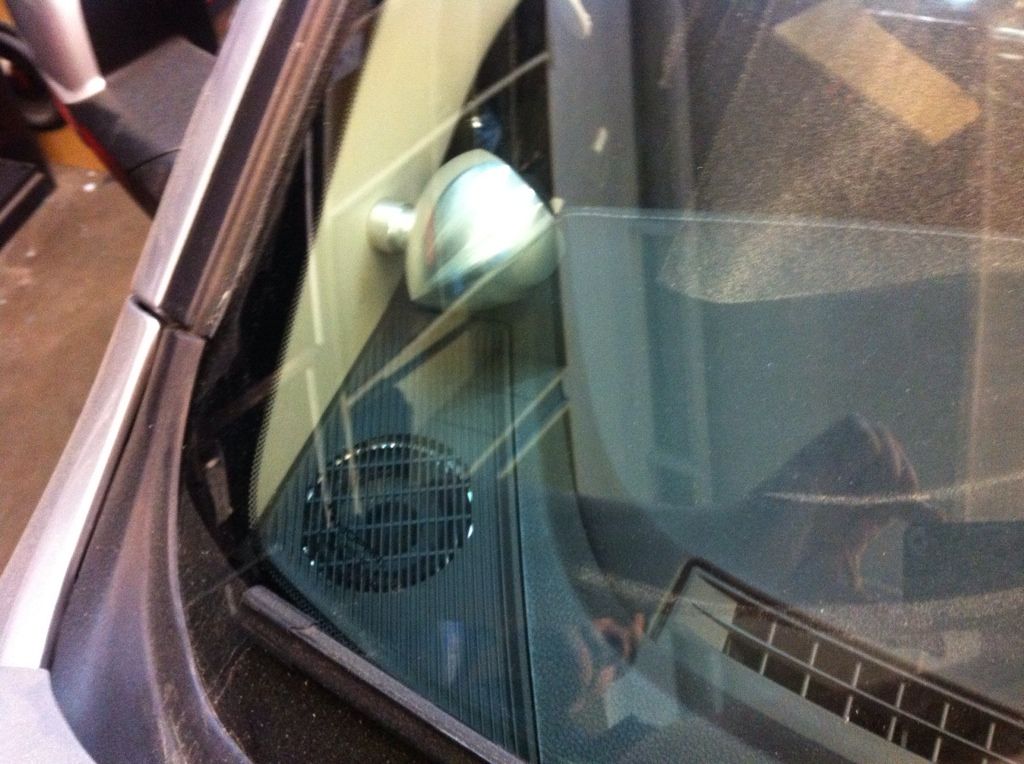
No time to waste, I went straight into the pillar install. When I first got the truck I saw these pods and was like wtf how are these supposed to go?! Luckily UNBROKEN had a picture of an install that was very similar to what his goal was and that helped substantially. (as it always does") ) In fact after I completely took them apart, the solution was quite straightforward!!
) In fact after I completely took them apart, the solution was quite straightforward!!
K, time to get ready for work, only two days left and it's close!!!
Here is an interesting topic. As a professional installer, I often find forks in the road where there are several different schools of thought. Problem is you never know which school of though your customer might prefer. Unless your willing to bug your customers all the time, sometimes you have to make executive decisions yourself. Several had already been made like; amp integration vs rewire whole truck. Based off of qualifying questions from UNBROKEN, I decided to spend the time and resources elsewhere than a complete rewire. This allowed the box and amp rack to be more complex.
So here I am with the dilemma of a SHORT factory plug in the dash!! I could cut and solder making serviceability tough, vs slight dismantle of the factory speaker for clip retention. The only time I like to build something hard to get to is for security and this wasn't the case so I went for speaker dismantle. The process can be reversed if need be...
No time to waste, I went straight into the pillar install. When I first got the truck I saw these pods and was like wtf how are these supposed to go?! Luckily UNBROKEN had a picture of an install that was very similar to what his goal was and that helped substantially. (as it always does
) In fact after I completely took them apart, the solution was quite straightforward!!
K, time to get ready for work, only two days left and it's close!!!
Chris Tobin
New member
- Joined
- Jun 20, 2008
- Messages
- 2,662
Wow Rich, I'm really surprised you and the installer went with using the factory speaker wiring. Whenever I do an install of a similar nature to yours I run new speaker cables. I want my audio system cables to be as isolated as possible from the factory wiring and relying on stuff that is inside the factory harness can lead to problems later on down the line... I even ran new speaker cables into the doors of an Acura NSX that I did a system for and those were the most difficult doors I have ever run cables into, it took me hours to fish both 14-gauge cable pairs into those stupid doors!!!!
In your Ram running fresh cables from the amp to the speaker locations should have been pretty easy, and then you would have less possibility of noise/interference from the factory harness. Running high quality amps and speakers like you are doing and connecting them with factory speaker wires is something like building a 1,000 HP Cummins and putting it in a race truck chassis and drag slicks but then channeling the power from the engine to the trans with a factory built 48RE transmission. It may get the job done for a while, but it certainly is not going to live up to its full potential.
That's my two cents anyhow... The rest of the install and fabrication work look good.
UNBROKEN
Ezekiel 25:17
- Joined
- Apr 21, 2006
- Messages
- 17,158
That's only on the mids....everything else was rewired. He said the wire looked fine and was of sufficient size.
The fact is...this is getting real, real expensive and I don't want it to go much higher.
I'm into the 15-16K range now....I'm over it.
The fact is...this is getting real, real expensive and I don't want it to go much higher.
I'm into the 15-16K range now....I'm over it.
Chris Tobin
New member
- Joined
- Jun 20, 2008
- Messages
- 2,662
Sounds good, I understand now... The log made it sound like it was all but the sub...

Dazed&Confused
Surfing my own world
- Joined
- Jun 27, 2006
- Messages
- 2,533
It looks awesome.
UNBROKEN
Ezekiel 25:17
- Joined
- Apr 21, 2006
- Messages
- 17,158
Final stretch-
Ok, so for the last couple of days it was overdrive time. Lots of work still left and just enough time to get it done in.
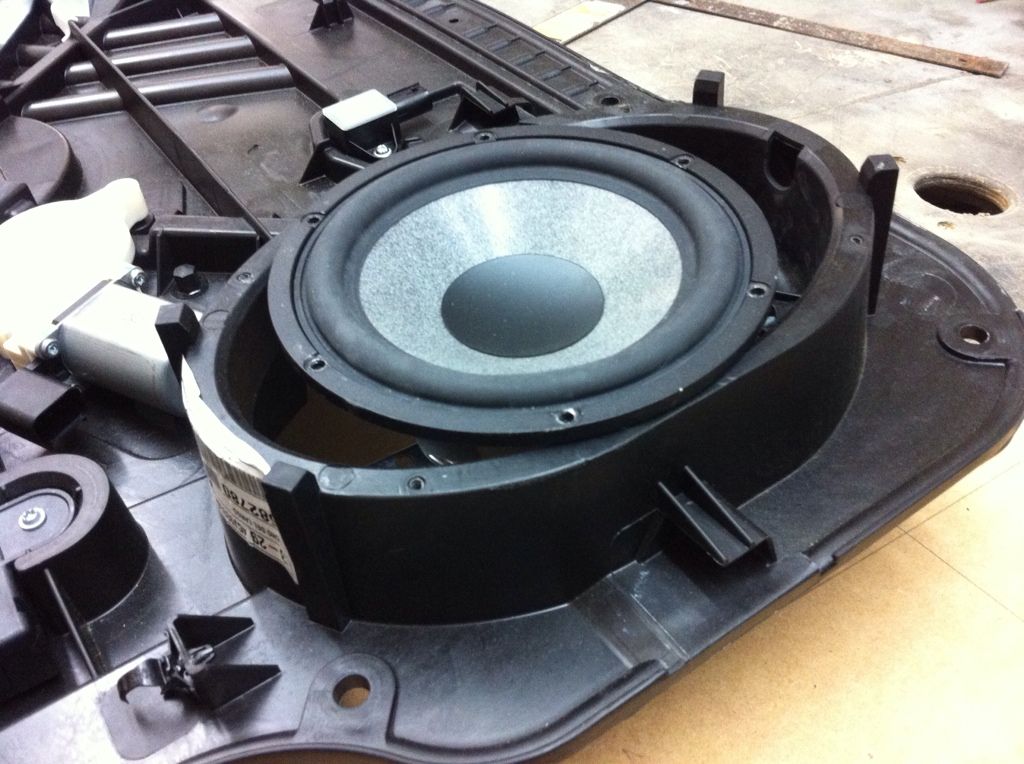
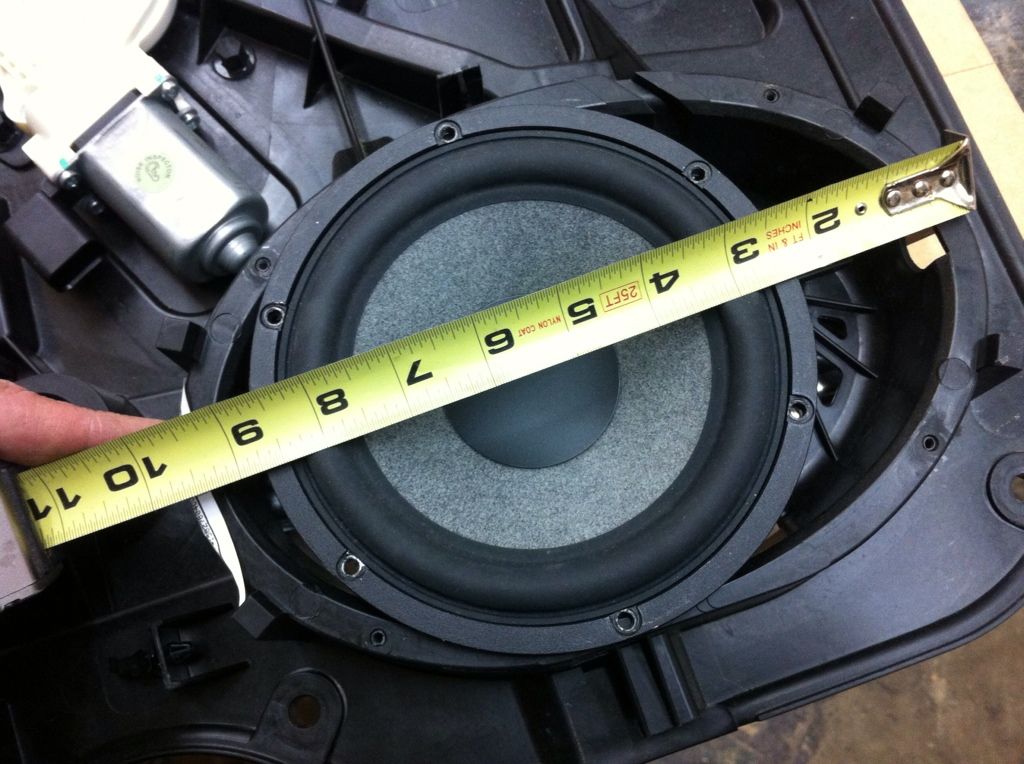
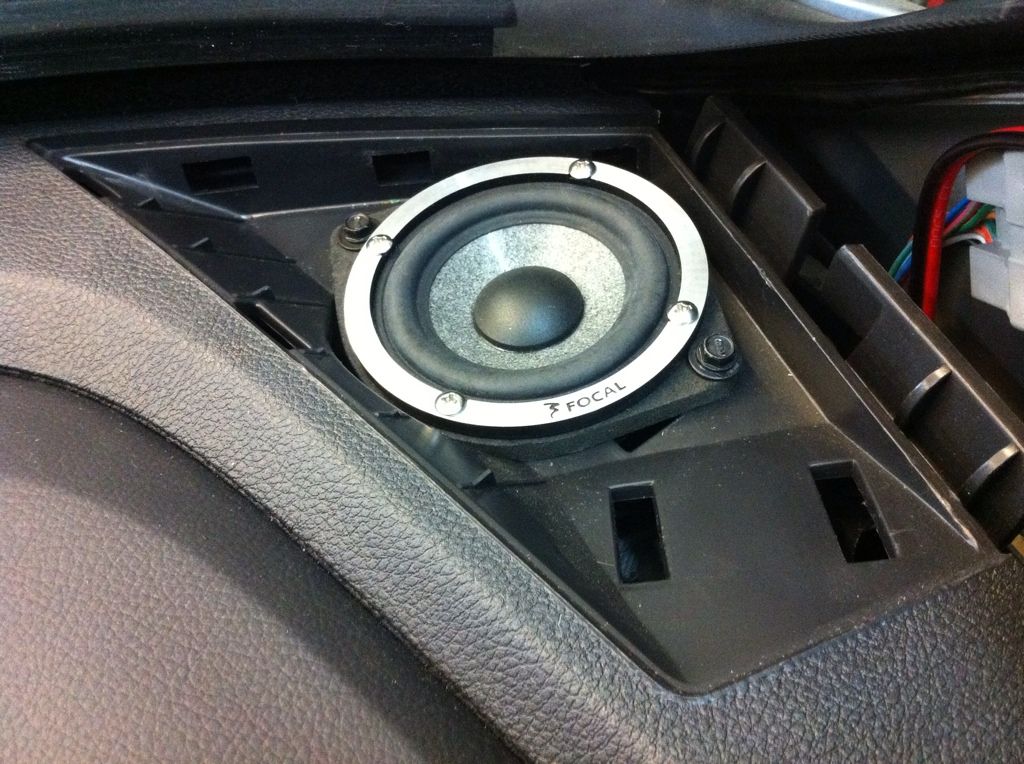
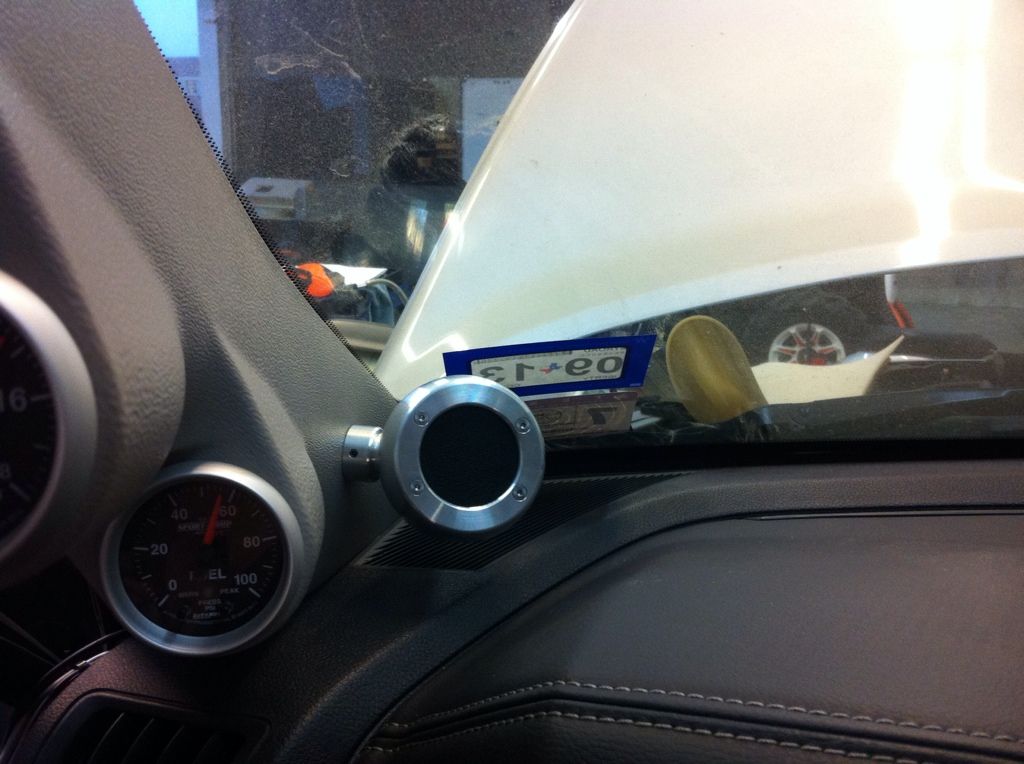
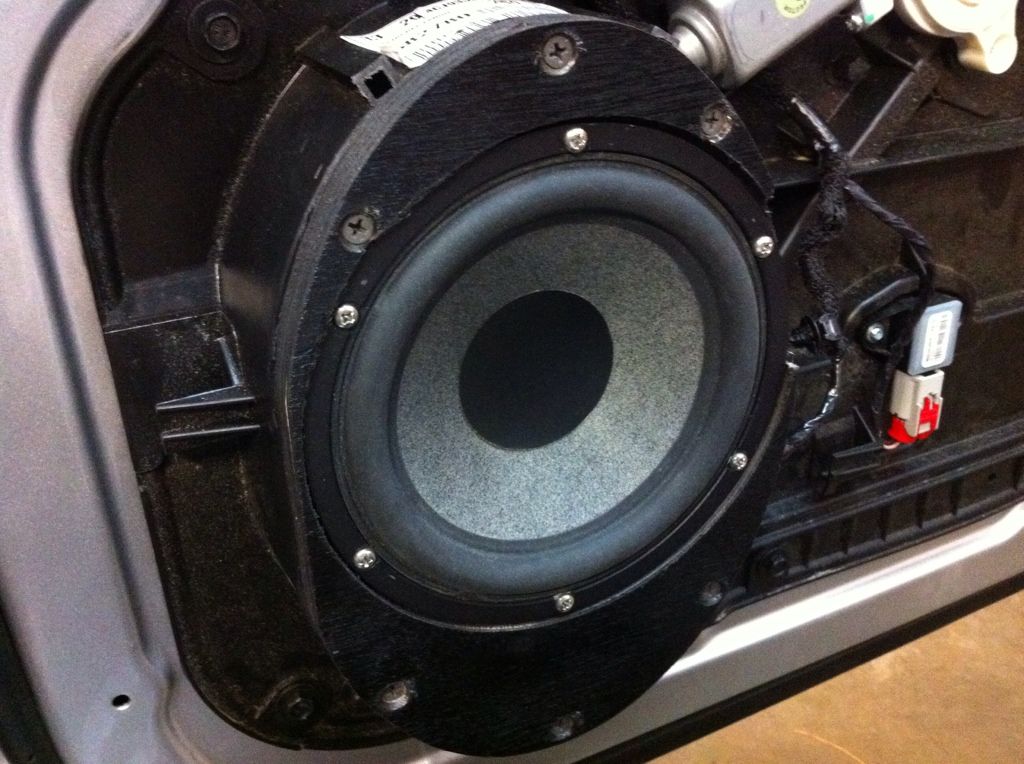
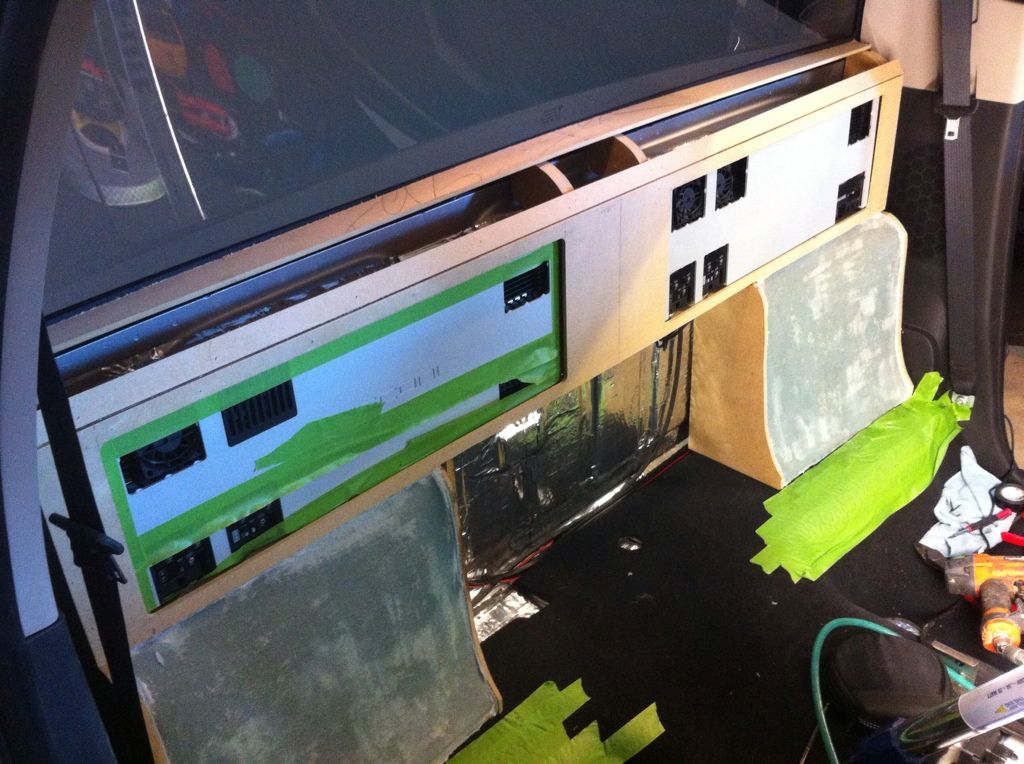
Here are the door rings. Notice I went flush on the edge, not a lot of clearance in the door card...
With the doors done and the amps wired and playing, I begin the first stages of tuning. My first impressions are that the truck is going to sound great, and I hate tuning the 6to8. Definitely not as intuitive as the 360, or the BitOne. Not at first anyways.
At this time it's late Thursday morning and the truck is slated for Saturday pickup. I haven't even started on the amp rack so time for that!
This is all to get it to fleece/resin as fast as possible.
By the end of Thursday I did not have it to fleece yet. Friday was going to be a long day...
First thing Friday was to get the fleece on and resined asap!!

While it was drying, finished up the big 3 and another tuning session. The 6to8 seems to clip too early on the input. I check for installation issues and test different inputs on the 6to8. Needed to focus on building so will come back for more tuning later.
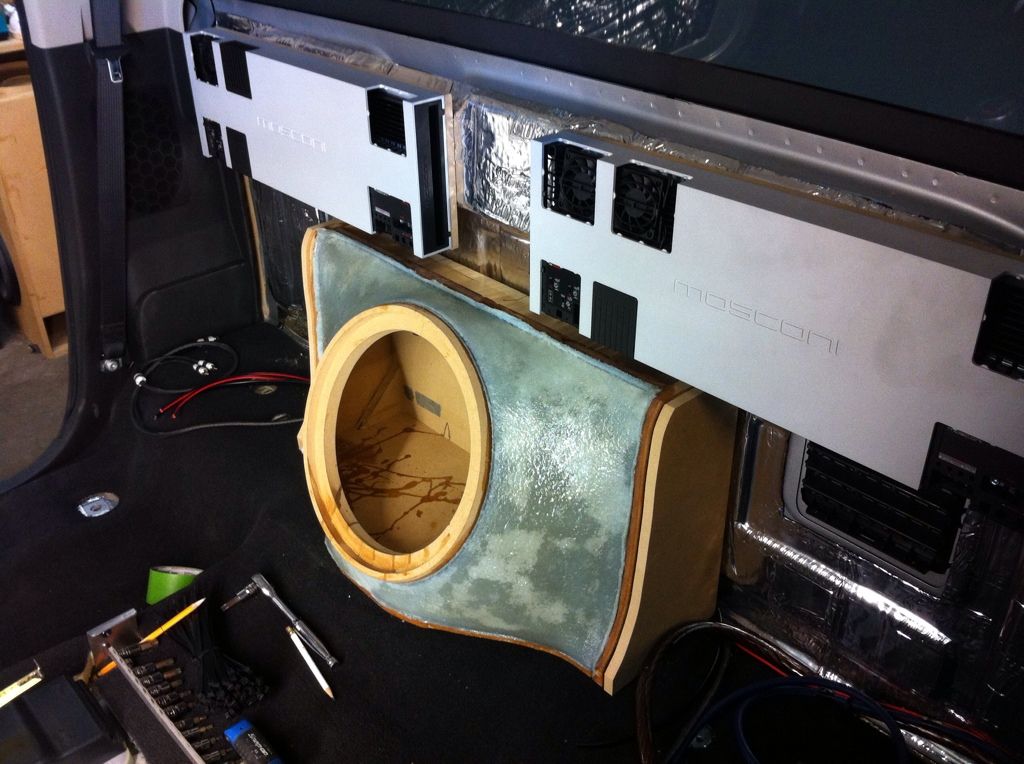
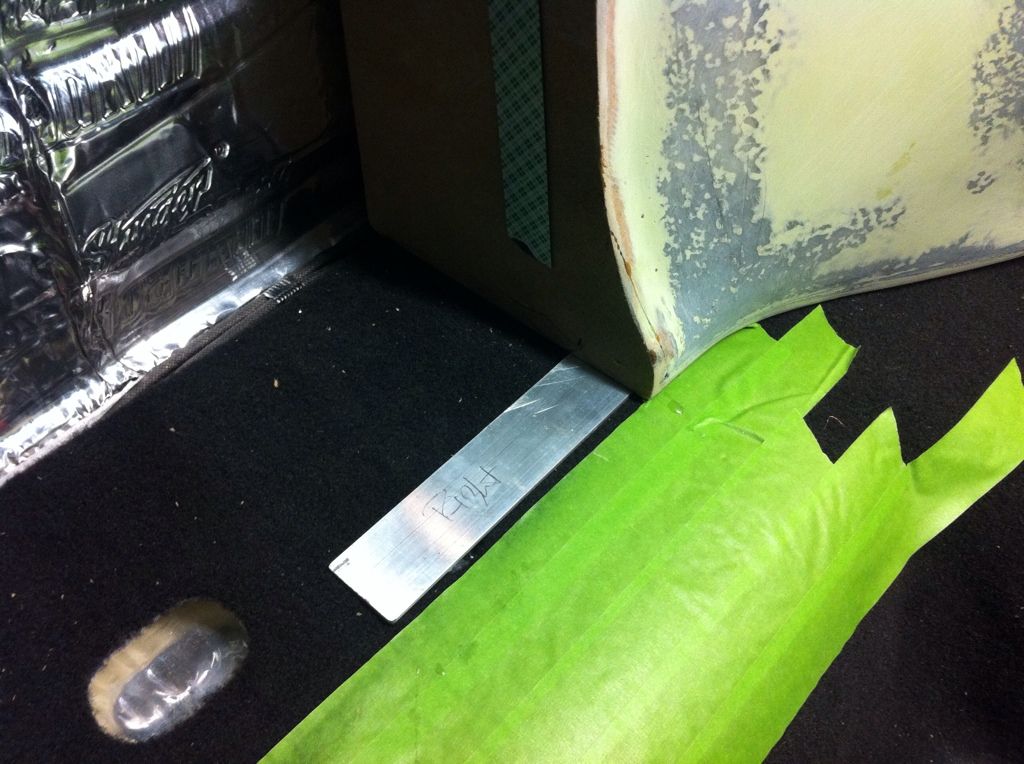
So in homage to the fact that Bing was going to be the original installer, I didn't want to drill any permanent new holes into the truck. To do this I used this aluminum bar to mount the box down, it extends to where the factory storage tray mounted.
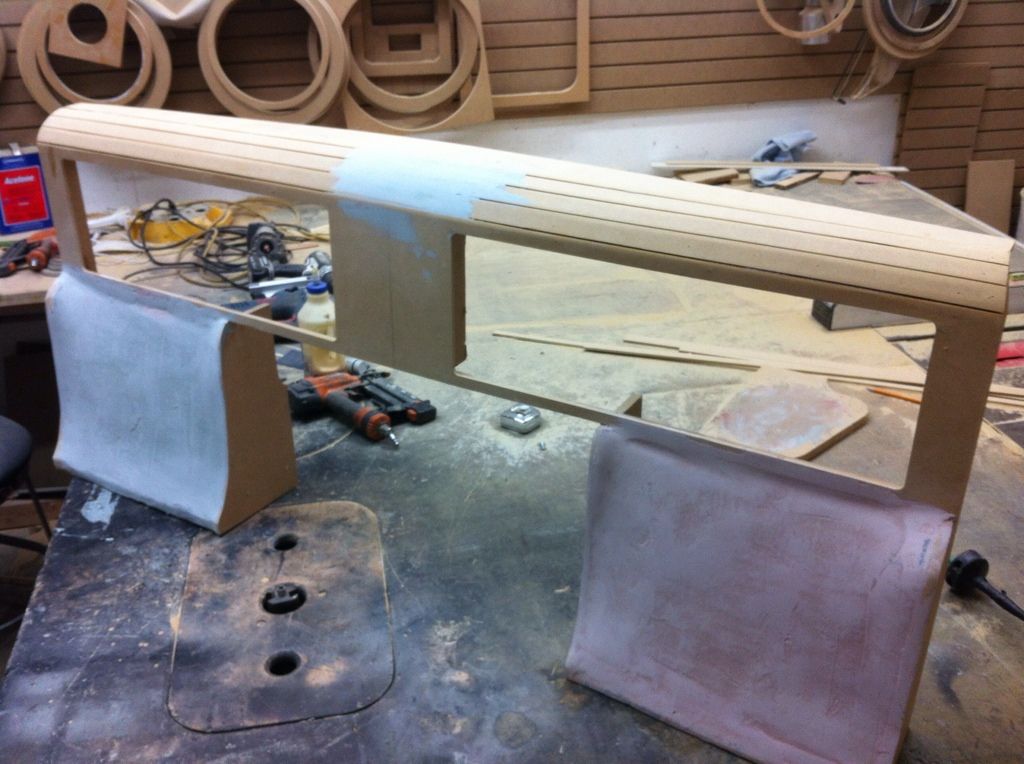
Resin dried, back to the amp rack. Started on the top profile and worked my way down.
Ok, so for the last couple of days it was overdrive time. Lots of work still left and just enough time to get it done in.
Here are the door rings. Notice I went flush on the edge, not a lot of clearance in the door card...
With the doors done and the amps wired and playing, I begin the first stages of tuning. My first impressions are that the truck is going to sound great, and I hate tuning the 6to8. Definitely not as intuitive as the 360, or the BitOne. Not at first anyways.
At this time it's late Thursday morning and the truck is slated for Saturday pickup. I haven't even started on the amp rack so time for that!
This is all to get it to fleece/resin as fast as possible.
By the end of Thursday I did not have it to fleece yet.
Friday was going to be a long day...First thing Friday was to get the fleece on and resined asap!!
While it was drying, finished up the big 3 and another tuning session. The 6to8 seems to clip too early on the input. I check for installation issues and test different inputs on the 6to8. Needed to focus on building so will come back for more tuning later.
So in homage to the fact that Bing was going to be the original installer, I didn't want to drill any permanent new holes into the truck. To do this I used this aluminum bar to mount the box down, it extends to where the factory storage tray mounted.
Resin dried, back to the amp rack. Started on the top profile and worked my way down.
UNBROKEN
Ezekiel 25:17
- Joined
- Apr 21, 2006
- Messages
- 17,158
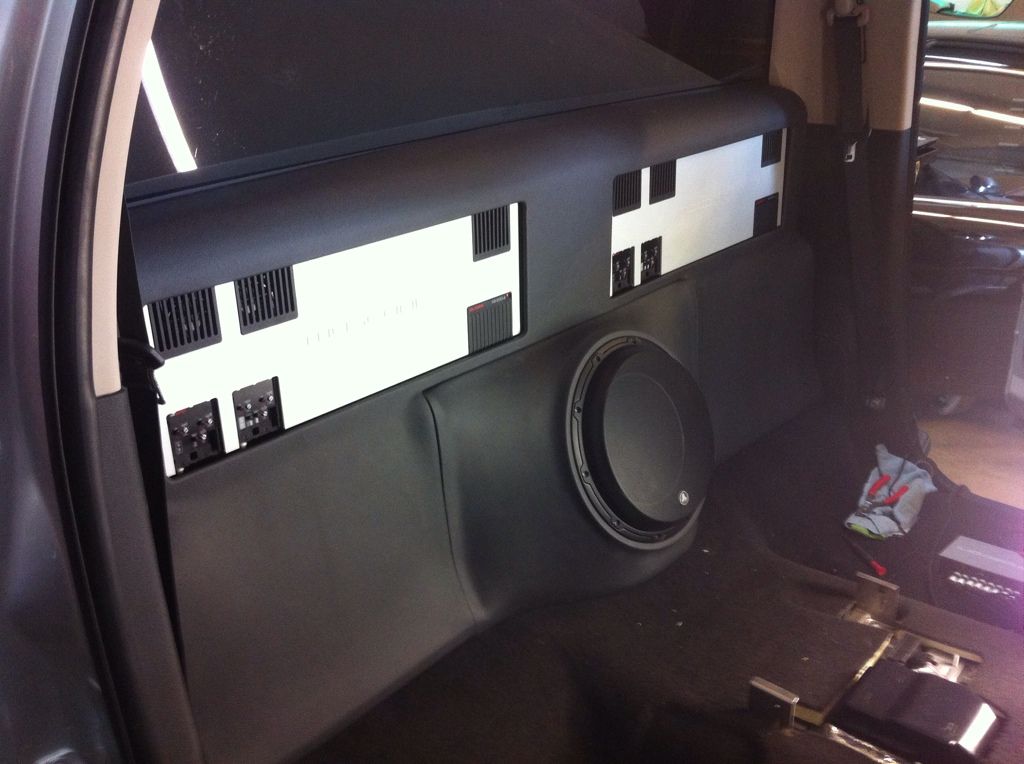
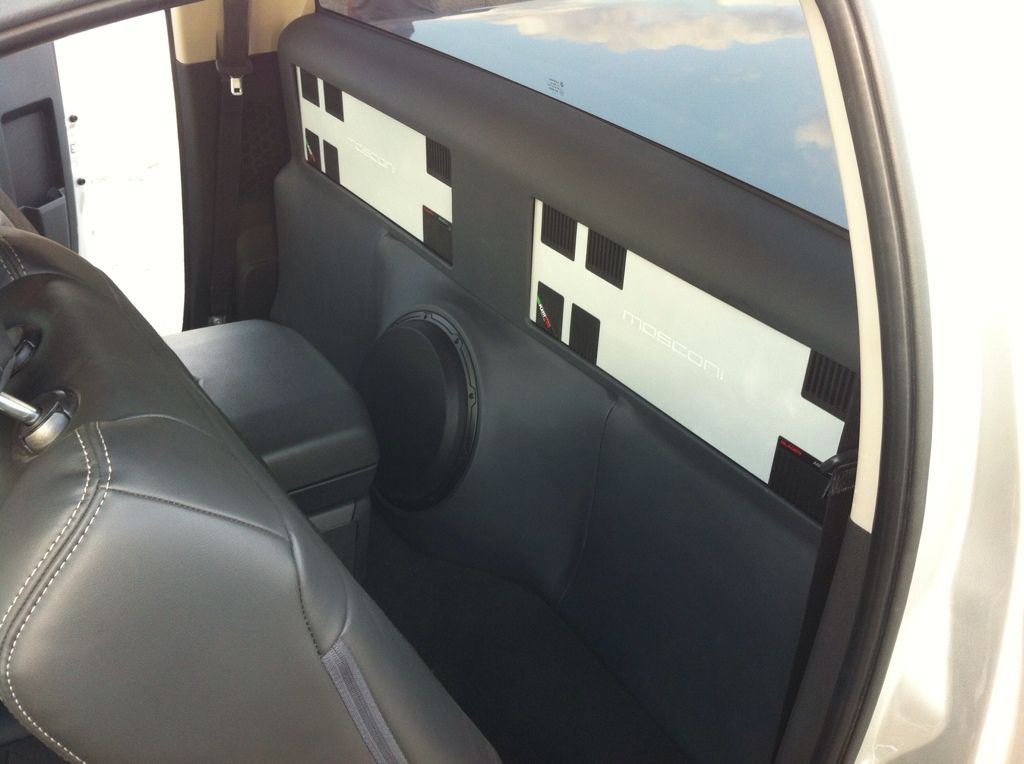
With the top profile done, it went in and out the truck a couple of times and when all angles had been checked it was time for bondo!! Me and this amp rack would spend the rest of the day on the woodshop together.
Stayed a little late that night but it was worth the progress. Saturday would start with wrapping.
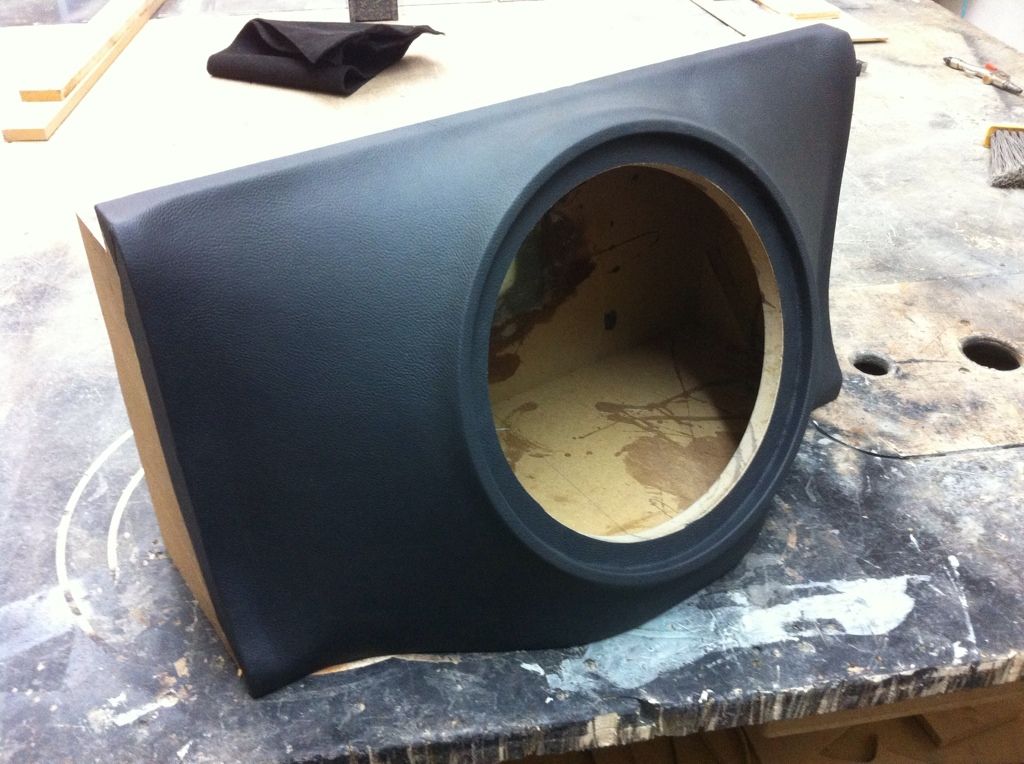
So D-day. I wrap the box and then a tuning session.
Next came the amp rack. Because of where it needed to stretch, I had to cut a piece of the vinyl longways. UNBROKEN didn't want any unattractive seems and we even discussed stitching but at the end of the day I planed to just wrap in one piece. Not easy...

Time to start putting it all together!!!
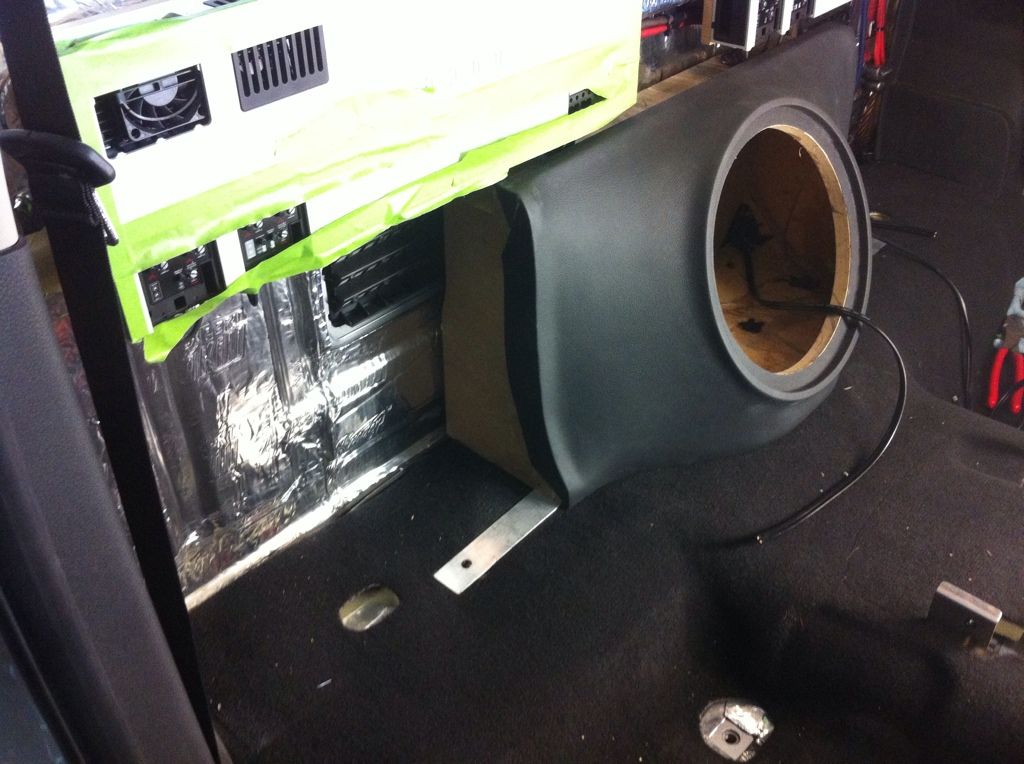
Everything is locked in by the sub box, making it difficult to steal.
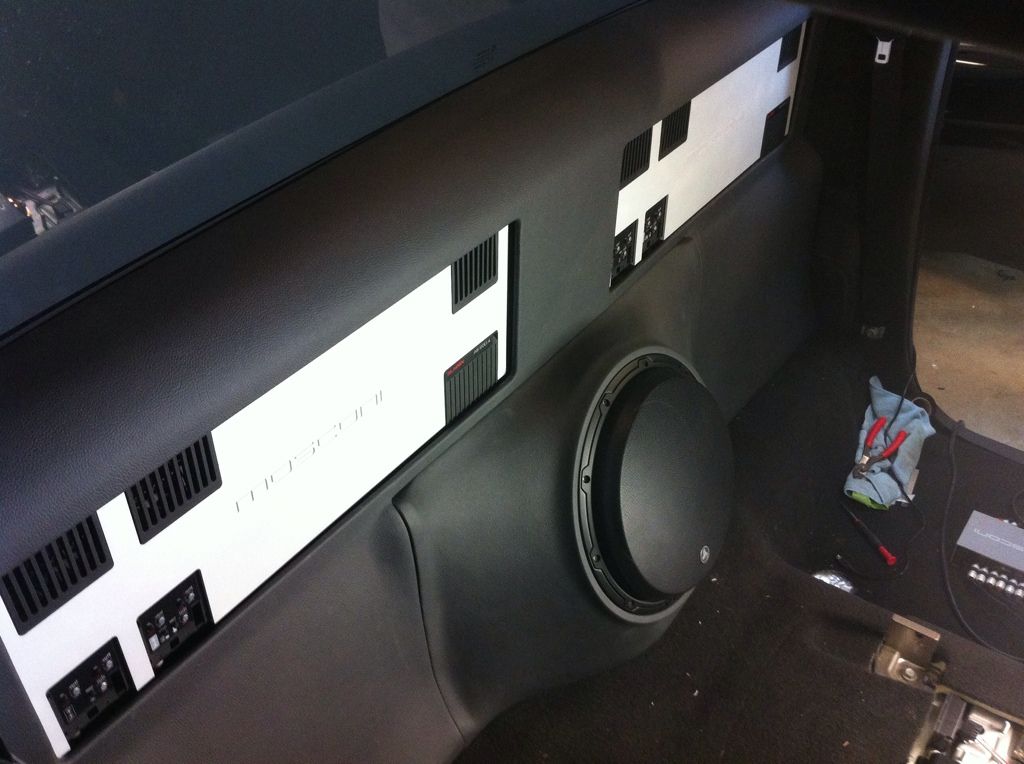
And finally, BAM!!
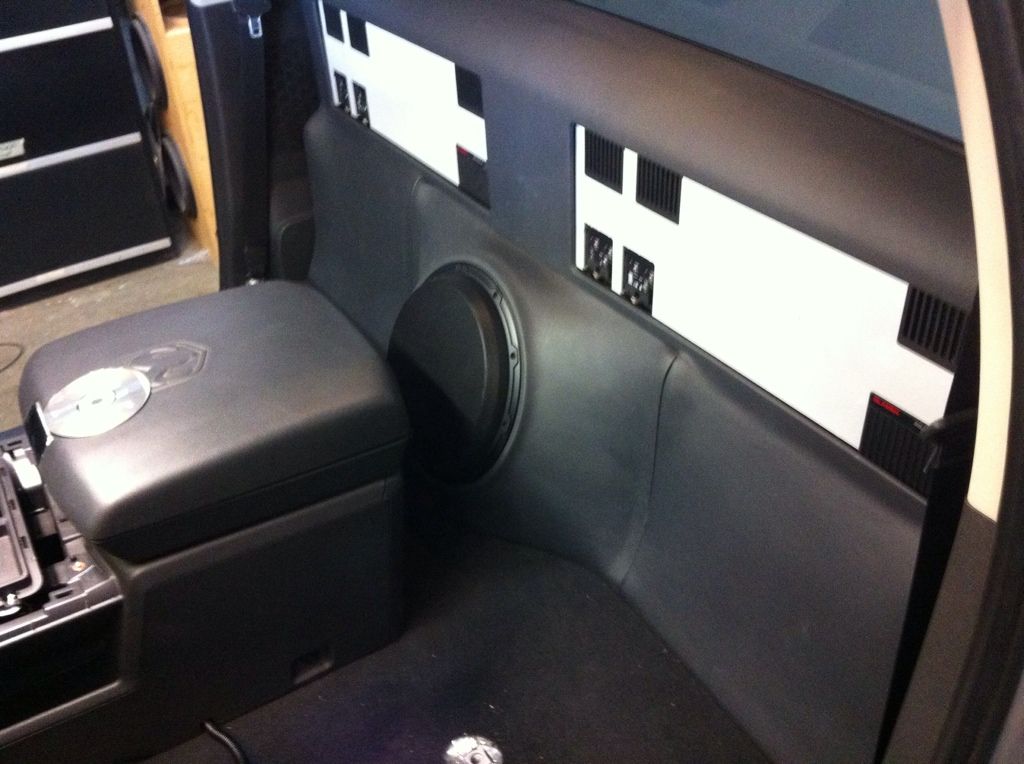
The rest of the day was putting the interior back in and tune, tune, tune!!
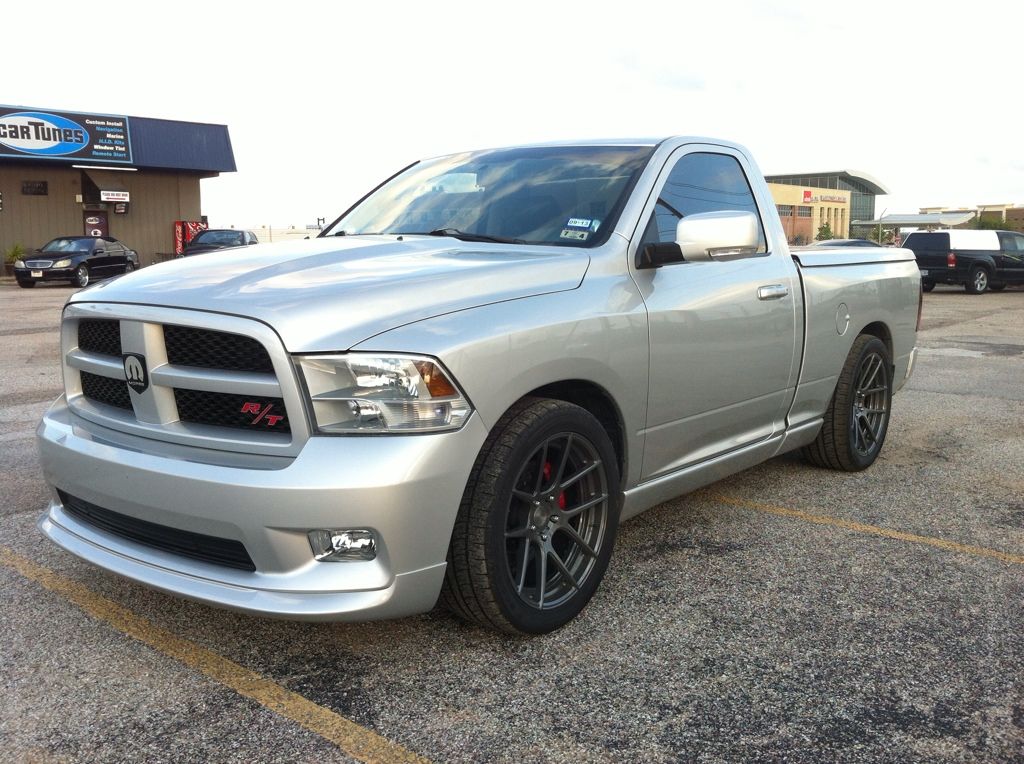
Finished and delivered on time. I'd still like some more tuning time but as previously stated we will revisit later. I am happy with the results and most importantly so was UNBROKEN, who I'd like to thank for choosing me on this build, thank you it was a blast!!!
And that's that...
Stayed a little late that night but it was worth the progress. Saturday would start with wrapping.
So D-day. I wrap the box and then a tuning session.
Next came the amp rack. Because of where it needed to stretch, I had to cut a piece of the vinyl longways. UNBROKEN didn't want any unattractive seems and we even discussed stitching but at the end of the day I planed to just wrap in one piece. Not easy...
Time to start putting it all together!!!
Everything is locked in by the sub box, making it difficult to steal.
And finally, BAM!!
The rest of the day was putting the interior back in and tune, tune, tune!!
Finished and delivered on time. I'd still like some more tuning time but as previously stated we will revisit later. I am happy with the results and most importantly so was UNBROKEN, who I'd like to thank for choosing me on this build, thank you it was a blast!!!
And that's that...
Chris Tobin
New member
- Joined
- Jun 20, 2008
- Messages
- 2,662
Quick work and good looking. Great job by the installer!!!
4x4dually
Moderator
- Joined
- Jan 22, 2007
- Messages
- 31,895
Dammit, Richard, why you got to make us all look like amateurs? :hehe:
Yours is soooo light years ahead of mine and I was pretty pumped last week when I got it done....now it is just like.....ya, it's nice, but not "unbroken nice." :hehe:


I bet I can out "bump" that tiny little single.oke: LOL
Yours is soooo light years ahead of mine and I was pretty pumped last week when I got it done....now it is just like.....ya, it's nice, but not "unbroken nice." :hehe:
I bet I can out "bump" that tiny little single.
oke: LOL