jimbo486
New member
- Joined
- Jan 24, 2010
- Messages
- 1,617
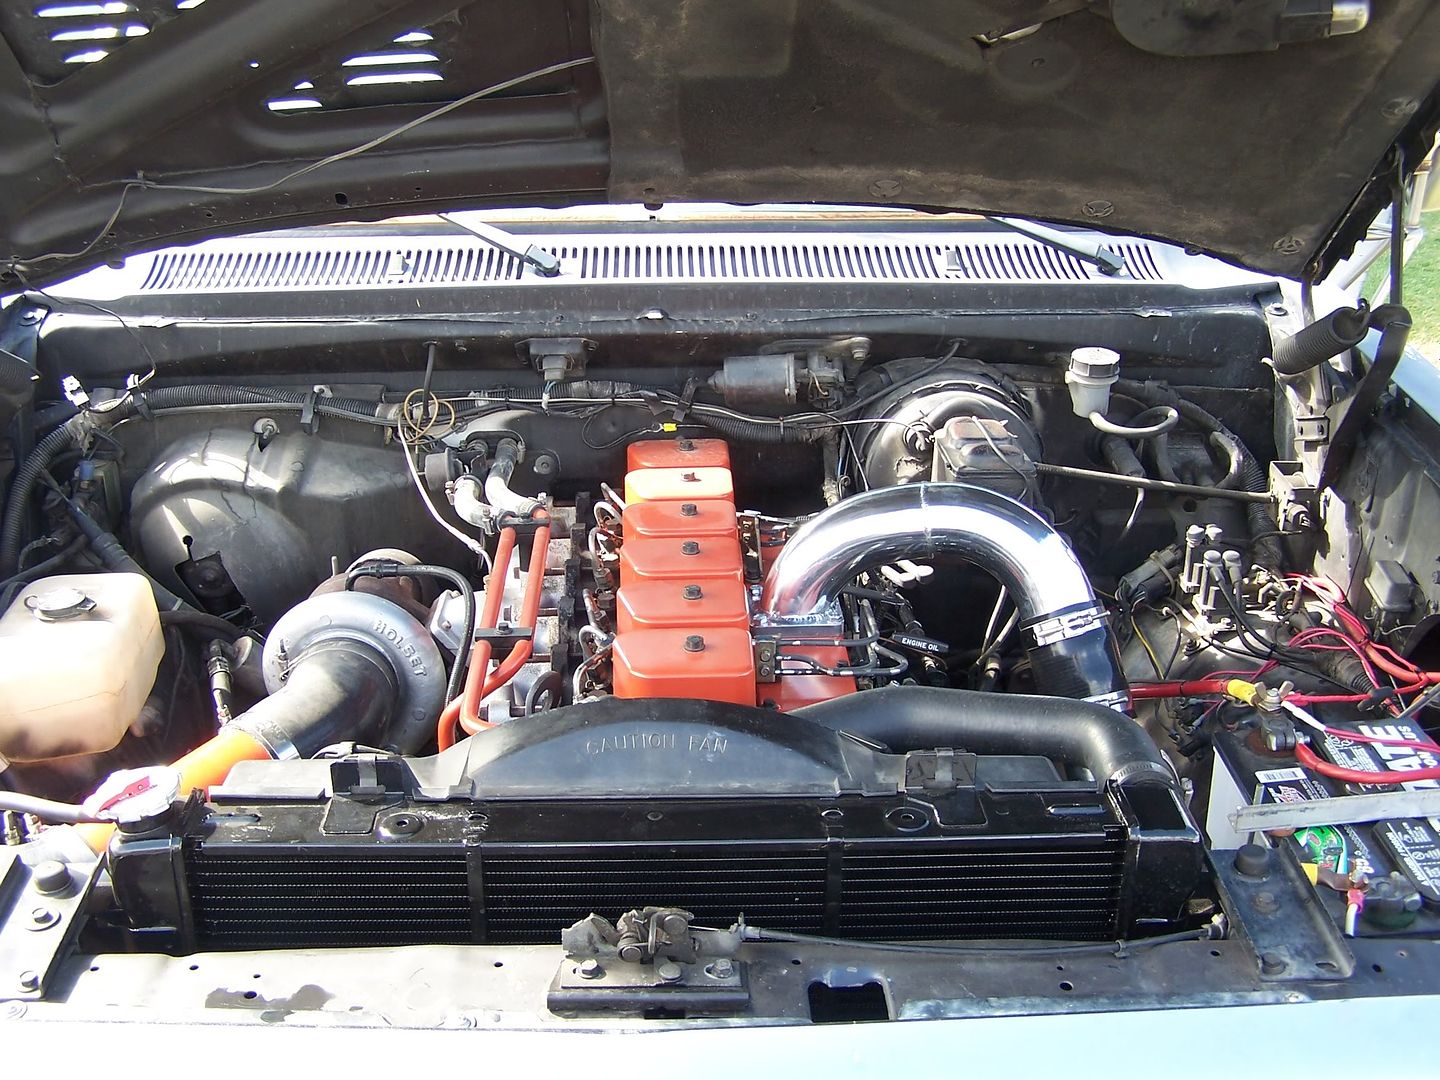
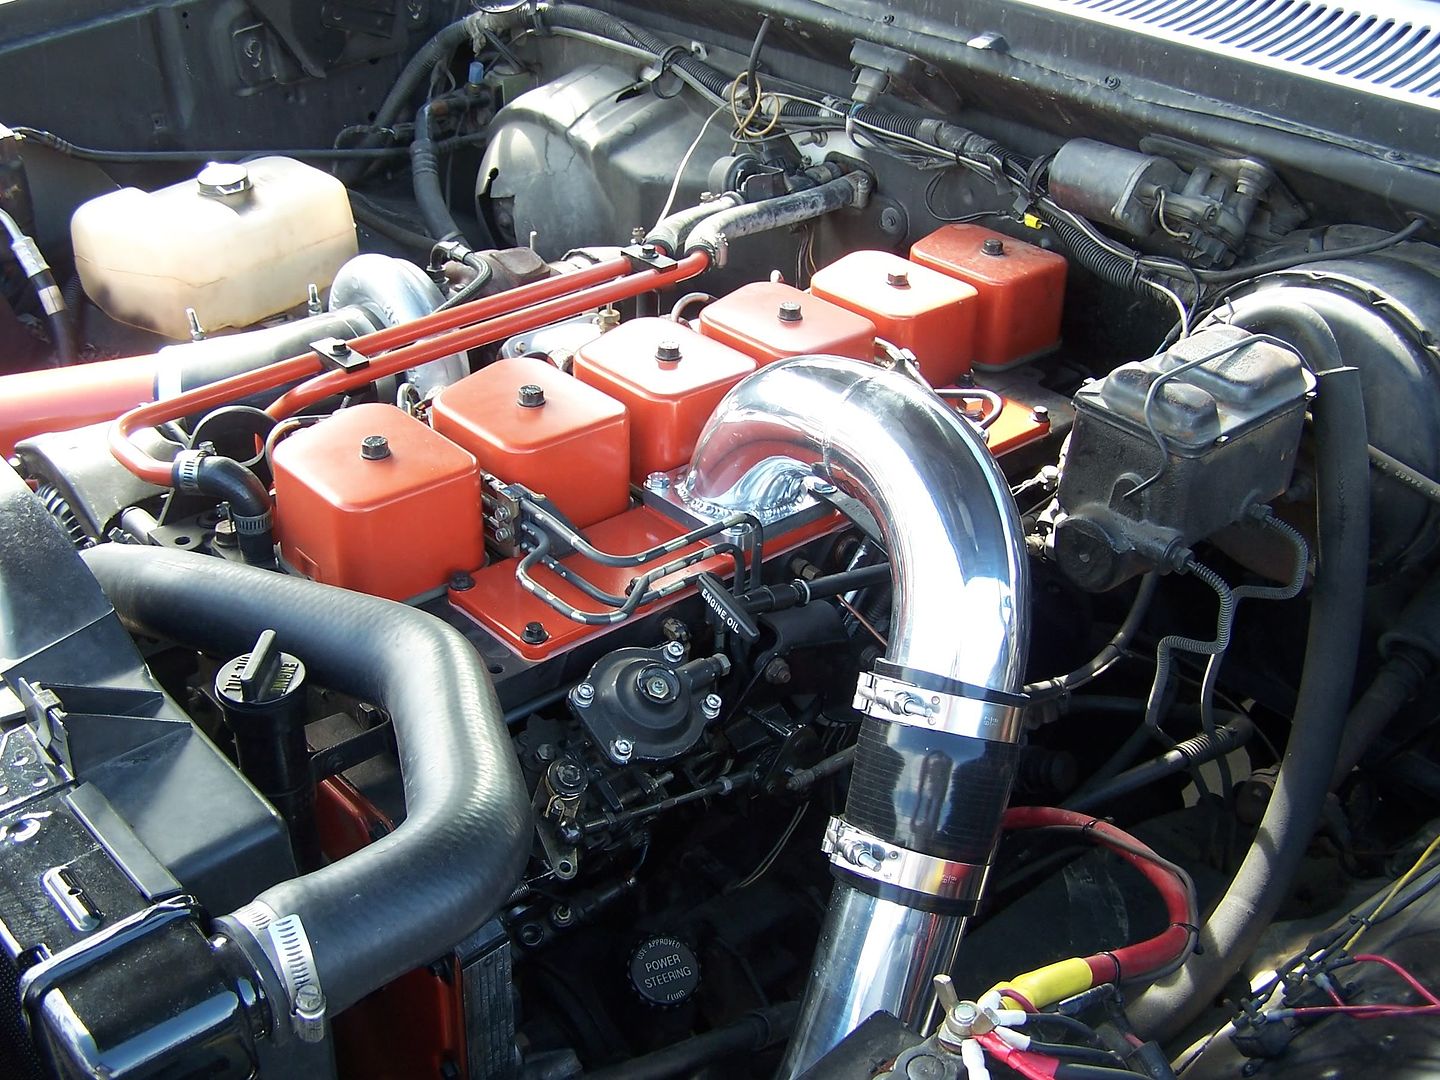
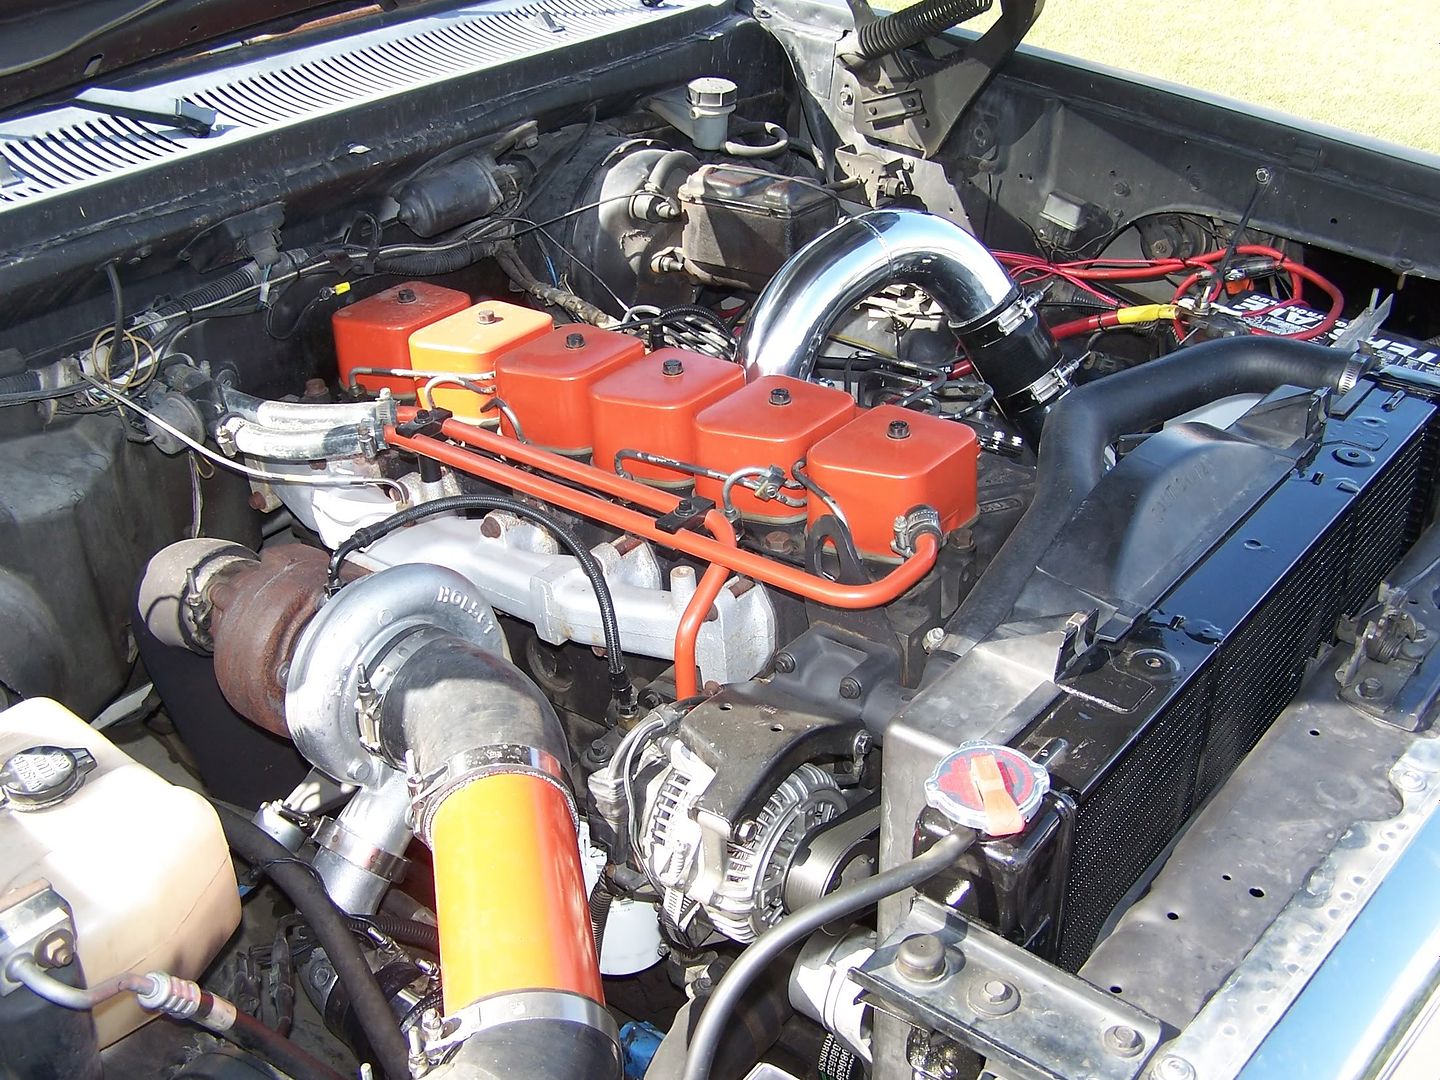
Part 1
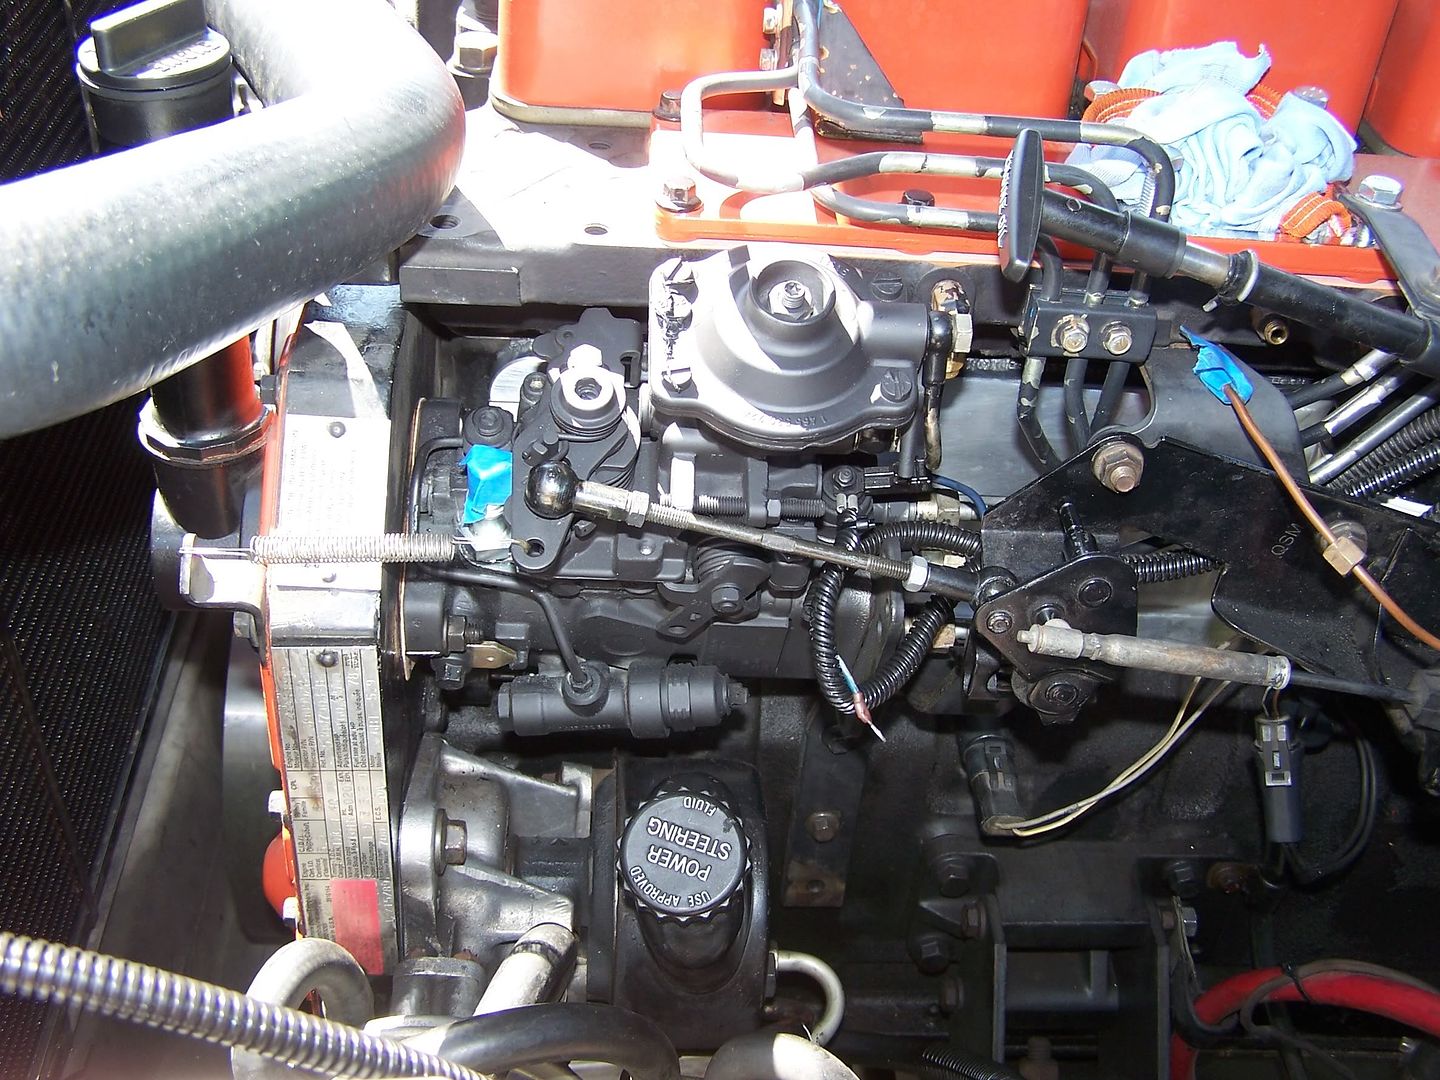
It all started when I ordered a Redhead steering gear and Borgeson steering shaft for The Beast. The input seal on the original gear was sweating some and I noticed that the PS reservoir was't keeping a level for very long. Once that order was placed, I then started to think, "well, since I'm going to replace the steering gear, I should replace the PS pump since it's probably run low on fluid enough that it could be a little worn." So I started looking at PS pump options on Rock Auto. Then, another thought. "Hell, now would be a good opportunity to get rid of the fuster cluck of a vacuum pump system with diaphragm pumps." Thus began a little research into the vein-type vacuum pumps. 3-piece, 2-piece, they both have ball-check valves in them, but the 2-piece pumps have a 90* fitting to further aid in preventing oil from entering the vacuum system, etc., etc. So I wanted to document what I did when I converted mine.
After a few days of gathering as much info possible to make a decision, I finally pulled the trigger. It was brought to my attention that the replacement pumps for later model trucks which have hydroboost, starting in '97, have a 2-piece vacuum pump and are the only ones that were offered as "new units" through Rock Auto. Not to mention, they were a little cheaper than the remanufactured 3-piece pumps.
Now, a little tip that was given to me about these 3-piece pumps. Part of their casting, the 4 "legs" at the aft end of the pump that mates to the PS pump is prone to cracking and ultimately, breaking. Surely, this seems like a rare occasion that one would break. Especially since there's a small support bracket for the PS/vacuum pump assemblies that bolts to the block. As the name implies, it should support the assembly, keeping it rigid and preventing any flexing or twisting motion. Mostly due to the fact that there's a lot of weight putting additional stresses on the vacuum pump casting. With all of this considered and as rare as the occasion seems, I didn't want to take a chance of it happening to me.
The two above facts are what swayed me. New and a less likely chance of breakage. So I wound up with a brand new, Cardone Select vacuum pump for a 2000 model truck (with a Cummins, of course).
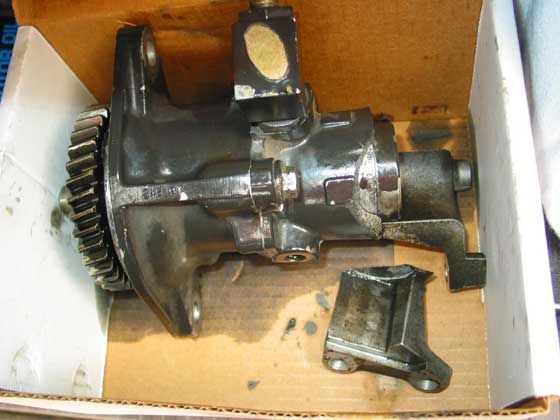
For the conversion to be possible for an '89-'91 engine, you will need the following parts. If you're a Cummins nut like me and want Genuine Cummins stuff, go to or call the nearest one.
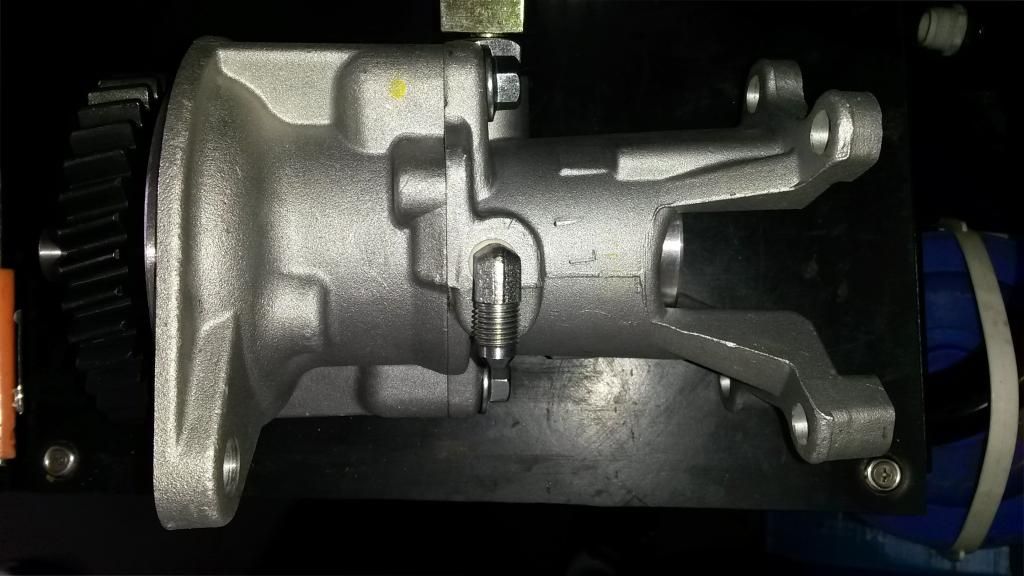
1. Injection pump support bracket - P/N: 3918949. This bracket is extended and has a third and threaded hole for the vacuum pump support bracket to bolt to. Seen in the picture below. Yours will more than likely not have this bracket. I must have swapped this at some point when swapping parts from the '91.5 donor truck I had.
2. Accessory drive (PS/vacuum pump) support bracket. P/N: 3919619, Position 5. Pictured below.
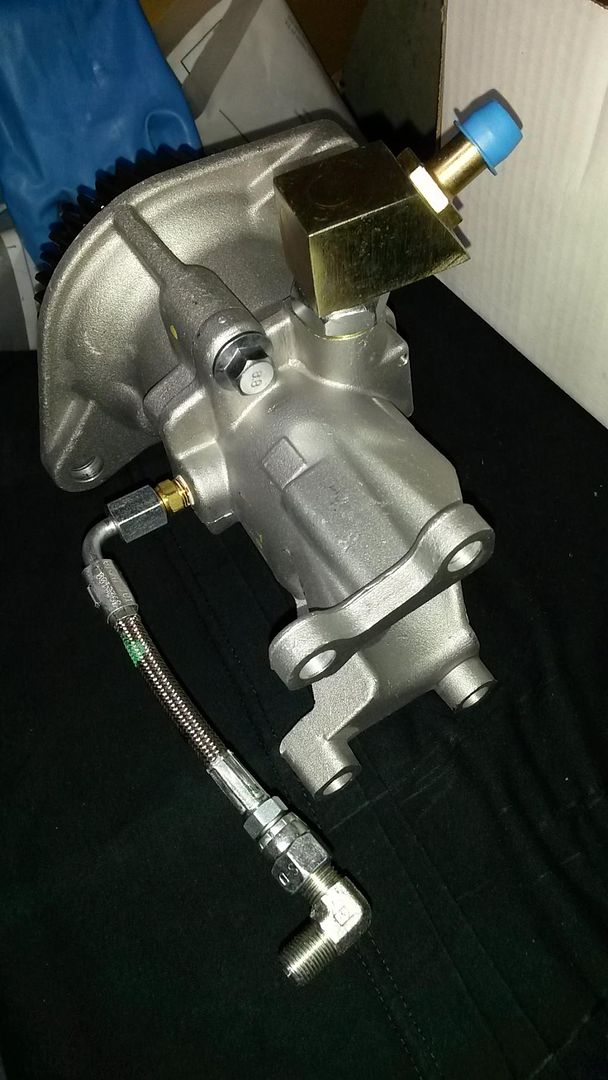
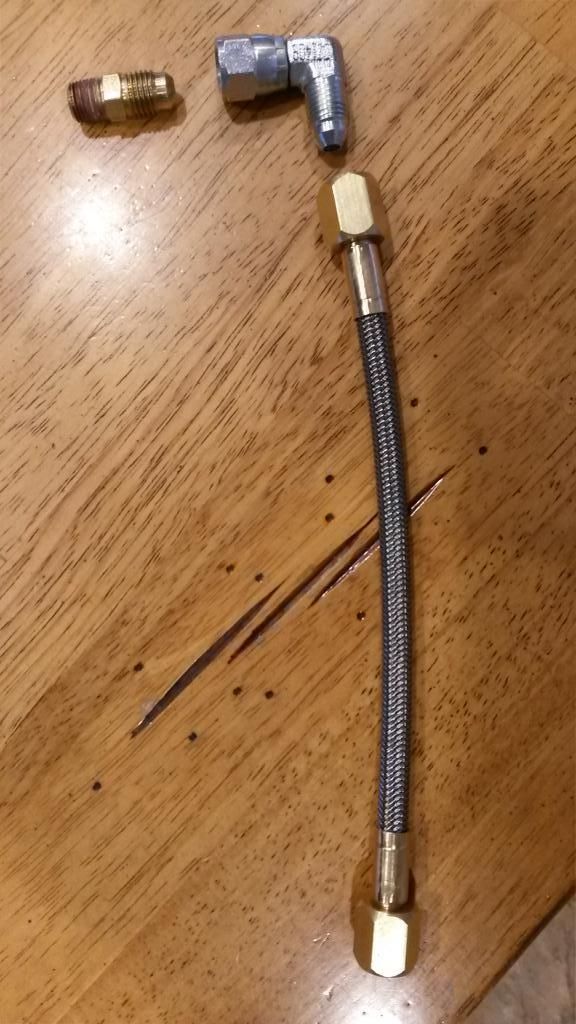
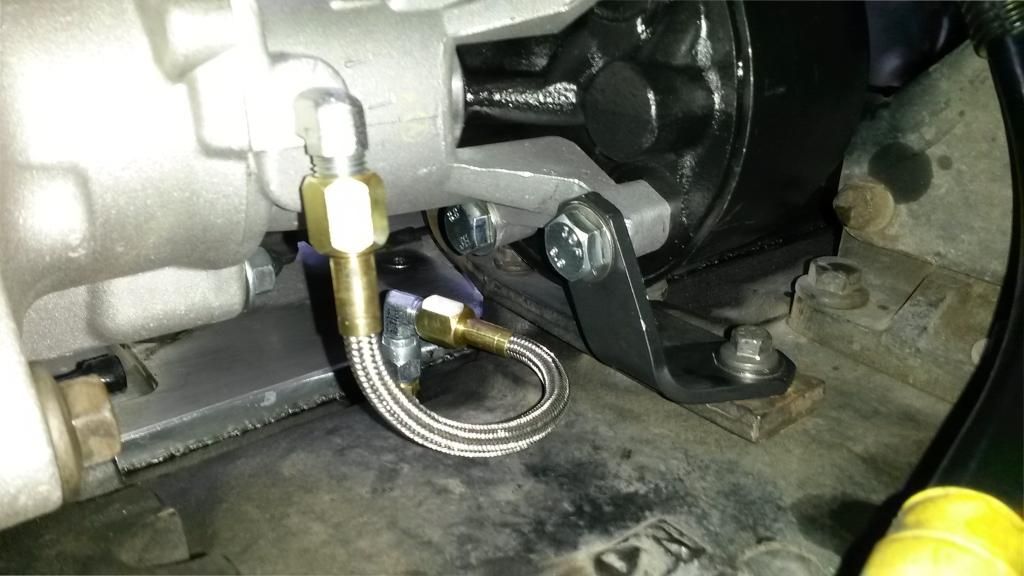
3. **Oil supply flex hose. P/N: 3925100. Position 14. Pictured below.** This is noted and I'll elaborate later in the post.
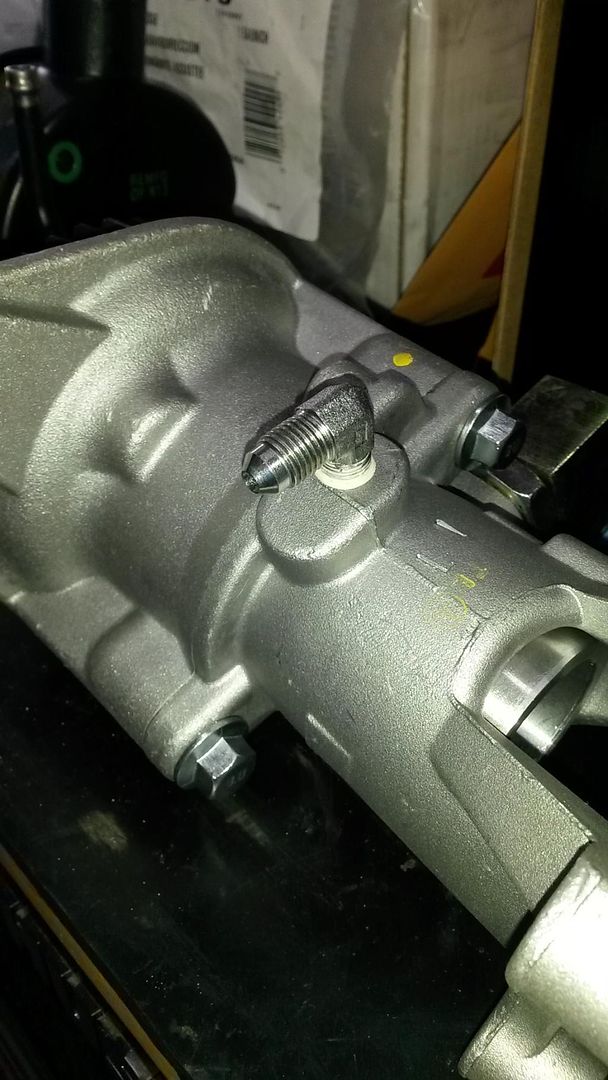
4. Male to male 1/8"-27 NPT x 5/16-24 SAE 45 fitting. P/N: 68138. Position 1. Pictured below.
5. M8x1.25x16 hex bolt. P/N: 3900629. Position 3. Pictured below.

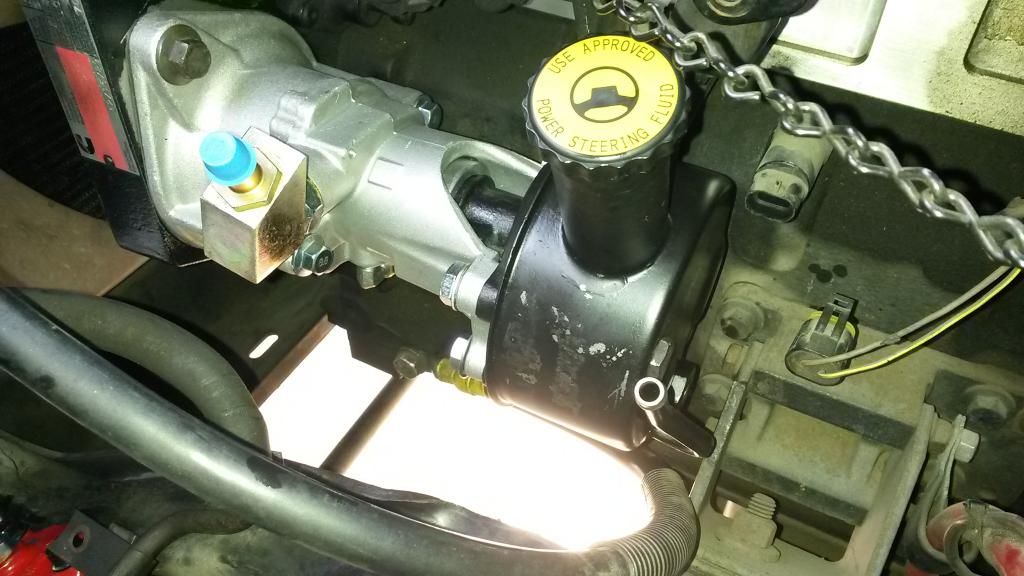
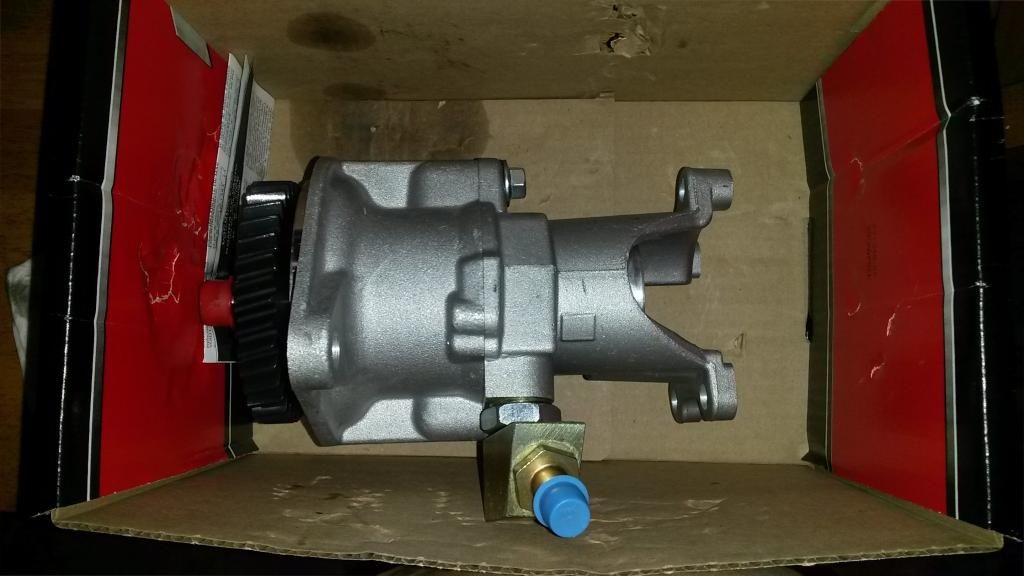
6. PS pump from a '96 Dodge 2500-3500 w/ the 5.9 Cummins. I ordered a remanufactured unit from Rock Auto. You may get one from a '97+ model. However, due to the hydroboost, there will be 2 return ports in the back of the pump. Since only one is necessary in this case, I went with the pump for the '96. The decision is yours, of course.
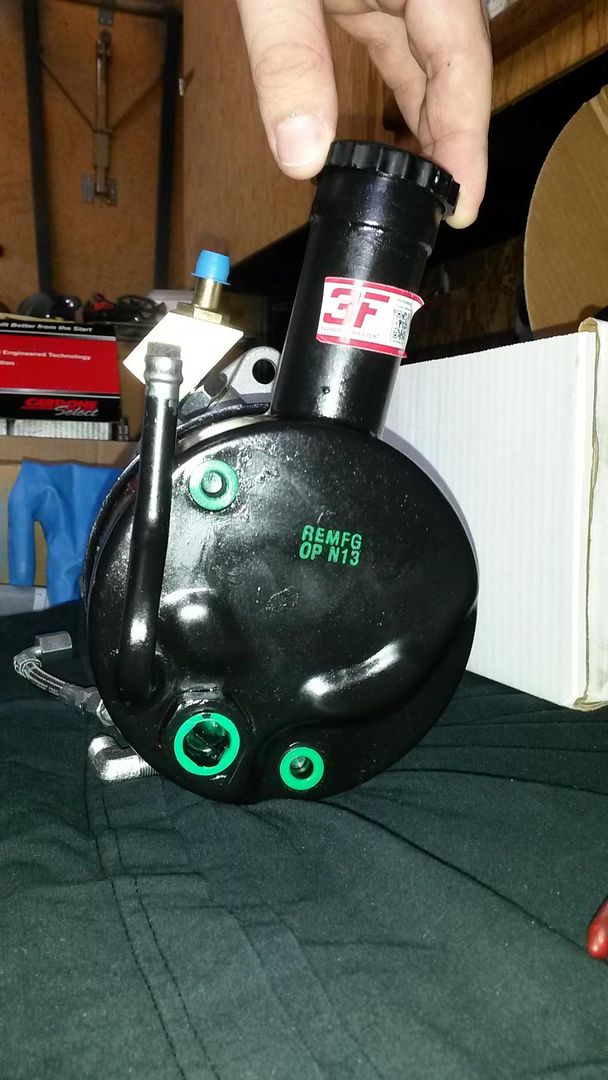
7. Vacuum pump from a '98-'02 Dodge 2500-3500 w/ the 5.9 Cummins. In this case, I got a 2000 model because it was a new unit, not remanufactured.
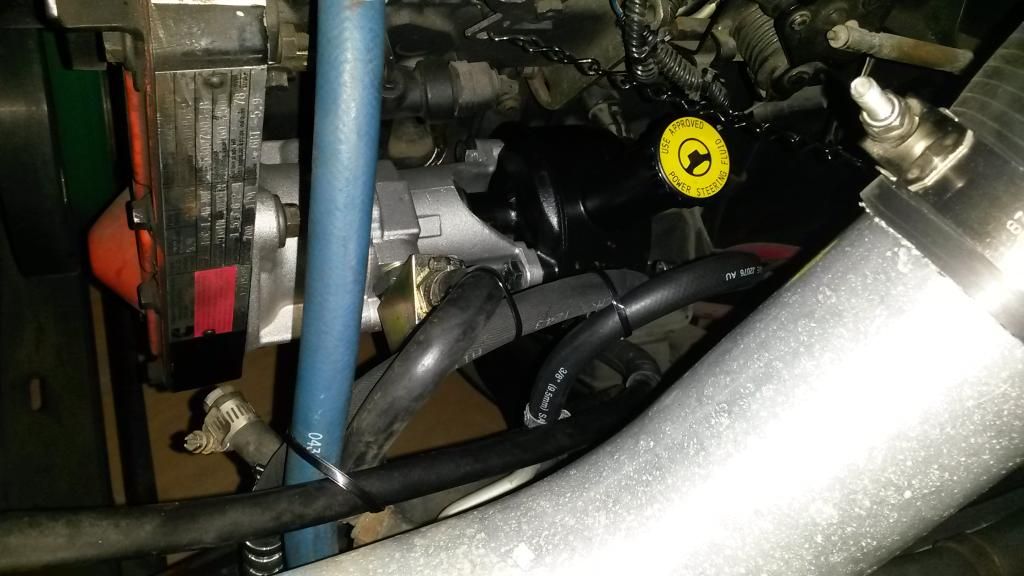
8. PS pump pressure/supply and return hoses for a '91.5-'93 truck. I ordered Gates hoses from Rock Auto.


Through Cummins, I had no luck finding a 90* elbow that threads into the oil galley port in the block so I went to a local hose supply and picked up a steel elbow; 1/8"-27 NPT x 5/16-24 SAE 45. I couldn't even get 2 threads before the fitting hit the casting of the block. So instead, I installed the straight fitting in the block and 90* elbow in the bottom of the vacuum pump, as opposed to what is shown in the QuickServe diagram.
Continued...
It all started when I ordered a Redhead steering gear and Borgeson steering shaft for The Beast. The input seal on the original gear was sweating some and I noticed that the PS reservoir was't keeping a level for very long. Once that order was placed, I then started to think, "well, since I'm going to replace the steering gear, I should replace the PS pump since it's probably run low on fluid enough that it could be a little worn." So I started looking at PS pump options on Rock Auto. Then, another thought. "Hell, now would be a good opportunity to get rid of the fuster cluck of a vacuum pump system with diaphragm pumps." Thus began a little research into the vein-type vacuum pumps. 3-piece, 2-piece, they both have ball-check valves in them, but the 2-piece pumps have a 90* fitting to further aid in preventing oil from entering the vacuum system, etc., etc. So I wanted to document what I did when I converted mine.
After a few days of gathering as much info possible to make a decision, I finally pulled the trigger. It was brought to my attention that the replacement pumps for later model trucks which have hydroboost, starting in '97, have a 2-piece vacuum pump and are the only ones that were offered as "new units" through Rock Auto. Not to mention, they were a little cheaper than the remanufactured 3-piece pumps.
Now, a little tip that was given to me about these 3-piece pumps. Part of their casting, the 4 "legs" at the aft end of the pump that mates to the PS pump is prone to cracking and ultimately, breaking. Surely, this seems like a rare occasion that one would break. Especially since there's a small support bracket for the PS/vacuum pump assemblies that bolts to the block. As the name implies, it should support the assembly, keeping it rigid and preventing any flexing or twisting motion. Mostly due to the fact that there's a lot of weight putting additional stresses on the vacuum pump casting. With all of this considered and as rare as the occasion seems, I didn't want to take a chance of it happening to me.
The two above facts are what swayed me. New and a less likely chance of breakage. So I wound up with a brand new, Cardone Select vacuum pump for a 2000 model truck (with a Cummins, of course).
For the conversion to be possible for an '89-'91 engine, you will need the following parts. If you're a Cummins nut like me and want Genuine Cummins stuff, go to or call the nearest one.
1. Injection pump support bracket - P/N: 3918949. This bracket is extended and has a third and threaded hole for the vacuum pump support bracket to bolt to. Seen in the picture below. Yours will more than likely not have this bracket. I must have swapped this at some point when swapping parts from the '91.5 donor truck I had.
2. Accessory drive (PS/vacuum pump) support bracket. P/N: 3919619, Position 5. Pictured below.
3. **Oil supply flex hose. P/N: 3925100. Position 14. Pictured below.** This is noted and I'll elaborate later in the post.
4. Male to male 1/8"-27 NPT x 5/16-24 SAE 45 fitting. P/N: 68138. Position 1. Pictured below.
5. M8x1.25x16 hex bolt. P/N: 3900629. Position 3. Pictured below.
6. PS pump from a '96 Dodge 2500-3500 w/ the 5.9 Cummins. I ordered a remanufactured unit from Rock Auto. You may get one from a '97+ model. However, due to the hydroboost, there will be 2 return ports in the back of the pump. Since only one is necessary in this case, I went with the pump for the '96. The decision is yours, of course.
7. Vacuum pump from a '98-'02 Dodge 2500-3500 w/ the 5.9 Cummins. In this case, I got a 2000 model because it was a new unit, not remanufactured.
8. PS pump pressure/supply and return hoses for a '91.5-'93 truck. I ordered Gates hoses from Rock Auto.
Through Cummins, I had no luck finding a 90* elbow that threads into the oil galley port in the block so I went to a local hose supply and picked up a steel elbow; 1/8"-27 NPT x 5/16-24 SAE 45. I couldn't even get 2 threads before the fitting hit the casting of the block. So instead, I installed the straight fitting in the block and 90* elbow in the bottom of the vacuum pump, as opposed to what is shown in the QuickServe diagram.
Continued...
Last edited: