
TooMuchBoost
Comp Diesel Sponsor
- Joined
- Apr 22, 2006
- Messages
- 2,072
Before:
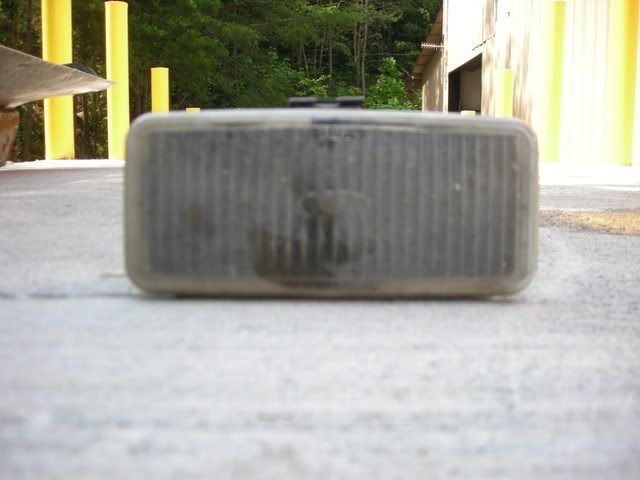
Before:
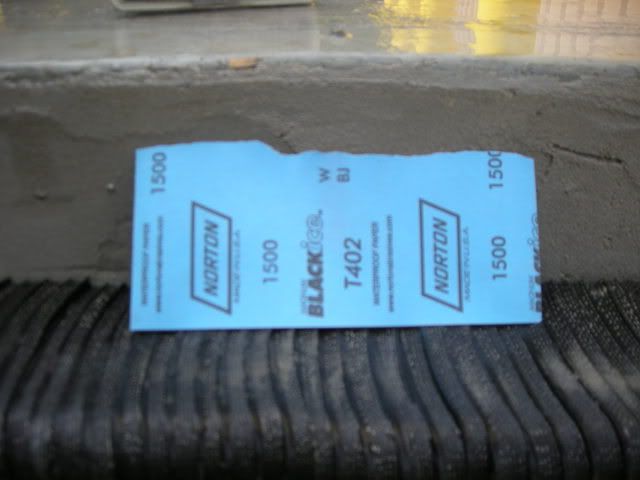
You will need 1 sheet of 1200 or 1500 wet sanding paper.
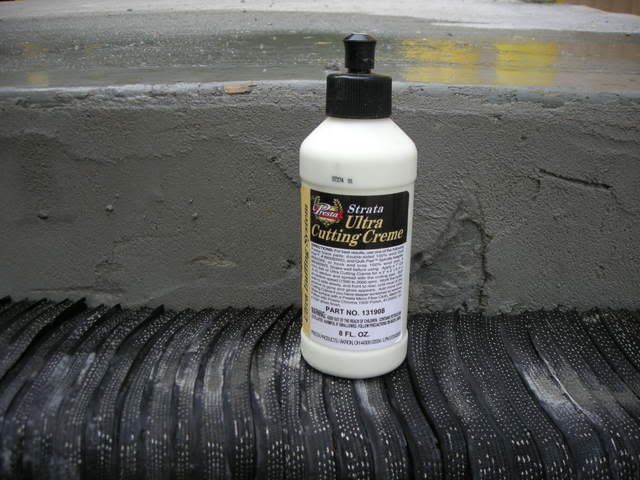
You will need a little rubbing compound. I like Ultra Cutting Creme by Presta because its fast, inexpensive and washes off easily.
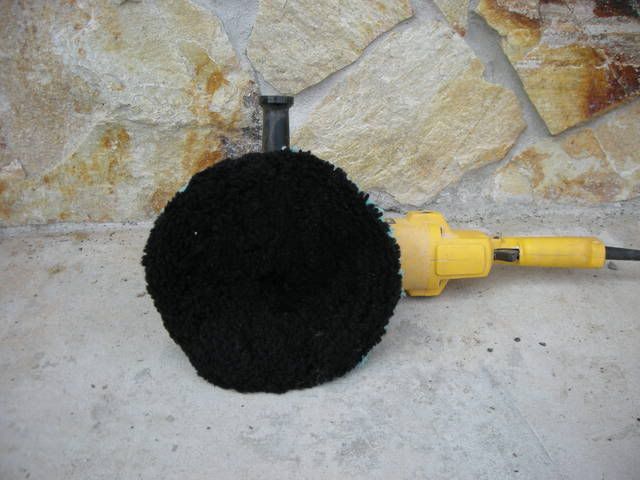
You will need a high speed buffer such as this 0-3000 rpm Dewalt buffer/grinder. A hand held orbital will not work but other higher speed/higher torque means of polishing you may have access to very well could. You want to use a wool compounding (not polishing) pad to remove your sand scratches.
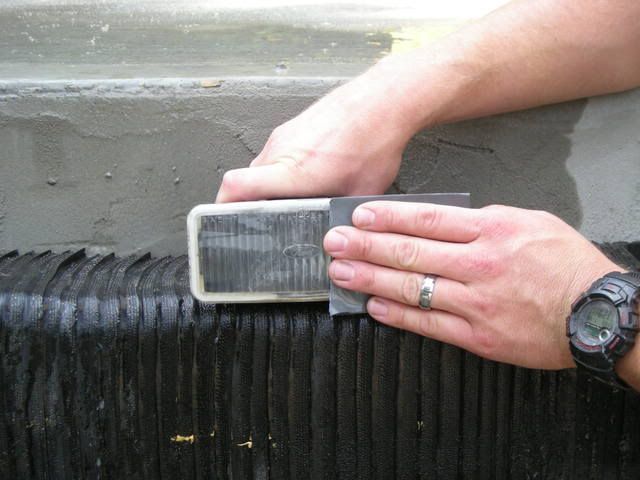
Using water as a lubricant begin wet sanding the lens trying to keep your sanding movement as flat to the surface as possible though this isn't critical as it is when wet sanding clearcoat. Just like sanding anything else around the house or shop sand vary the direction in which you sand and sand until all imperfections can no long be felt (just like painting a car if you can feel it you will see it in your finished result). If the lenses are bad start with 1200, knock the rough down and finish with 1500. I've started with 800 grit before but I'm confident with my buffing skills.
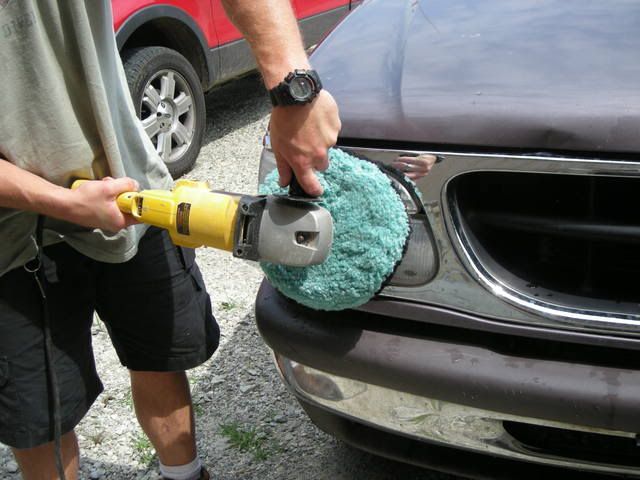
When buffing start out flat to 5 degrees whenever possible. The reason you now see a blue/green pad is because that is the backside of the black pad in the previous photo. The B/G side is a wool light compounding/polishing pad. It could have been used in this application but would have taken longer to achieve the same results. Wool pads like speed (1000 rpm-2400) I start out slow for a second to see what I have then throw the coals to it and in this application I buffed at 2200 rpm's.
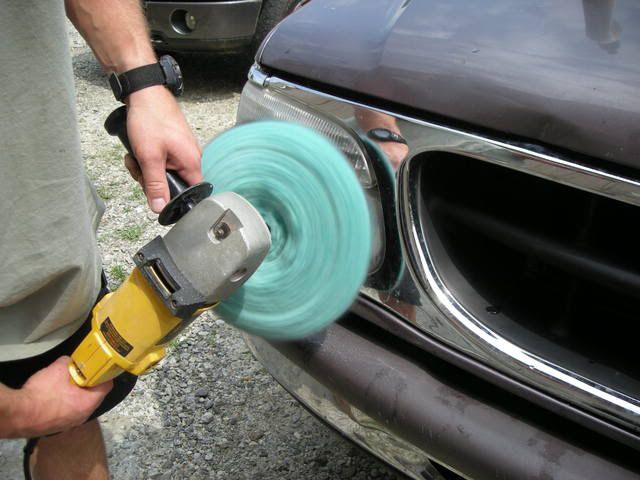
Once you have a feel for things you might need to deviate from holding the buffer flat against the surface to using a little body language to reach all the spots especially if you do the lenses on the vehicle (what the owner wanted to do).
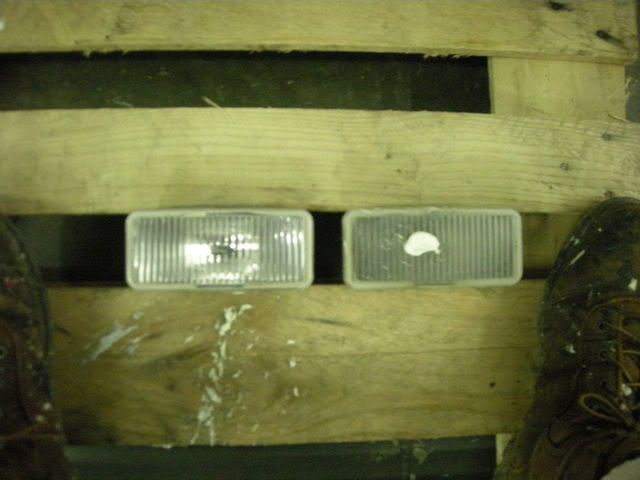
Not having a vice or jig at our plant we found this pallet held the lenses in place for buffing perfectly. The lens on the left has been buffed already. The amount of compound you see on the lens on the right is way more than enough Presta to remove the scratches from a lens this size.
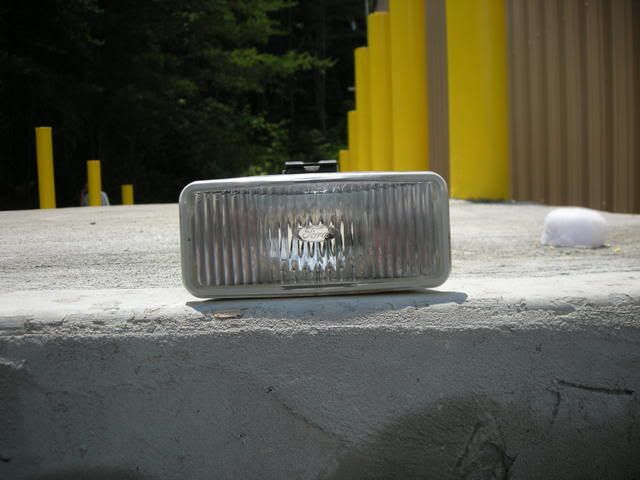
Finished lens outside glowing in the sunshine on the loading dock....
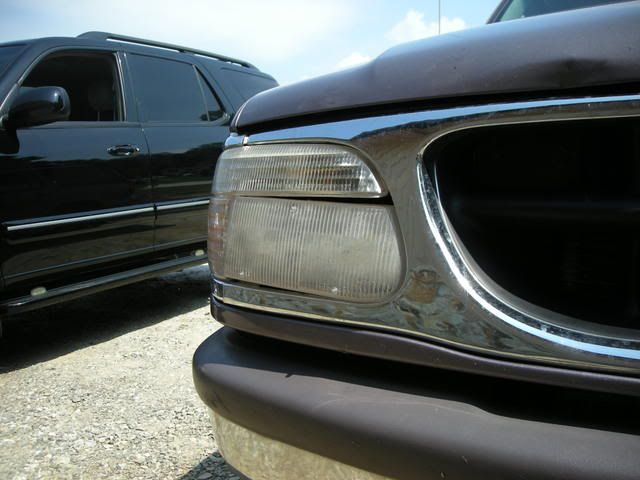
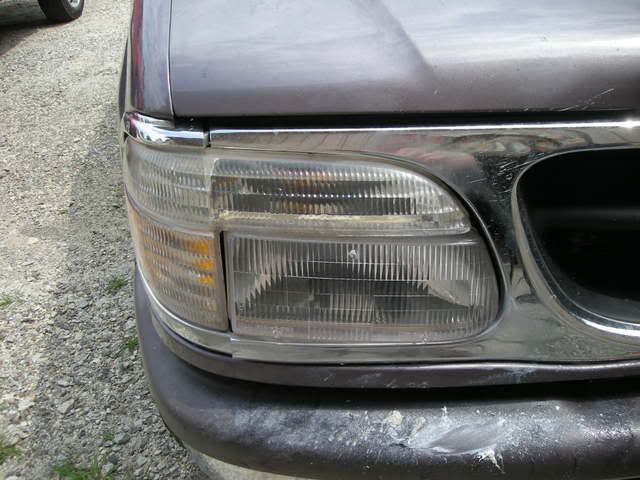
"After" shot of a finished headlight. I even hit the pseudo chrome grill real fast to make it shine. Didn't hurt a thing.
Please forgive my warehouse motiff but dad's house is an hour away and mine is two so I improvised and adapted to this non-workshop environment which also means any back yard guy could perform this procedure on his lenses as well.
If all the lenses had been removed this would have taken 30 minutes start to finish. Instead it took about 45-50 min with the headlights in the vehicle.
Note: While these lenses look pretty now the UV inhibitors used in plastics float to the outside of the plastic during the mold process. In English that means over time it has deteriorated and lost its effectiveness. So in about 6 months these lenses could very well begin losing some of what I gained here. A very quick polishing will freshen them up again.
Presta along with other companies has a water-based UV coating that you hand apply over the lens to maintain quality. Do they work? I don't know though I will be trying the Presta version next week on this Exploder. I'll apply it to one side only and watch what happens over time and report back.
Before:
You will need 1 sheet of 1200 or 1500 wet sanding paper.
You will need a little rubbing compound. I like Ultra Cutting Creme by Presta because its fast, inexpensive and washes off easily.
You will need a high speed buffer such as this 0-3000 rpm Dewalt buffer/grinder. A hand held orbital will not work but other higher speed/higher torque means of polishing you may have access to very well could. You want to use a wool compounding (not polishing) pad to remove your sand scratches.
Using water as a lubricant begin wet sanding the lens trying to keep your sanding movement as flat to the surface as possible though this isn't critical as it is when wet sanding clearcoat. Just like sanding anything else around the house or shop sand vary the direction in which you sand and sand until all imperfections can no long be felt (just like painting a car if you can feel it you will see it in your finished result). If the lenses are bad start with 1200, knock the rough down and finish with 1500. I've started with 800 grit before but I'm confident with my buffing skills.
When buffing start out flat to 5 degrees whenever possible. The reason you now see a blue/green pad is because that is the backside of the black pad in the previous photo. The B/G side is a wool light compounding/polishing pad. It could have been used in this application but would have taken longer to achieve the same results. Wool pads like speed (1000 rpm-2400) I start out slow for a second to see what I have then throw the coals to it and in this application I buffed at 2200 rpm's.
Once you have a feel for things you might need to deviate from holding the buffer flat against the surface to using a little body language to reach all the spots especially if you do the lenses on the vehicle (what the owner wanted to do).
Not having a vice or jig at our plant we found this pallet held the lenses in place for buffing perfectly. The lens on the left has been buffed already. The amount of compound you see on the lens on the right is way more than enough Presta to remove the scratches from a lens this size.
Finished lens outside glowing in the sunshine on the loading dock....
"After" shot of a finished headlight. I even hit the pseudo chrome grill real fast to make it shine. Didn't hurt a thing.
Please forgive my warehouse motiff but dad's house is an hour away and mine is two so I improvised and adapted to this non-workshop environment which also means any back yard guy could perform this procedure on his lenses as well.
If all the lenses had been removed this would have taken 30 minutes start to finish. Instead it took about 45-50 min with the headlights in the vehicle.
Note: While these lenses look pretty now the UV inhibitors used in plastics float to the outside of the plastic during the mold process. In English that means over time it has deteriorated and lost its effectiveness. So in about 6 months these lenses could very well begin losing some of what I gained here. A very quick polishing will freshen them up again.
Presta along with other companies has a water-based UV coating that you hand apply over the lens to maintain quality. Do they work? I don't know though I will be trying the Presta version next week on this Exploder. I'll apply it to one side only and watch what happens over time and report back.