Valve seal install tricks

burnin oil

New member
Joined
May 20, 2008
Messages
229
Is there any good tricks to keeping the old style non tophat seals in place? I just went through and replaced all the exhaust valve seals and after 100 miles #5 is floating again. Is there any adheasive that can be used to help hold these things down? The originals made it 25k miles before lifting. I do plan to have tophats installed next time the head is off but untill then I would really like to keep the oil burning down along with the white cloud at idle.
 
Which seal are you using? Part number and where you got it from...

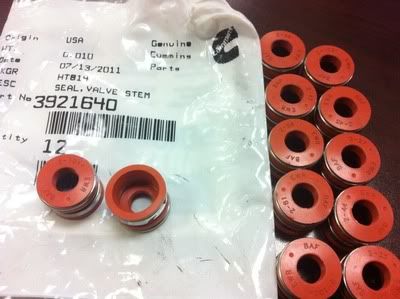
I'm using these and have had no problems..

1000000909-1.jpg


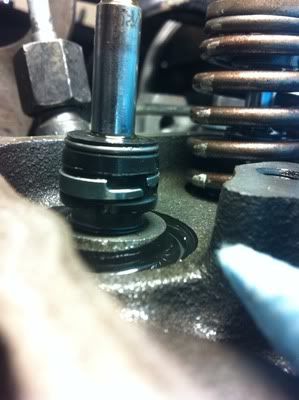
This is what the machine shop installed when they had my cylinder head.

photo3-3.jpg


They didn't come off their seat, but they did leak oil.

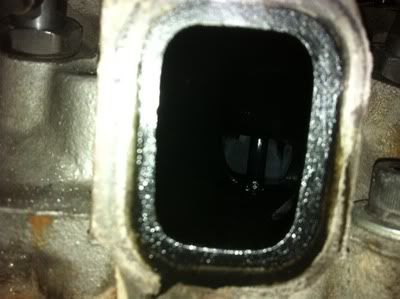
1000001061.jpg


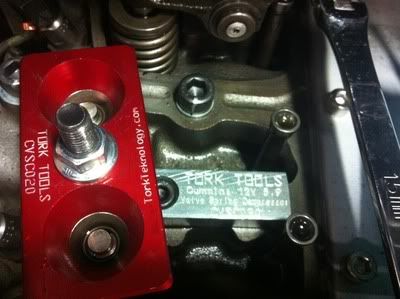
In case you don't already have it.. You should get this tool for ~$45

photo1-2.jpg
 
Are you sure your valve guides and seats have not been machined for the top hat style already? I tried those pictured above to find out my stuff had been machined for the top hat style which resulted in the non top hat style blowing up and off the guide as you say yours are doing. I tried to use the non top hat style to gain some installed height with the spring package I run given the top hat style result in less ~.030" installed height due to the rim of the hat being a spring seat.
 
The seal is definatley riding with the valve and not staying in place. I used the FELPRO premiums this time on the motor and they install just like Jon's pic. This is what was on the motor from the machine shop, rebuilt long block. Ironically the intakes have tophats. For the tophat seals doesn't the entire top of the guide need machined off or does the tophat fit down and over the same way? Maybe I should get a set off Tophats and see if they fit in there. Seals are an easy install but a pain. That Torqtek valve tool sure makes the job easy other than reinstalling the stud.
 
^^^ If the guides look the same on your intake and exhaust it is likely both have been machined to accept top hat style and that is a portion of why your non top hat style won't stay on the guide. A pic of the guides would answer alot of questions.

Edit: I have the above pictured tool and it is absolute money when changing springs, seals, etc.
 
I didn't disturb the intakes seals. I just pulled the valve springs and saw what was there and said good enough as it was the exhaust that gave me the headaches. If it doesn't rain I will pull it apart again and snag a pic. It looks just the same as Jon's pic with one exception. In the valve pocket I don't recall there being any cast material in the valve pocket. It may have had oil on it it but I seem to remember it being flat with only the upper guide for the seal to ride.
 
I didn't disturb the intakes seals. I just pulled the valve springs and saw what was there and said good enough as it was the exhaust that gave me the headaches. If it doesn't rain I will pull it apart again and snag a pic. It looks just the same as Jon's pic with one exception. In the valve pocket I don't recall there being any cast material in the valve pocket. It may have had oil on it it but I seem to remember it being flat with only the upper guide for the seal to ride.

I would venture to say your guides and seats have been machined for the top hat style then. I have not actually seen first hand the casting material in the seat area like posted by pic john.
 
White knight, that is an awesome picture. The botom picture is what is on the intake. I will pull the exhaust apart when I get a chance and double check it but I think that it was machined for the tophats and then they installed the posative seals.
 
Yes that tool is awesome. I am thinking of modding it though. Considering drilling out the locator so that you don't need to pull the stud out to use the tool. Might not work on 5 & 6 but it would speed up the first 4 cylanders.
 
That's a good idea.


One thing I would do is make the notches (for the springs) a little more pronounced. The tool fits fine with factory springs, but any 60lb spring is a tight squeeze and it becomes bound between them.
 
I noticed that also. The one good thing about being tight one hte 60lb springs is that once it is seated the drop for the keepers is perfecly lined up. Looks like the weather is holding so I am going to try and pull it apart this evening and see what I have. It sucks getting older and getting CRS.
 
No progress to report yet. Property management hung around on their day off so no playing with the truck. The good news is that I am not hazing at the moment but I still want to get to the bottom of this. Hopefully this week will work out.
 
Back
Top