Triples & Header Build on Big Angry

Big Swole

MegaInterceptor
Thought I'd share since this would be just about my dream street / strip truck. Rich from Dog House Diesel has had this truck as a work in progress for many years now, but he's recently decide to take a serious leap in progress. Building a set of triples and a customer header to replace his old LARGE single and nitrous set up.


I'll be posting from his thread " The Build Up" on another forum. I ask his permission to share bits and pieces of his build. The whole thread is amazing, but I'll just post most of the newest progress.


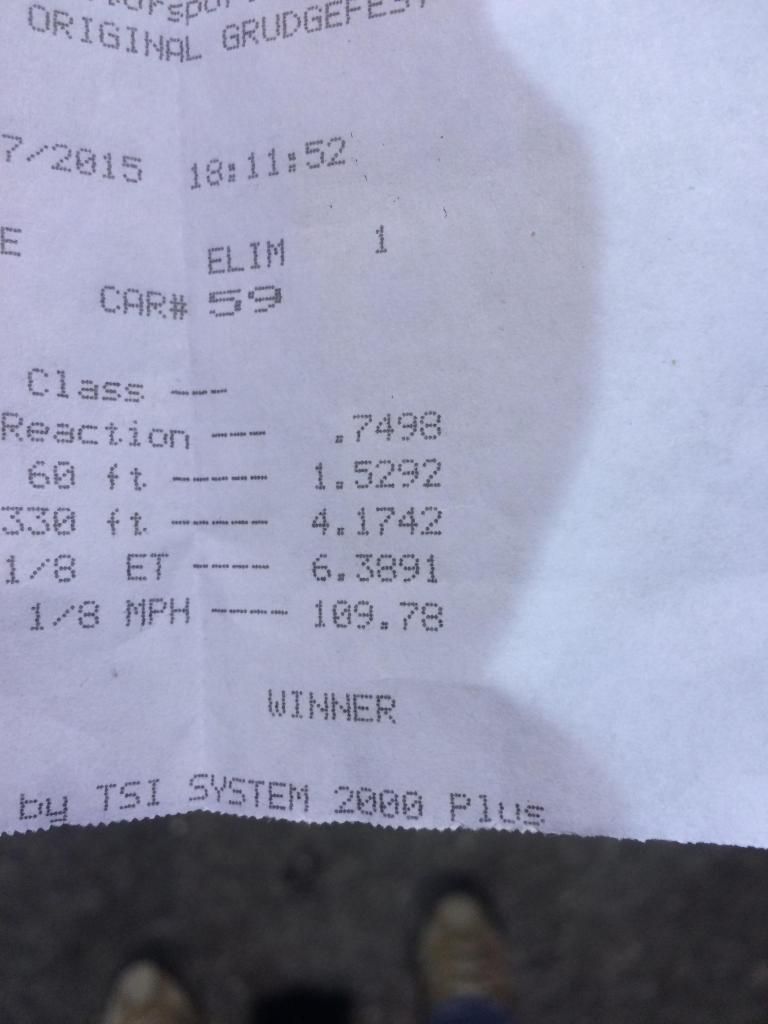
His old build netted around 1500 whp and has run a 6.38 in the 1/8 to this point. I'll hit on just a bit of his old setup.


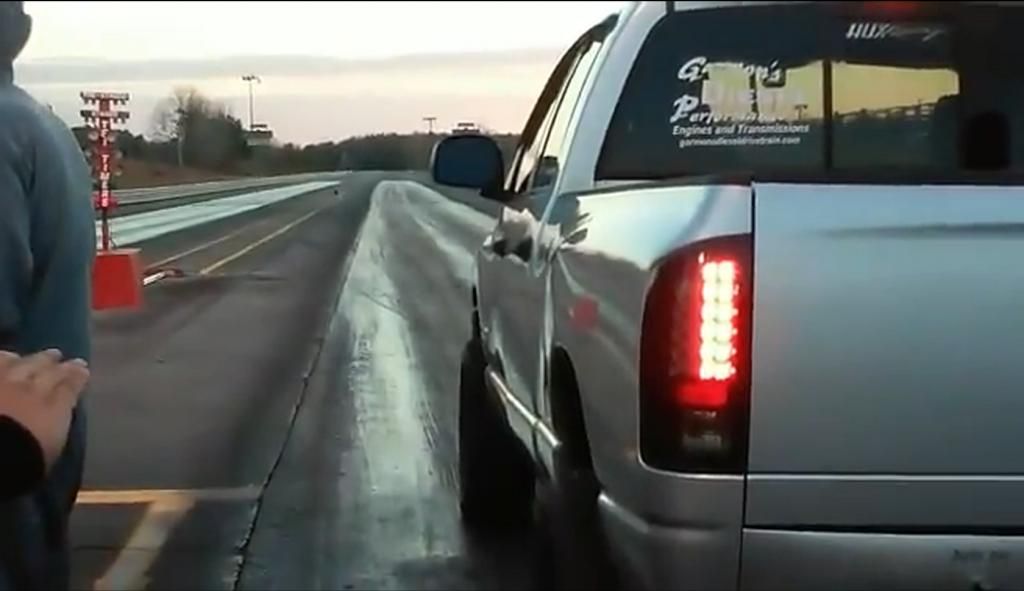
Here is a vid of him taking the track manager for a ride. Street tires so he figured he'd just have a little fun with the guy.


http://www.youtube.com/watch?v=YOpv96EBJ_A?list=PLid5ulDLnH-daxCgLkW7tKV6bffxerc9-


Made a few more passes today. Truck did decent. Spun at about mid-track on 2 consecutive passes, but not too shaby...speed was off a bit from the little bit of spin, but only 3-4 mph from usual.

image-28.jpg


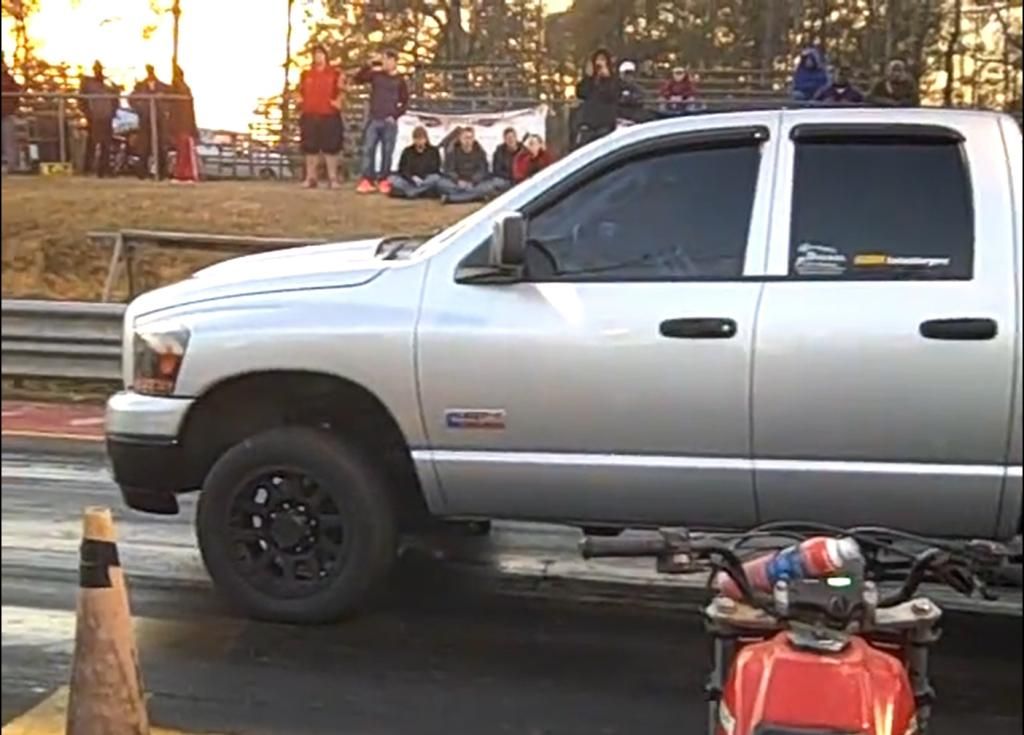
Sorry about the picture quality, I'm pulling these from folks videos....

She gets a little squirrelly when the second kit comes on. lol

Sideways.jpg


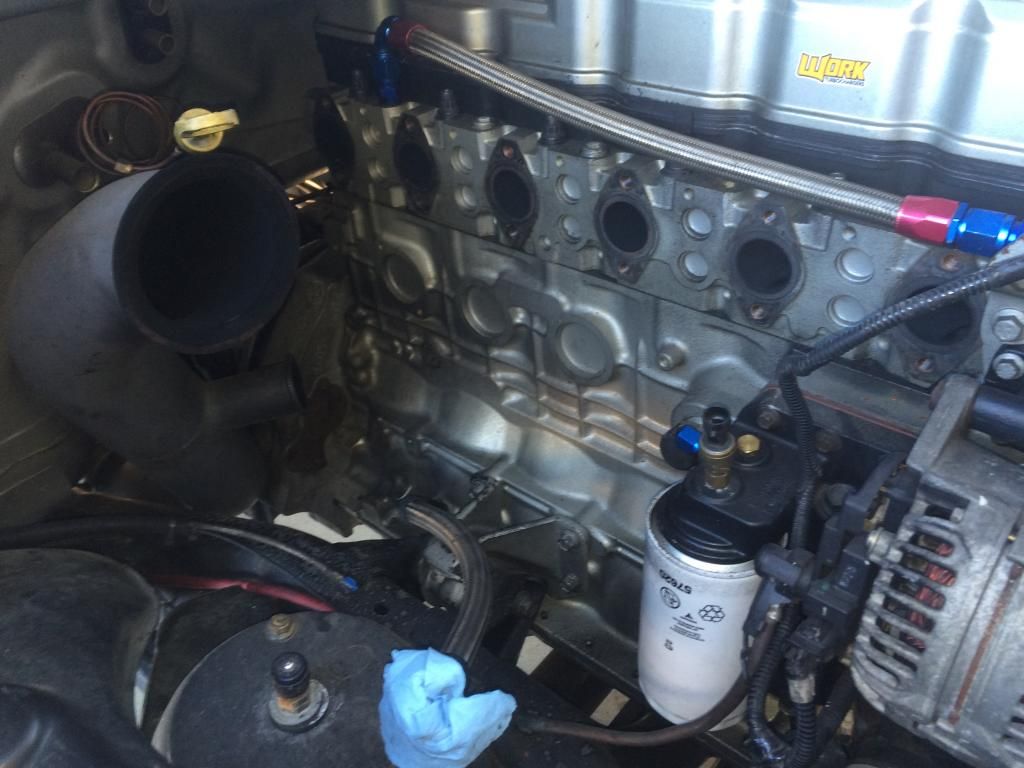
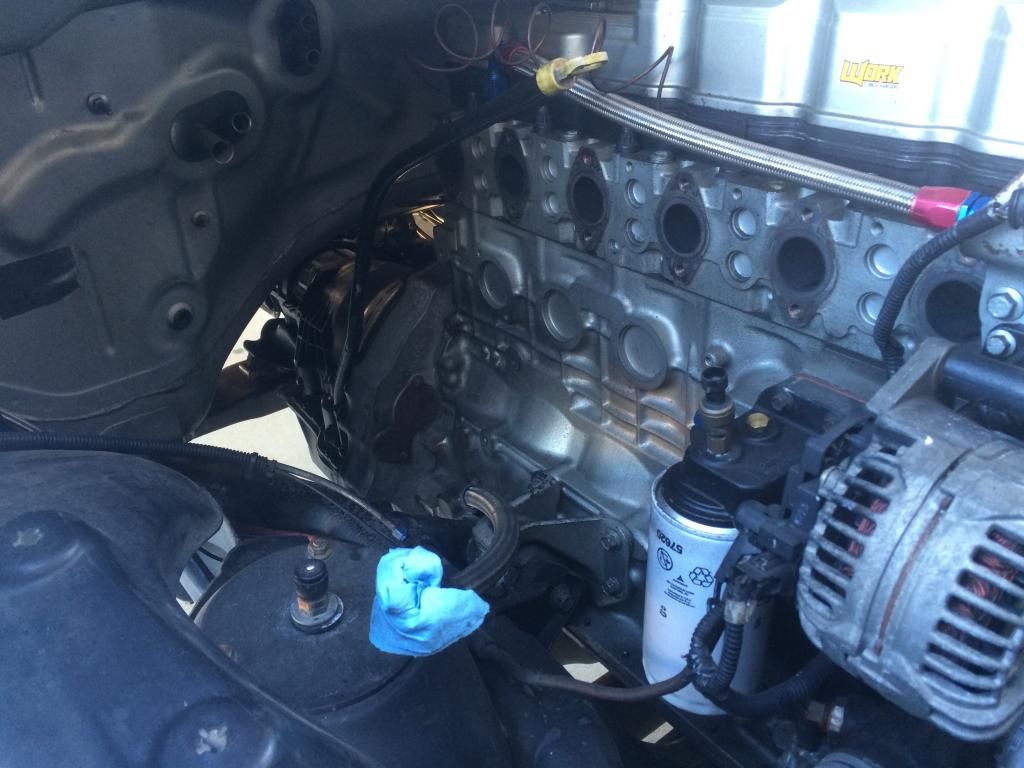
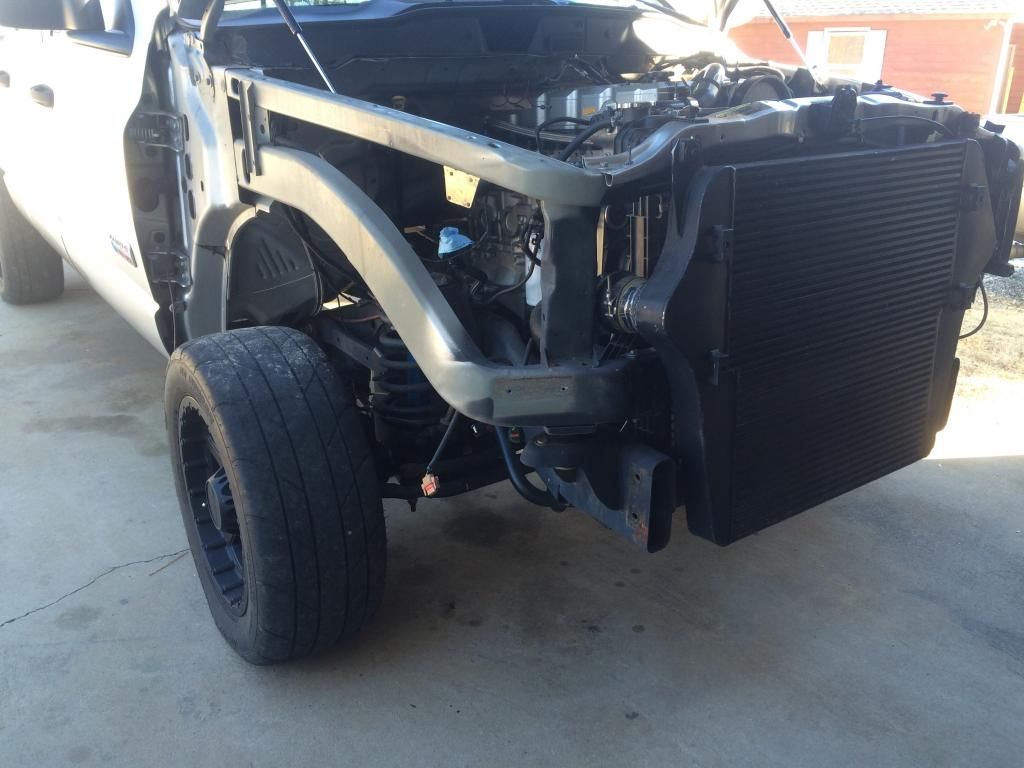
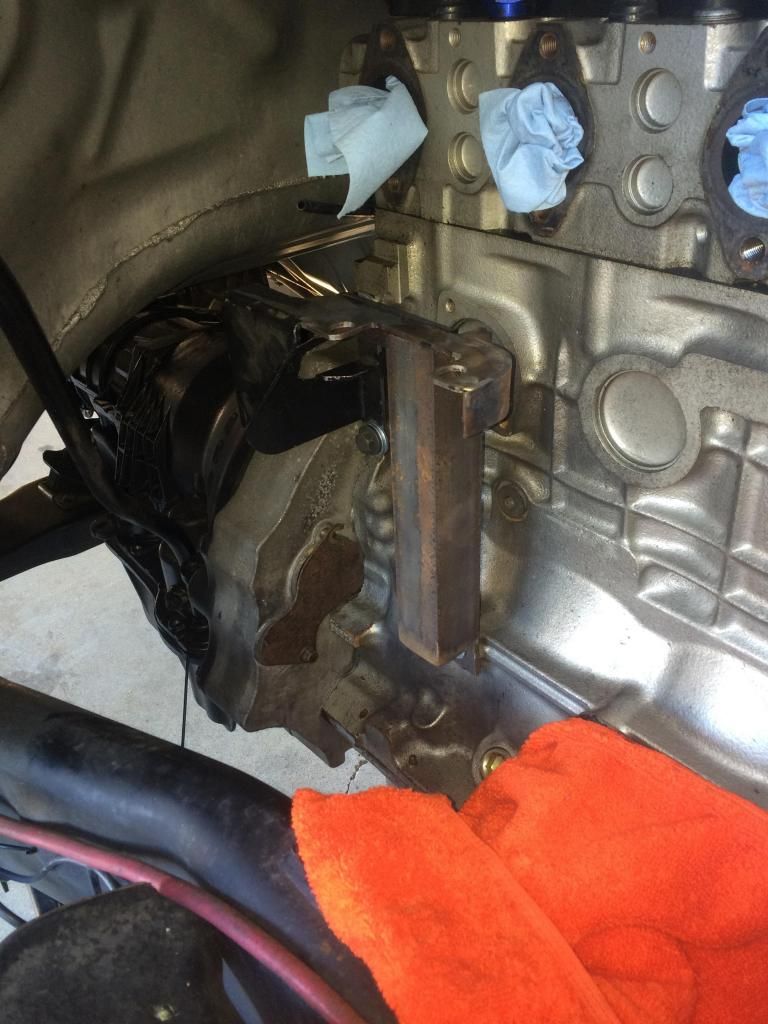
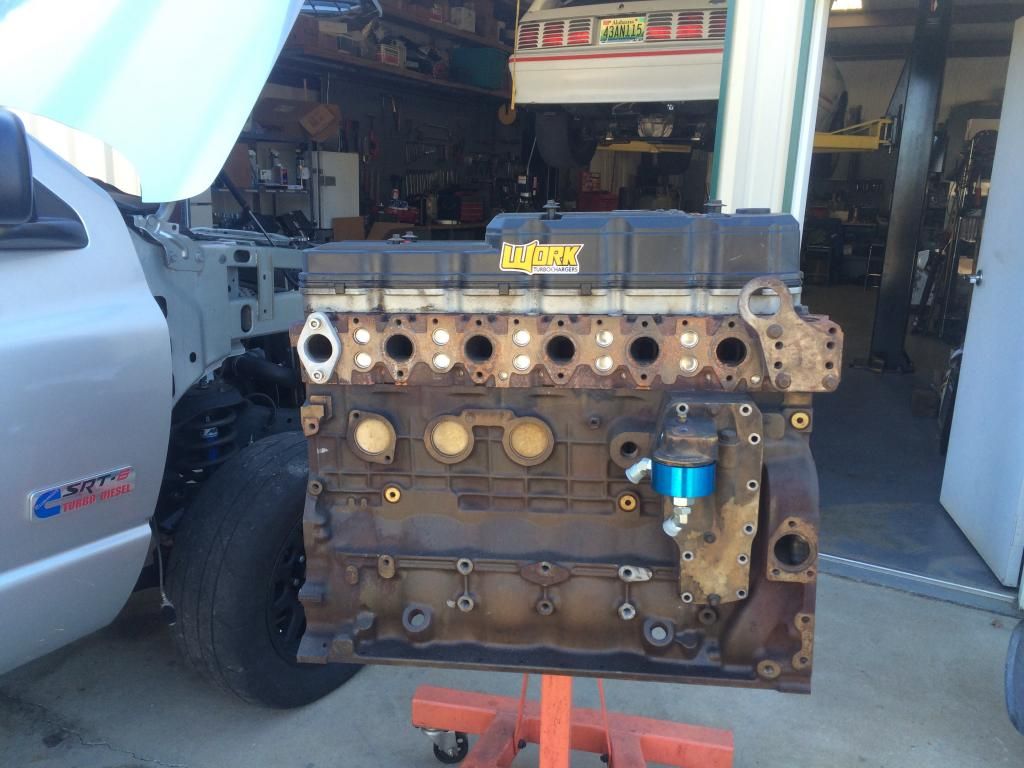
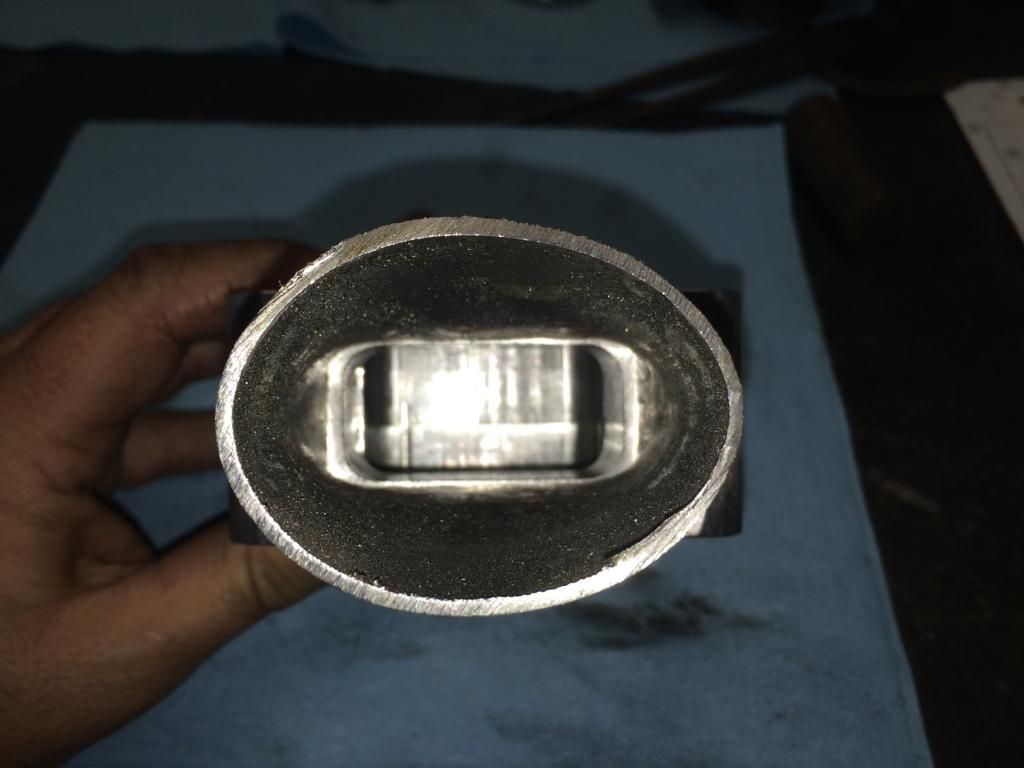
Out with the old.....

image-29.jpg


image-31.jpg


image-32.jpg


image-33.jpg


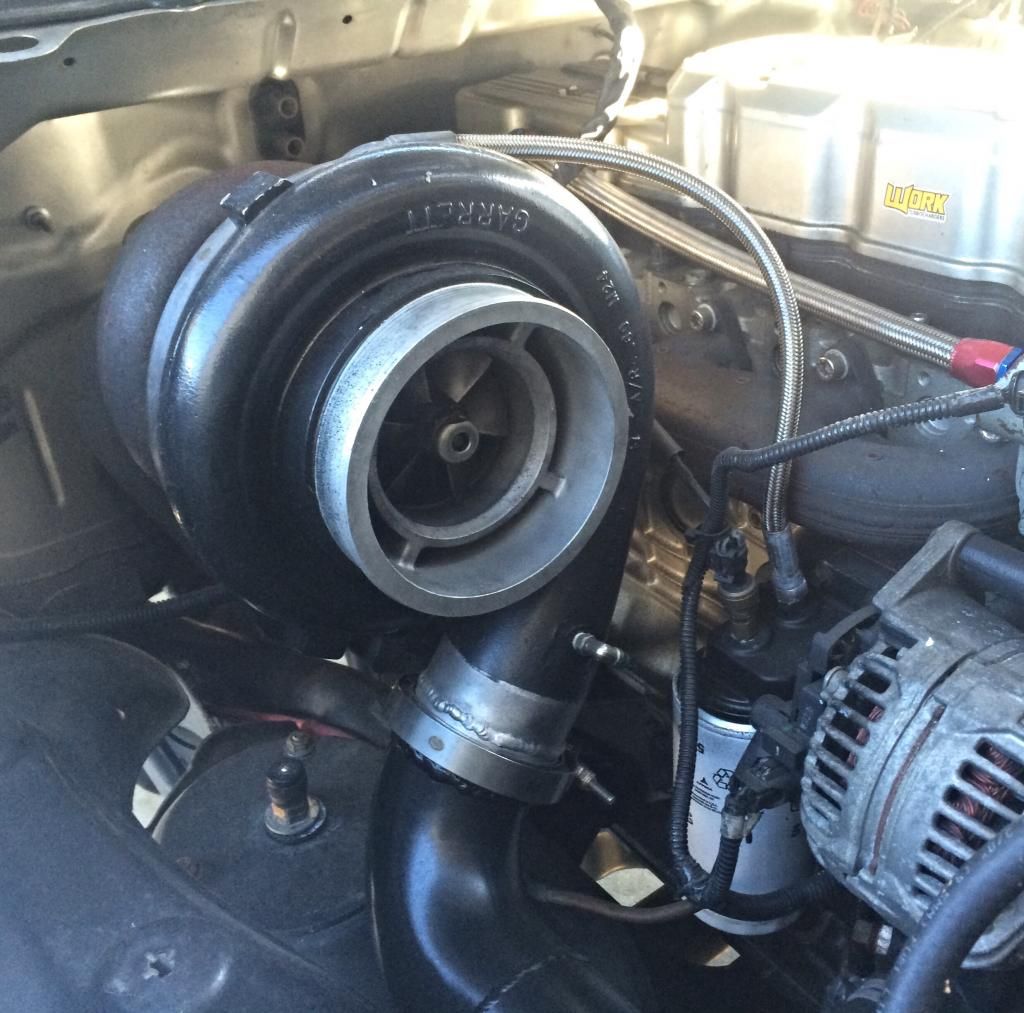
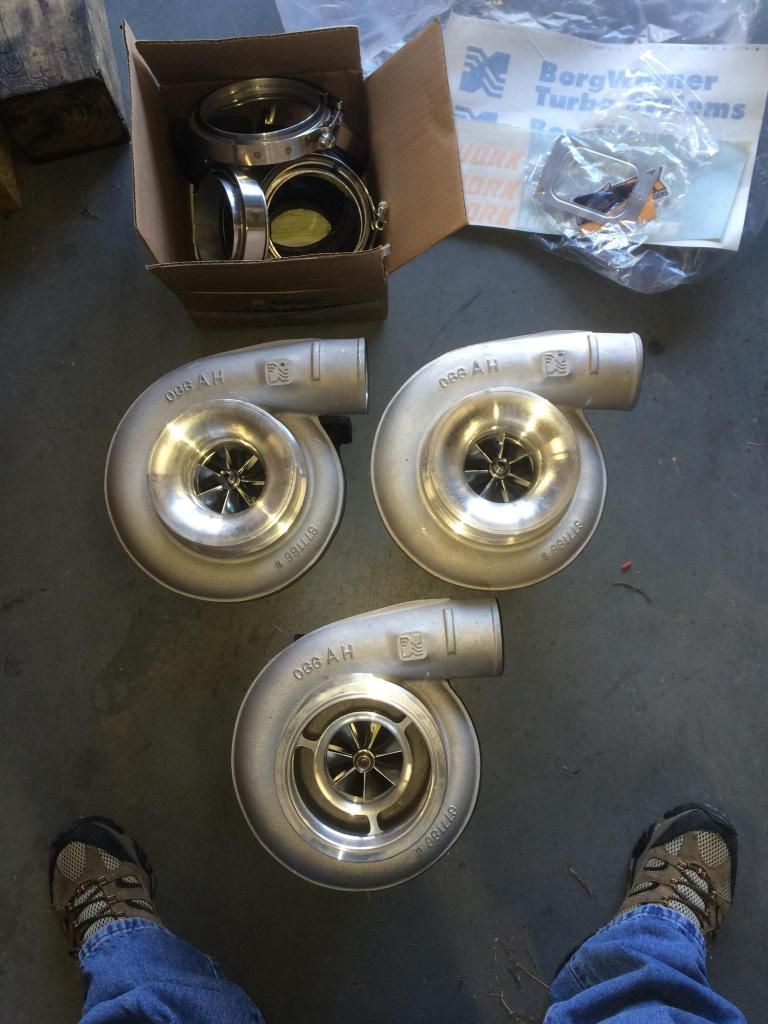
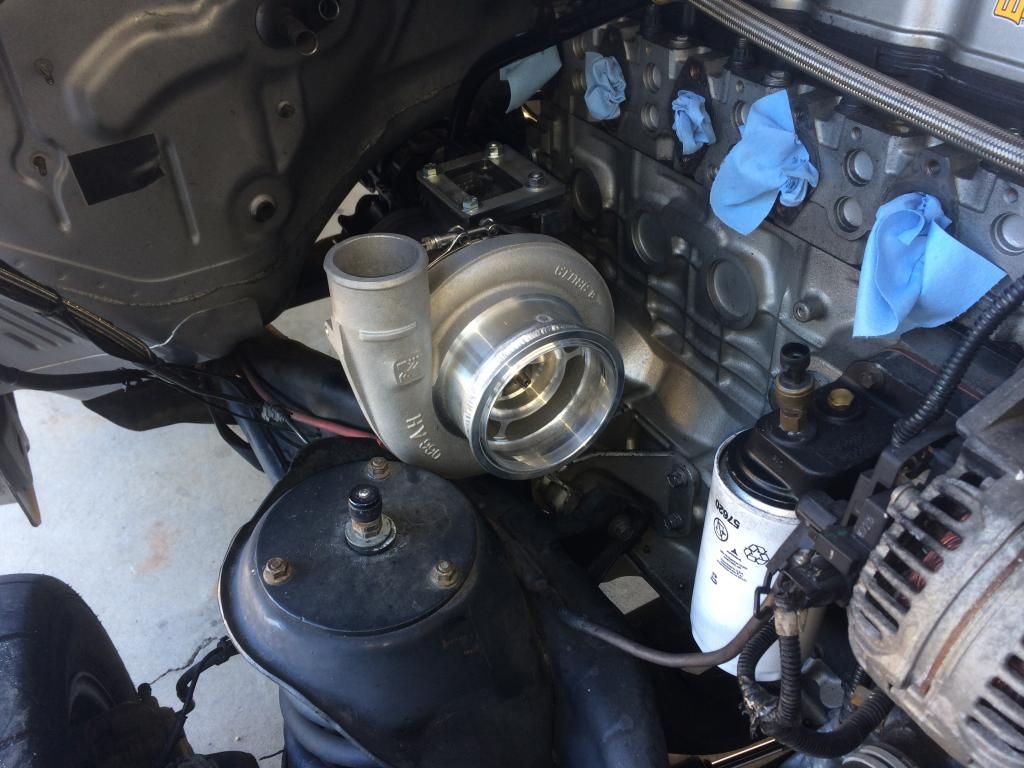
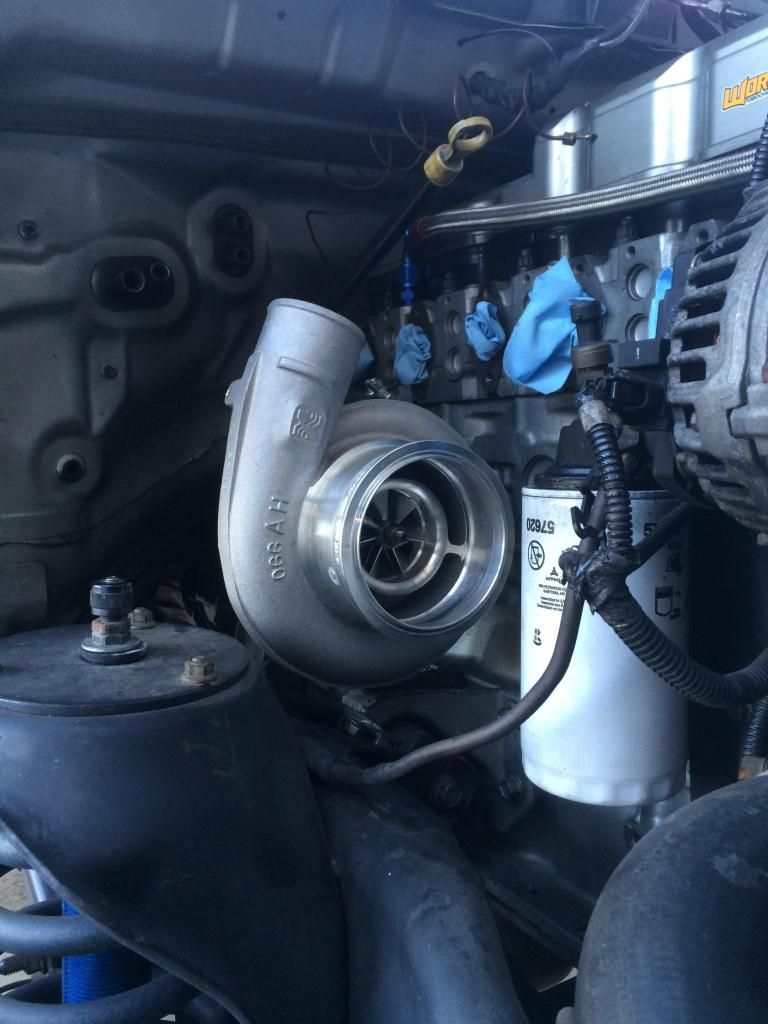
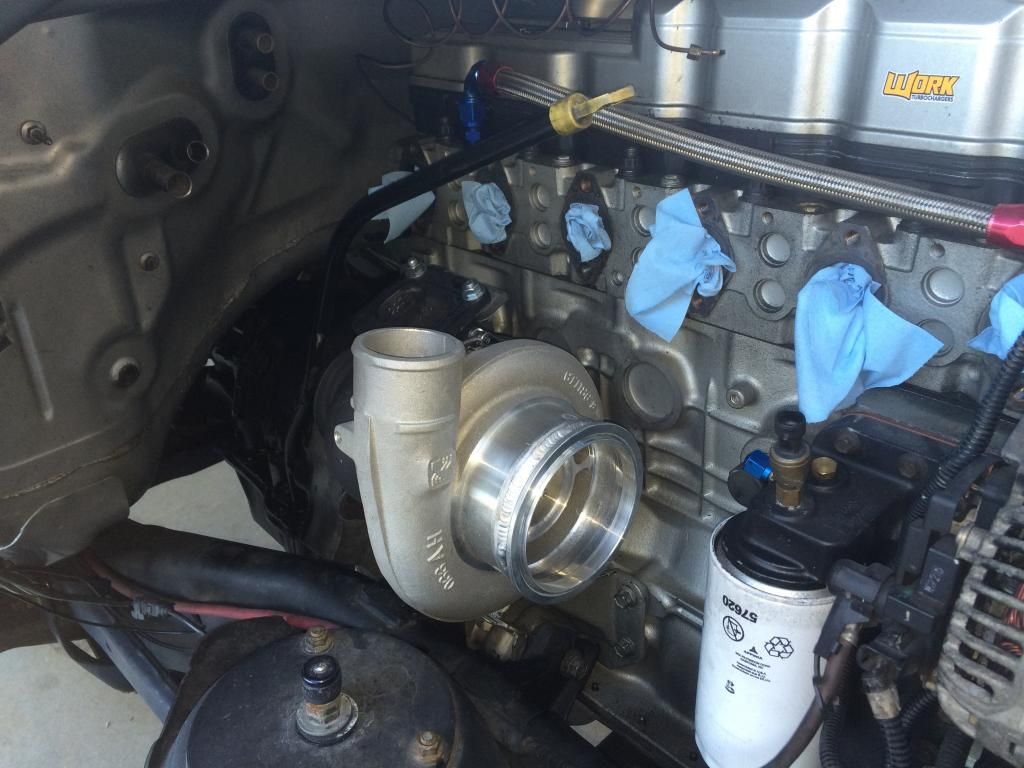
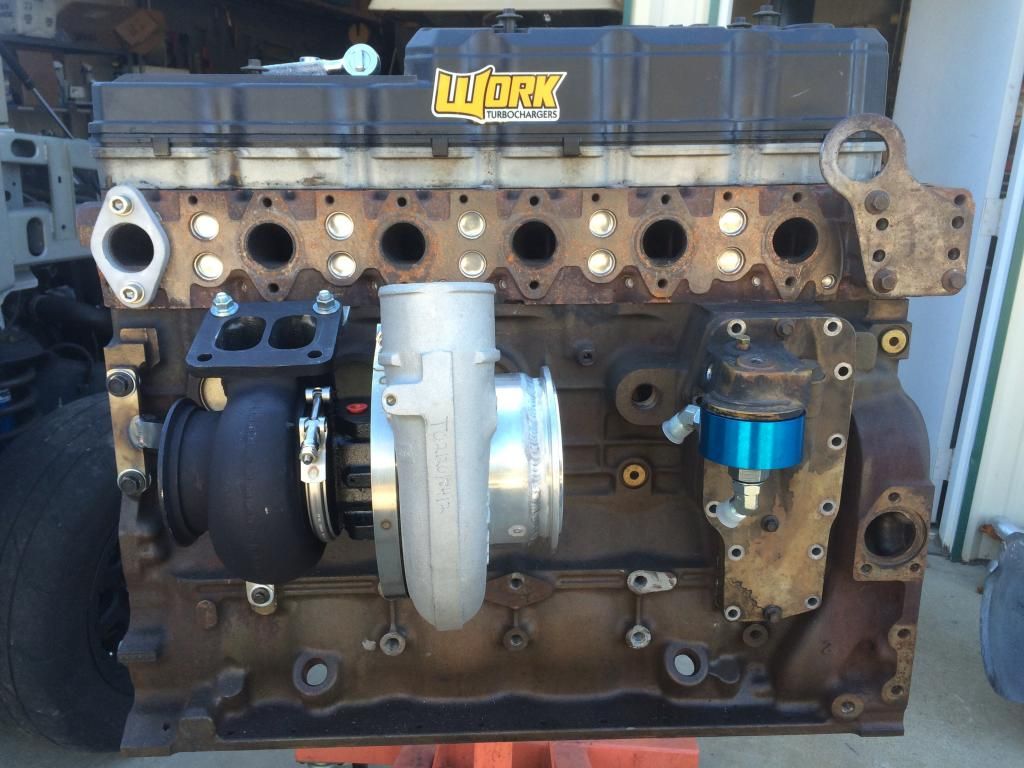
In with the new.....

image-34.jpg


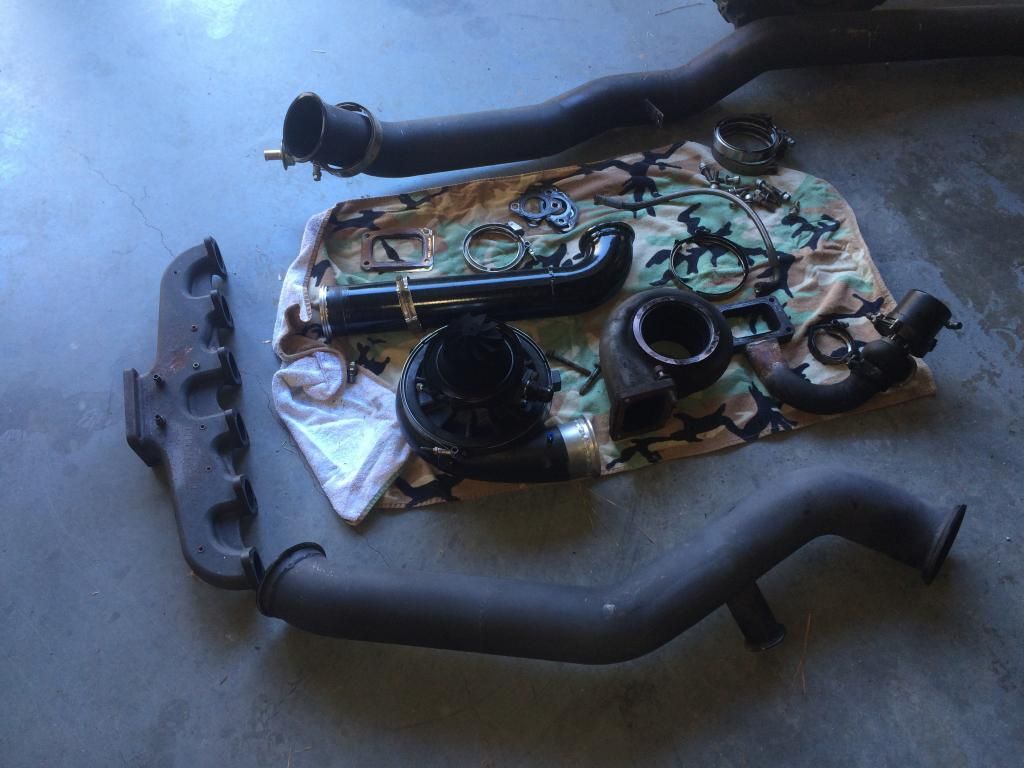
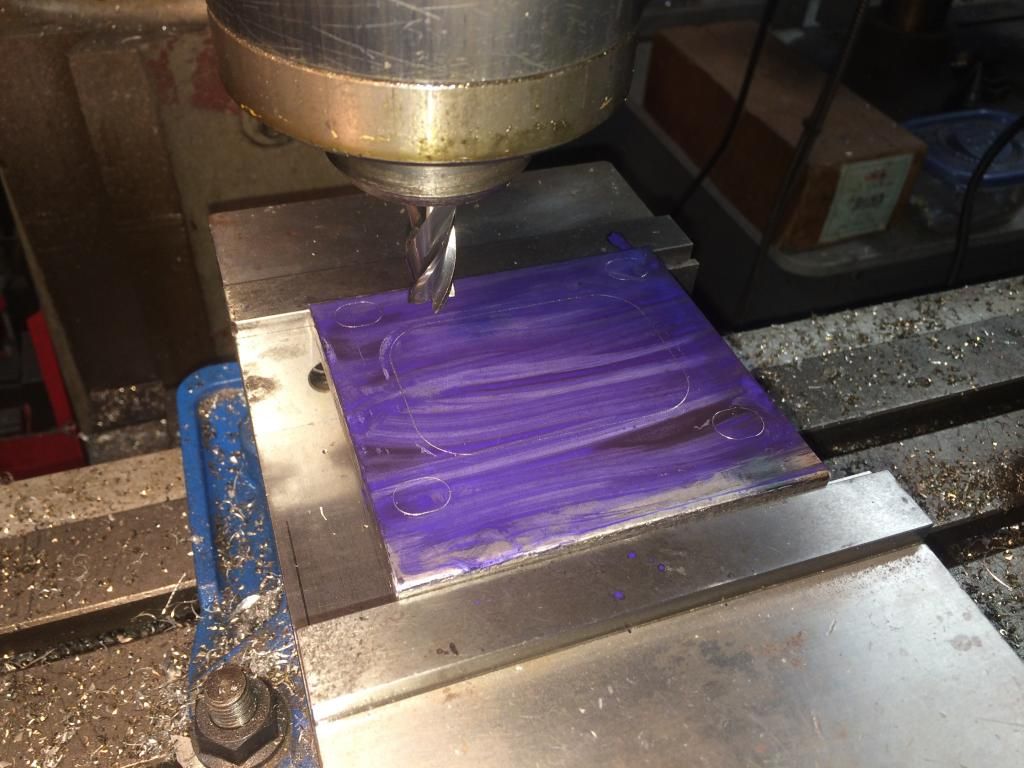
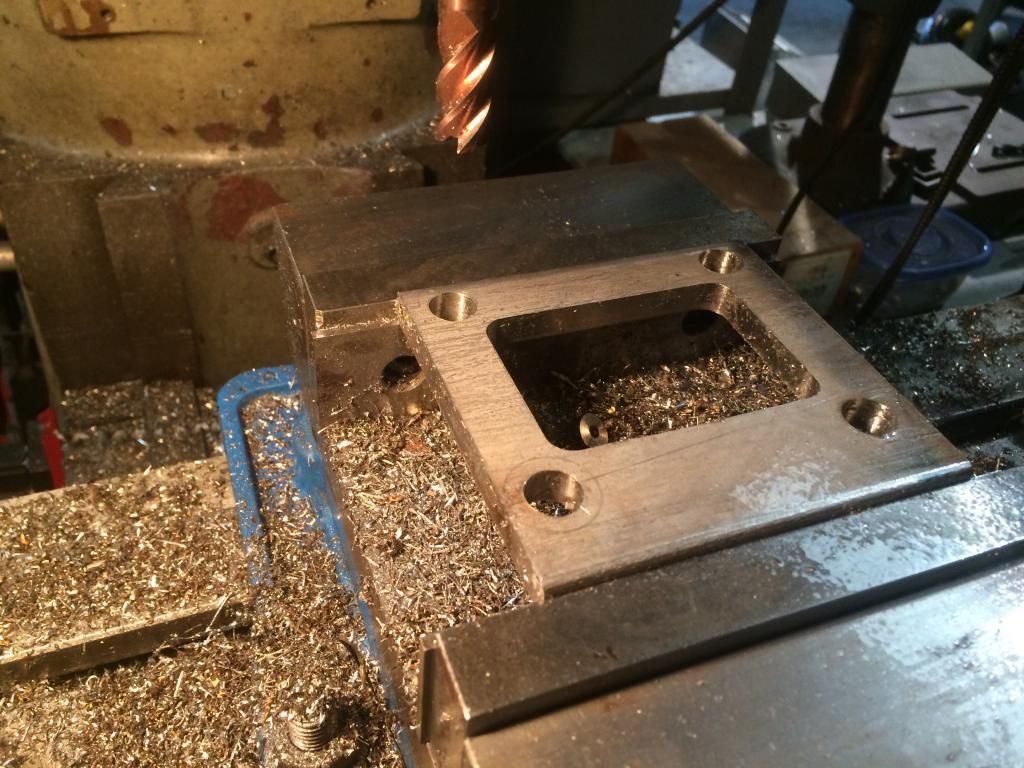
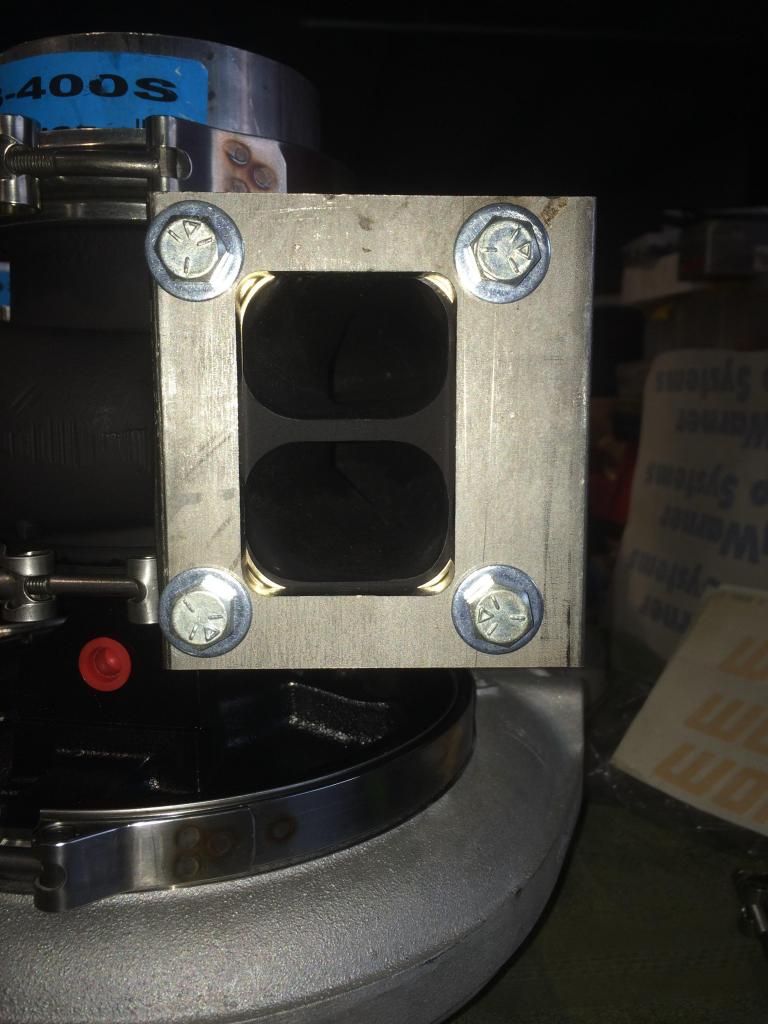
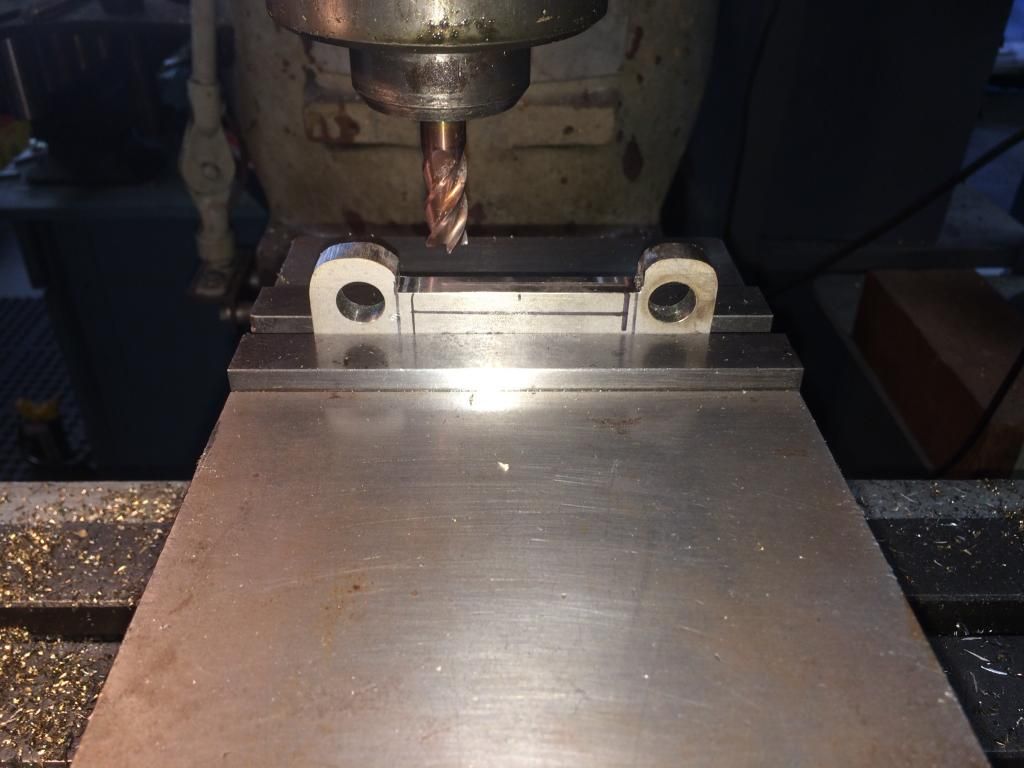
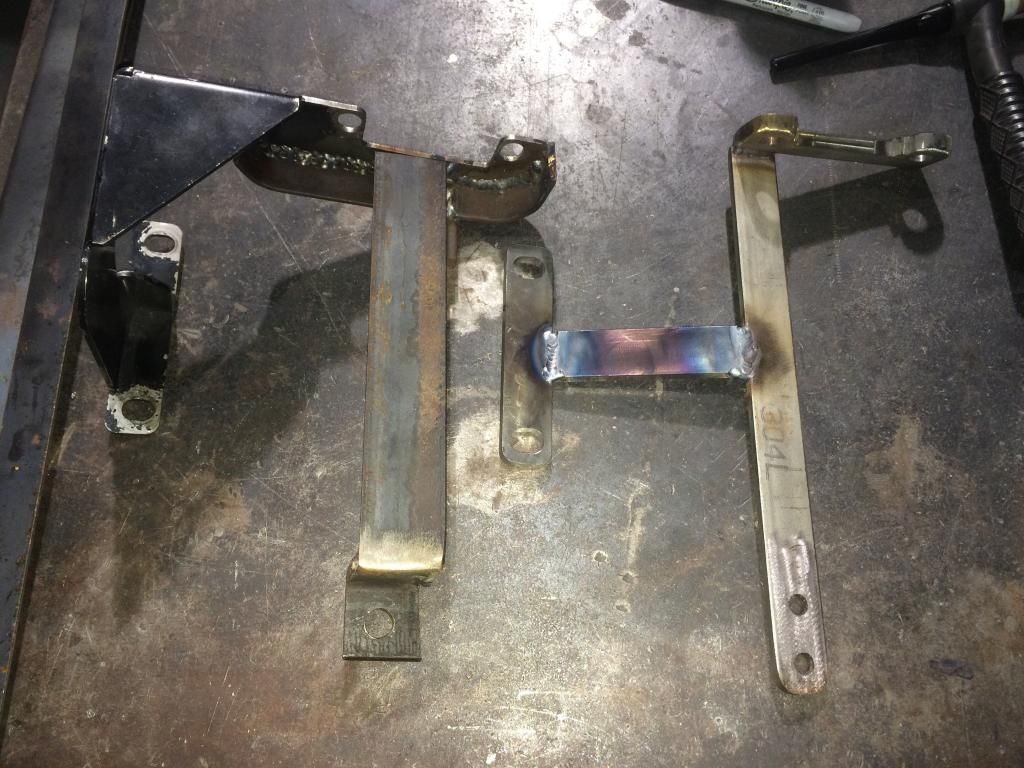
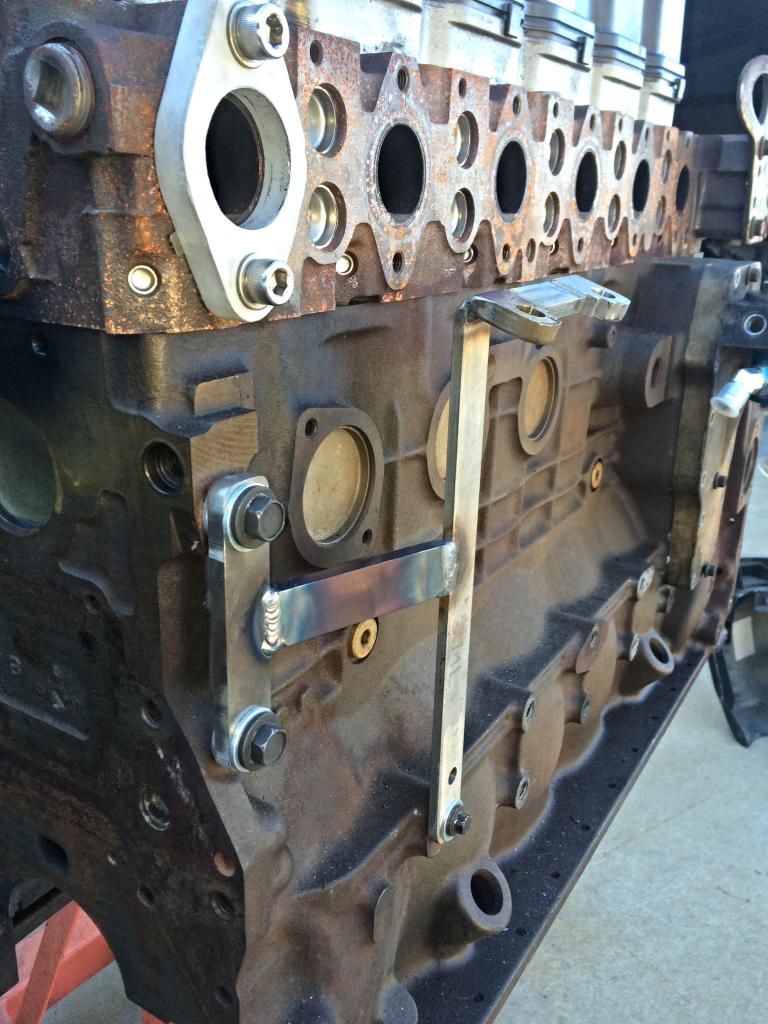
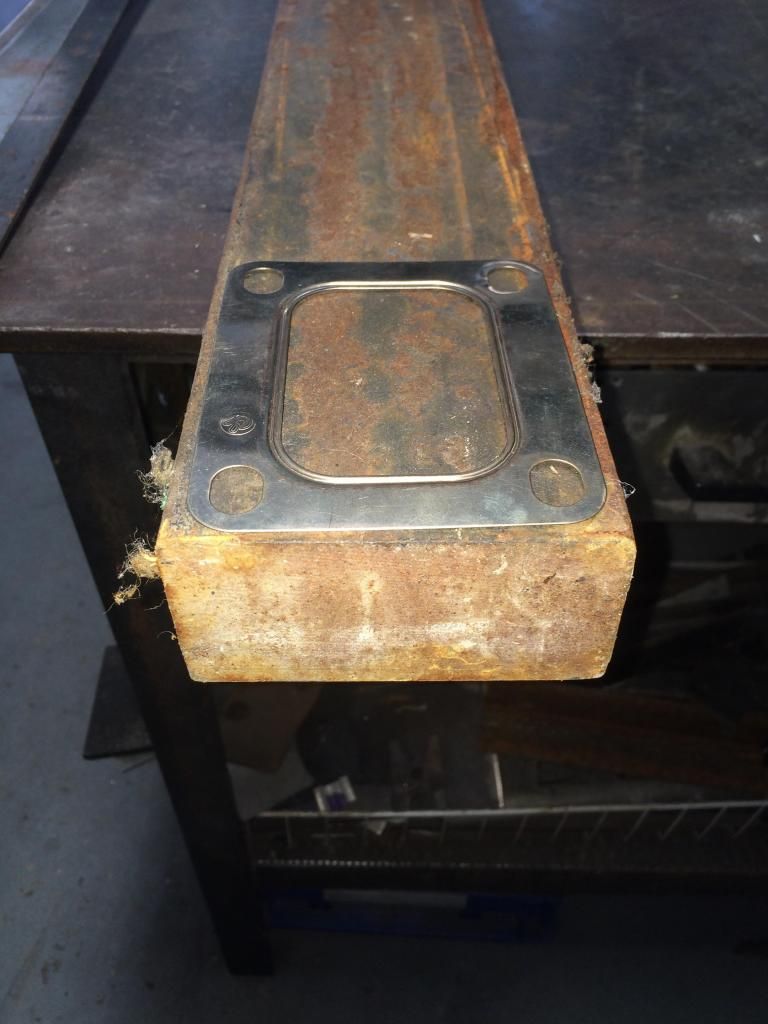
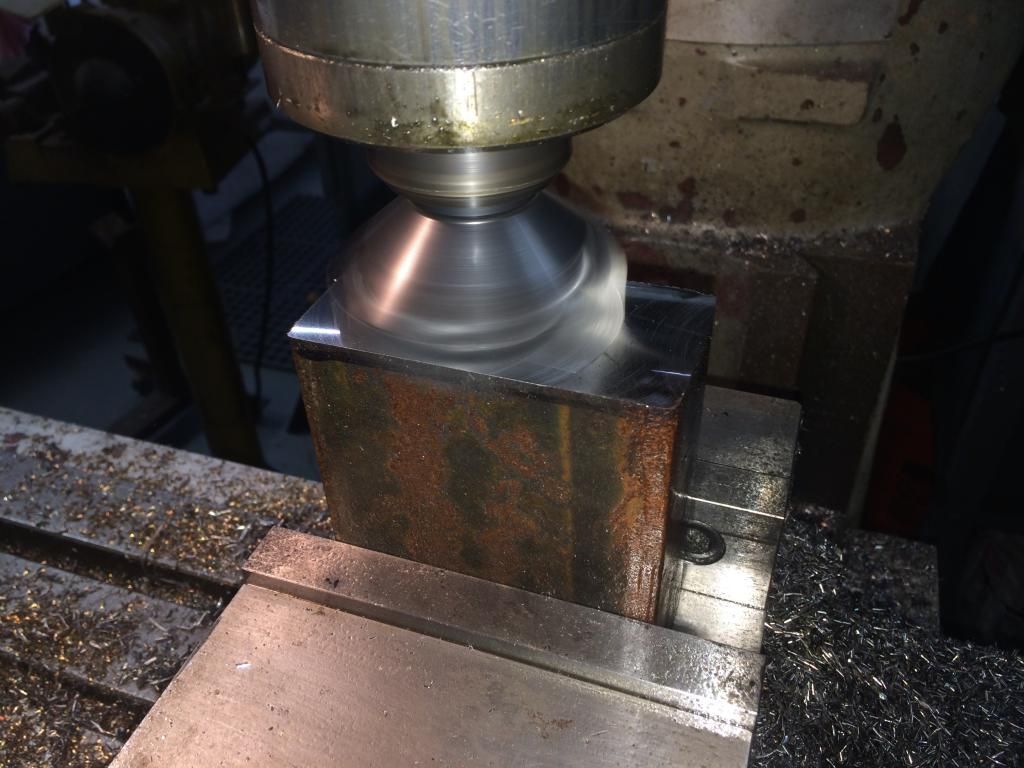
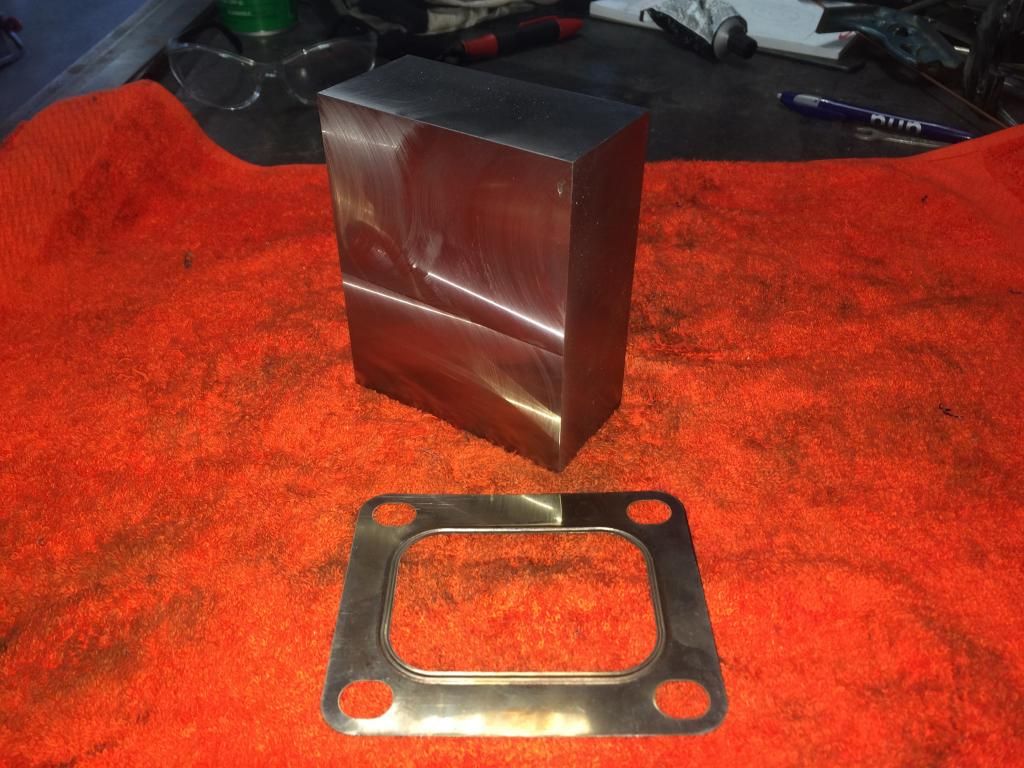
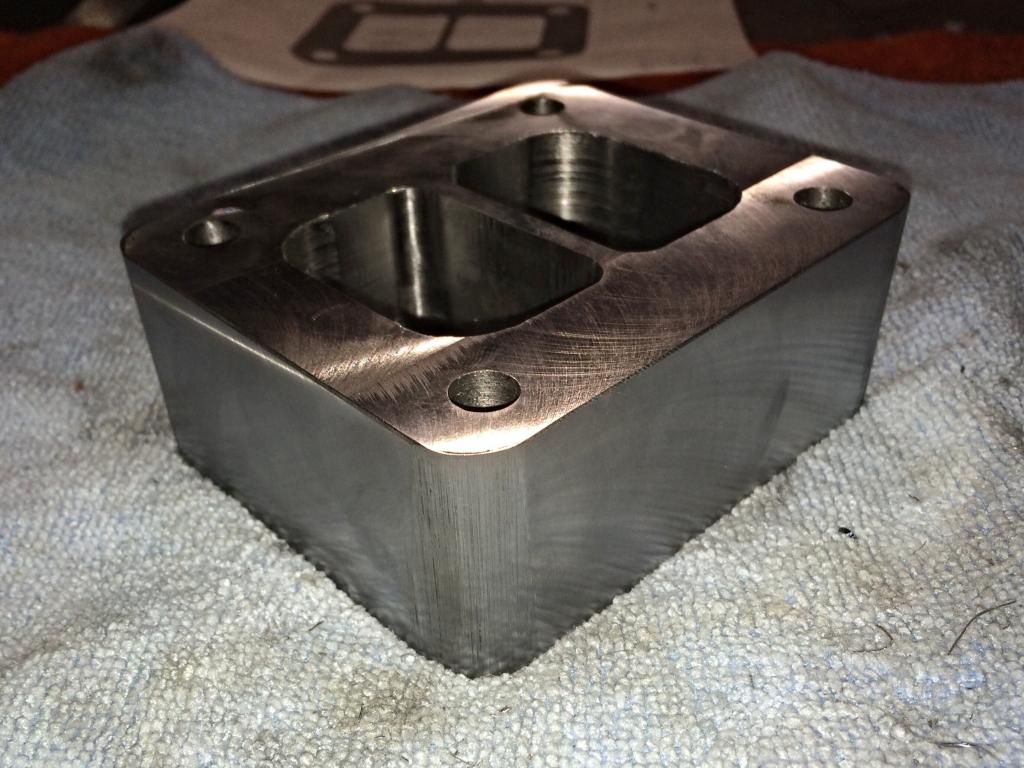
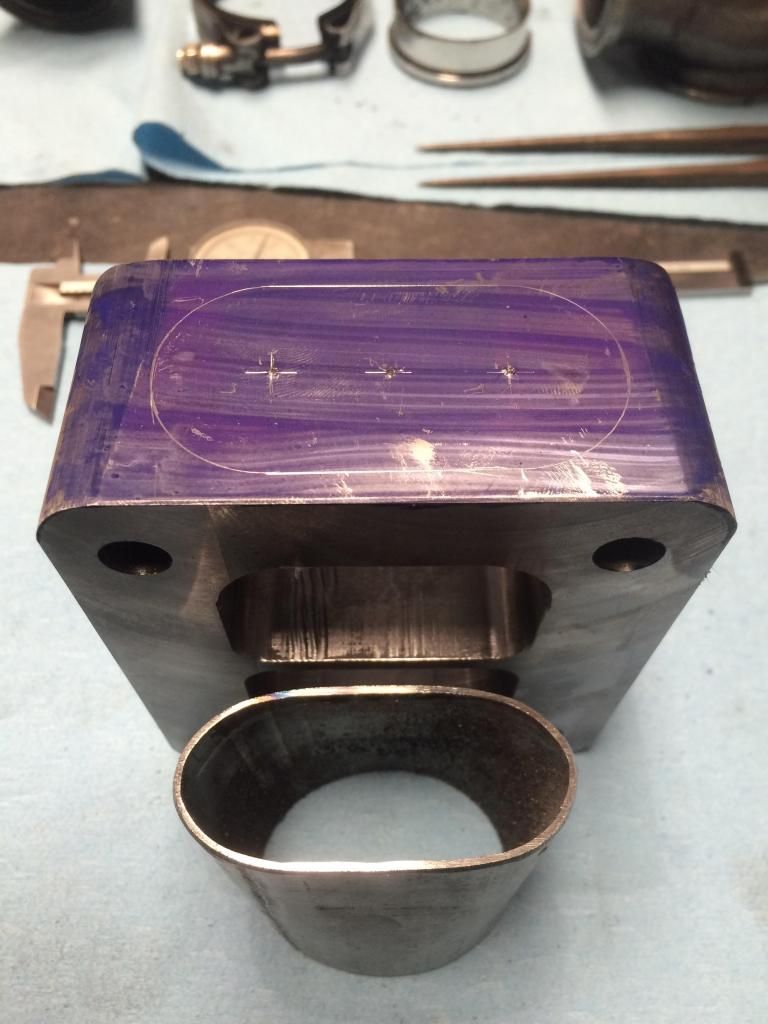
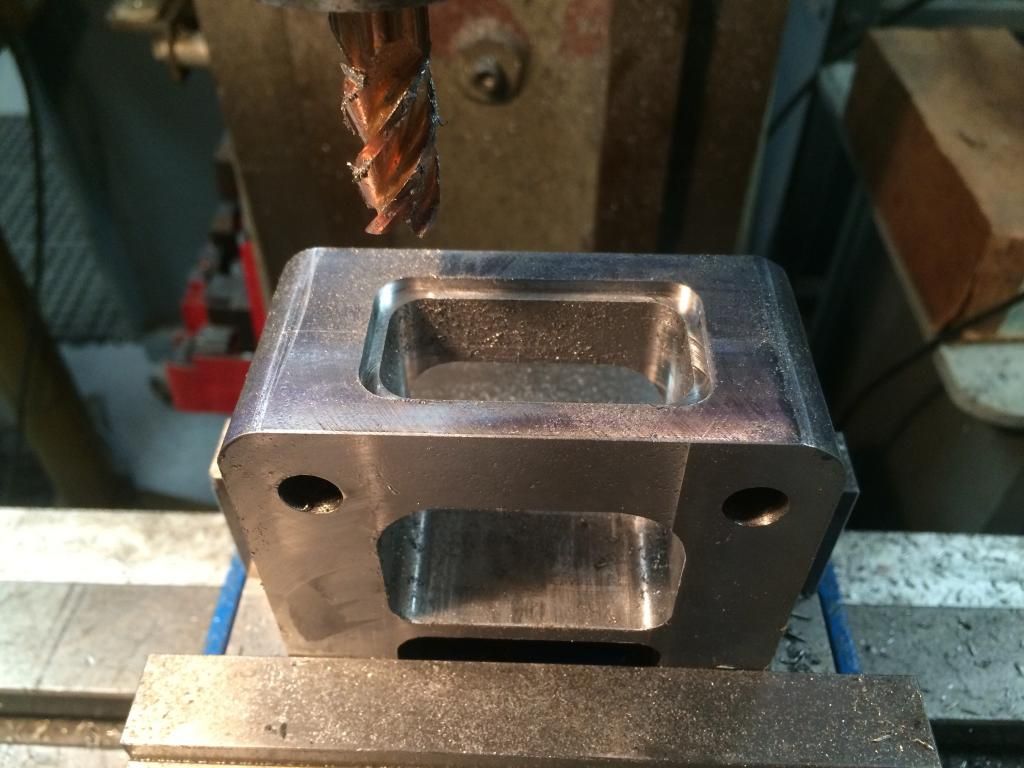
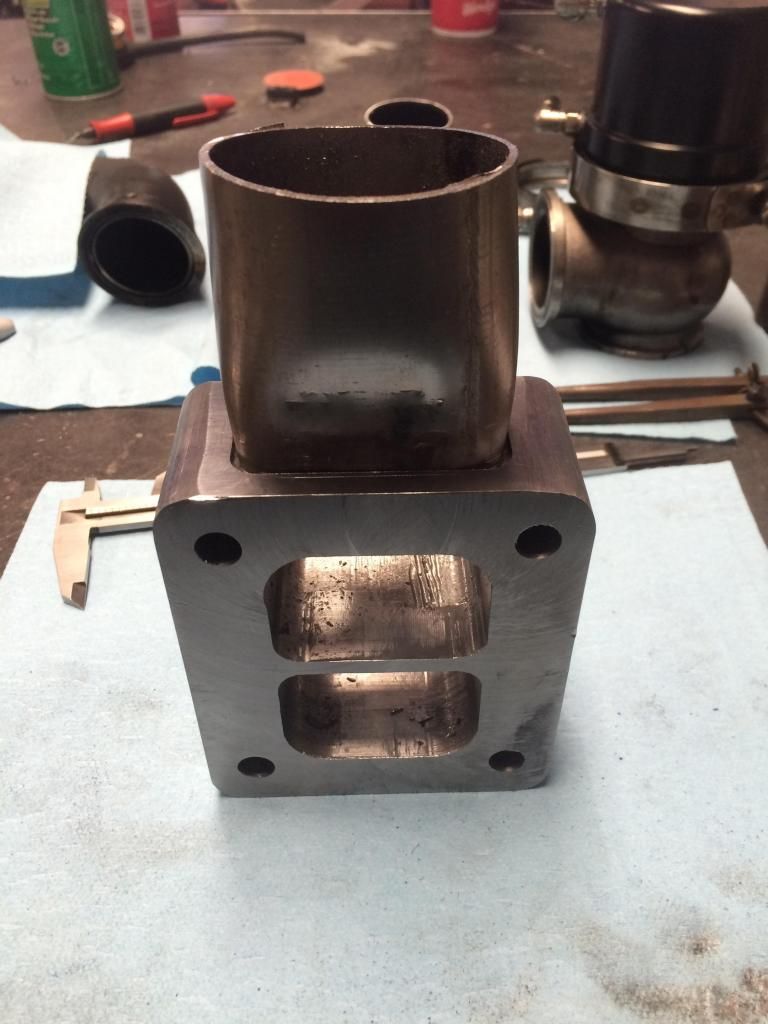
This is just a temporary piece to bolt the turbos to the engine to make brackets and mock-up the piping....

image-36.jpg


image-37.jpg


image-38.jpg
 
Just continuing the progress.


Get this junk outta the way....

image-40.jpg

It's a bit ghetto, but it'll work for right now. I'll make a nice one when I blow it all back apart....

image-41.jpg

Turbo #1.....CHECK! FMW S472.

image-42.jpg

Muuuuuch, better.....now the 72 is right where I want it....

image-43.jpg


image-44.jpg


image-45.jpg


image-46.jpg
Whole lot nicer bracket. lol

image-47.jpg

So here's the plan for today....

Get the mock-up block on the stand...CHECK!

image-48.jpg


Mount the 72 in the mock-up block...CHECK!

image-49.jpg


image-50.jpg


Make the block for the dual wastegates....

image-51.jpg


And then stand around for a while scratching various body parts until I decide exactly what I want to do next. lol
 
More pics.....


Flanges are all set.....


Big Angry's back there goin', "What is this moron doing to me now?"....lol


This is about as far as I can get before heading on vacation. Gonna try and get the up pipe on the back of the 72 done today, but that's a long shot....


Plenty of room to get twisty.....


Gonna try and get this hot pipe at least tacked together today....


Do work, son!....


I think this is where I'm tapping out until after vacation....


More pics from after Christmas...


Merry Christmas to me!

Got back from vacation today and all the piping I need for the header was waiting on me.....


AC is deleted. If you go back through the pics (somewhere), you'll see I used a 12 valve tensioner pulley in place of the CR tensioner. It's flipped around about 180*'s and I just needed to drill a hole for the alignment pin to position it how I wanted.

Don't forget, I also use an electric water pump so my routing may be different than what you need.


Got a little bit done today......it's starting to take shape now.

It's just tacked together right now, but you get the picture.


Starting to look awesome...


Got a bunch more done this afternoon. Just need to run the primary off #3 and plumb into the turbine and do all the welding....


Well, this is about all I can get done this week. I'm out of tight radius bends and just need to finish this one last little section. I have some larger radius bends but they're a little bigger than I want and it just took up more space and looked bulkier than I wanted. I have more tubing on the way, but this is about it until next week.


This is about how the last section will fit. This is just a real thin piece of my mock-up piping....


But, it's starting to take shape. I'm back in school so I won't be able to go buttholes and elbows on it, but I am giving myself Thursday afternoon / evening and some of Friday to work on this thing, so that's when I'll probably update stuff.

 
Nice Work Rich!!!


Let's just see if we can get a little more done today. I want to at least try and get the divider done and the 2 primaries oriented.


Not too much done tonight. I didn't have the piping I wanted to use for the divider into the primaries, so I made the bracket for them instead. Well, made the first part of the support brackets for them.....


Using the radius of the piping to set the spacing between the turbine flanges.....


Just used some 1/8" x 1.5" flat bar for the initial brackets. I'll make some gussets and pretty these up before it's all done....


And here they are being held "sort of" in place. Tom was holding them up for me and with the two of them together it's a bit awkward. They'll actually be slightly farther back and rotated clockwise (as you're looking at them).....


The only thing left is..........everything. lol

 
Pics and Info....


Made a big ole dent in that list.....the rest of the stuff are things I either have to make or really can't do until I actually put the turbos in the truck.


You have an '06 w/ EFILive, so don't sweat going big on the injectors too much. You can turn them way down and make them plenty controllable.


The ones I'm running now are Exergy 250% over with 2 Floor-It mod'd pumps. Even running the big single (Garrett 4718 - 88mm) I could drive it without blacking out the planet if I didn't want to. The main problem was the single was so big that it made no boost below 2000 RPM's. I just pretended that part of the RPM range didn't even exist. It woke up around 2300-2400 and wasn't REALLY lit until 3000 RPM's. Trying to get the truck moving without having to go heavy on the fuel with no boost took a little finesse.

Now, if I just let it eat, there wouldn't be a mosquito problem in North America for a decade.

With the fuel I have now, the truck wont make much more power than what it has. I'm just out of pump. It sits right at 1551 hp now, but that's about all it's got. It'll have enough air 1600-1800 hp and it has enough injector for that, but the pumps are pretty maxed out. If I bring the duration any higher than what I run it at the track the pumps start dropping pressure. Oh well, just need to add another pump. lol :doh:

As for compounds or triples.......how much power do you want? Once you start getting really big with the primary is where you want to look at the triples. Two smaller ones are usually cheaper than one big mofo.


No, actually I'm out of pump at this point. They are pretty much maxed out as it. I have plenty of injector to go higher and now plenty of turbo, but the pumps are the limiter now.

I have no "immediate" plans to rig up a 3rd CP3, but it'll happen....probably a project for next winter. No need for another ECM to control 3 CP3's, it's just further splitting the signal from the ECM 3 ways versus 2 right now.....just a little playing with the Fluke to get that sorted out.

The guys you see running standalone ECM's or piggybacking ECM's are in the older 03-05 trucks. One controls the egine and the other controls all the dash functions.


Combined they can push approx 450L/hr. You can support a little over 3 hp (about 3.2-3.4 hp) per liter of fuel you can move.

450 * 3.2 = 1440 hp
450 * 3.4 = 1530 hp

Like I said, they're maxed out.


1083 hp is on turbo alone, but that is only at 40 - 45 psi of boost on the dyno. The single is so big for the motor and takes so long to come on that it never hits full boost on the rollers. On the track I turn 60 psi. The rest is nitrous.....I spray the living crap out of it.

That picture to the right in my signature is what happens if I forget to turn the timer on for the second stage and it all just hits at once.......tires don't stand a chance. Even delaying the big hit out to around 2.0 - 2.2 seconds it still blows the tires off half the time.


Just look at the compressor maps for those primaries and you can see what they can really support. For every pound per minute of air you can move, you can support approx +/- 9 hp. 1000 hp needs about 110 - 111 lbs/min. Between my two 67.7's......I have about 84-85 lbs each before I really start pushing the map. 170 X 9 is about 1530 hp....that's keeping the compressors in the 70% efficiency island. Plus......I still have 2 bottles in the back. ;-)
 
Wished I had the skills and equipment...


Got the reducer for the secondary done today. This will neck down the inlet from 5" to 4". No need to feed the secondary with 5" pipe and use up all that space.

Just started with a piece of 1/2" thick aluminum I had under the welding table....


Hadn't used the baby lathe in a while.....now I remember why. Going .010" at a time vs .250" at a time takes a "bit" longer....


Test fit to the 5" aluminum v-band....


Boring out the 4" inside diameter....


Turning big metal into small metal....


Outside diameter....5.000" dead on the money.....


Inside diameter....4.000"


Now I need to trim back the compressor inlet about an inch and a half and reweld the v-band flange back on. Then it'll clear the filter with no issue.....

 
Chime in Rich if you want.....


Chop chop!....


Got the flange out intact....


Trimming back the inlet to the compressor housing....


Trimming it back far enough so that the v-band would be able to clear the weld....


Cutting back the compressor outlets so I can weld on the v-bands....


Now I gotta head to class. I'll get to welding later on....


Yeah, it's been through 3 generations. Works good for little stuff that you don't wanna set up the big lathes for, but man it takes forever. Even turning aluminum it'll only let you pull .010....maybe .020 if you have a REALLY good cutter.

I'm used to cranking up the big lathes and pulling .250" off at a whack. Anything less than .030" and it's not even worth setting up the big lathe.


Now we have some room to work with.....


Let's see how bad I can jack up the welds on the aluminum. Aluminum always kicks my butt and I haven't welded it in about 6 months or so.....


Not TOO bad. I did have one little bit of burn back I had to touch up, but it's certainly not my worst welds. It'll do for a bit of redneckery....


All welded back up and now it has plenty of clearance for the charge piping. There is just about 5.5" between the front of the flange and the oil filter and the radius on the elbow is 4.125"...

 
And some more....


The forward header will just be a 90* turn down into the turbine. For the rear header I'm using a tight 180* bend that will run just slightly over the forward header and it'll dump into the turbine. That's why I put the forward header slightly lower than the rear header and left a little space between the two of them.

Each of the collectors will have v-band on it. That way I can remove either header separately or the section going into the turbine. It'll be a 3-piece setup, that way if I need to work on or get to stuff I don't have to remove EVERYTHING.


The parts fairy came a-knockin'.......lets make more goodies....


And this is why I had to be so tight on the tolerances.....


AND more........


Now the fun stuff.....

Gotta make the divider to split the exhaust into the primaries.....


Fitting a test piece into one of the flanges....


Here's the tricky part.....sectioning the two pipes so that the two 2.75" pipes merge into one 4" pipe.....

The pipes get offset 45*'s to form the 90, then each pipe gets 98*'s worth of the circumference taken out of it and tapered back so each pipe splits evenly and divides the exhaust flow without some big bulky divider. Right from straight pipe and into the turbines without a huge disturbance in flow.

Here's how you set it up.....


Aluminum Piping : atpturbo.com

There are a bunch of places that have them and I usually use the ones from Vibrant, but they only have them up to 3" and I needed a 4" for the compressor inlet. 2", 2.5", 3" and 3.5" are pretty common and occasionally you can find 4" and 5".

I use these for compressor discharges, intercooler inlets/outlets, elbows into the intake plenum, etc.

These cast ones weld pretty well, you just want to pre-heat them a bit when you're welding them to thinner stuff like flanges.

The lips on them are bigger than the specified OD, so they hold boots and clamps well too. I have to grind down the lips to use them with flanges and piping.


Yes Jeff! Please call me when this happens!!!!


I can't wait to see you play with that beast on the rollers!:thumbsup:
 
Continuing.....


Just needed an excuse.....lol


Here's what I was working on yesterday. This is the piece I ended up scraping....it was coming out okay, but I just wasn't happy with the wall thickness and radius.....


Nailed the cuts and the piece came out within 1* of my target.....


But, once I started working it over and transitioning it to 4", I realized it was just too thin for this part....


So now I gotta order the stuff I wanted in the first place. Oh well, can't make an omelet without breaking some eggs.


Whew Hew! The magic parts fairy just dropped off more fairy go-fast parts! lol

Looks like I might get a little more done this weekend....


Got a little done today....


Now it's getting close...


Wanted to get a little bit done before heading to the track....


Got more manly parts........but I'll use them anyways. ;)

This will be the 3" OD aluminum charge piping and the small stuff is 2" OD 11 gauge 304 SS for the wastegate piping.


Glad I just filled all the argon bottles.....fixin' to get ignorant this weekend.

This is everything to finish the header. Once the header is welded up it and the secondary can go on the truck and I can start making the brackets to locate the primaries and get them where I want.


Alright, back to our regularly scheduled program....

I think this is where I left off last....doing the elbows and flanges for the discharges on the turbos....


Here's what I had going on this afternoon. Started working on the piping off the headers and into the secondary turbine. I had to work on this because the box of bends that showed up didn't have the tight radius bends that I ordered....they sent the larger radius ones that I already have plenty of....so I couldn't finish that one little section on the front header.

First, finished up the flanges on the collectors....


Then started working on the piping to the turbine....


And this is as far as I got tonight....


When's it gonna be done Rich?? I need a ride :)


Correct. Everything will get tacked, test fit on the truck, then pulled off and the final TIG welding will be on the bench. I'll be bolting down and fixing as much of it as I can to prevent excess warpage. Stainless like to draw up pretty good when you weld it, so the flanges need to be bolted down to prevent warping and the piping needs to time to cool between welding sections.


Reworked the pipe coming off the rear header today. Wasn't happy with how high it had to stick up to clear the #3 primary so I pulled it off, sectioned it out and used multiple compound curves to keep it fairly low and still clear everything....


Yeah purging makes the inside of the welds come out REALLY nice when you get full penetration of the weld. I'll grab a piece tomorrow that I was working on without purging and you can see what it looks like inside.....it looks like really fine cottage cheese because it doesn't have the protection of the argon.


Yes, I have a 3rd argon bottle and regulator that I'll setup when I weld the header.

If you don't purge it you actually get a pretty significantly reduced diameter where the slag forms on the inside of the weld. On big stuff (exhaust pipe, etc) it's not that big of a deal. But, when you get .100" (x4) build up of slag inside a 1.55" ID pipe, you cause a significant restriction. You end up with a pipe that flows like a 1.15" ID instead of 1.55" ID.
 
Closing in....


I think this will be my next piece to work on. Gonna pull that flange of and fit the piping to transition into the turbine. It'll be a lot easier to slighting splay the pipes so welding between them isn't such a PITA.

I decided to gate the pipes directly instead of using the plate. I have plenty of good spots that will flow to the gates better than having to go 90* from the exhaust flow. I'll be able to put each gate right at a bend so it flow straight to the gate, which is how you ideally want it.

I'm seriously thinking about taking the truck for a ride once the headers are done and it's on the truck. Just want to see how well it responds to this setup. I know I have a down pipe that'll fit, just need to whip up a temporary charge pipe.


This is what it looks like on the inside of stainless when you don't purge....


The outside might look awesome, but inside looks like crap.


Just stuff a rag in the ends and tape the joints. You don't want to do the whole pipe at once, it'll get too hot and distort.

You just run a piece of hose off the regulator, put it INSIDE the rag at the opposite end and start going. Do one weld on one pipe, then move to another pipe and let that one cool....repeat.


Gettin' a little bit done today....


Instead of cutting it and rewelding.....little trim off the top...


Well, can't say I'm overly pleased with the end result, but it'll hold.....

First, welded the inner portion of the tube together and sanded them flush....


Then bolted the flange to the wastegate plate to keep it from warping. Just waiting on it to cool and I'll weld the inside too. I really should have put the flange on the hot plate for a few minutes. It ain't pretty, but it'll git 'r did.

The bar stock on top of the pipe is just tacked to keep it from warping.

 
Back
Top