02, PPump 24V build.

ahale2772

New member
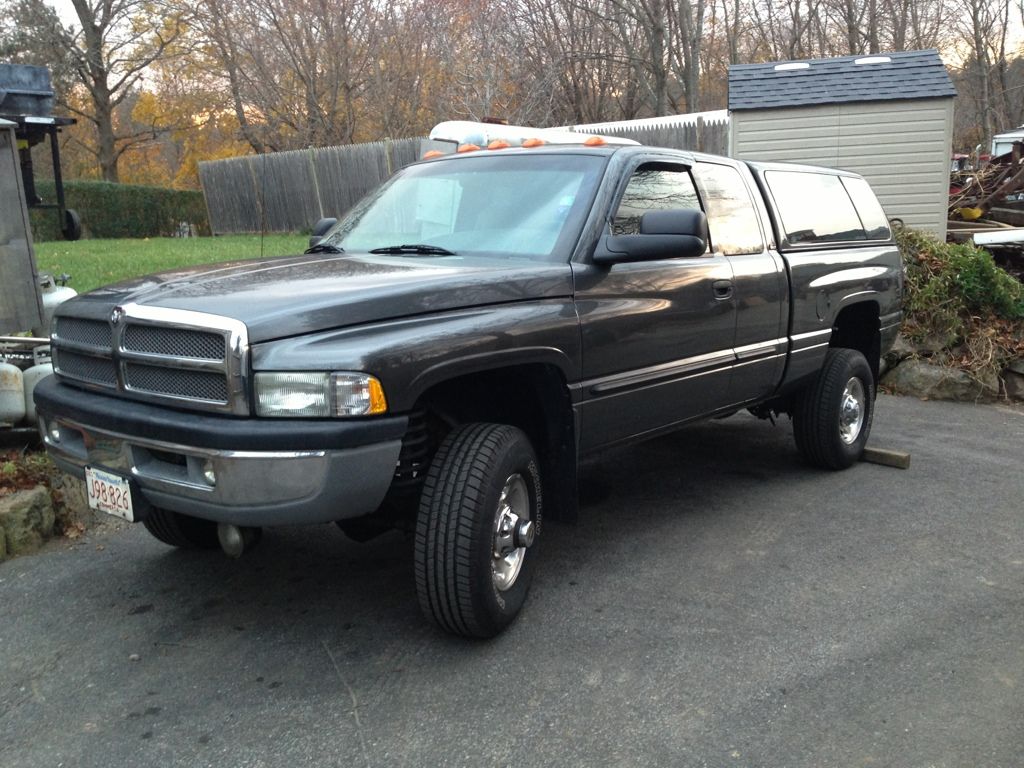
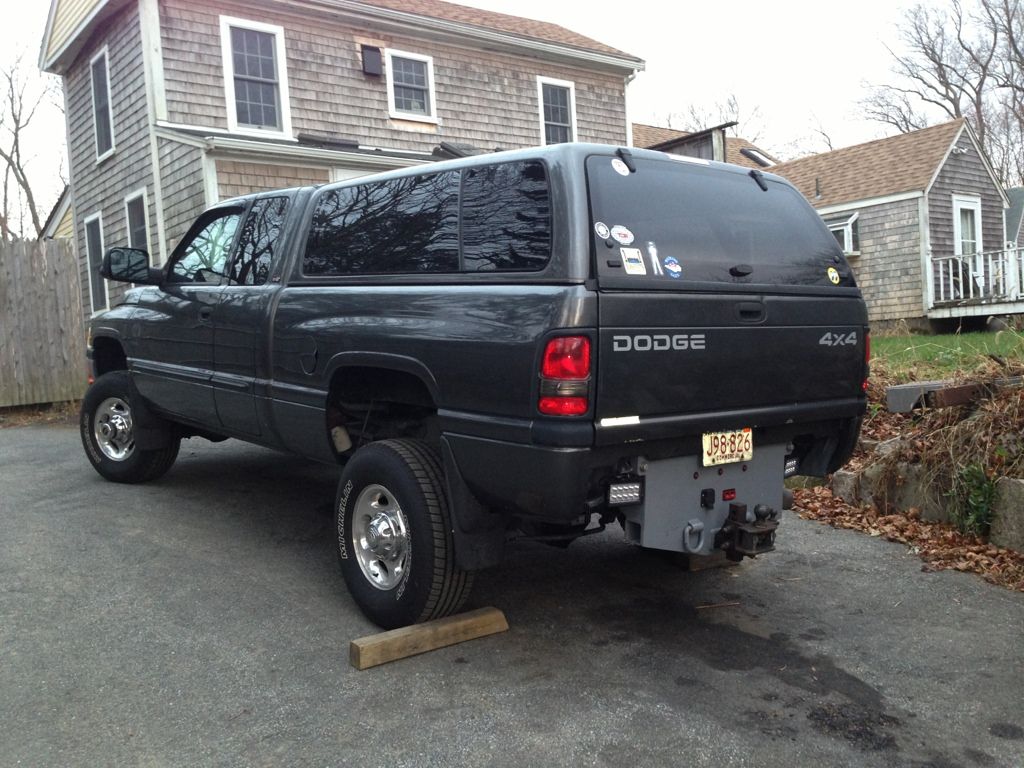
Starting a PPump 24V build on my fathers 02, tow package 2500 HO 6speed truck.

truck is super clean (for a NE truck), 2nd owner, about 150k miles.

the 3rd VP died the other day, no codes, dead pedal and randomly shutting off. its a bluechip pump and a newer APPS.

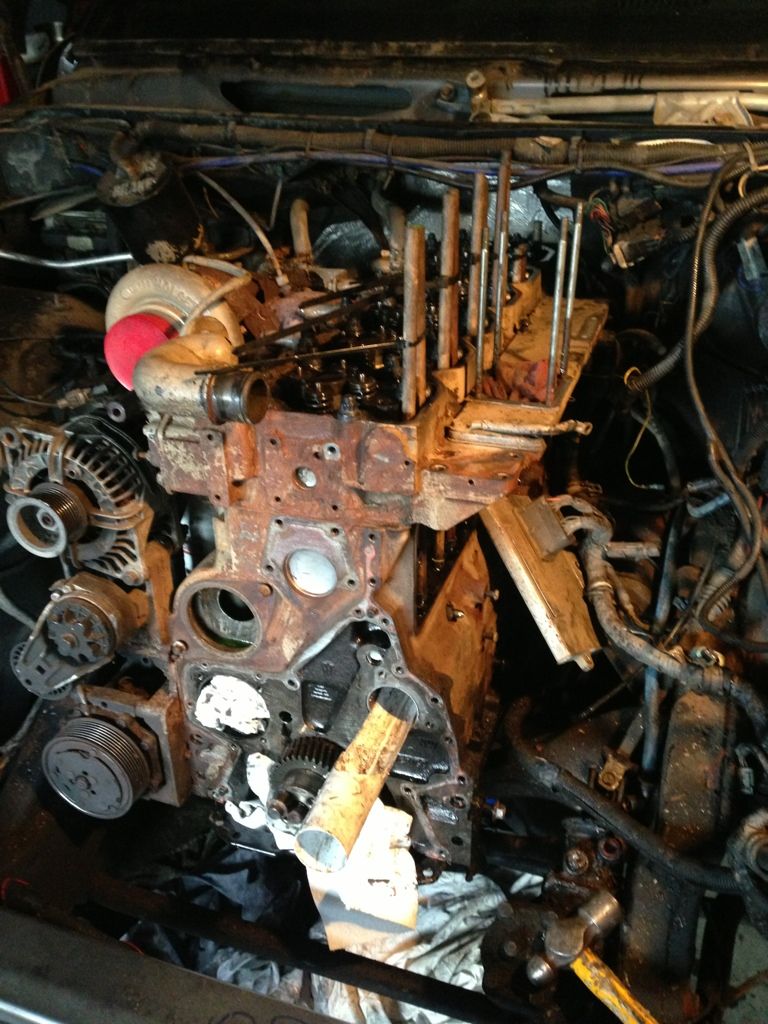
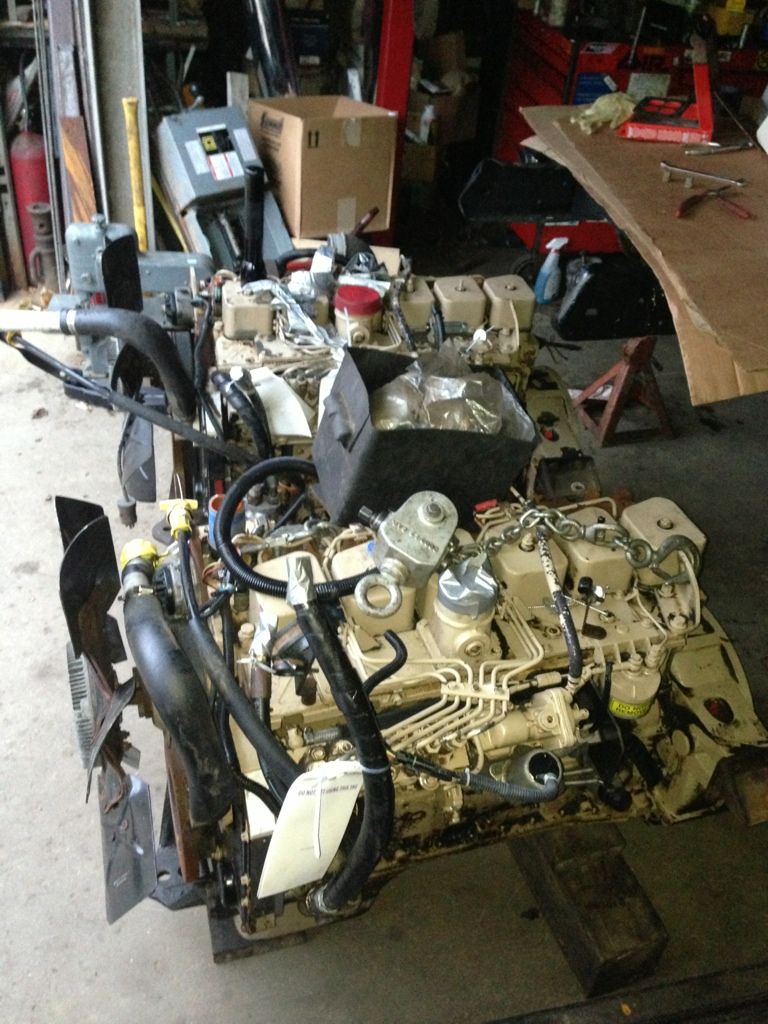
Went to NH last night and picked up 2 complete 175 hp 12V engines, came out of fedex trucks. one will he scavenged for parts, one kept as a complete spare engine.

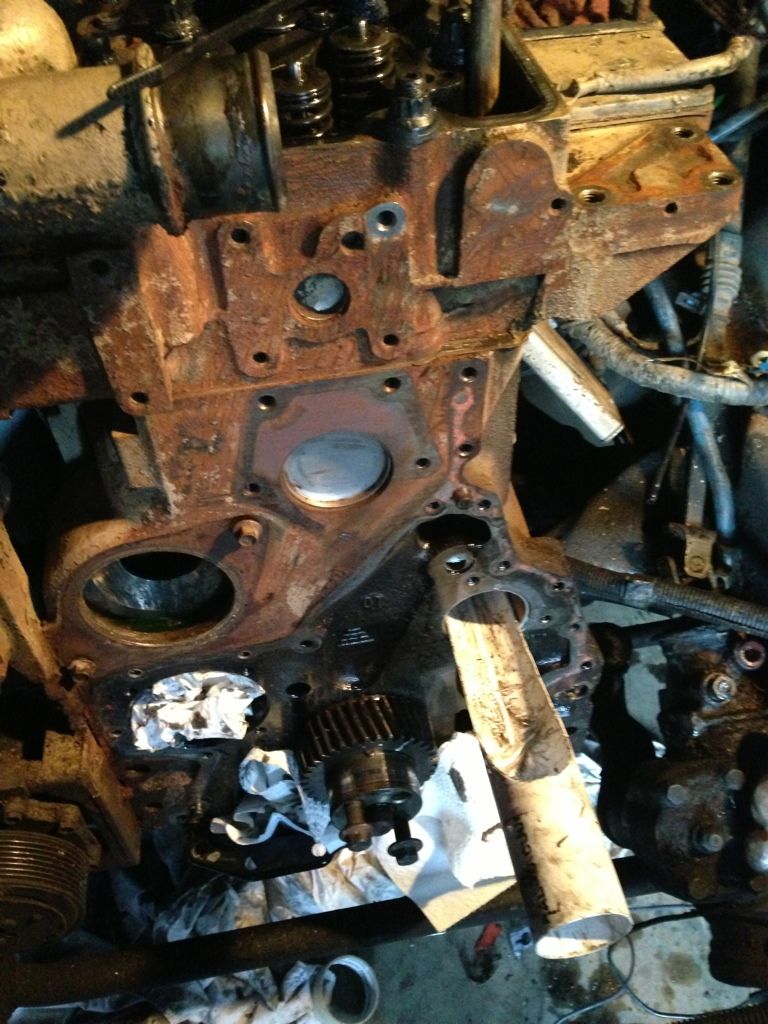
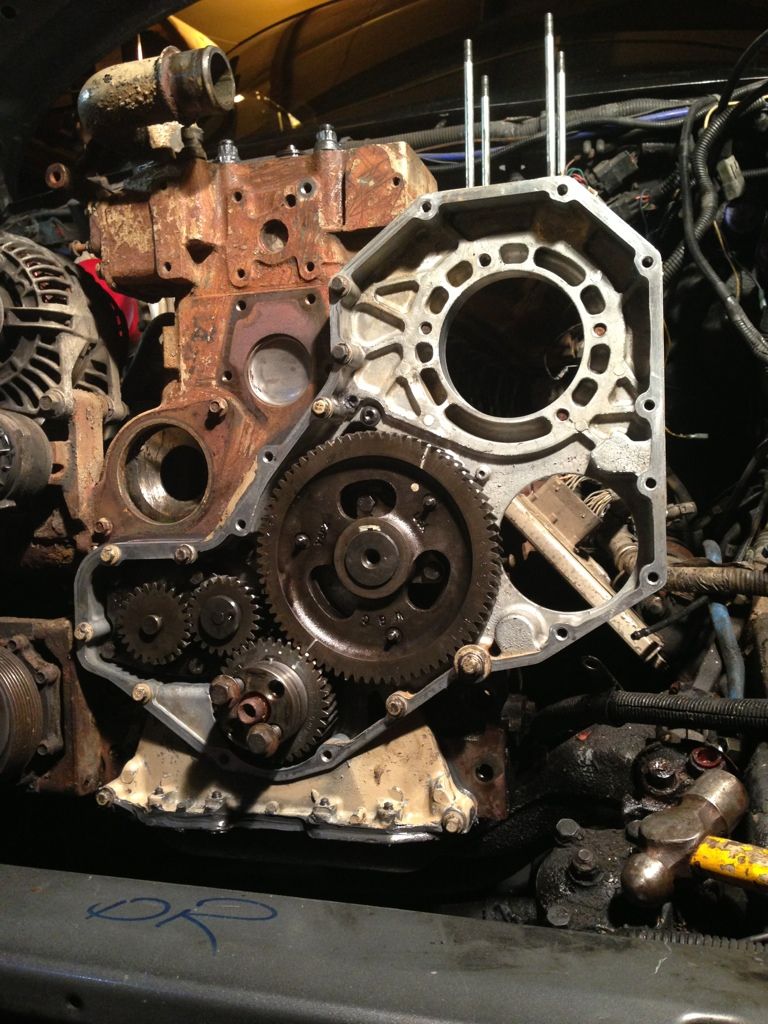
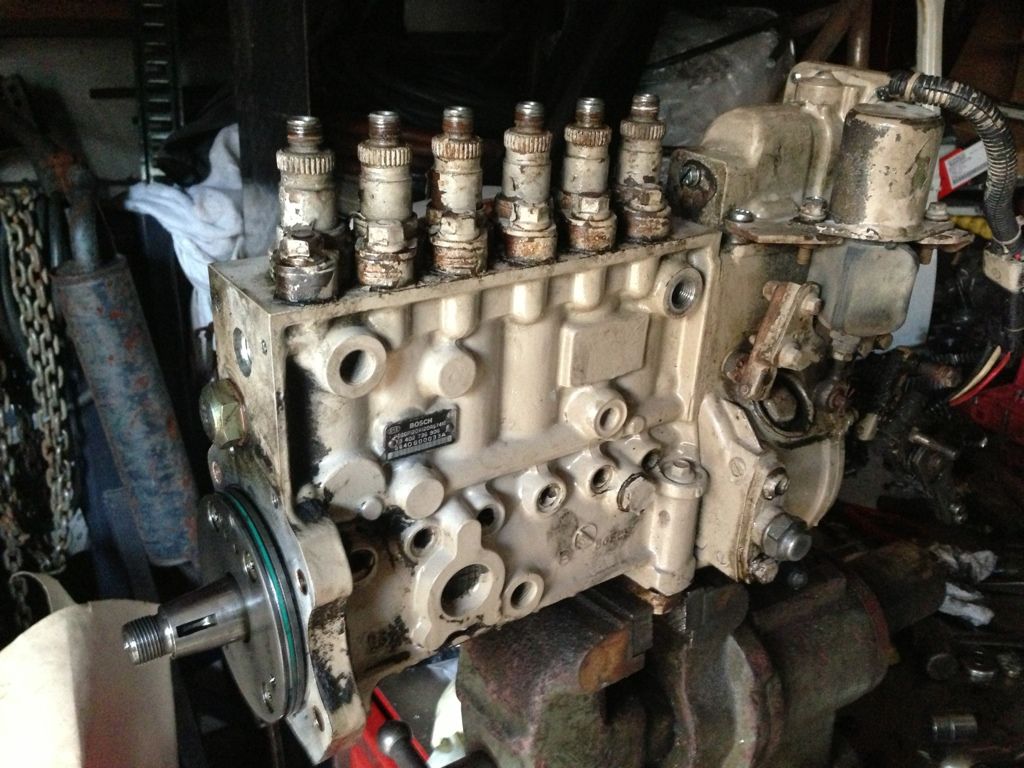
first thing we did today was check and make sure his block was a non-53 block, to see if it would be worth the time invested into the 24V swap. its not, so first call was to Gary at Scheid. ordered their .093 mild lines, spacer for the intake, and cam sensor bracket. Also got a set of their 100horse injectors set to p7100 pop, a 2095 rack plug for the pump, and a set of 5k springs. also planning to get a hold or Zack/Ryan at Hamilton and order a cam. plan is to grab a cam that will include the lift pump lobe and use a mechanical piston type lift pump.

goal for the truck is reliability and a clean towing setup. nothing huge HP but a cool 350 hp would be perfect, with egts and boost in check. Need to try and get the MPG's back to where the VP44 was

may need a clutch after its all done, but we will cross that bridge when we get there.

progress should be quick, parts are mostly ordered, and the truck is dead (need it back!). I will try and document as much as we can. biggest mysteries will be trying to use the 12V tappet cover and breather, and figuring out how to best mount the computer. Also need to rig the exhaust brake switch back up on the ppump linkage, and throw a new set of guages at it.

35B3F055-000D-48DB-8FA6-6122178429C6-1473-0000008FB99A69C6.jpg


7715AA20-37EC-4A91-B5EA-AC587EEB60C3-1473-0000008FC00AA58B.jpg


B2E698E1-205F-4B1E-82D0-966E66303906-1473-0000008FCAD535FB.jpg
 
it has begun!!!

finally pulled the truck in the shop ( a feat in itself) and got started. removed the radiators, and all the VP44 garbage. pulled the cam, and front case. Ive got a set of wooden dowels for pulling the cam, standard 1/2 dowels with 4 short for #5 and #6 on a 2ndgen truck.

started by throwing in the injectors, scheids 100 horse set to Ppump pop. then a set of arp 2000's at 130ftlbs.

stripped our spare engine of the ppump and case. needed to clearance the P7100 case for the cam sensor adaptor for these 00-02 trucks. easy to do with just a die grinder. The adaptor from scheid is decent quality, has an oring on it that is a better design than some I've seen with none. (pure diesel power is just a billet block with no oring)

after feeding the new lifters for the hamilton cam in the truck (easy to do with the tappet cover off) we threw the front case on, and the cam in. the front timing case gasket needs to be trimmed down near the oil pan, about 1/4 inch needs to be trimmed off, extra material is left so that it can be shaved when installing on a block that has no oil pan installed. With the pan still on, it needs to be shaved. for the front part of the pan gasket, all that was used is a bead of RTV.

IMPORTANT.... on truck with a cam sensor, there are special torx bolts behind the cam. the bolts have a shorter head (torx) so they dont interfere with the cam sensor ring. if you use the 10mm case bolts from the 12V, it will rub on the gear!

I can take a picture of the cam swap tools if anyone wants them. all standard stuff from a hardware store.

spent some time on the pump, threw in a set of 4K springs at 4 clicks (decided on 4k's just to make the truck a bit more driver friendly), clearanced the AFC for full travel, threw a 2095 rack plug on, and locked the pump at pin timing.

next up will be the tedious stuff. Going to replace some brake lines that are easy to get to, and route them in a different manner that makes mounting the ECM easier. Going to split the harness for the ECM and extend a few sensor wires so that the ECM wiring can be mounted closer to the frame. Then we need to figure out a fuel system, plan is just a simple CAT screen filter with a spin on as well, pump will be a 12V piston pump mounted on the block.

DA379E10-889E-4085-99A0-66F94E87C54C-1240-0000006647D50146.jpg


lifter tray...

7F2CD353-6FEB-4F06-840F-EEF7A677C890-1240-0000006652066325.jpg


studs and injectors in.

C5464D80-24D6-4C9E-A3F9-6BD99BFCEB08-1240-000000663901D17B.jpg


case on

F8E27B34-7468-452E-99BE-A6872FA0BE24-1240-000000666273164C.jpg


cam sensor adaptor
F5F8A22C-ACCF-46DA-9FDD-EC3834396B05-1240-000000667207B139.jpg


pump is ready to go on

6BEED40E-6CC4-4B52-A5B4-44D58766A463-1240-000000665CDDF75C.jpg
 
Last edited:
Did you put new tappets in with the new cam? For the piece of mind, while you have everything apart l'd say throw a new oil pump on there too. Believe there around $90 IIRC. Looking good so far!
 
I bought a used p pump a while back that was out of a ups truck, with 5k springs it acted like 3k and was told it was due to the gov weights.
 
slowly chipping away at the truck. apparently photobucket is ****bucket tonight due to the fact that nothing wants to upload.

Oil lines are made up. We have the dies to make up stainless braided line, and my father made up some #4 flare lines for the oil feed's to the p7100 and the PS pump. for the PPump feed, a banjo fitting, to male #4 was made.
img0775cu.jpg


Grinding the cast numbers off the head helps to get some clearance for the oil fitting.
img0781ym.jpg


12V tappet cover on. We have stretched the computer harness that normally runs on the side of the block, to drivers side fender well. any sensor wires that need to be extended will be extended. there is no need to have the computer hang near the engine.
img0787jv.jpg


brake lines have been made out of stainless and re-routed for more room in the engine bay.
img0790n.jpg


gear sitting in the housing
img0783ry.jpg


Retainer that Ryan/Zach sent us for free (thanks guys)
img0782ty.jpg


got a front cover from the guys at Eatsoot, very nice piece.
img0784cn.jpg


made a timing indicator for the balancer out of a metric bolt.
img0785nvyqe.jpg


set up a dial indicator to find true TDC
img0793gz.jpg


we then pinned the balancer to the crank using a roll pin.
img0795r.jpg


marking TDC on the balancer.
img0792ux.jpg


set up marks for 5,10,15 and 20 degrees advance or retard on the balancer. we plan to buy a diesel injection line pulse adaptor for a standard timing light, the marks on the balancer will help to tell us where the timing is set at. Just nice to be able to have dead-nuts-on TDC on a 24V truck.

the math on it, if anyone wants to do it their self. the diameter of this balancer was 9 1/4 inch, using the equation for circumference, then dividing by 360 degrees, we find that 1 degree is .0807inch, there 10 degrees is .807 and so on...

img0794os.jpg
 
Last edited:
as a side note. how common is it for rocker arm/Pin wear. did a bit of searching and looks like guys are having some serious wear with big cams and springs.

this truck has about 140 K on it, oil changed regularly, yet every single one of the pins and its correcponding rocker has some serious scoring from contact....even in this bone stock aplication.

we have a spare set and we will try to find 12 of the best for now
 
set up marks for 5,10,15 and 20 degrees advance or retard on the balancer. we plan to buy a diesel injection line pulse adaptor for a standard timing light, the marks on the balancer will help to tell us where the timing is set at. Just nice to be able to have dead-nuts-on TDC on a 24V truck.

the math on it, if anyone wants to do it their self. the diameter of this balancer was 9 1/4 inch, using the equation for circumference, then dividing by 360 degrees, we find that 1 degree is .0807inch, there 10 degrees is .807 and so on...

img0794os.jpg

Make sure when you lay out the marks with that system, that you are using a tape, and not using a caliper. Difference between using chordal and circumferential distance will be quite significant.
 
as a side note. how common is it for rocker arm/Pin wear. did a bit of searching and looks like guys are having some serious wear with big cams and springs.

this truck has about 140 K on it, oil changed regularly, yet every single one of the pins and its correcponding rocker has some serious scoring from contact....even in this bone stock aplication.

we have a spare set and we will try to find 12 of the best for now

Both of the engines i used to make 1 good one last year had wear on the rocker pins. Both engines had 200k miles + on them, one stock and one modded for ~60k miles. I used the best ones and called it good enough.
 
Make sure when you lay out the marks with that system, that you are using a tape, and not using a caliper. Difference between using chordal and circumferential distance will be quite significant.

accounted for that, either way its only a refercence, the TDC mark is the only one that really counts. Injection timing will be set with ye'olde SP500 snapon timing kit
 
Looking good so far. Couple things you might want to do to make things easier on yourself. If you ever plan on dual feeding the pump get the front plug out now while the pump is off the truck if you haven't. It's hard to tell in the picture whether it's still in or not. You can get a standard oil pan plug with an o-ring to replace it from your local auto parts store. Cut off the corner of the head where the 24 valve APPS mounts. It will make it easier to see/get to the 2 inside p7100 bolts, they can be a real PITA.
 
Back
Top