
You are using an out of date browser. It may not display this or other websites correctly.
You should upgrade or use an alternative browser.
You should upgrade or use an alternative browser.
New Pro Stock Diesel build - 2 D Max
- Thread starter Michael
- Start date
Stingpuller
New member
- Joined
- Feb 5, 2007
- Messages
- 1,166
Lookin good
With all the trouble it's givin you it will be all the better when it's done.
With all the trouble it's givin you it will be all the better when it's done.
Michael
Comp Diesel Sponsor
- Joined
- Apr 25, 2006
- Messages
- 3,411
Episode 5
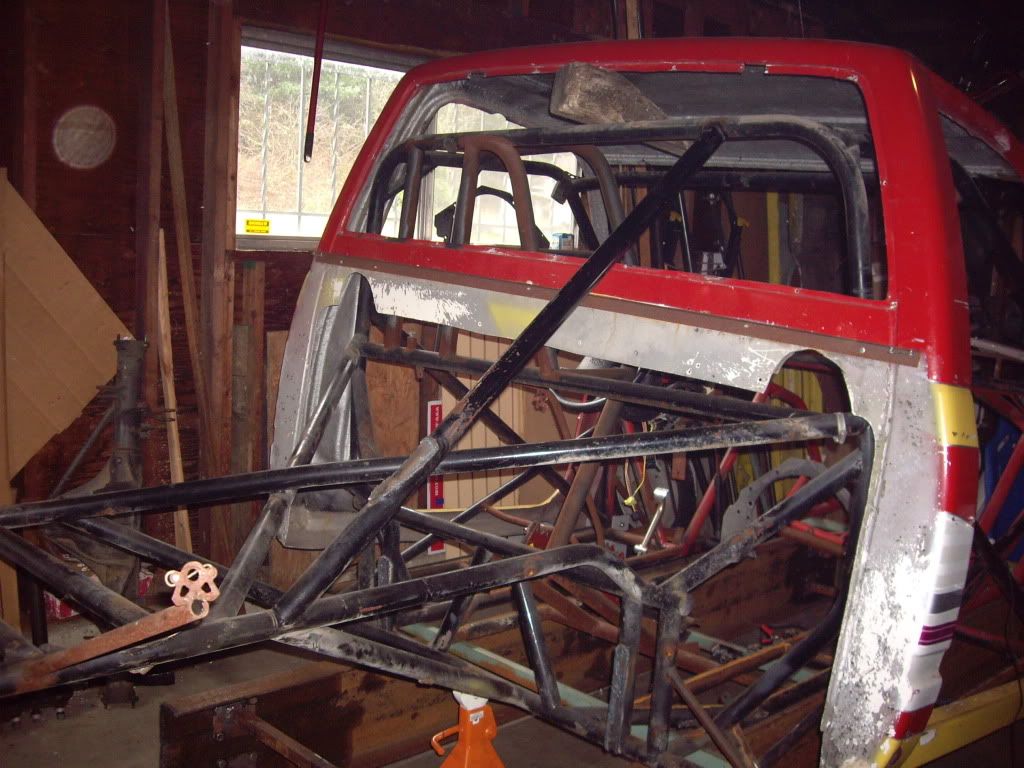
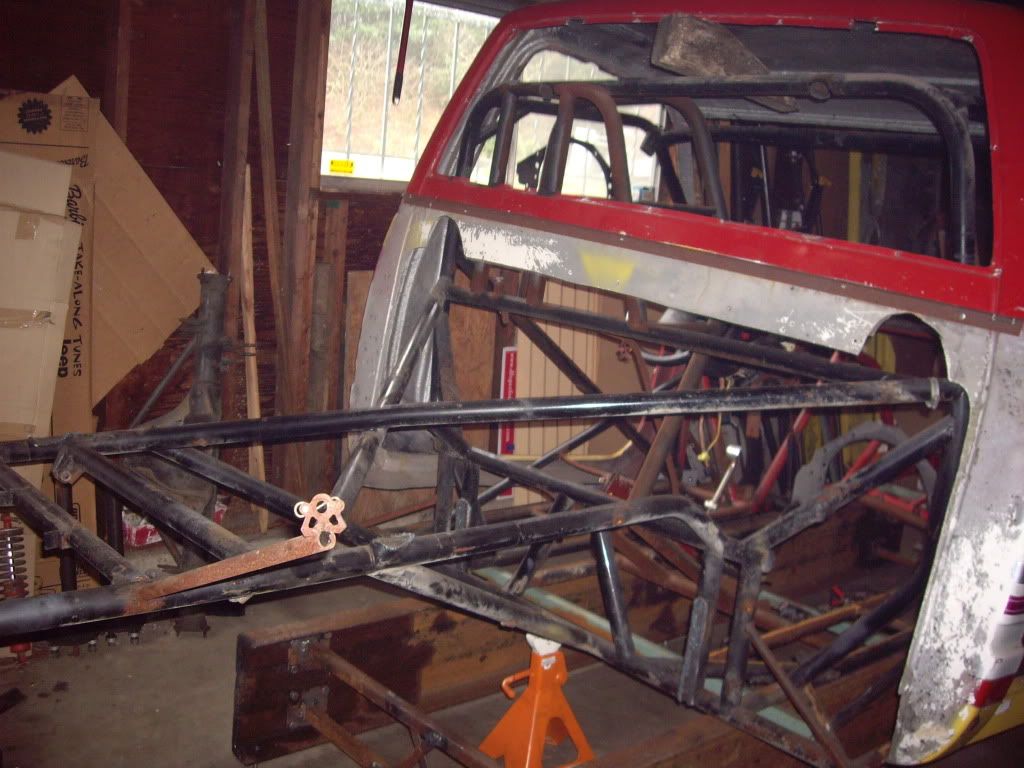
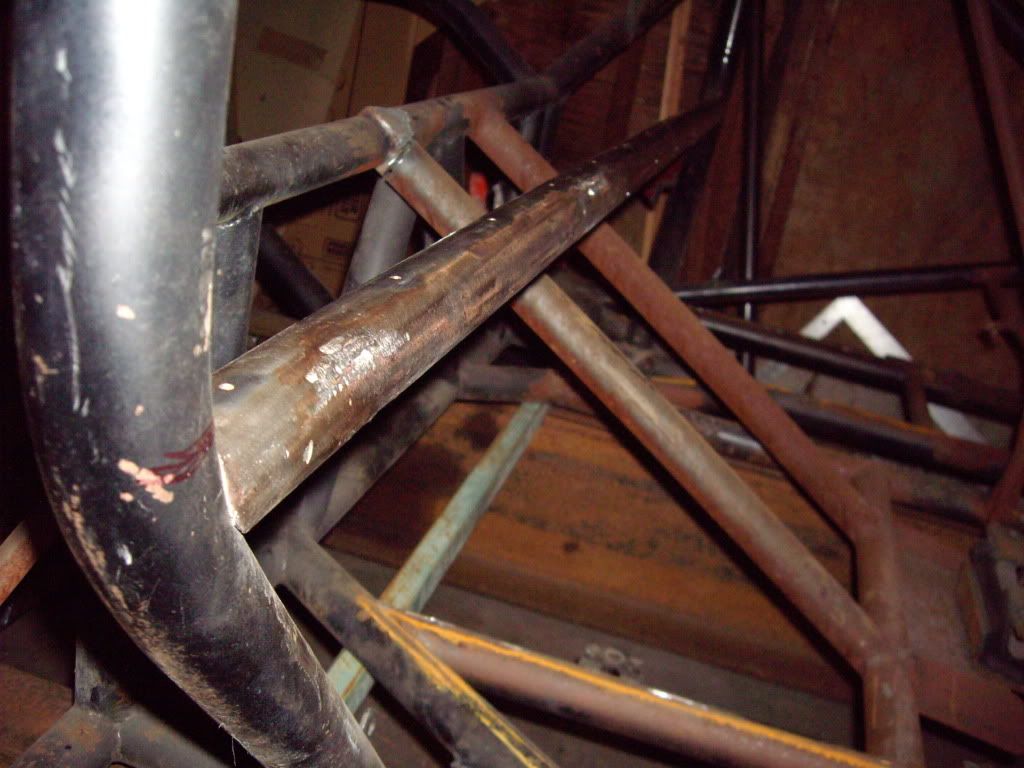
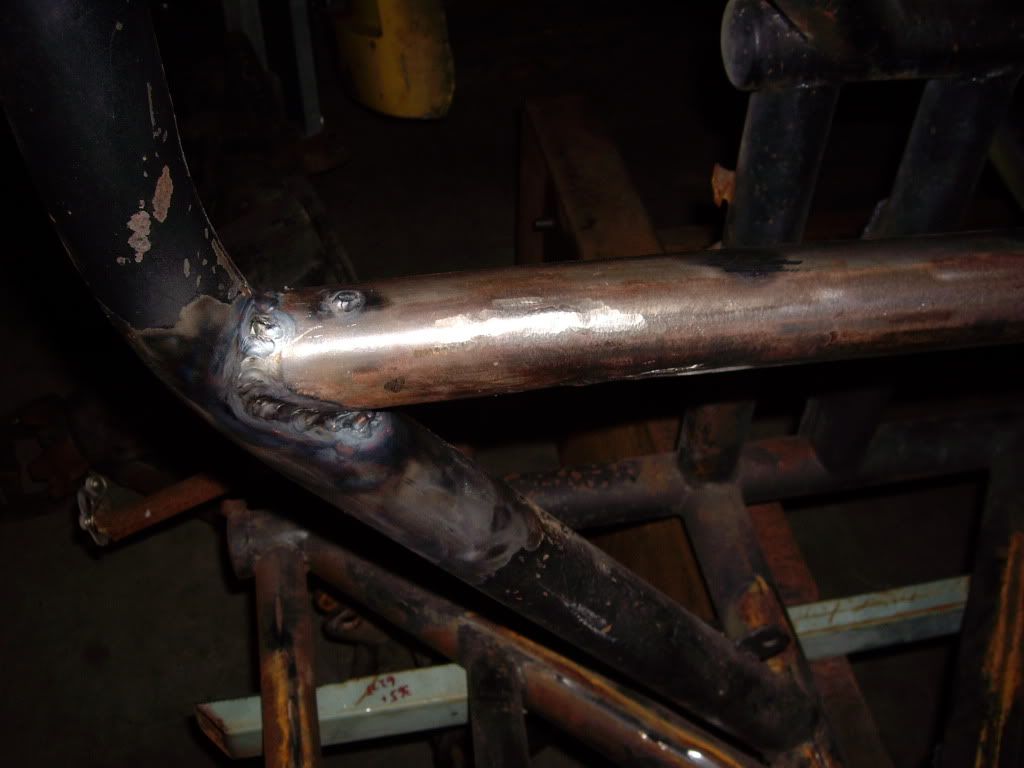
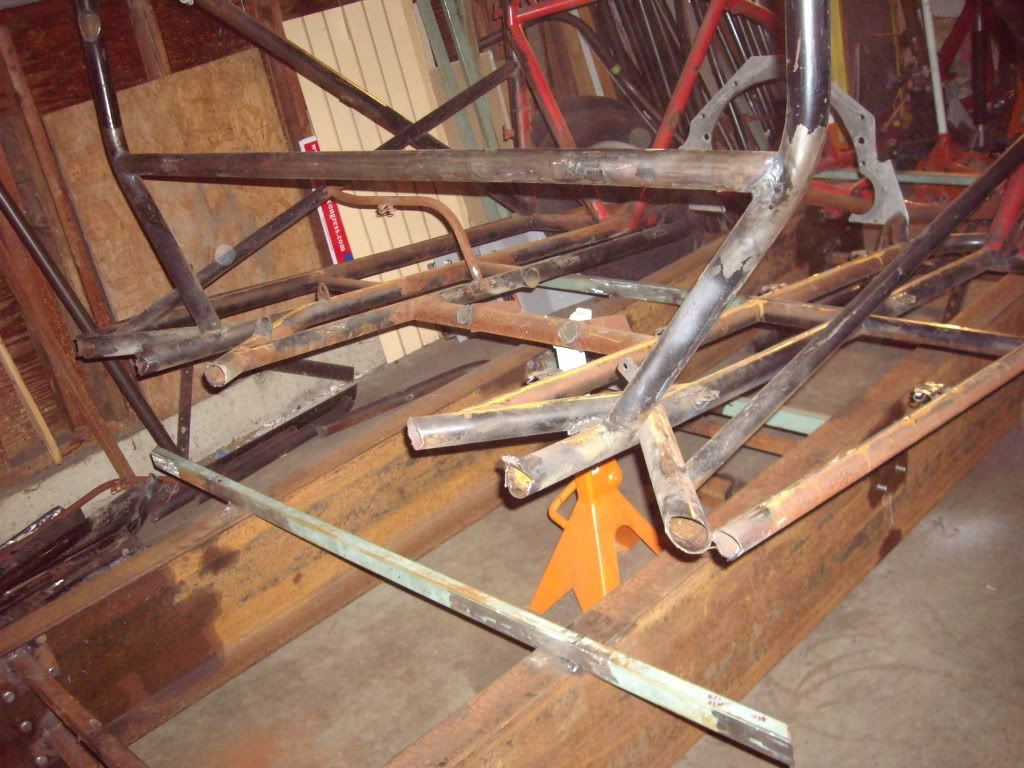
A rough weekend in this build! I ground the welds and removed all of the welded-in floor panels, getting ready to start removing tubes. As I pulled the last panels out I realized that the MAIN crossmember had been spliced in 2 places, obviously when originally built, presumably because the builder ran out of tubes of the proper length. In addition, the splice was a pure butt splice with an insert, not the 30°-45° angled splice required by SFI. This is the "foundation" crossmember, considered "Bar #1" in the SFI specs, and the tube that you usually measure all other dimensions off of. And mine needs to be cut out and replaced!

I fired up the plasma cutter and removed two tubes that braced the ladder bar mounts (which stuck out several inches below the chassis).
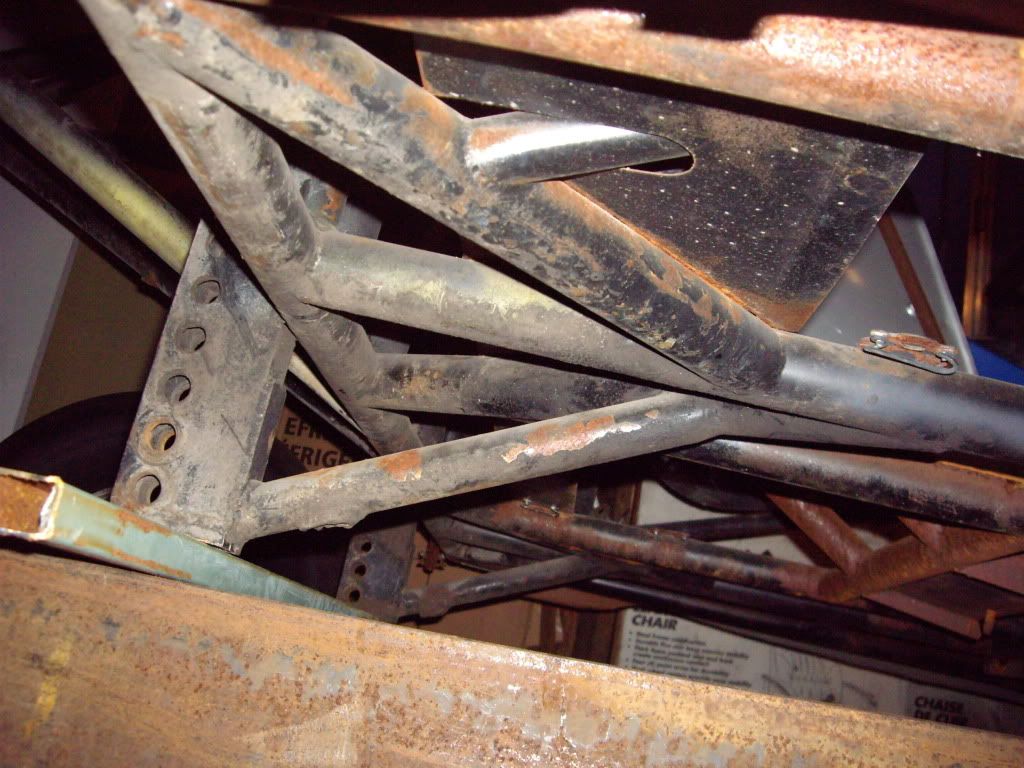
I started using the plasma cutter to remove the 1/4" thick ladder bar mounts, but the cutting speed was painfully slow. I originally wanted to be sure to keep from overheating bar #1, but since this was no longer an issue I dragged out the primitive Oxy-Acetyline cutting torch and made very quick work of those mounts.
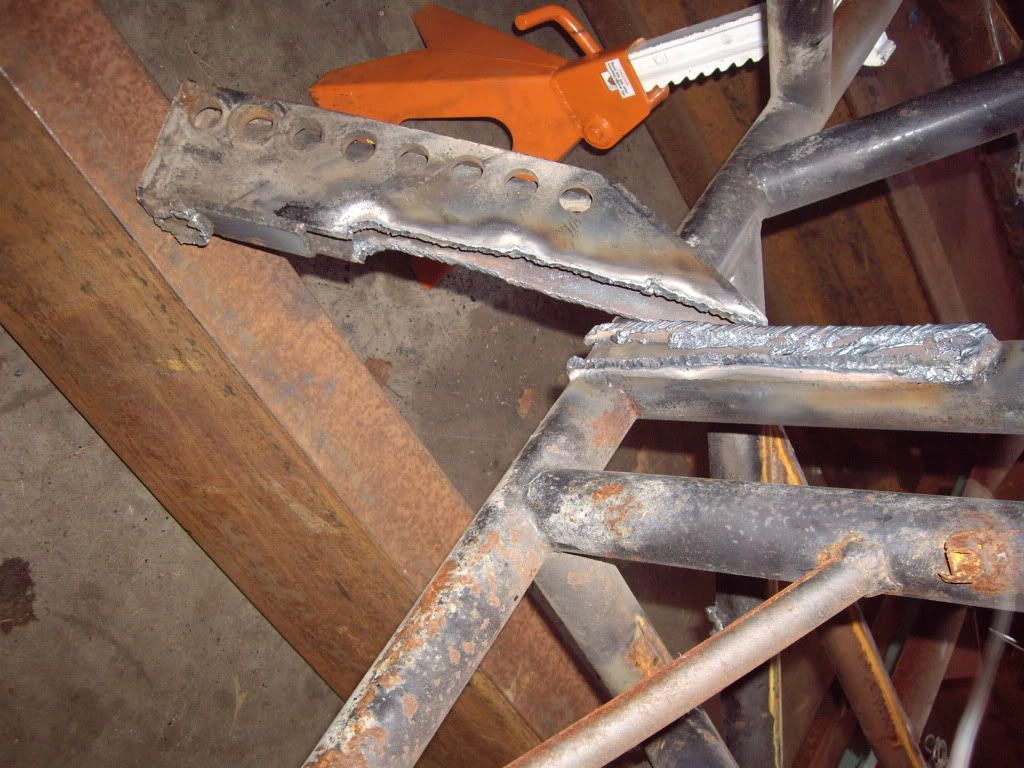
With those mounts removed I could finally drop the chassis all the way onto the jig. When the chassis was resting on the ladder bar mounts on the jig, it was nice and square with the front strut mounts (the 4 points were in a perfect plane and therefore did not rock). Now that I was down to the tubing in the back (and the strut mounts holding it up in front), I had 3/4" of disparity from planar. In other words, the main cage/frame structure was welded together twisted, but the builder compensated for it by welding the ladder bar mounts in lopsided.
As if my weekend couldn't get any more interesting, I spotted a section in the SFI spec, referring to the Funny Car cage members: : “When required, the Forward Outer Funny Car Cage Bar (#40A) and the Forward Inner Funny Car Cage Hoop (#41B) must be fully forward of the driver’s helmet.” Now when this spec was written, open face helmets were allowed in this type of car/truck. Since then they require full face helmets (which extend a few inches farther forward). However, the position of these tubes in my chassis was such that even an open face helmet would extend past them. I confirmed with NHRA that they check that the tubes protrude past the "forehead" section of the full face helmet. I had 0.75" of protrusion past the tubes.
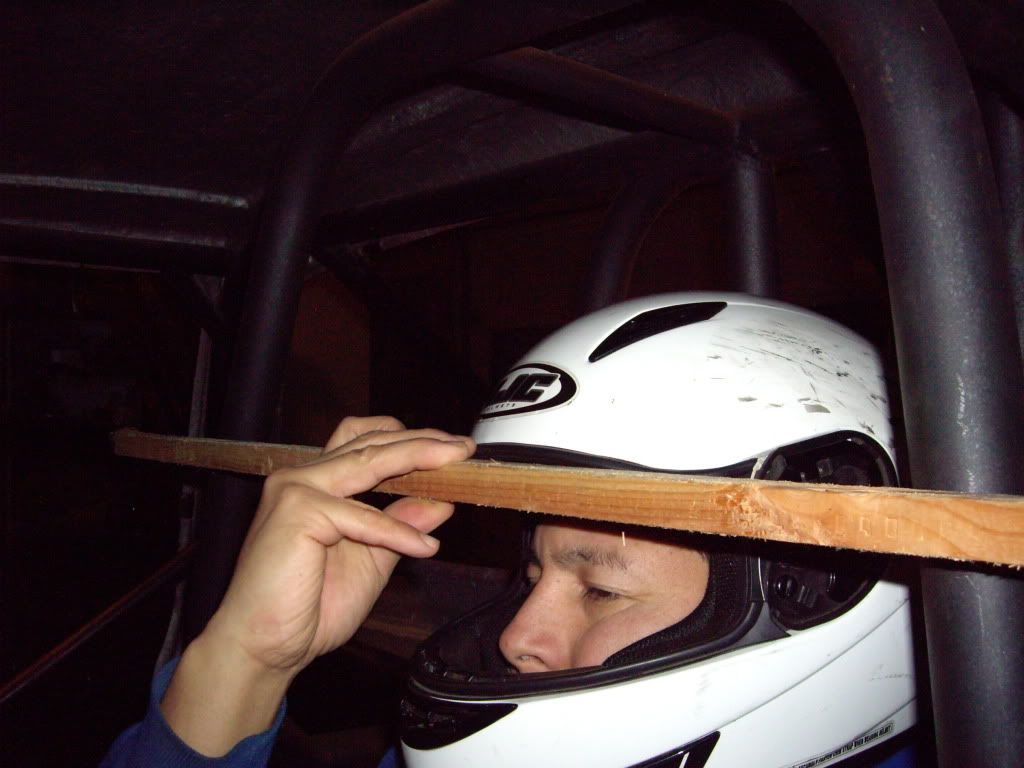
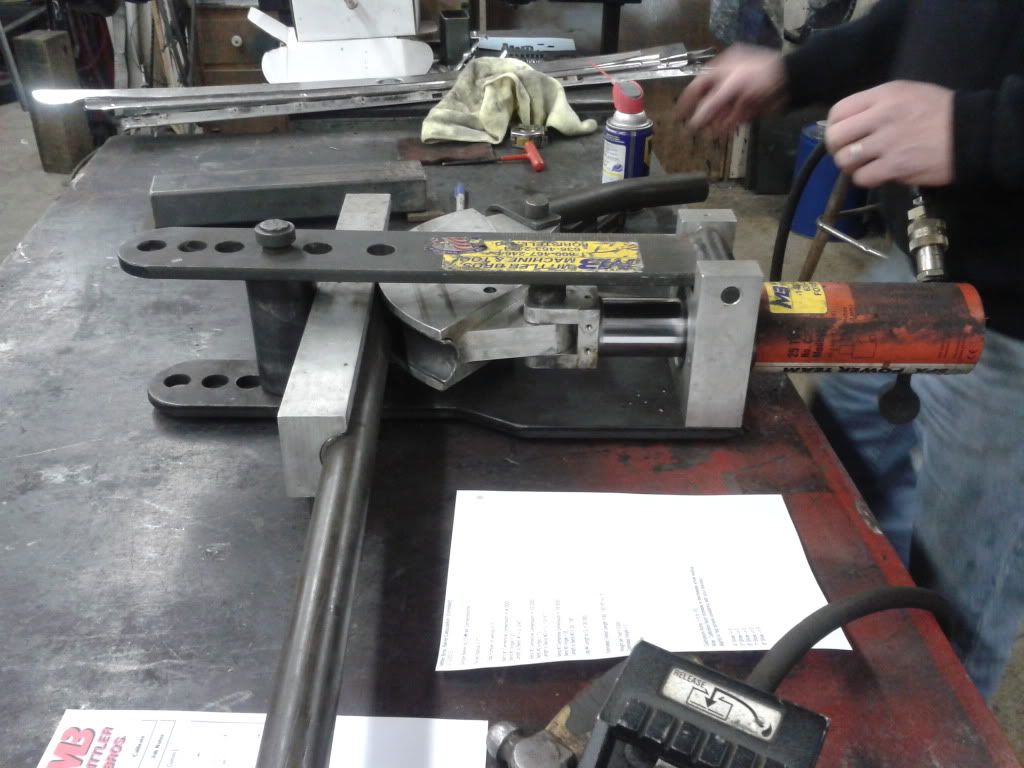
Rather than move those tubes, I will re-contour and reposition the tubes behind my helmet and the top of the seat, running them completely against the cab and rear window, so I can slide my seat back about 1.25". I am now shopping for an inexpensive tubing bender, as these new changes will add enough new bends that it will be inconvenient to run back and forth to the local chassis shop for my bends.
On a positive note, I have my turbos now -

A Garrett GT4202R ball bearing turbo with chromed compressor cover
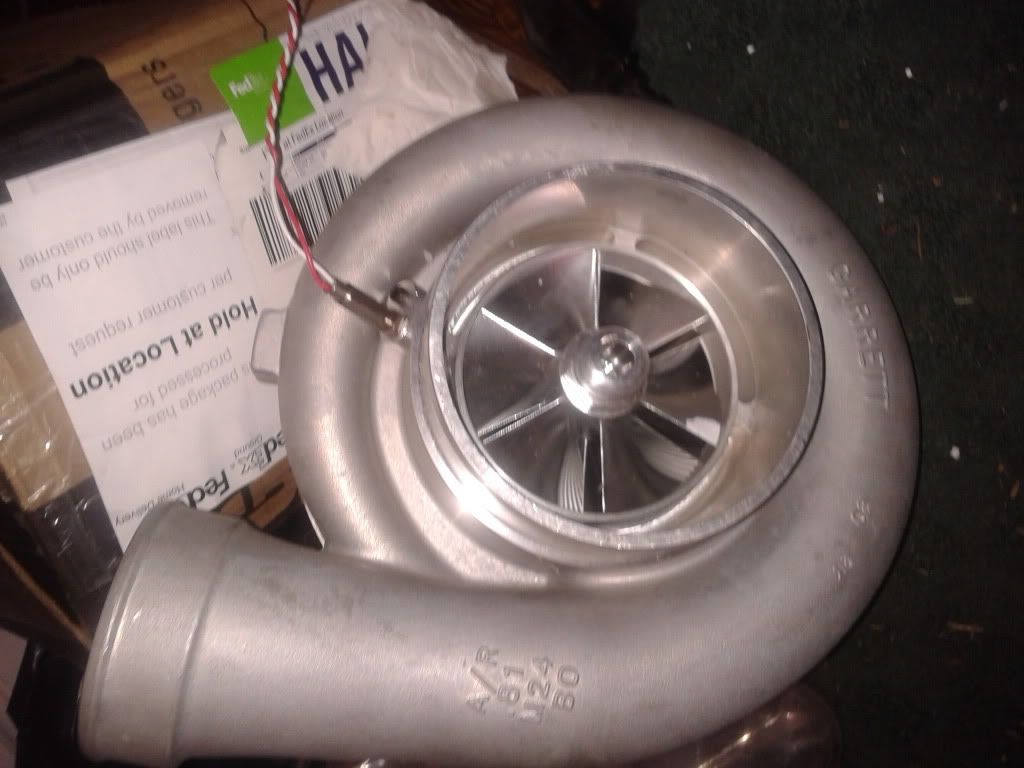
A Garrett GT5541R, which I was surprised to learn comes with a billet compressor wheel from the factory
When I lay out the front section of the chassis I want to make sure I leave room for optimum turbo placement and plumbing, so it will be nice to have these handy!
A rough weekend in this build! I ground the welds and removed all of the welded-in floor panels, getting ready to start removing tubes. As I pulled the last panels out I realized that the MAIN crossmember had been spliced in 2 places, obviously when originally built, presumably because the builder ran out of tubes of the proper length. In addition, the splice was a pure butt splice with an insert, not the 30°-45° angled splice required by SFI. This is the "foundation" crossmember, considered "Bar #1" in the SFI specs, and the tube that you usually measure all other dimensions off of. And mine needs to be cut out and replaced!
I fired up the plasma cutter and removed two tubes that braced the ladder bar mounts (which stuck out several inches below the chassis).
I started using the plasma cutter to remove the 1/4" thick ladder bar mounts, but the cutting speed was painfully slow. I originally wanted to be sure to keep from overheating bar #1, but since this was no longer an issue I dragged out the primitive Oxy-Acetyline cutting torch and made very quick work of those mounts.
With those mounts removed I could finally drop the chassis all the way onto the jig. When the chassis was resting on the ladder bar mounts on the jig, it was nice and square with the front strut mounts (the 4 points were in a perfect plane and therefore did not rock). Now that I was down to the tubing in the back (and the strut mounts holding it up in front), I had 3/4" of disparity from planar. In other words, the main cage/frame structure was welded together twisted, but the builder compensated for it by welding the ladder bar mounts in lopsided.
As if my weekend couldn't get any more interesting, I spotted a section in the SFI spec, referring to the Funny Car cage members: : “When required, the Forward Outer Funny Car Cage Bar (#40A) and the Forward Inner Funny Car Cage Hoop (#41B) must be fully forward of the driver’s helmet.” Now when this spec was written, open face helmets were allowed in this type of car/truck. Since then they require full face helmets (which extend a few inches farther forward). However, the position of these tubes in my chassis was such that even an open face helmet would extend past them. I confirmed with NHRA that they check that the tubes protrude past the "forehead" section of the full face helmet. I had 0.75" of protrusion past the tubes.
Rather than move those tubes, I will re-contour and reposition the tubes behind my helmet and the top of the seat, running them completely against the cab and rear window, so I can slide my seat back about 1.25". I am now shopping for an inexpensive tubing bender, as these new changes will add enough new bends that it will be inconvenient to run back and forth to the local chassis shop for my bends.
On a positive note, I have my turbos now -
A Garrett GT4202R ball bearing turbo with chromed compressor cover
A Garrett GT5541R, which I was surprised to learn comes with a billet compressor wheel from the factory
When I lay out the front section of the chassis I want to make sure I leave room for optimum turbo placement and plumbing, so it will be nice to have these handy!
Michael
Comp Diesel Sponsor
- Joined
- Apr 25, 2006
- Messages
- 3,411
Looking good Michael, FWIW those are the exact same turbos as are on Max'd Out.
Yup, that's why I picked them! I already know they work well together, and hopefully it is one less variable for Rob when writing the tunes!
BTW, I want to make sure you don't take any offense at my bashing of the guy who built the chassis. If I were more careful I would have spotted these issues before buying it, but I want to make sure to mention them so people in a similar situation know some of the things to look for! One thing for sure, if I were considering a chassis that meets a certain specification (or I plan to race in a class that needs that spec), I would buy the SFI spec and study it even before looking at the chassis, so I would know all the things to look for. When I looked at this chassis I didn't know about the splice rule or the helmet clearance rule. The good news is that by tearing up even more of this chassis, I will get a chance to make it even more like I want in terms of optimizing it for the class! Also - don't assume that just because a chassis has a current or expired certification tag that it actually meets all of the rules! It is entirely possible that the chassis inspector missed some items that another inspector will catch, and make you repair before certifying. I have exchanged MANY emails with our NHRA Division Tech Director over rule interpretations and how I plan to build this chassis. Even though he won't be the one certifying it, someone who reports to him will be, and I can show them the emails where he approved of something.
Michael
Comp Diesel Sponsor
- Joined
- Apr 25, 2006
- Messages
- 3,411
That GT5541R is sure pretty. Sucks about the chassis stuff. Better to build it right now, than find out the hard way I suppose.
After getting the chromed cover on the GT4202R, I was tempted to at least polish the cover on the big guy, but there are many more important things to do right now! Now I'm kinda torn about whether to completely re-do the rollcage to get more clearance for the helmet, or to just replace enough bars to get 1/2" or so tolerance. If I wasn't already protected by the front halo then I'd be more worried about it, and extending the FC bars would make it pretty damn hard to get in and out with a HANS or similar device on. I think I just talked myself into sticking with the plan to go for the 1/2" clearance!
Michael
Comp Diesel Sponsor
- Joined
- Apr 25, 2006
- Messages
- 3,411
Episode 7:
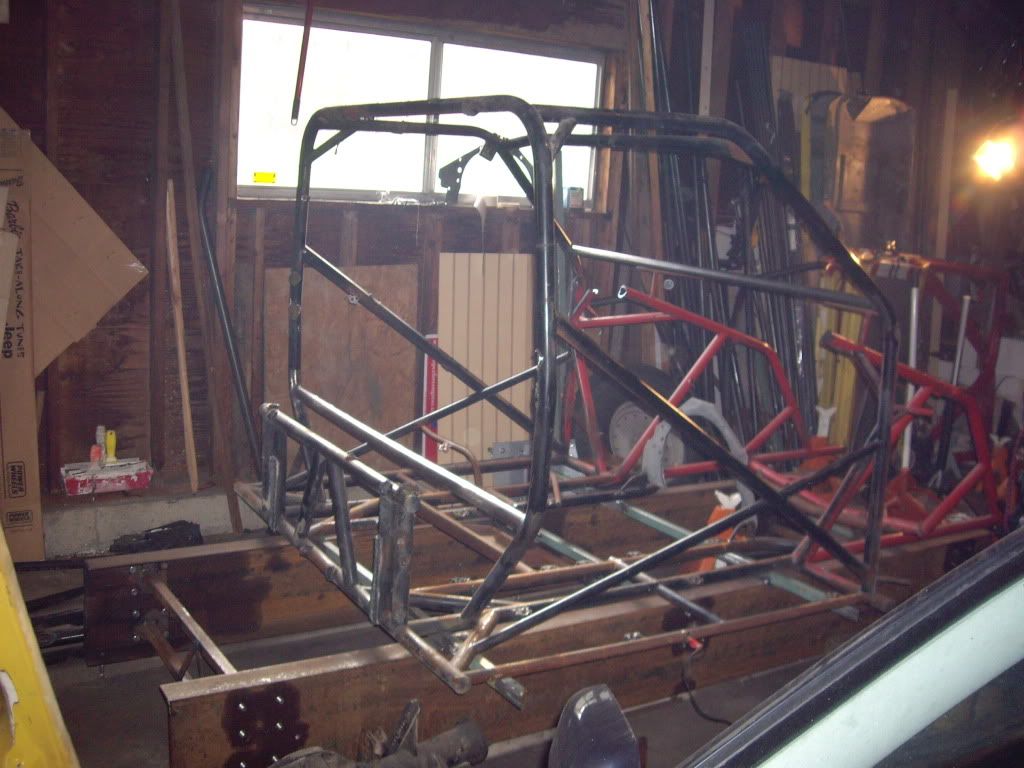
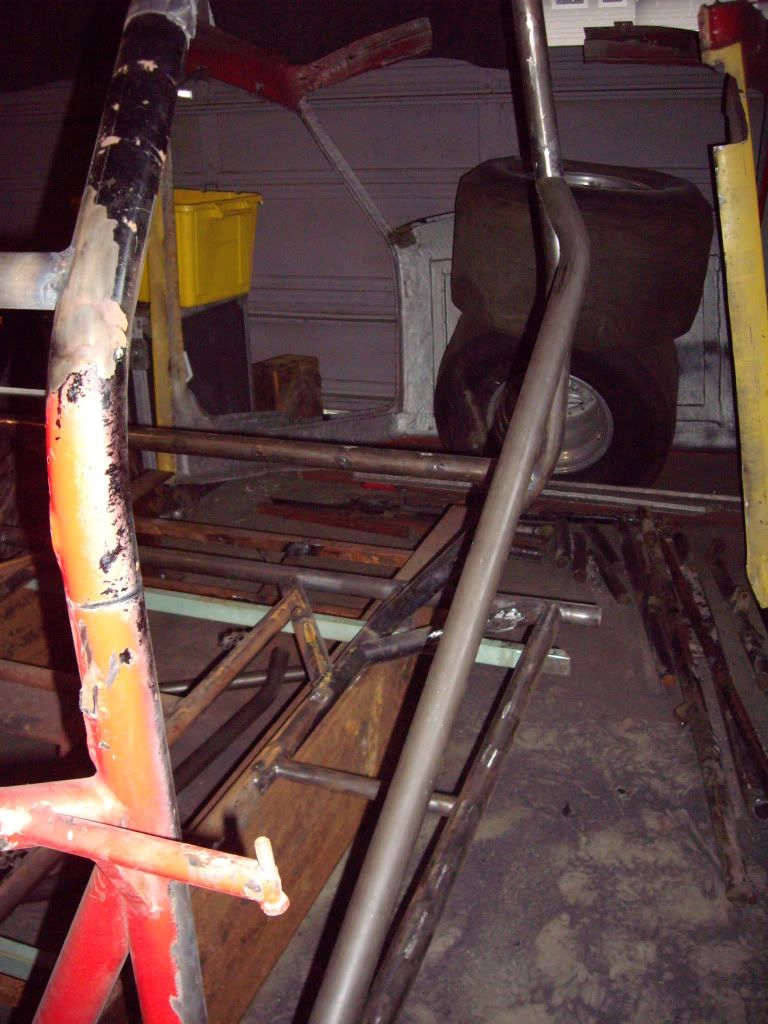
After mulling it over I decided to completely re-do the funny car cage area of the chassis, including the lower crossmember in that area. This way I can make sure the cage covers the full helmet in case they ever change that rule, and I can design it so that the seat can slide back if a taller person ever needs to drive it. At the same time I am taking some weight out but adding strength by designing the chassis portions to function like a truss.
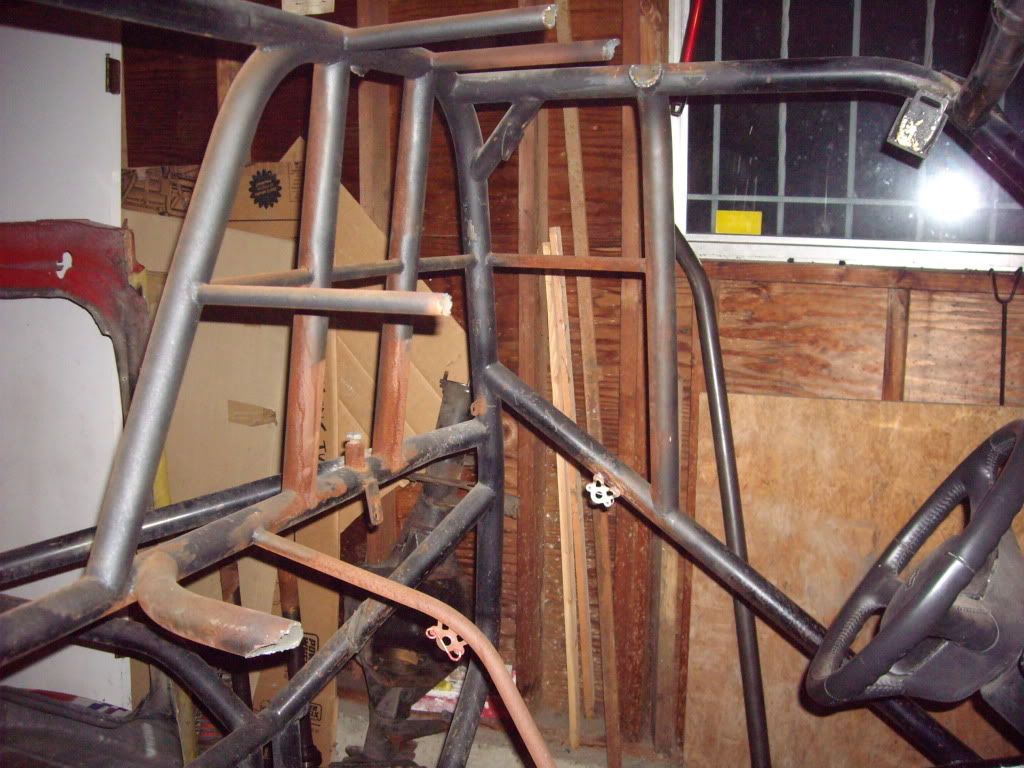
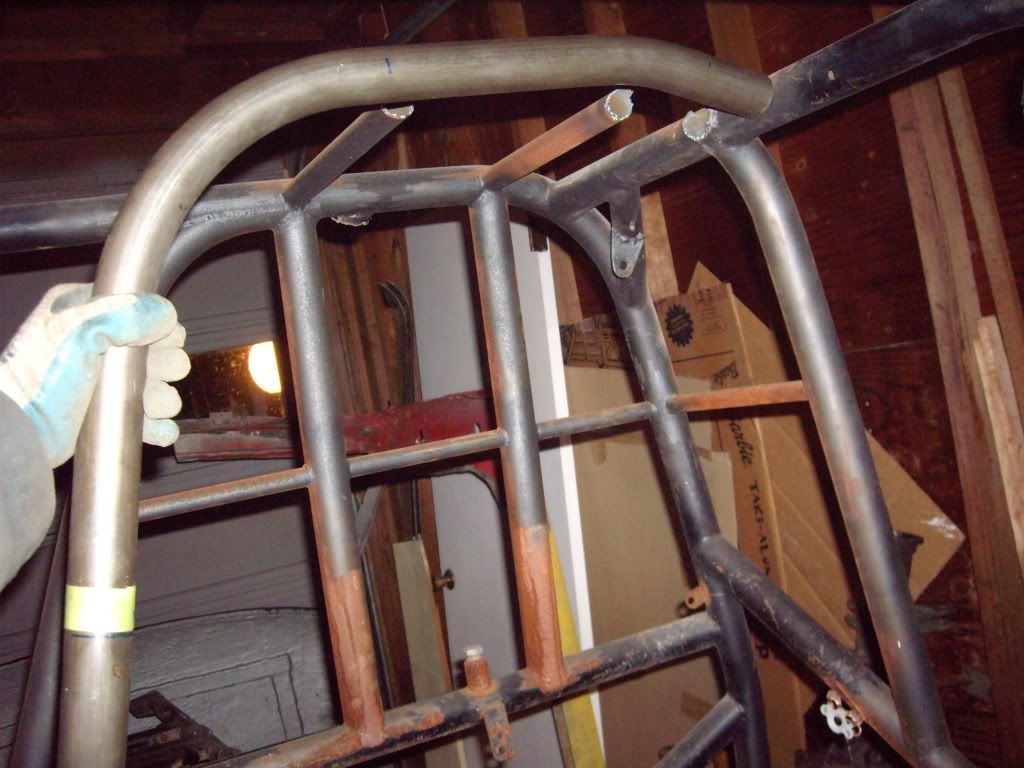
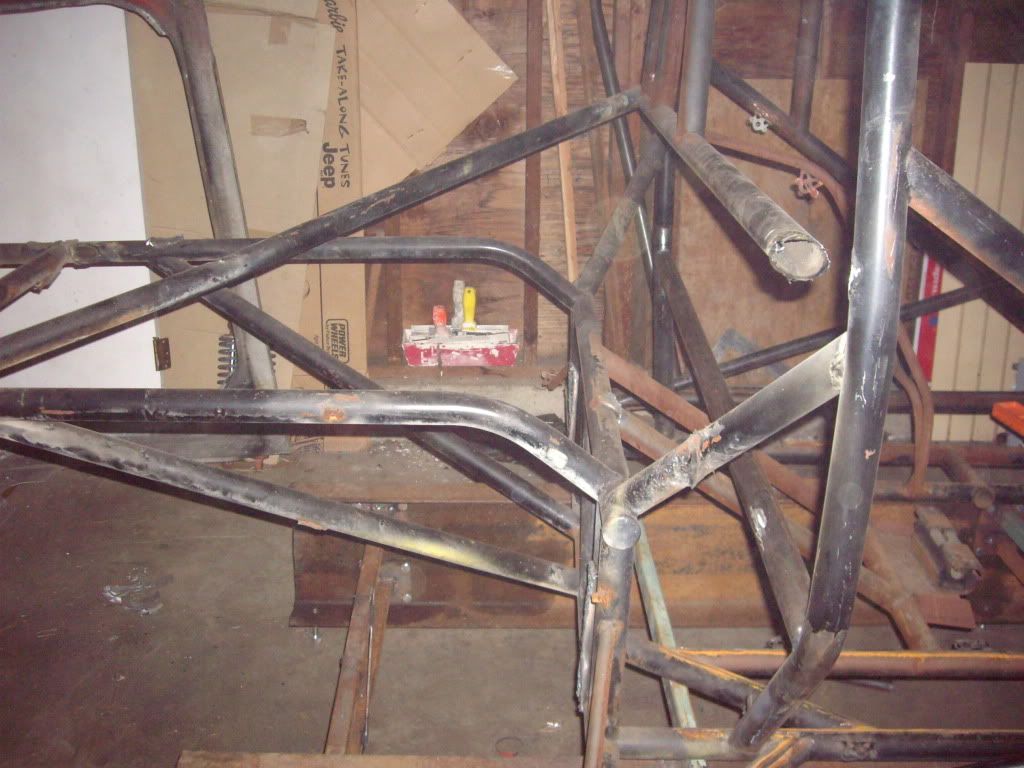
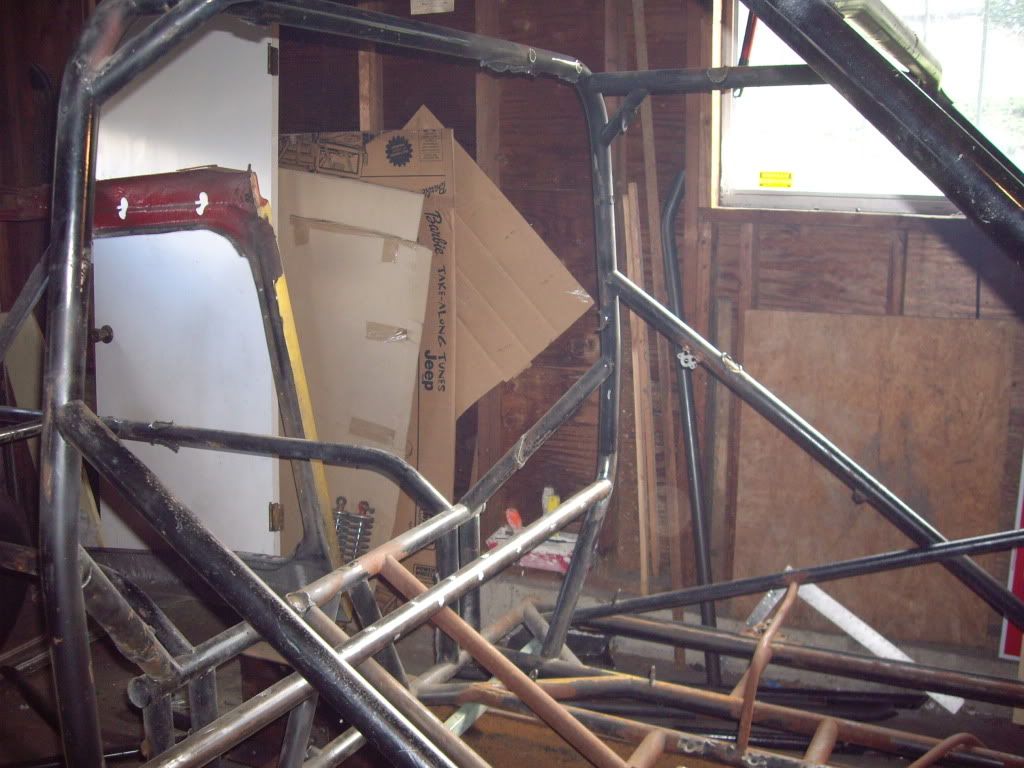
Next step was to remove the cage bars that passed through the rear window so I could pull the cab all the way off:
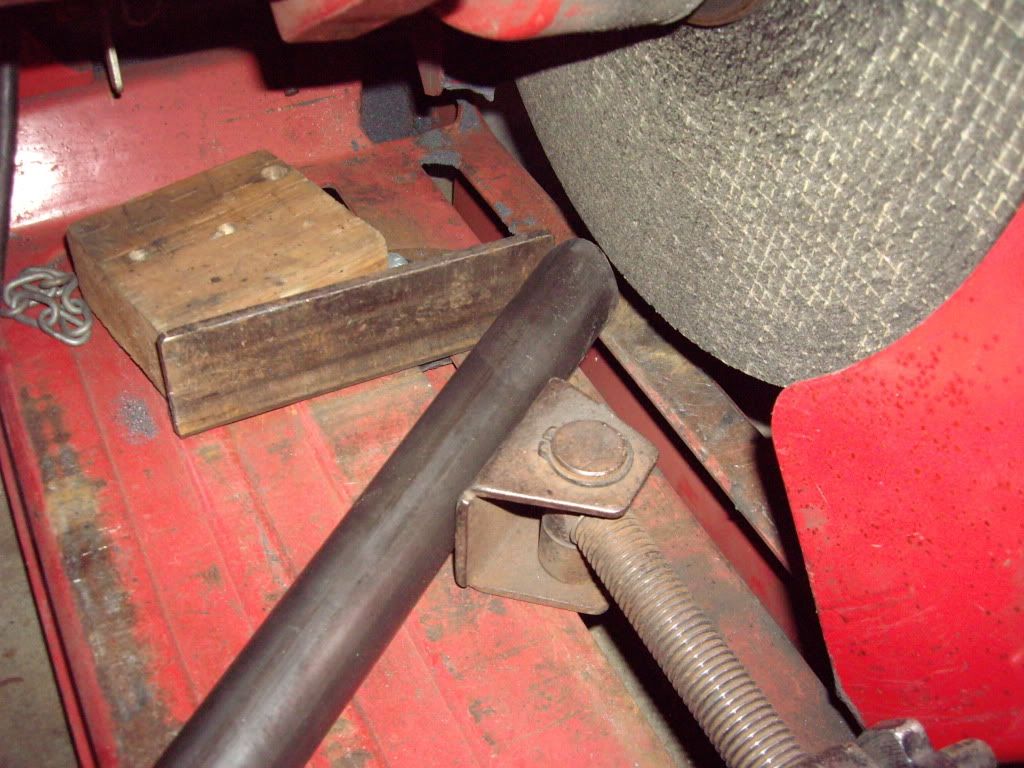
Here you can see the portions of the cage as I cut them out. I started making cuts with a Sawzall (even using genuine Milwaukie Made in USA blades), but I completely dulled a blade in just two cuts on this 4130 tubing! It seemed to cut harder near the welds, presumably due to some hardening that took place during the welding process. Remaining tubes are being cut either with the plasma cutter or abraisive cutoff wheel in an angle grinder.

Of course nothing is ever easy on this project, and my trusty old Black & Decker Industrial series grinder I have had since 1988 was a casualty. I went to use the stop pin to remove the cutoff wheel to change it out, and it was so wedged on that I broke the cast aluminum head of the grinder. I did my best to salvage it, building a custom tool to hold the shaft so I could get the cutting wheel arbor off. I machined flats into the shaft so I could remove wheels without using the now-destroyed stop pin. Unfortunately there was also a tooth missing in the right angle drive, so it makes a little bit more noise than before! I picked up a nice older Milwaukee grinder off of Craigslist, and moved the B&D grinder to backup duty.
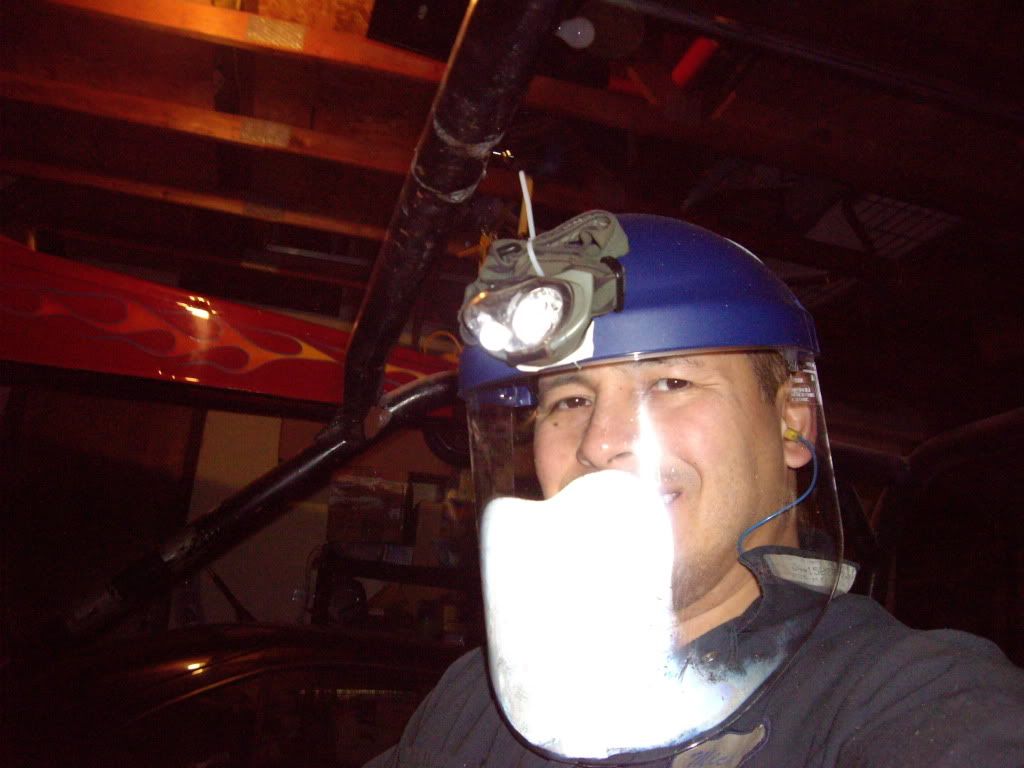
After getting tired of taking hot metal sparks in the face while cutting, I picked up a clear face shield and mounted an LED headlamp to it. I also tried using Rain-X anti-fog on it, but it tended to scratch the lens. After a little bit of internet research I ordered some C-Clear anti-fog gel, something that is made for use with plastic shields. When I race the truck in NHRA competition in Top Sportsman, I'll have to use the helmet's face shield even though I am in an enclosed vehicle, so I figured I should have some good anti-fog stuff around! This stuff is great, it stops all fogging and leaves a nice clear lens. In my cold garage the condensation eventually wears this stuff out, but I just need a quick swipe with more of the gel to take care of it.
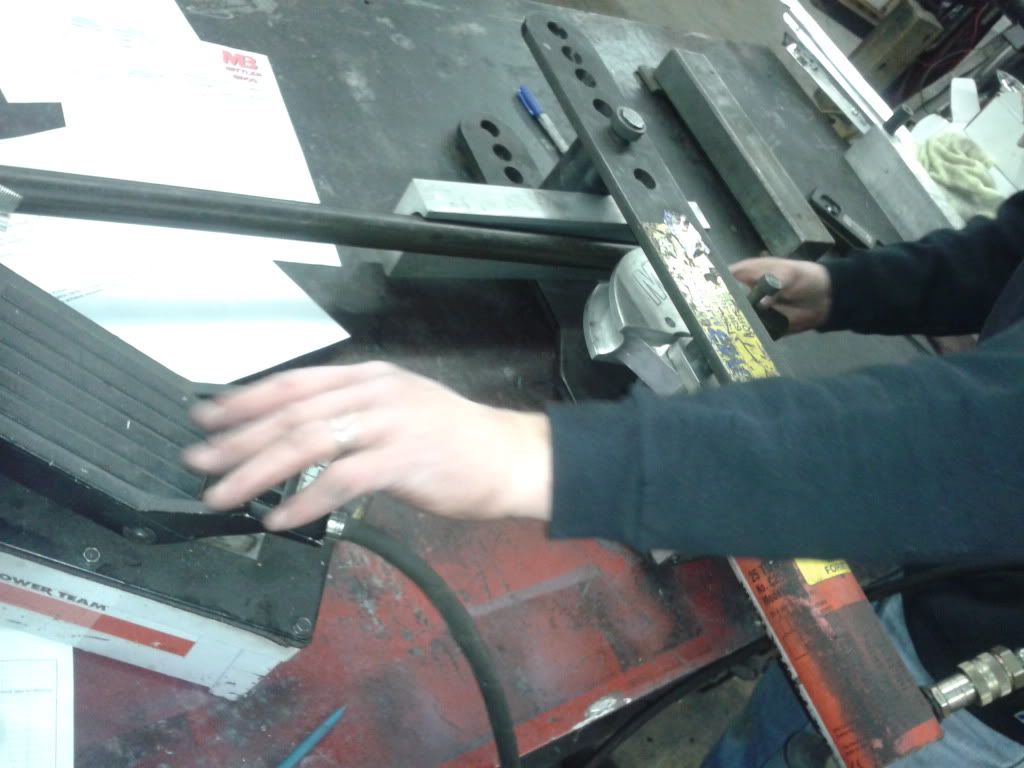
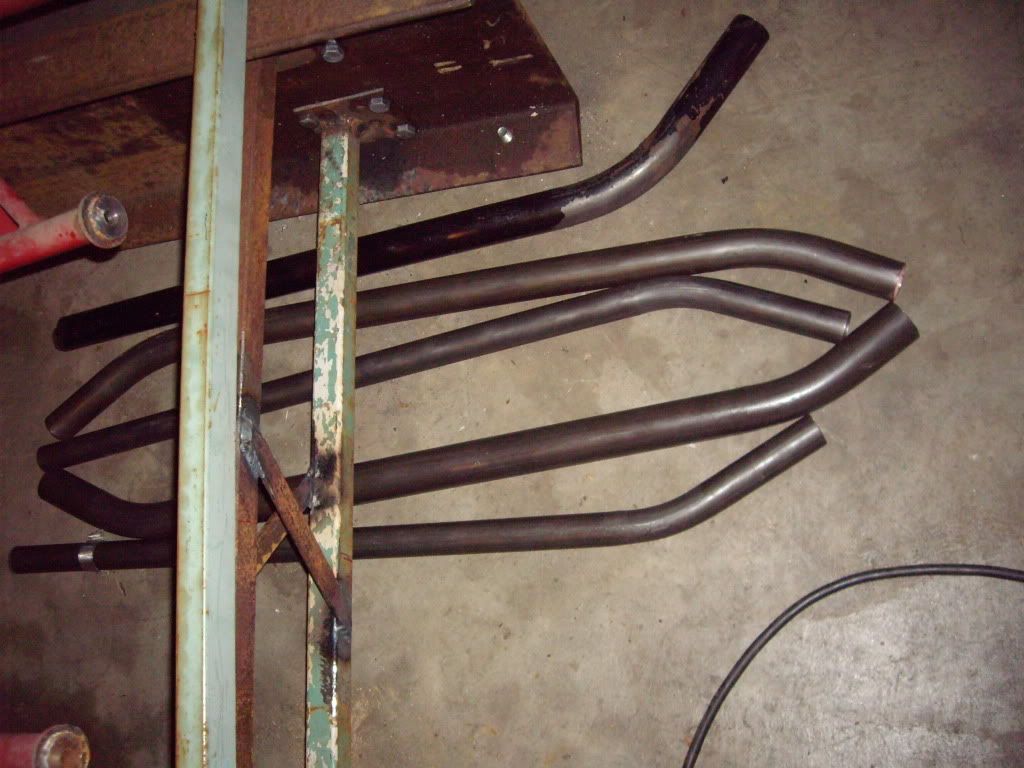
I spent an afternoon at a chassis builder, bending up the new cage bars.
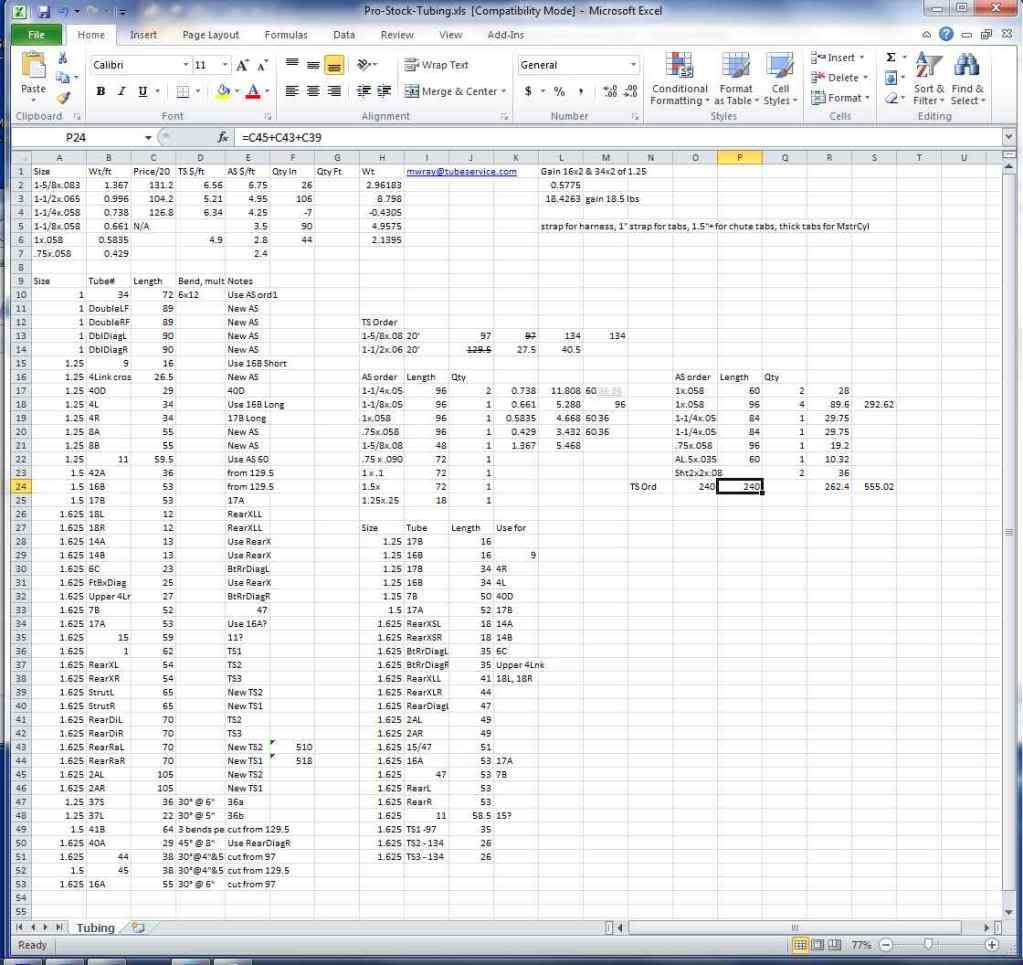
As I looked at the remaining tubes to be added (44 of them not counting small gussets), I decided to attempt to pick the best "grouping" of the tubes when cutting them from a mix of straight tube sections removed from the chassis, and new tubes of varying lengths (and finally from 20' lengths while trying to get the best yield without waste). Even though there is a large tubing supplier here in town, their prices on smaller 4130 tubes is out of line, and therefore cheaper from an online source (AircraftSpruce.com) even with oversized UPS shipping. As I was home sick anyway, I spent a few hours sorting this out for the best yield. Just picked up a (hopefully final) shipment from the local supplier, and also received my package of smaller diameter tubes from AircraftSpruce. Every tube has a specific cut pattern now for optimum yield. I just used an Excel spreadsheet to do all of that.
As I plan out the remaining parts of the chassis (front and rear suspensions), I needed to finish unpacking the many boxes of parts from Chris Alston's Chassisworks. The components are all packed ludicrously well, including boxes that are taped up like crazy AFTER adding dozens of box staples to the flaps. I swear I have spent more time opening boxes than welding at this point!
Here is the aluminum double-adjustable front strut body:

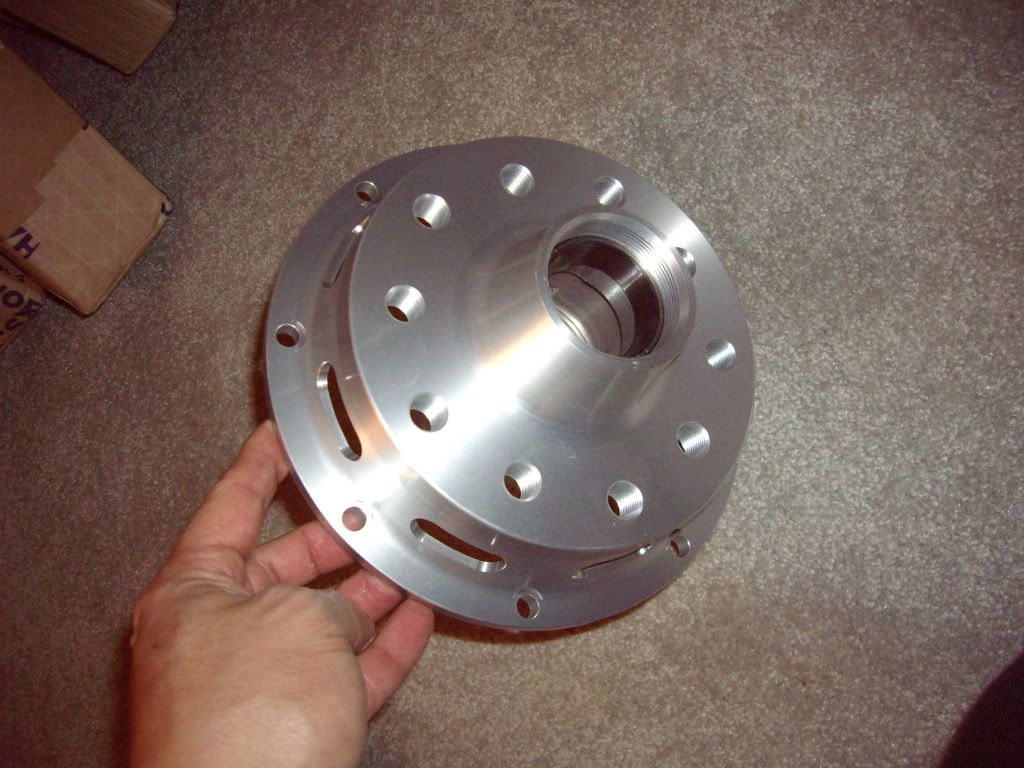
Aluminum front hubs
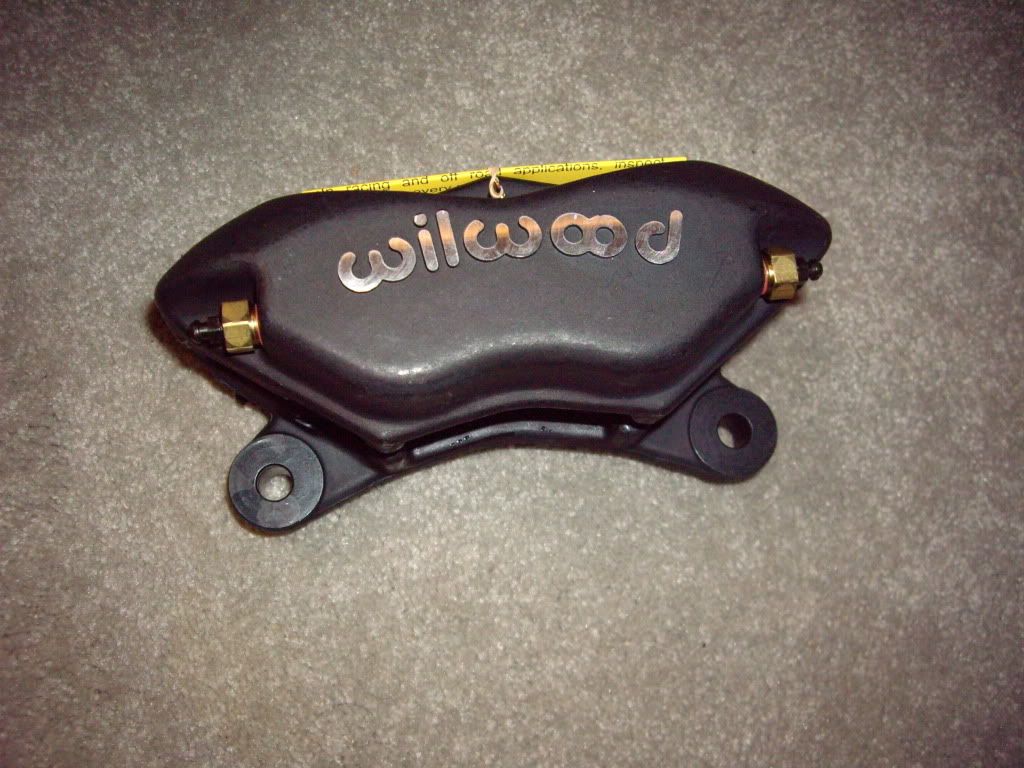
Wilwood 4-piston forged aluminum calipers
Slotted brake rotors
Next step - to free up a tube used elsewhere, I started notching the new tube to fit snugly with no gaps against the adjoining tubes. I will be doing a LOT of this in the next couple of weeks! The big chassis shops usually use a dedicated "notcher" that positions the tube precisely then cuts it with a hardened hole saw. I went with the redneck approach and carved the contour with a chop saw, holding the tube at the appropriate angle. Kids, don't try this at home! With practice I was able to get pretty good at it, but I also have a few scars from doing this when building my gasser chassis many years ago!
You really have to get these notches perfect to get good welds with minimal filler.
Then sometimes it is difficult to hold the bar in place while you double check everything:
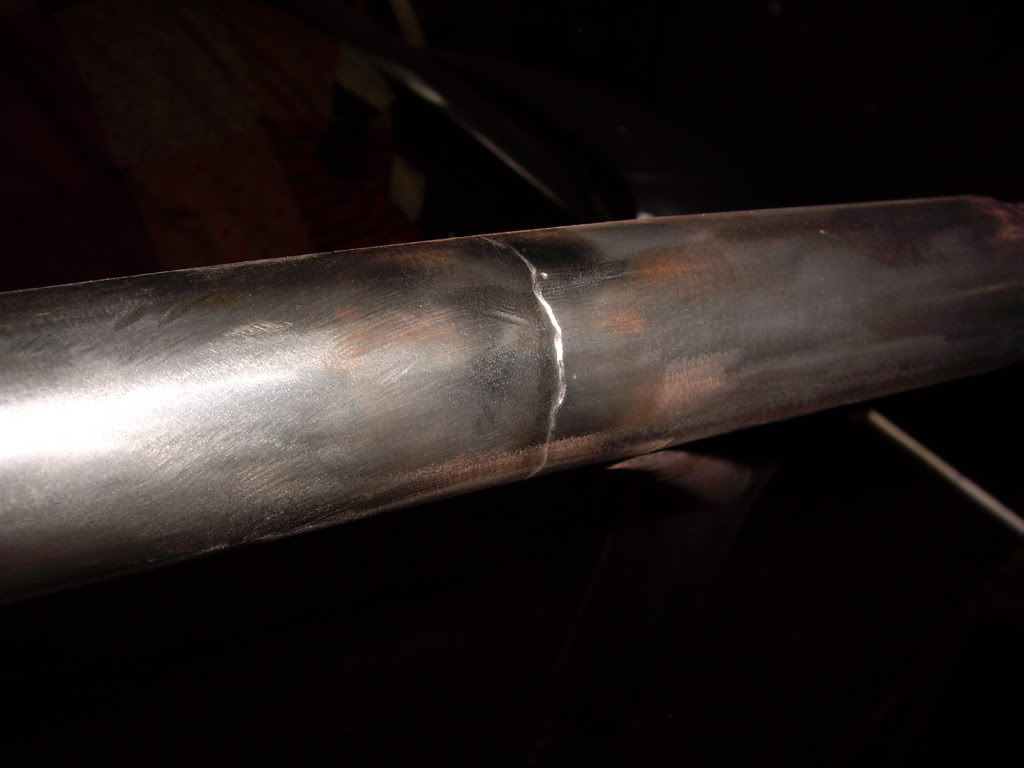
I finally welded in the first new bar! So far it had been all about cutting other bars out and bending the new ones, so this was a milestone in the build.
Unfortunately I chose this time to try to teach my daughter about TIG welding, and discovered that when combined with too much amperage and too large of a TIG electrode, if you turn your head for a moment it's possible to blow a pretty big hole in the tube!
I got to patch that hole next...
I needed to add that bar so I could remove the original bar just below it, then cleaning up and reusing that bar in another location in the chassis.
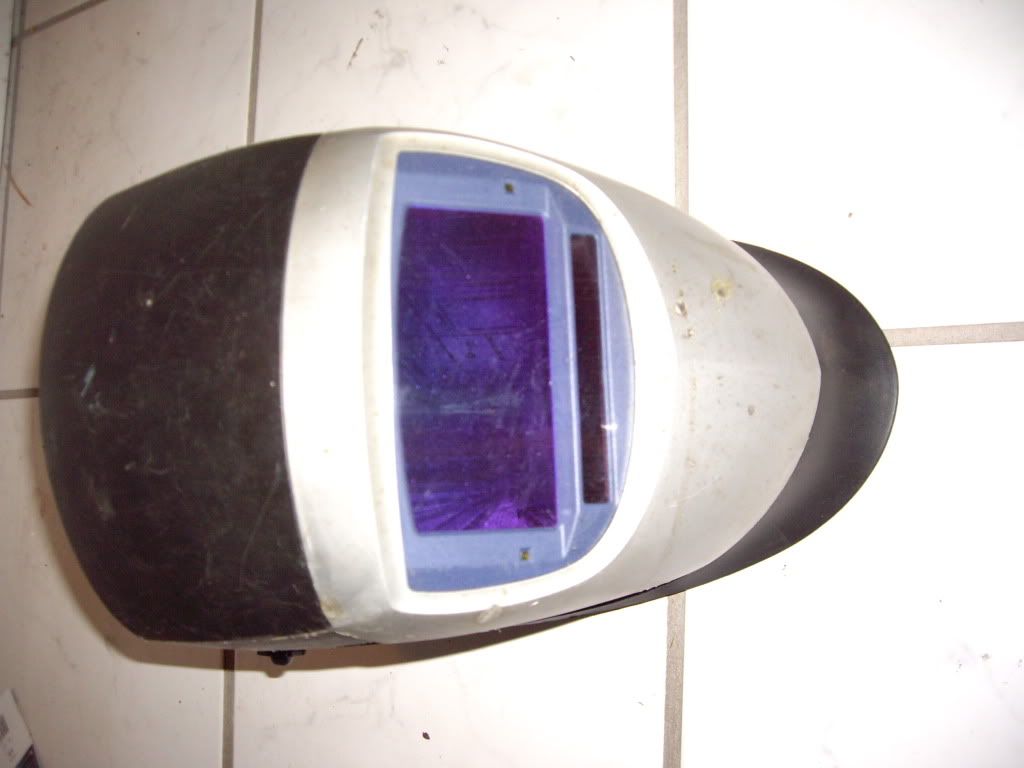
Prior to this I had been using a cheapo Harbor Freight auto-darkening welding helmet. After getting "flashed" with non-darkened light several times I decided to find a better helmet. I picked up a nice Speedglas unit off of ebay. As usual, nothing works as planned. Ebay had some sort of error that was telling the seller that I hadn't paid, even though I paid immediately via Paypal. After weeks of dealing with this I finally got the dang helmet. It worked much better, but still would give me an occasional flash when rollcage tubes blocked the sensors.
I found a really nice Snap-On helmet on Craigslist with 4 sensors, so far it has worked the best.
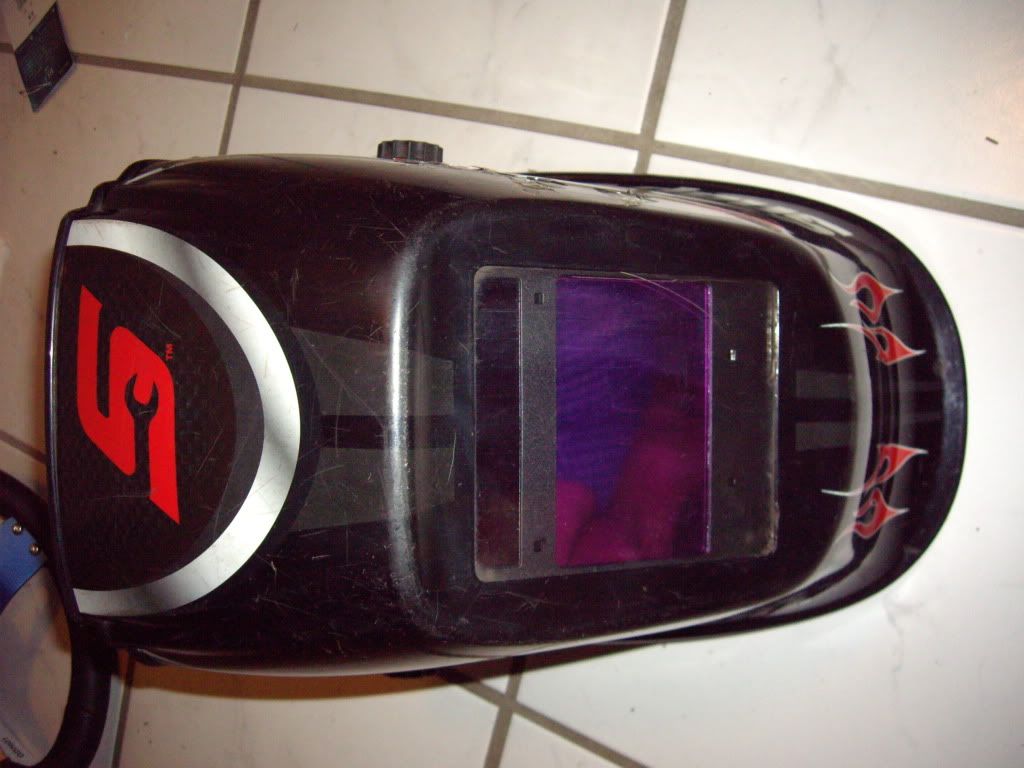
I liked the Speedglas one the best for comfort and breathability (it has a neat vent system), but as long as I am climbing around rollcage bars that block one or more sensors then I'll use the Snap-On. With a bunch of welding in awkward positions I have not been flashed yet with that one!
My next "milestone" is to finish enough of the cage to get the SFI 25.2 chassis certification. I have always been spoiled with the region's certification technician only about 10 miles away, but he had to retire due to medical reasons. On March 25 a tech is coming in from out of town to do multiple certifications at the local track, so I will have some late nights for the next several days trying to make that!
After mulling it over I decided to completely re-do the funny car cage area of the chassis, including the lower crossmember in that area. This way I can make sure the cage covers the full helmet in case they ever change that rule, and I can design it so that the seat can slide back if a taller person ever needs to drive it. At the same time I am taking some weight out but adding strength by designing the chassis portions to function like a truss.
Next step was to remove the cage bars that passed through the rear window so I could pull the cab all the way off:
Here you can see the portions of the cage as I cut them out. I started making cuts with a Sawzall (even using genuine Milwaukie Made in USA blades), but I completely dulled a blade in just two cuts on this 4130 tubing! It seemed to cut harder near the welds, presumably due to some hardening that took place during the welding process. Remaining tubes are being cut either with the plasma cutter or abraisive cutoff wheel in an angle grinder.
Of course nothing is ever easy on this project, and my trusty old Black & Decker Industrial series grinder I have had since 1988 was a casualty. I went to use the stop pin to remove the cutoff wheel to change it out, and it was so wedged on that I broke the cast aluminum head of the grinder. I did my best to salvage it, building a custom tool to hold the shaft so I could get the cutting wheel arbor off. I machined flats into the shaft so I could remove wheels without using the now-destroyed stop pin. Unfortunately there was also a tooth missing in the right angle drive, so it makes a little bit more noise than before! I picked up a nice older Milwaukee grinder off of Craigslist, and moved the B&D grinder to backup duty.
After getting tired of taking hot metal sparks in the face while cutting, I picked up a clear face shield and mounted an LED headlamp to it. I also tried using Rain-X anti-fog on it, but it tended to scratch the lens. After a little bit of internet research I ordered some C-Clear anti-fog gel, something that is made for use with plastic shields. When I race the truck in NHRA competition in Top Sportsman, I'll have to use the helmet's face shield even though I am in an enclosed vehicle, so I figured I should have some good anti-fog stuff around! This stuff is great, it stops all fogging and leaves a nice clear lens. In my cold garage the condensation eventually wears this stuff out, but I just need a quick swipe with more of the gel to take care of it.
I spent an afternoon at a chassis builder, bending up the new cage bars.
As I looked at the remaining tubes to be added (44 of them not counting small gussets), I decided to attempt to pick the best "grouping" of the tubes when cutting them from a mix of straight tube sections removed from the chassis, and new tubes of varying lengths (and finally from 20' lengths while trying to get the best yield without waste). Even though there is a large tubing supplier here in town, their prices on smaller 4130 tubes is out of line, and therefore cheaper from an online source (AircraftSpruce.com) even with oversized UPS shipping. As I was home sick anyway, I spent a few hours sorting this out for the best yield. Just picked up a (hopefully final) shipment from the local supplier, and also received my package of smaller diameter tubes from AircraftSpruce. Every tube has a specific cut pattern now for optimum yield. I just used an Excel spreadsheet to do all of that.
As I plan out the remaining parts of the chassis (front and rear suspensions), I needed to finish unpacking the many boxes of parts from Chris Alston's Chassisworks. The components are all packed ludicrously well, including boxes that are taped up like crazy AFTER adding dozens of box staples to the flaps. I swear I have spent more time opening boxes than welding at this point!
Here is the aluminum double-adjustable front strut body:
Aluminum front hubs
Wilwood 4-piston forged aluminum calipers
Slotted brake rotors
Next step - to free up a tube used elsewhere, I started notching the new tube to fit snugly with no gaps against the adjoining tubes. I will be doing a LOT of this in the next couple of weeks! The big chassis shops usually use a dedicated "notcher" that positions the tube precisely then cuts it with a hardened hole saw. I went with the redneck approach and carved the contour with a chop saw, holding the tube at the appropriate angle. Kids, don't try this at home! With practice I was able to get pretty good at it, but I also have a few scars from doing this when building my gasser chassis many years ago!
You really have to get these notches perfect to get good welds with minimal filler.
Then sometimes it is difficult to hold the bar in place while you double check everything:
I finally welded in the first new bar! So far it had been all about cutting other bars out and bending the new ones, so this was a milestone in the build.
Unfortunately I chose this time to try to teach my daughter about TIG welding, and discovered that when combined with too much amperage and too large of a TIG electrode, if you turn your head for a moment it's possible to blow a pretty big hole in the tube!
I got to patch that hole next...
I needed to add that bar so I could remove the original bar just below it, then cleaning up and reusing that bar in another location in the chassis.
Prior to this I had been using a cheapo Harbor Freight auto-darkening welding helmet. After getting "flashed" with non-darkened light several times I decided to find a better helmet. I picked up a nice Speedglas unit off of ebay. As usual, nothing works as planned. Ebay had some sort of error that was telling the seller that I hadn't paid, even though I paid immediately via Paypal. After weeks of dealing with this I finally got the dang helmet. It worked much better, but still would give me an occasional flash when rollcage tubes blocked the sensors.
I found a really nice Snap-On helmet on Craigslist with 4 sensors, so far it has worked the best.
I liked the Speedglas one the best for comfort and breathability (it has a neat vent system), but as long as I am climbing around rollcage bars that block one or more sensors then I'll use the Snap-On. With a bunch of welding in awkward positions I have not been flashed yet with that one!
My next "milestone" is to finish enough of the cage to get the SFI 25.2 chassis certification. I have always been spoiled with the region's certification technician only about 10 miles away, but he had to retire due to medical reasons. On March 25 a tech is coming in from out of town to do multiple certifications at the local track, so I will have some late nights for the next several days trying to make that!
Michael
Comp Diesel Sponsor
- Joined
- Apr 25, 2006
- Messages
- 3,411
Episode 8:
I forgot to add to the last update, I was fortunate enough to get some professional coverage courtesy of an article on Dragzine.com:
A Different Type of Build: A Pro Stock Diesel Truck - Dragzine
Now for more updates:
I took the tube I removed from the chassis previously (it was the dash bar), and proceeded to clean up the welds on it, weld a few holes shut, then notched it for its new location. Like the last tube, this goes in a spot with a compound set of angles into a bend of another tube (where the cross section of the mating tube is no longer a perfect circle). As a result even a notcher would not have worked, so I just did a trial and error process of grinding and fitting!
Welding this one in was a little easier since I wasn't trying to teach my daughter at the same time!
After that I was able to start removing the whole rear portion of the chassis, one tube at a time.

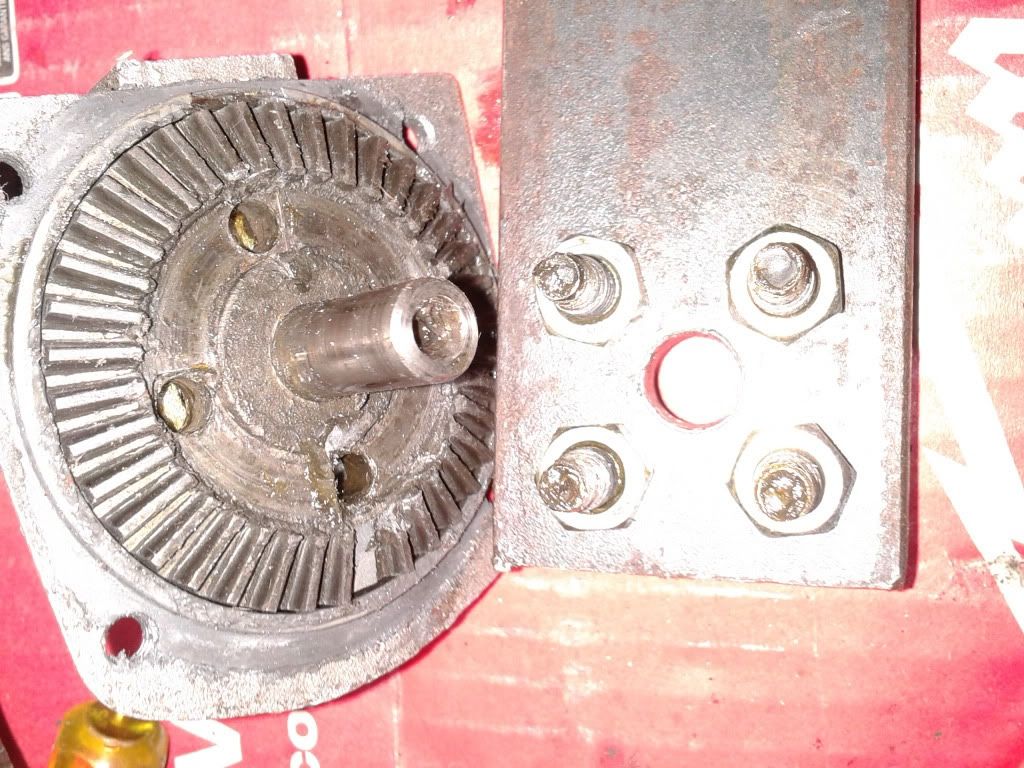
I needed my steering wheel for mocking up the driver position, which ended up being a separate distraction. One of my minor hassles was trying to use a 6-hole steering wheel with a 5-hole SFI-certified quick release. I could not find a wheel I liked in 5-hole, but found the perfect one in 6-hole.

Fortunately Grant makes and adapter ring, but like most things on a race truck it needed to be modified in order to work. They assumed you would have nuts sticking up on the "face" of the wheel when using a 6-hole wheel on a 5-hole mount.
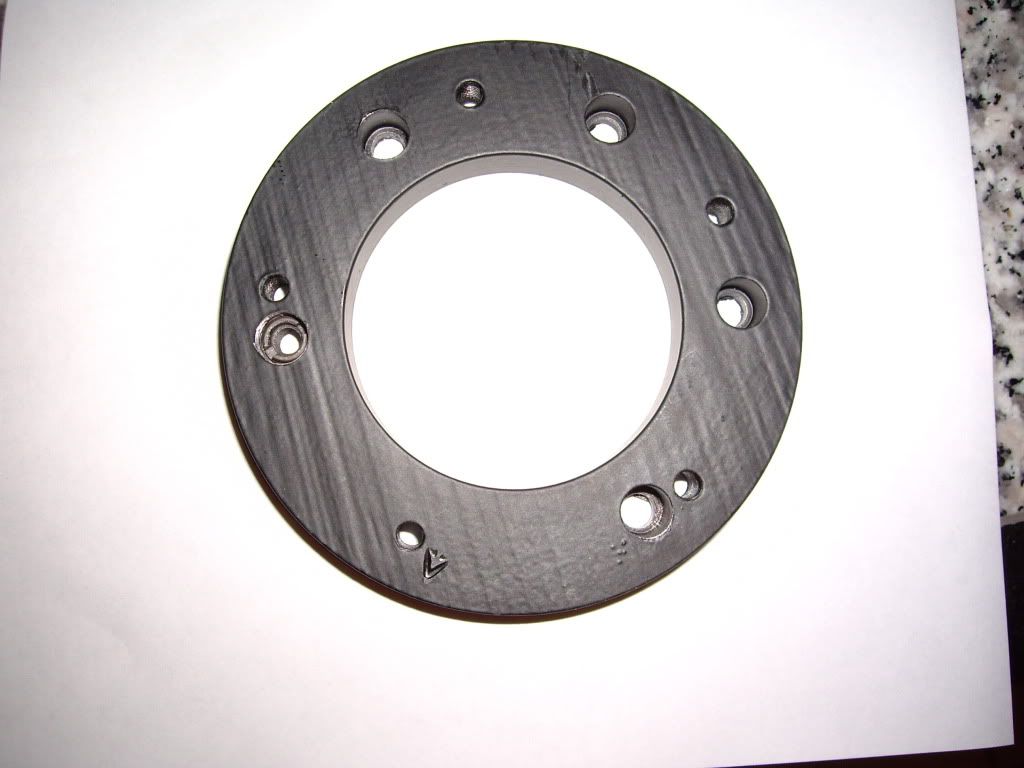
I prefer to have rounded button-head capscrews from the "face" side, so I drilled, tapped, and added threaded inserts to allow this.
I forgot to add to the last update, I was fortunate enough to get some professional coverage courtesy of an article on Dragzine.com:
A Different Type of Build: A Pro Stock Diesel Truck - Dragzine
Now for more updates:
I took the tube I removed from the chassis previously (it was the dash bar), and proceeded to clean up the welds on it, weld a few holes shut, then notched it for its new location. Like the last tube, this goes in a spot with a compound set of angles into a bend of another tube (where the cross section of the mating tube is no longer a perfect circle). As a result even a notcher would not have worked, so I just did a trial and error process of grinding and fitting!
Welding this one in was a little easier since I wasn't trying to teach my daughter at the same time!
After that I was able to start removing the whole rear portion of the chassis, one tube at a time.
I needed my steering wheel for mocking up the driver position, which ended up being a separate distraction. One of my minor hassles was trying to use a 6-hole steering wheel with a 5-hole SFI-certified quick release. I could not find a wheel I liked in 5-hole, but found the perfect one in 6-hole.
Fortunately Grant makes and adapter ring, but like most things on a race truck it needed to be modified in order to work. They assumed you would have nuts sticking up on the "face" of the wheel when using a 6-hole wheel on a 5-hole mount.
I prefer to have rounded button-head capscrews from the "face" side, so I drilled, tapped, and added threaded inserts to allow this.
Michael
Comp Diesel Sponsor
- Joined
- Apr 25, 2006
- Messages
- 3,411
Episode 9
I took advantage of the Summit Racing 15% discount sale for New Years, and picked up a bunch of "smaller" items:
Front wheels (Weld Pro Star 15 x 3.5)
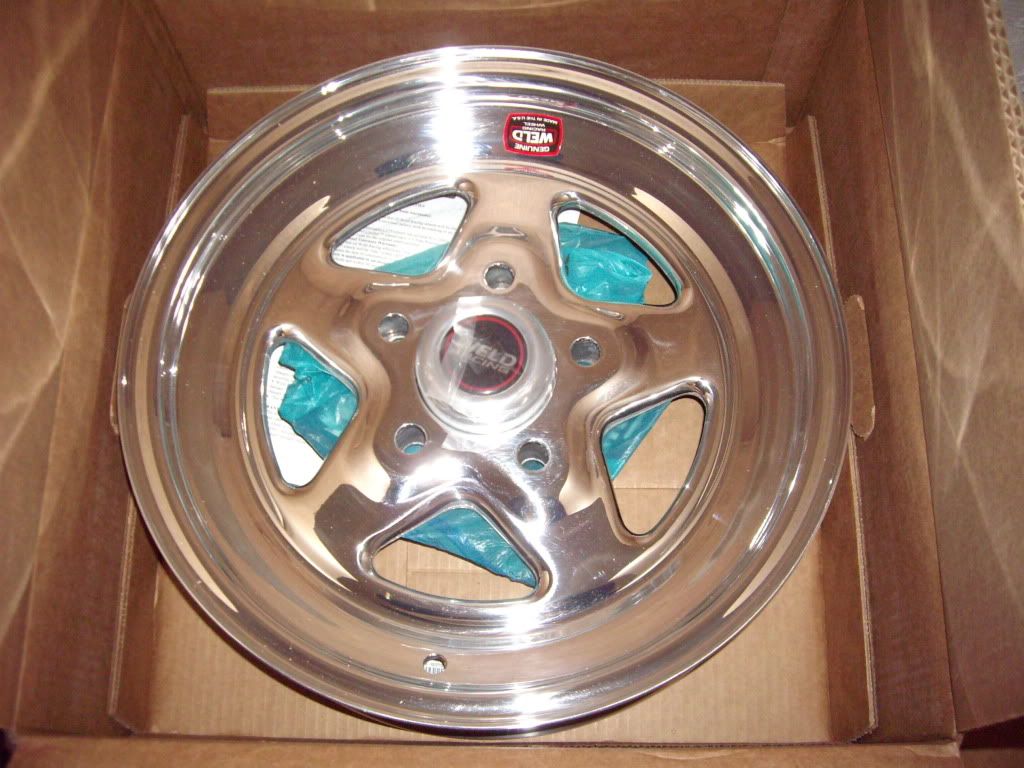
Front tires (Moroso DS-2, 26 x 4.5 x 15)
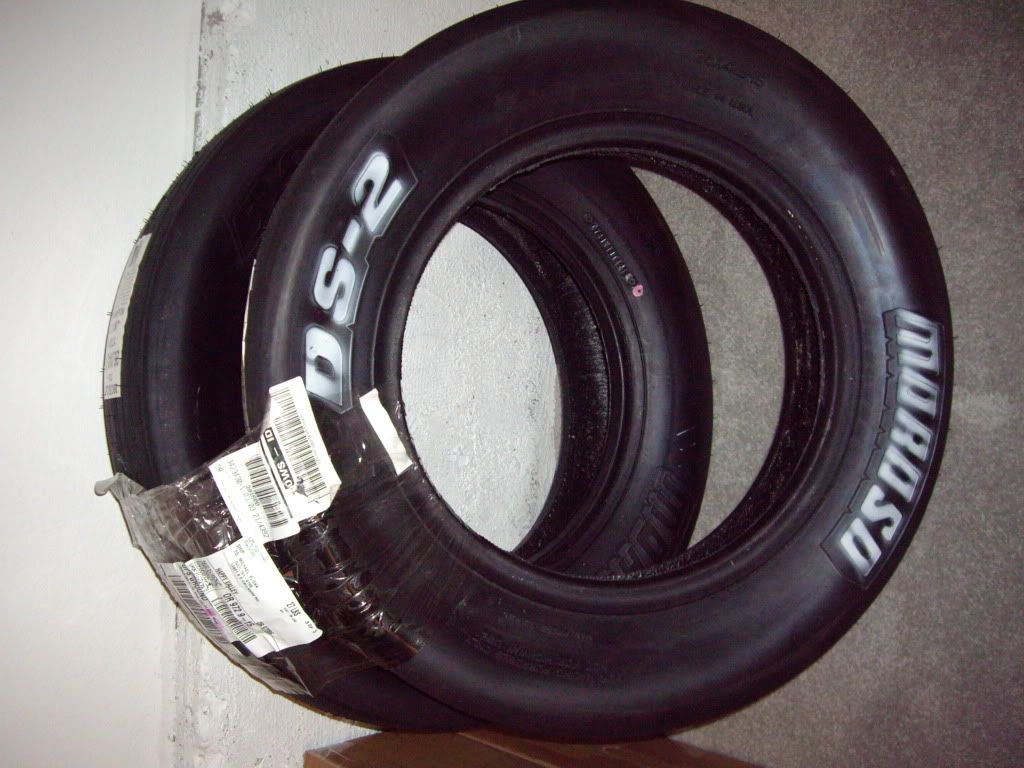
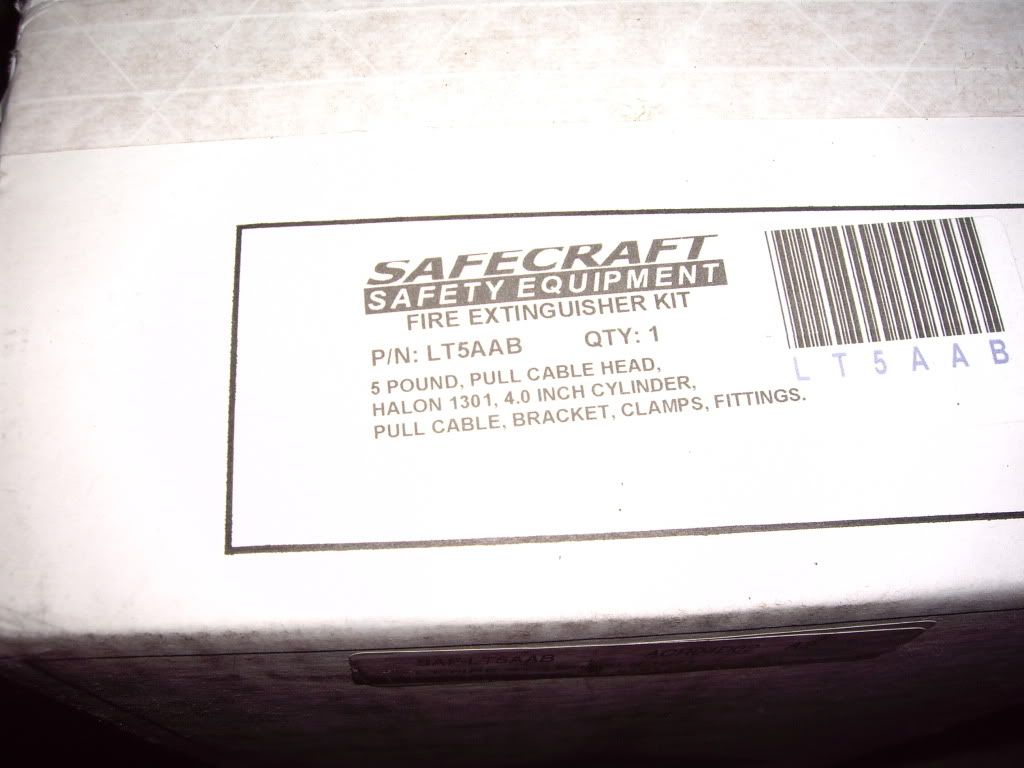
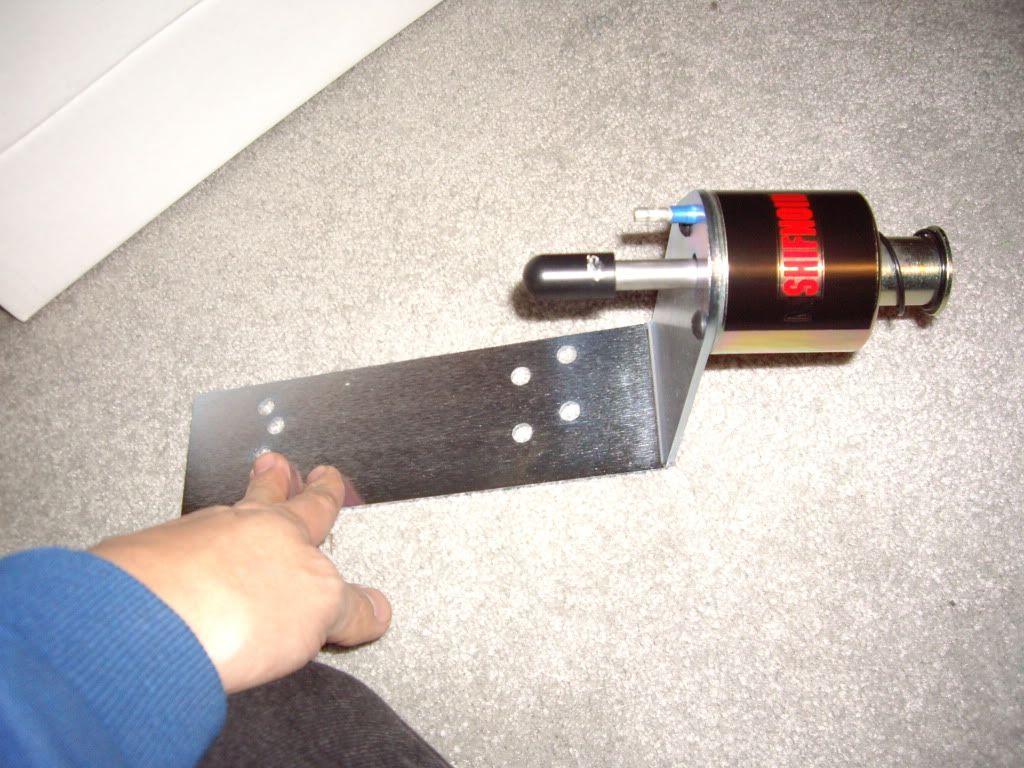
Onboard fire suppression system (Safecraft 5 lb Halon system) - my friend Shawn Ellerton should probably get one of these!
Electric shift solenoid (Shiftnoid)
I like the idea of shifting myself, but it may be too much to deal with during a pass.
Combination mid-plate and flexplate SFI shield from TCI. I actually sent this one back, as it had an SFI tag date of Oct 2011. I have heard (and seen the evidence) that SFI allows at least 2 month "post dating" of tags from the manufacturer, so this one has been sitting around a while. As it will need replacing or recertifying based on its manufacture date, I wanted a newer date on mine. I don't care so much if it's December or February, as long as it falls in the "off season" for recertification, but the new one (which arrived in February) has an April 2012 manufacturing date on it!
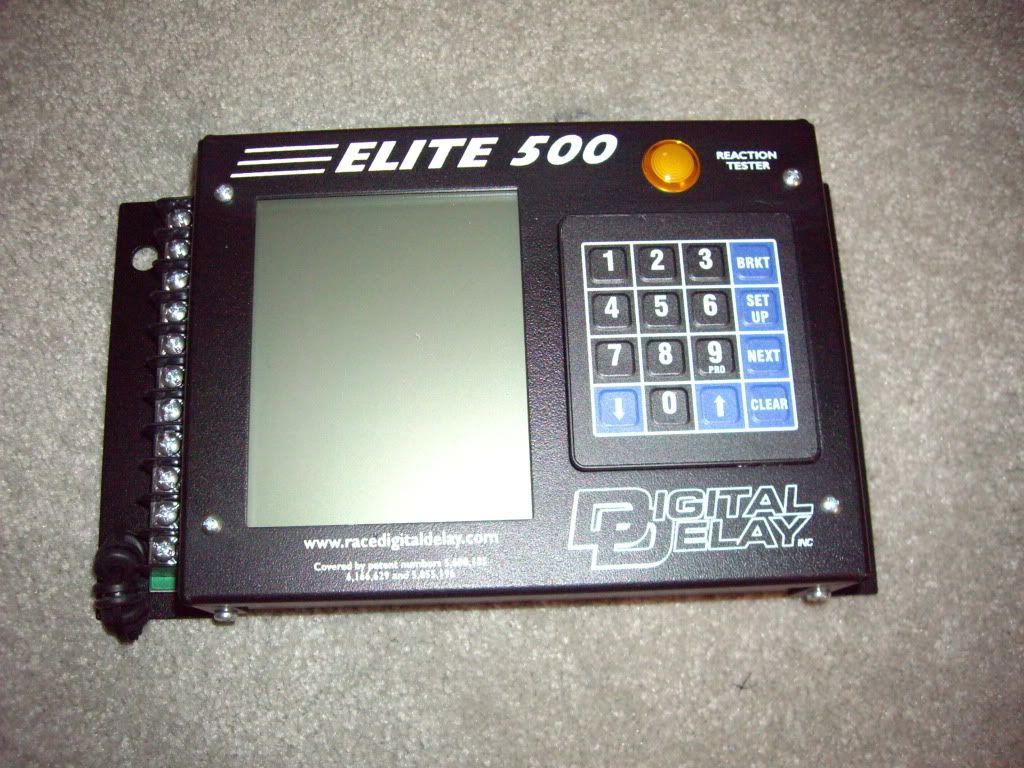
Delay box (Biondo Elite 500), which will be used to control the transmission shifting and lockup.
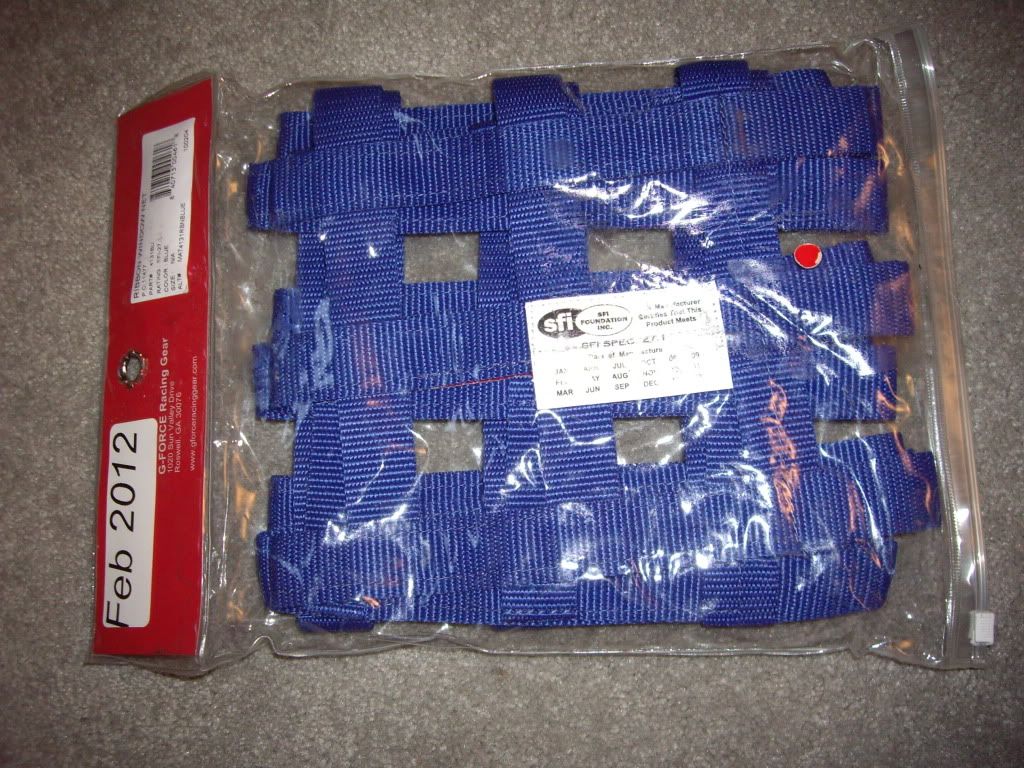
Window net
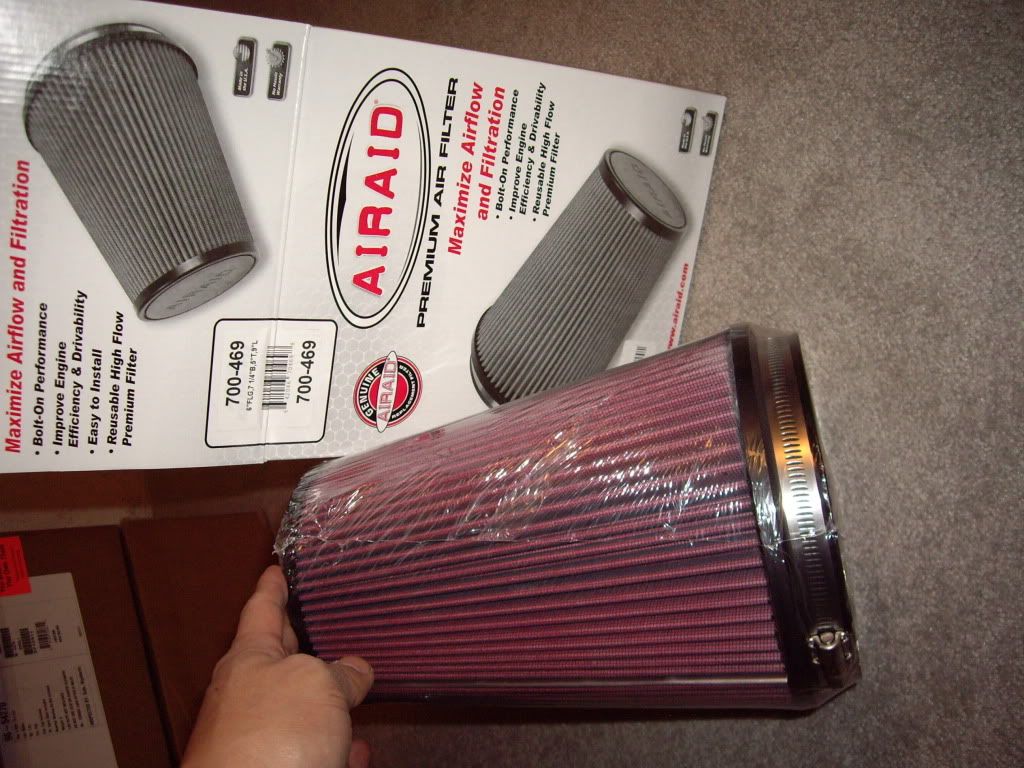
Airaid Air Filter (specifically picked this since they are an NHRDA contingency sponsor):
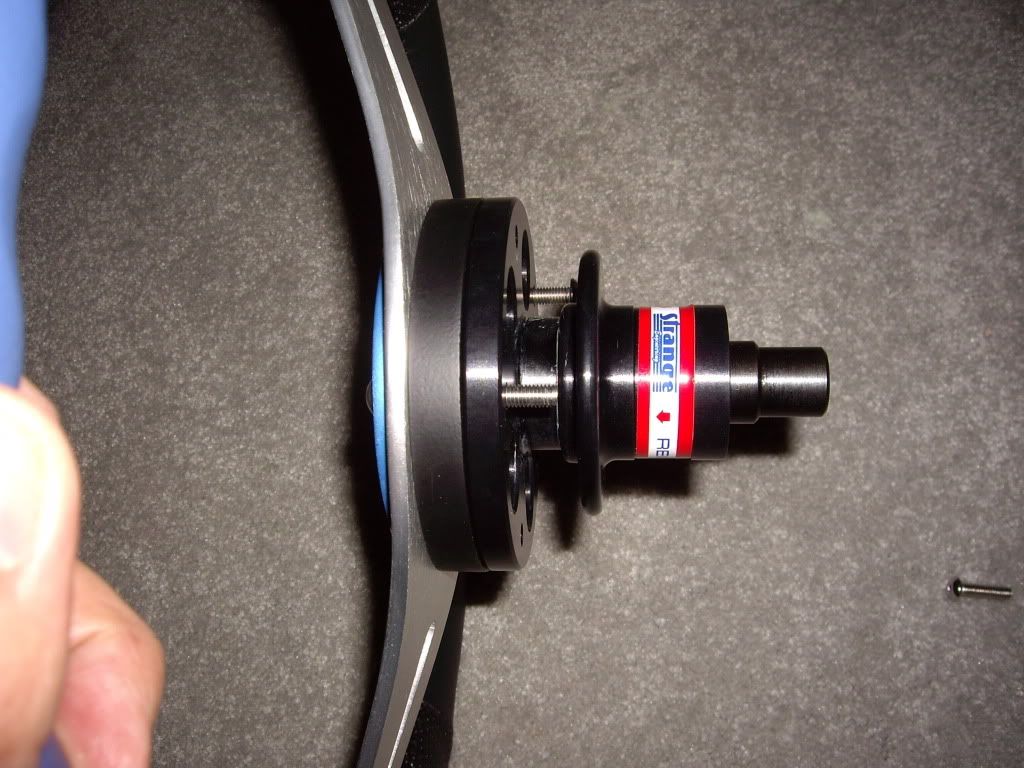
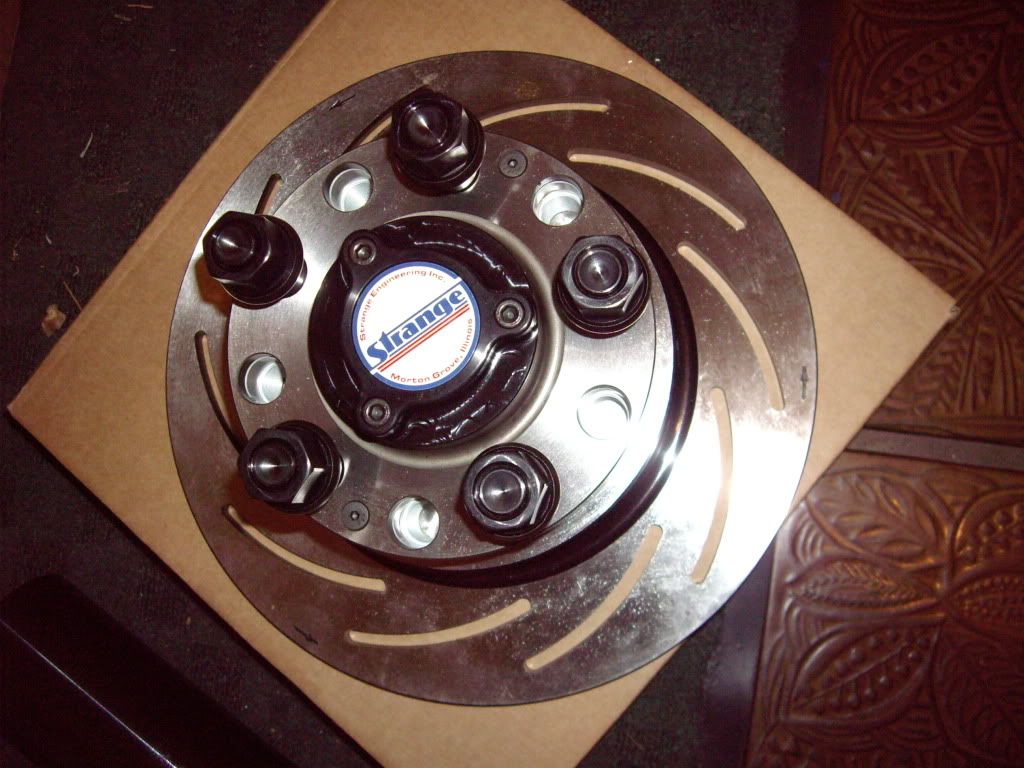
And how about a little Strange? No, not the kind Charlie Sheen is always talking about, I mean Strange Engineering, who made the full floater axle kit.
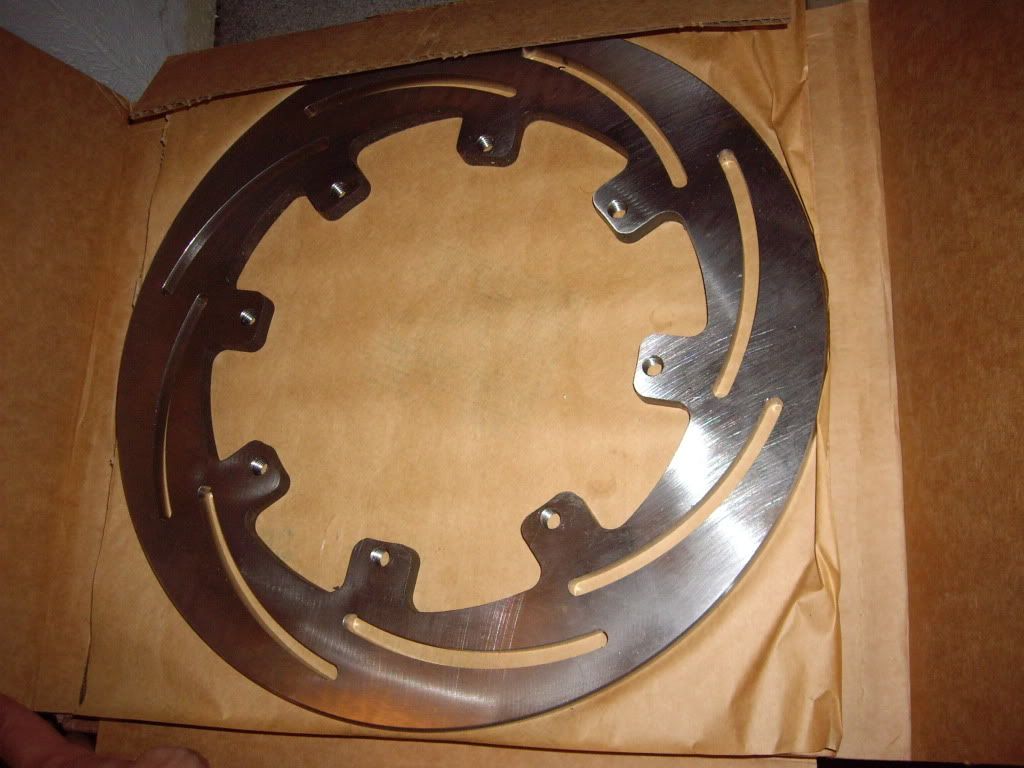
Then again Charlie would like hearing about Strange times 4, and I've got four of these beauties going on the rear axle:

I'm going to plumb both pairs of calipers separately, and rig up a solenoid valve to allow blocking flow to one of the sets. That way I can run agressive pads on one pair to help with spooling, but won't have to worry about premature lockup when stopping after a run. At least that's how it will work in theory!
Here are the hub/rotor assemblies:
Here is one of the "spindles" before it was shipped off to Chassisworks to be welded in to the Fab9 rearend they are building for me. Hoping to see that in the next week or so!
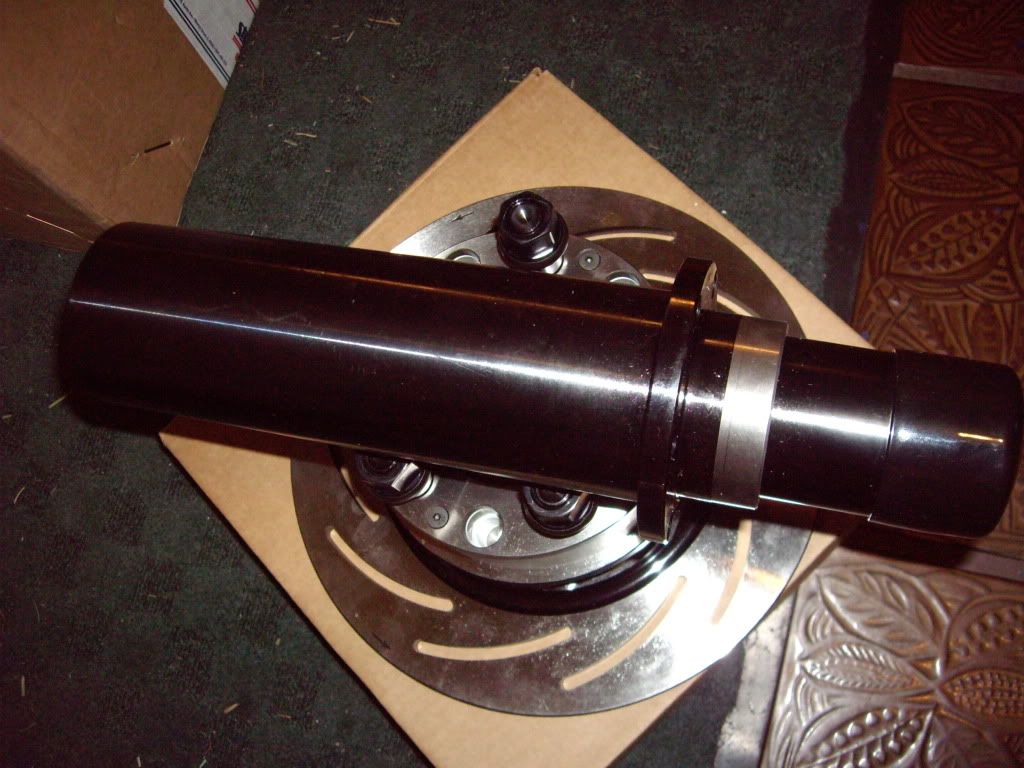
Funny thing about the floater, it's undeniable that a floater is the safest type of rear axle for a drag vehicle. They were required by NHRA for anything capable of 210 mph or higher, and I had it on some inside info that the rule was being "looked at" for revision. We figured that any revision would make the rule more strict, like lowering the limit to 200 or even 180 mph, so I ordered my parts to build a floater for this truck. Then the rule change came out and they raised the limit to 240 mph! Oh well, at least I know my rear tires aren't going to come off even with a broken axle!
After several weeks of delays, my other LB7 crank showed up (the seller had a few things come up). He wrapped it in layers of cardboard and bubble wrap:
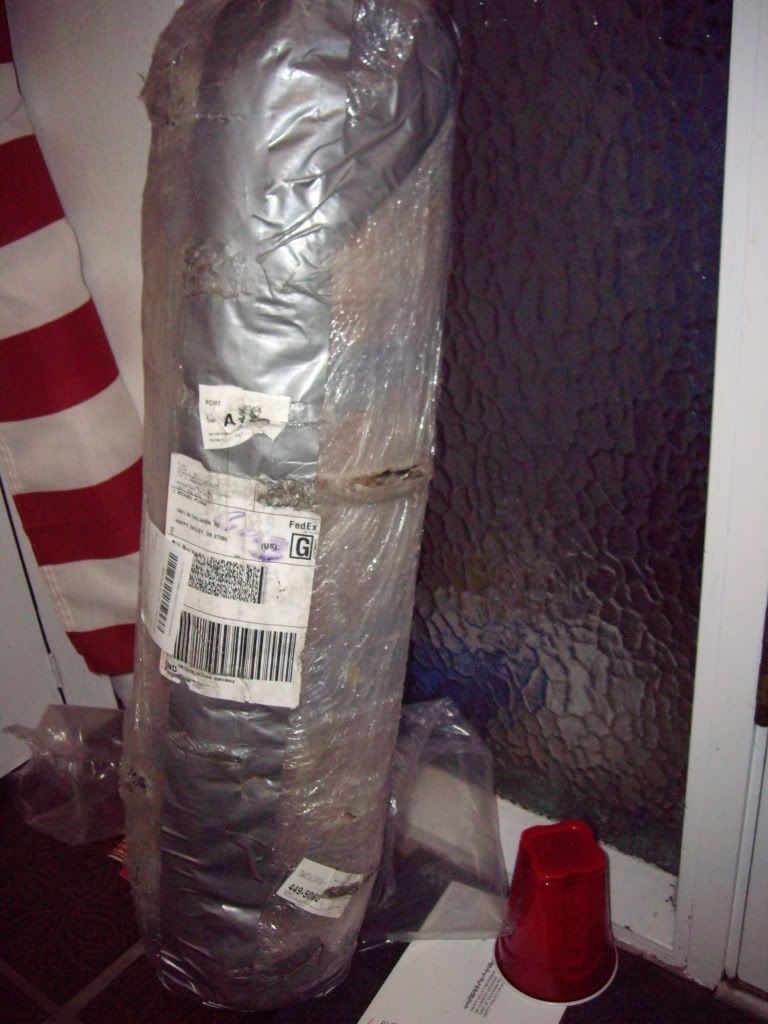
Despite that packaging, Fedex managed to still mangle the tone ring, but as I understand it I'll be using the one from the LBZ anyway.
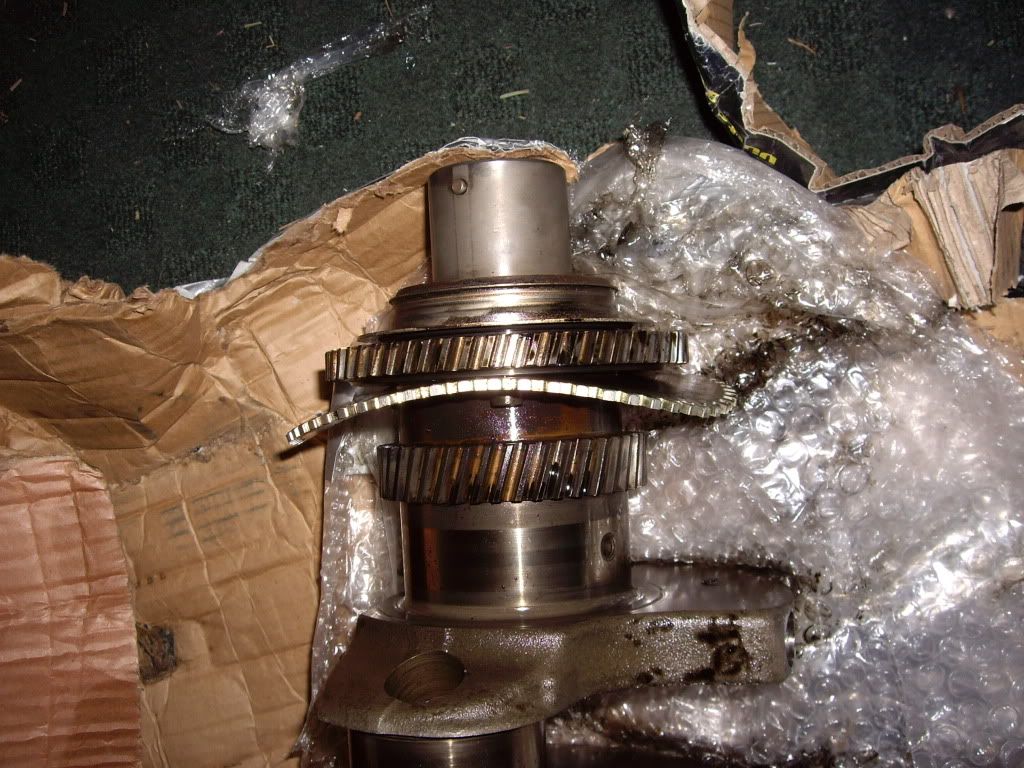
The crank itself was in beautiful condition, the journals are smooth as glass.
With all this shopping, I thought my gasser might get jealous. There was a sale on Valvoline VR1 racing oil at all the Autozone stores, so I cleared out every store on my way home one night.
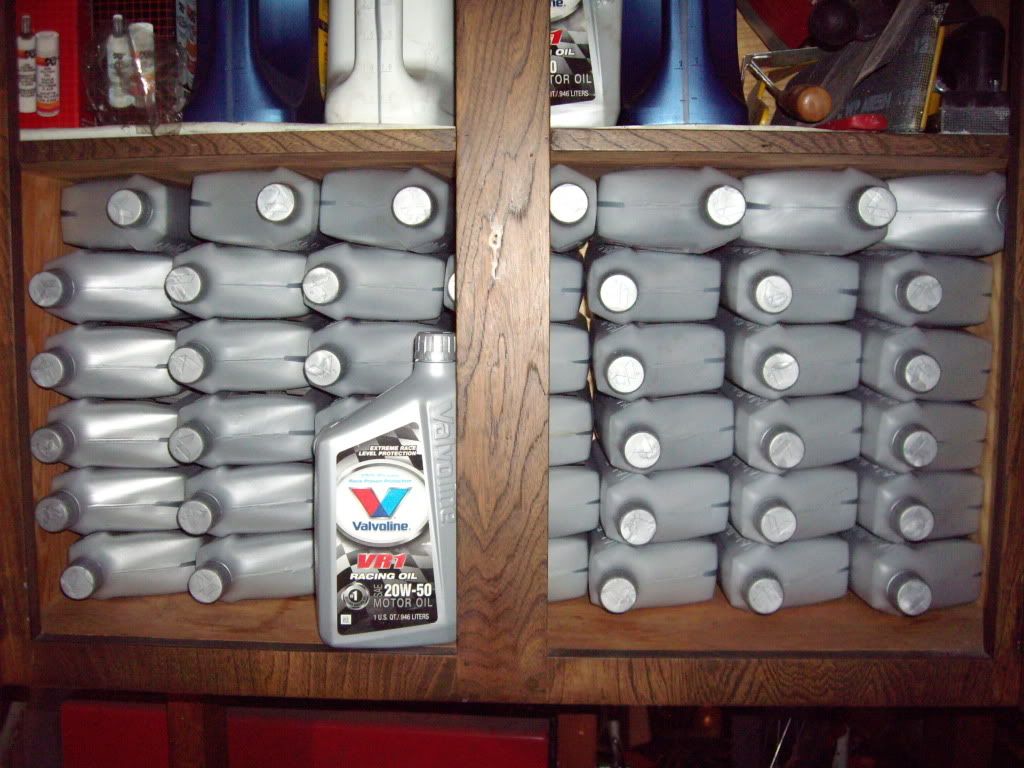
This is in addition to one more case that went into the trailer! With a change to E85 in the gasser I want to keep an eye on the oil and probably change it more often.
I took advantage of the Summit Racing 15% discount sale for New Years, and picked up a bunch of "smaller" items:
Front wheels (Weld Pro Star 15 x 3.5)
Front tires (Moroso DS-2, 26 x 4.5 x 15)
Onboard fire suppression system (Safecraft 5 lb Halon system) - my friend Shawn Ellerton should probably get one of these!
Electric shift solenoid (Shiftnoid)
I like the idea of shifting myself, but it may be too much to deal with during a pass.
Combination mid-plate and flexplate SFI shield from TCI. I actually sent this one back, as it had an SFI tag date of Oct 2011. I have heard (and seen the evidence) that SFI allows at least 2 month "post dating" of tags from the manufacturer, so this one has been sitting around a while. As it will need replacing or recertifying based on its manufacture date, I wanted a newer date on mine. I don't care so much if it's December or February, as long as it falls in the "off season" for recertification, but the new one (which arrived in February) has an April 2012 manufacturing date on it!
Delay box (Biondo Elite 500), which will be used to control the transmission shifting and lockup.
Window net
Airaid Air Filter (specifically picked this since they are an NHRDA contingency sponsor):
And how about a little Strange? No, not the kind Charlie Sheen is always talking about, I mean Strange Engineering, who made the full floater axle kit.
Then again Charlie would like hearing about Strange times 4, and I've got four of these beauties going on the rear axle:
I'm going to plumb both pairs of calipers separately, and rig up a solenoid valve to allow blocking flow to one of the sets. That way I can run agressive pads on one pair to help with spooling, but won't have to worry about premature lockup when stopping after a run. At least that's how it will work in theory!
Here are the hub/rotor assemblies:
Here is one of the "spindles" before it was shipped off to Chassisworks to be welded in to the Fab9 rearend they are building for me. Hoping to see that in the next week or so!
Funny thing about the floater, it's undeniable that a floater is the safest type of rear axle for a drag vehicle. They were required by NHRA for anything capable of 210 mph or higher, and I had it on some inside info that the rule was being "looked at" for revision. We figured that any revision would make the rule more strict, like lowering the limit to 200 or even 180 mph, so I ordered my parts to build a floater for this truck. Then the rule change came out and they raised the limit to 240 mph! Oh well, at least I know my rear tires aren't going to come off even with a broken axle!
After several weeks of delays, my other LB7 crank showed up (the seller had a few things come up). He wrapped it in layers of cardboard and bubble wrap:
Despite that packaging, Fedex managed to still mangle the tone ring, but as I understand it I'll be using the one from the LBZ anyway.
The crank itself was in beautiful condition, the journals are smooth as glass.
With all this shopping, I thought my gasser might get jealous. There was a sale on Valvoline VR1 racing oil at all the Autozone stores, so I cleared out every store on my way home one night.
This is in addition to one more case that went into the trailer! With a change to E85 in the gasser I want to keep an eye on the oil and probably change it more often.
Michael
Comp Diesel Sponsor
- Joined
- Apr 25, 2006
- Messages
- 3,411
Episode 10
With the aforementioned March 25 chassis inspection event coming up, I really started busting my butt on the chassis fab area, working on it every night and early morning. In my recent Summit orders they have included either a Summit hat or a sample bottle of 5-hour Energy. Can you guess which one was used with this build?

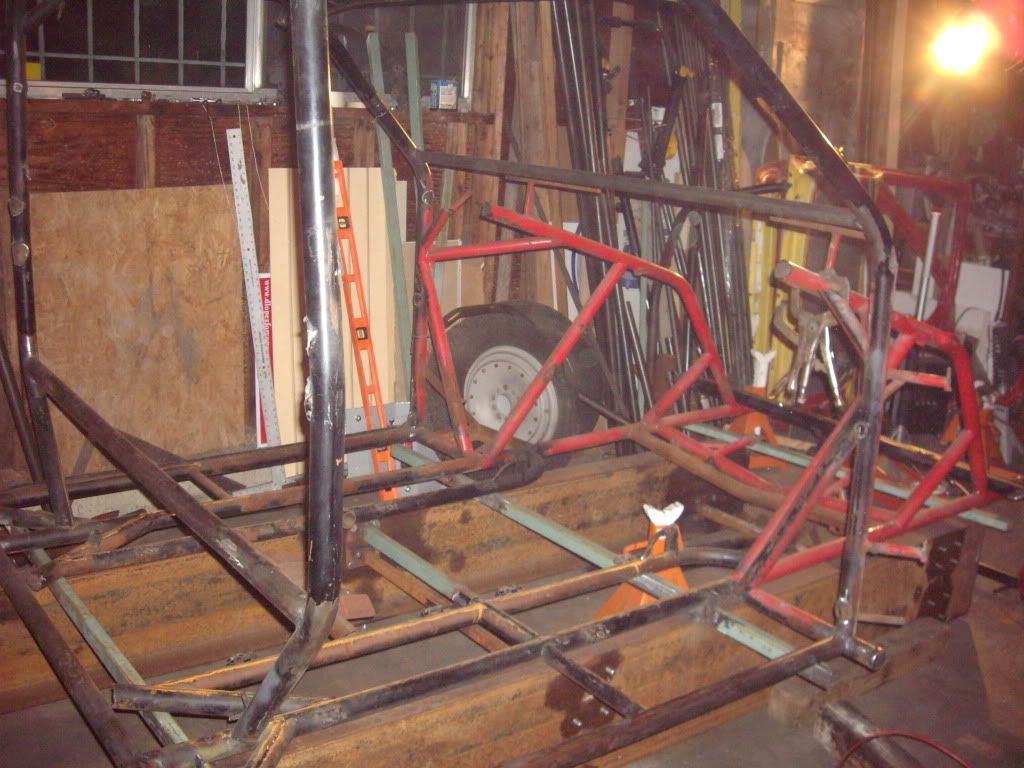
I removed the rest of the original Funny Car cage:
Then I removed the rear frame section completely
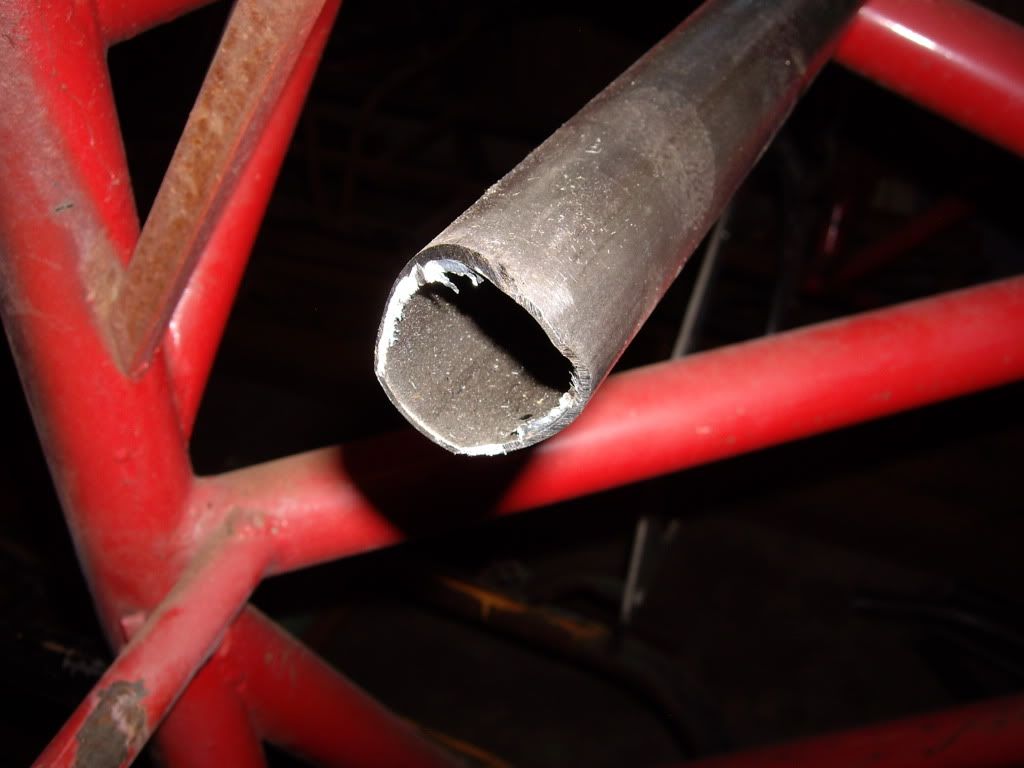
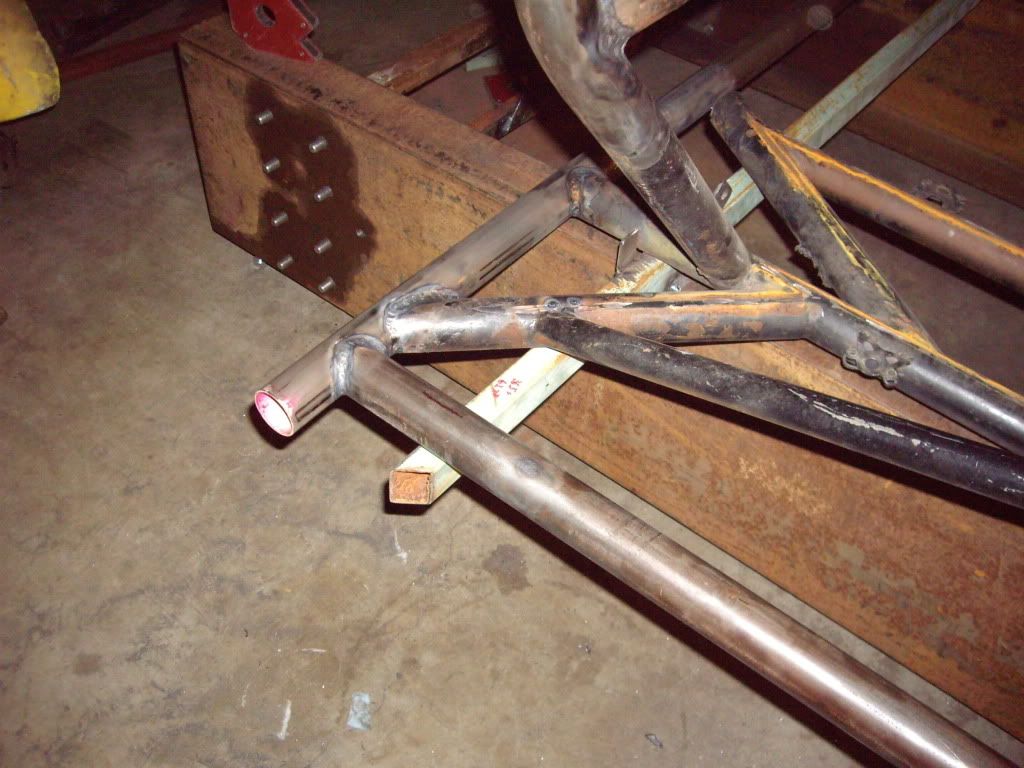
Also removed the original "#1" bar, the main rear crossmember that positions the rear suspension (arguably the most important bar in the chassis):
This needed to be replaced since it needed to be one solid piece without any splices, but had a splice in it. I checked and found that the original bar was VERY crooked in the chassis. This thing would have launched crooked and dog-tracked after the launch!
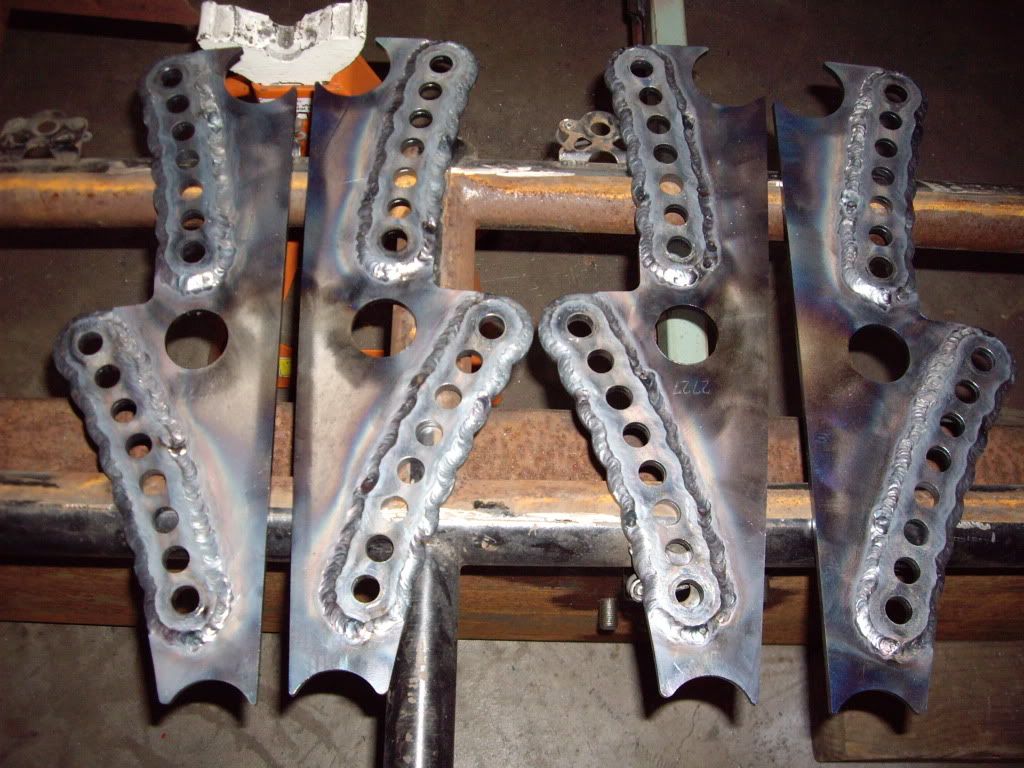
I welded on "doublers" for the new 4-link brackets, something Chassisworks recommends for blown Pro Mod type chassis.
I squared the chassis up in the jig and welded in a new #1 bar, along with a passenger-side door sill bar (original was undersized).

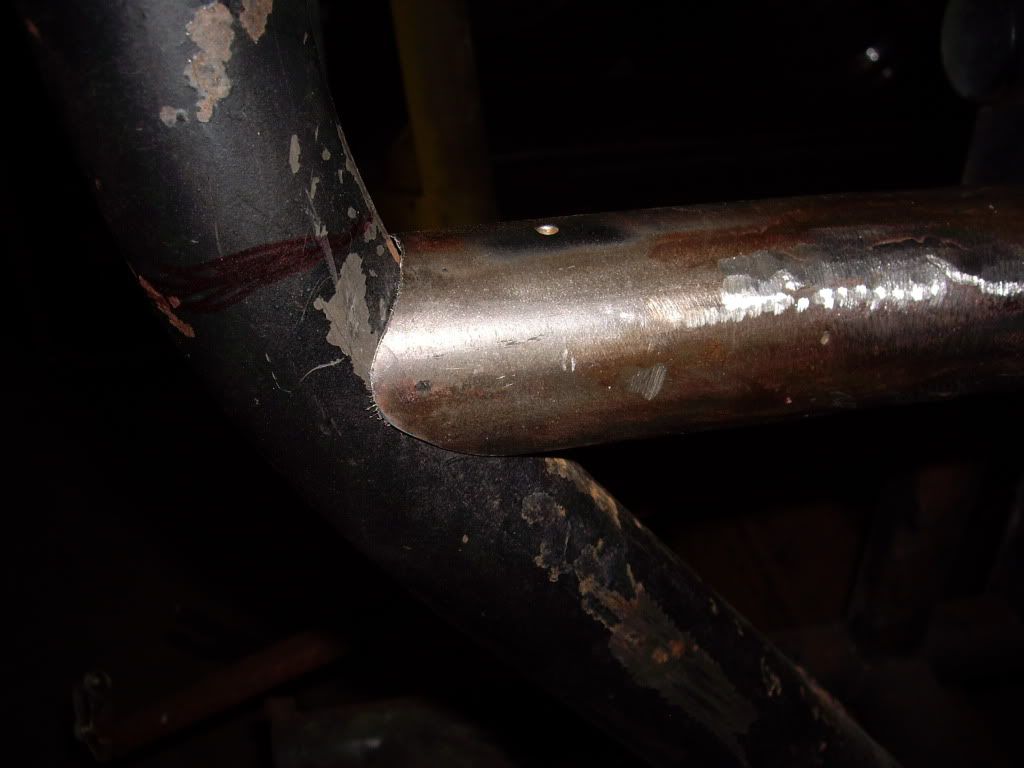
At that point I noticed yet ANOTHER original weld that did not go all the way around a tube.
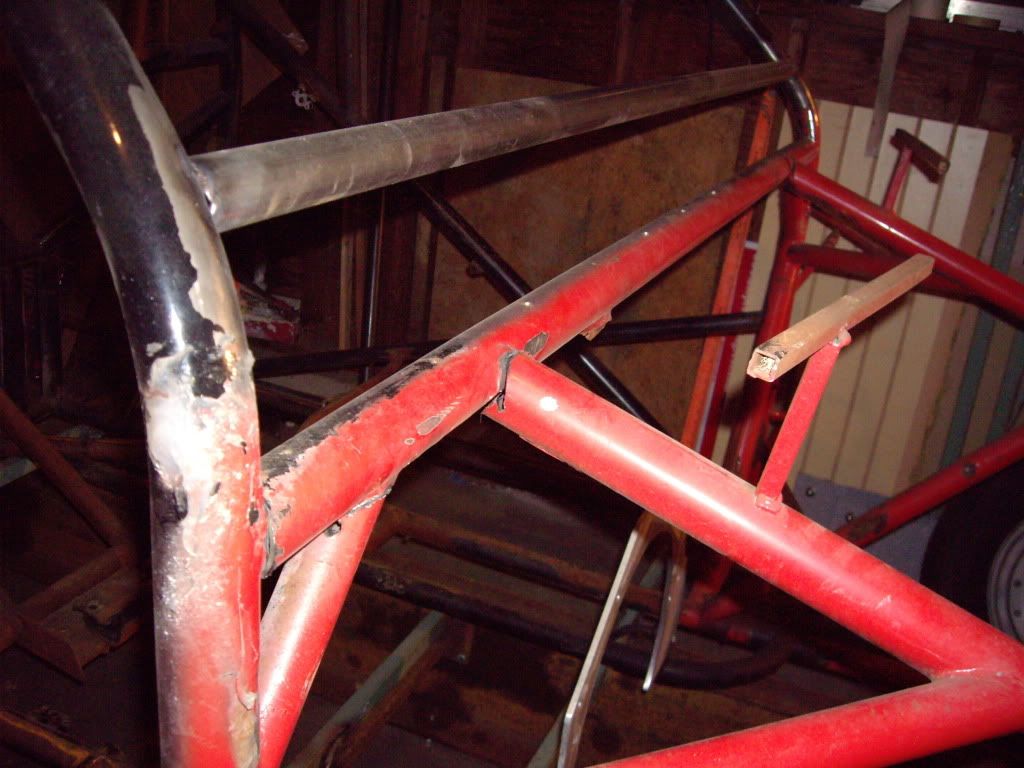
I cut out the original door bars
Of these, the main (from shoulder to foot) one on the passenger side was too small, and the driver's side one needed a bend to give me some elbow room. The X-brace parts were way too small, and did not properly connect to the main bars (they overlapped with a tiny weld between, rather than notching and fully welding).
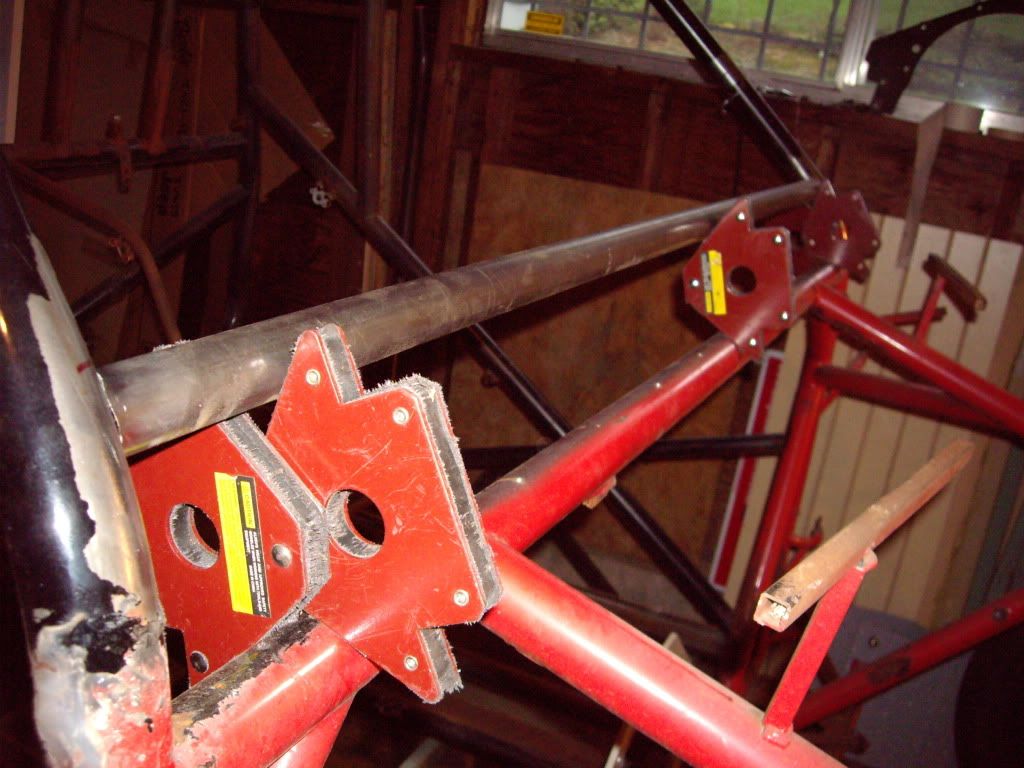
I started notching the new main door bars to prepare them for welding:
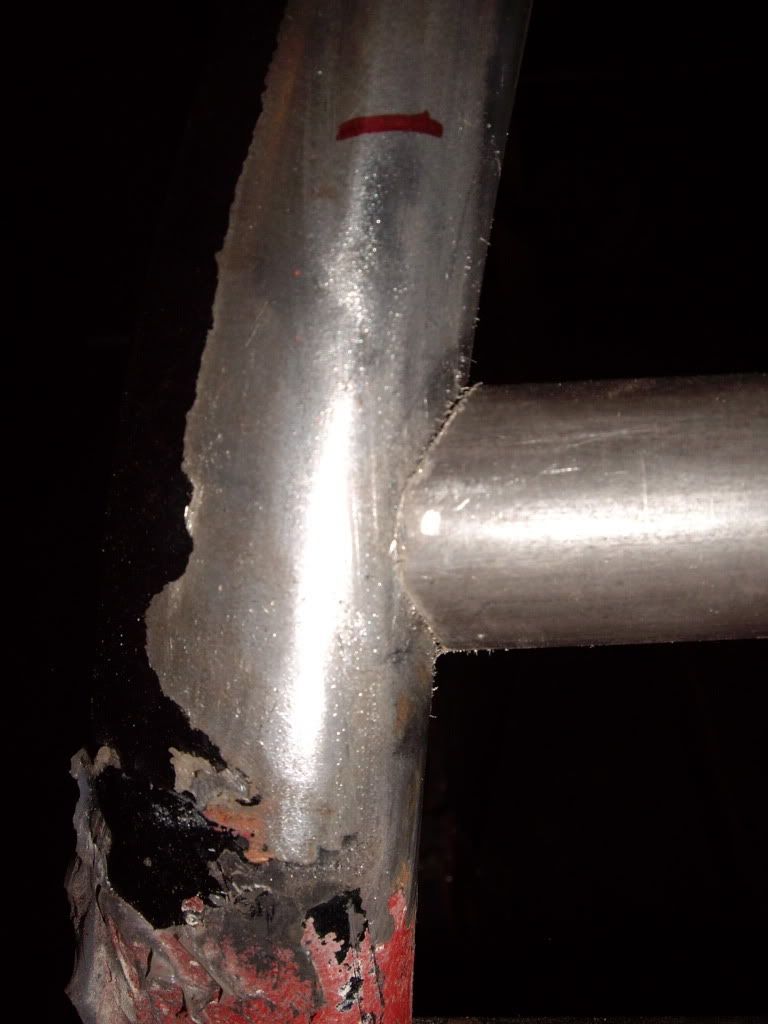
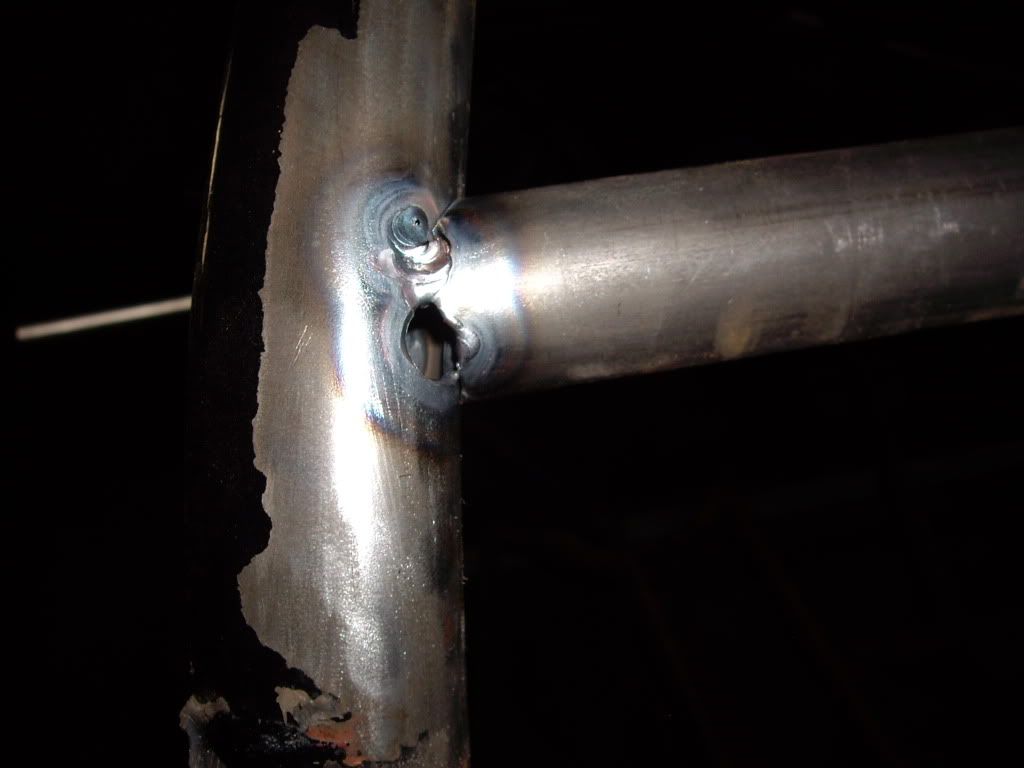
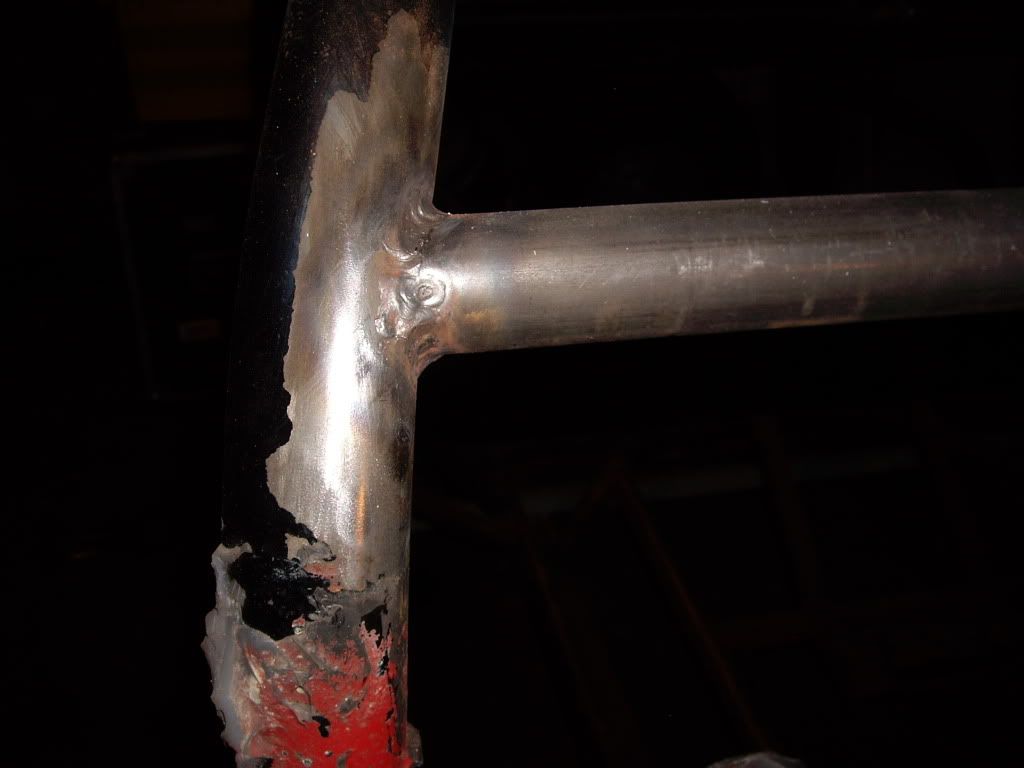
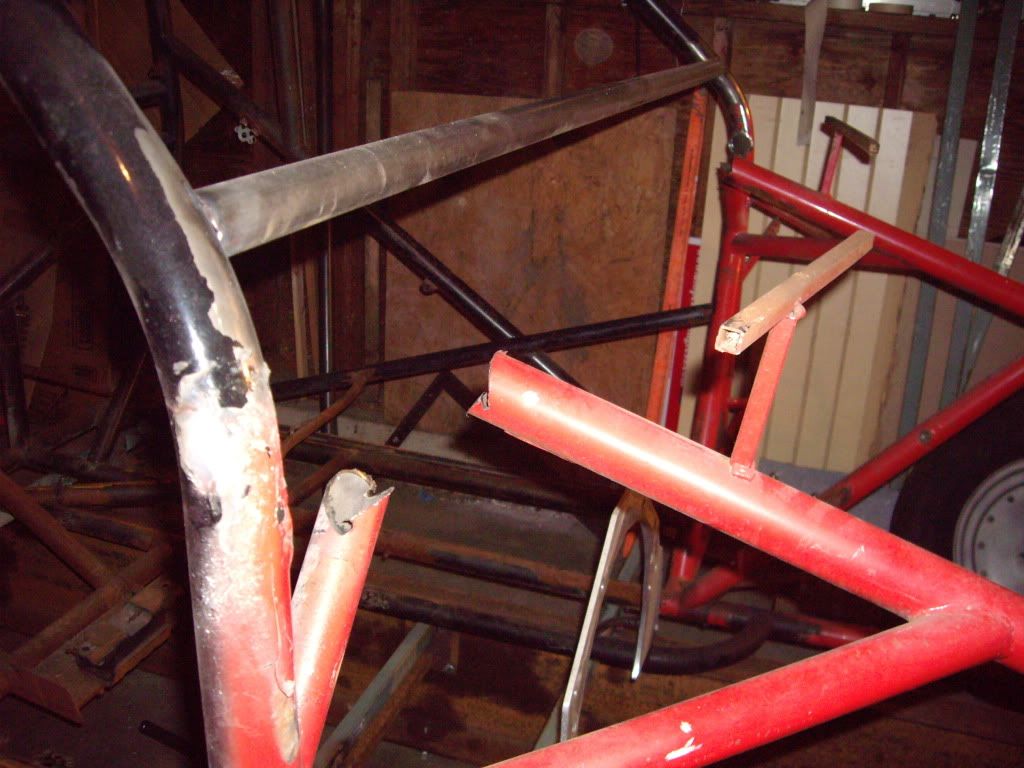
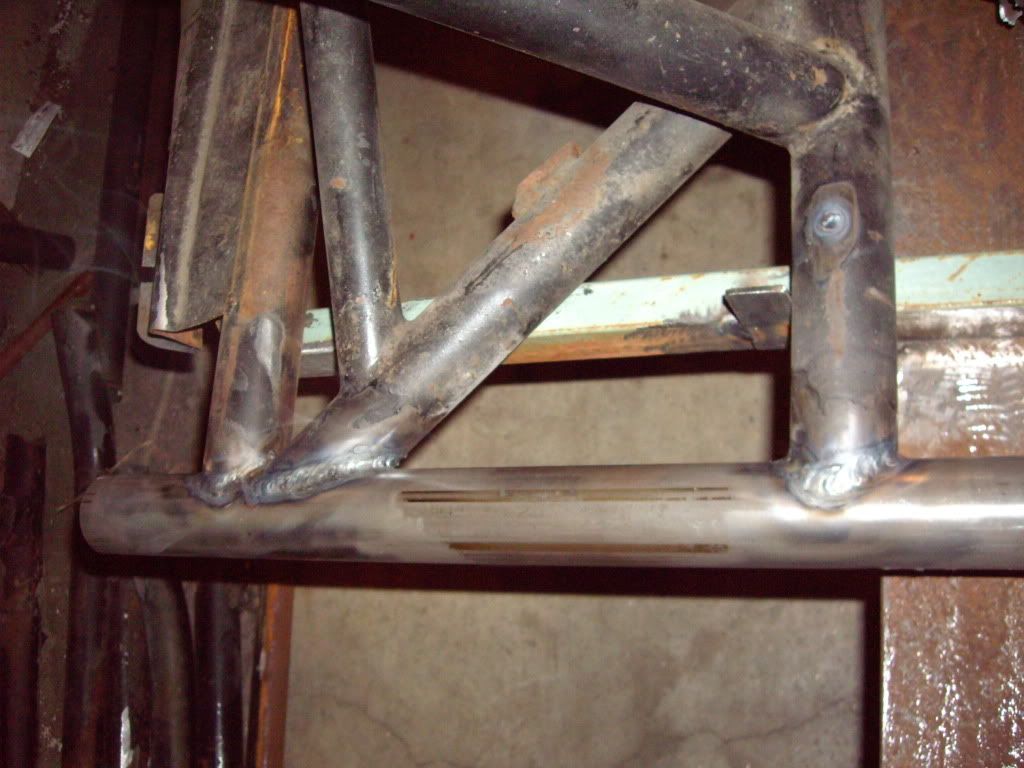
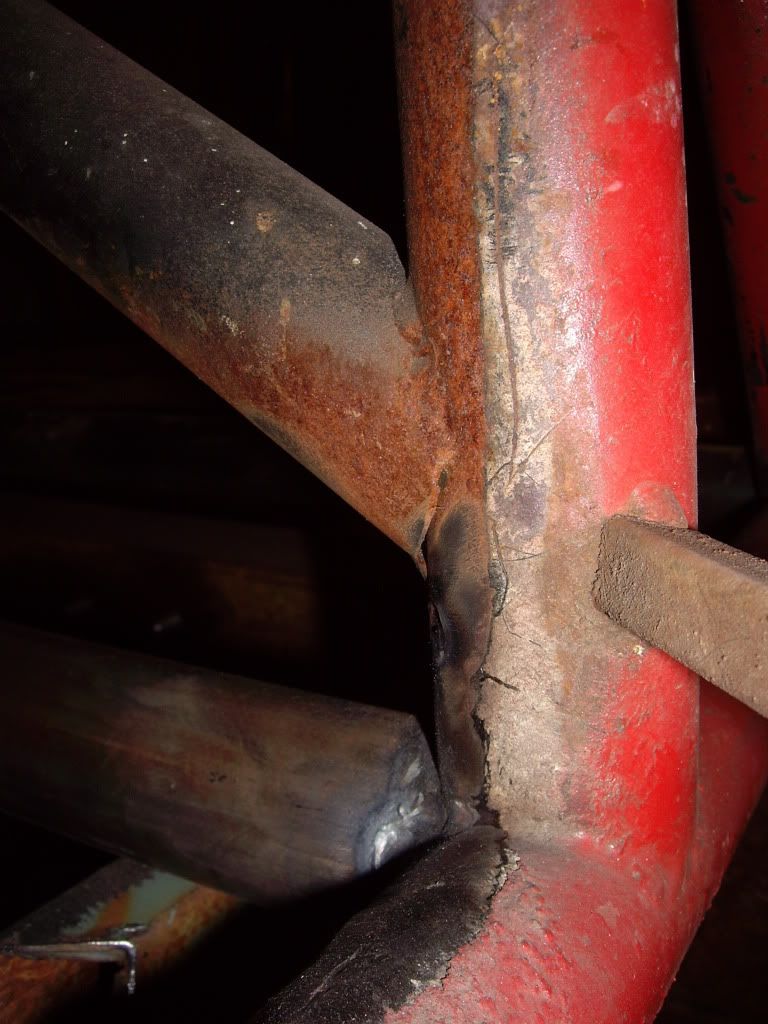
At this point it looked like I might almost get all the bars done in time for the certification. However, I decided to wire brush off the paint in all of the areas where I would be doing some welding. That was when things came to a screeching halt, as I wire-brushed through a layer of bondo under the paint. After removing the paint this is what I found:
In two different critical spots someone had done an unreinforced butt weld, then went to great lengths to conceal it with grinding, bondo and paint.
As if there weren't already so many things wrong with this chassis, but this is downright criminal to put something together like this then go to great lengths to conceal it. The main hoop would not have been legal to splice at all in this area, but the pillar bar would have been okay with a properly inserted splice. The way it was done it would have been very unsafe in a wreck. It looks like the original builder just didn't have any long enough pieces of tubing left, so he just spliced and bondoed away. I swear if I ever meet the guy who built this chassis originally, there will be a few harsh words! I still can't believe a human being would let something out of his shop like that, knowing that someone is expecting it to protect them in the event of an accident. I feel the same way about the safety equipment manufacturer who approved a change to standard (flammable) thread in fire suits to save money, and more than one racer was badly burned as a consequence. Do these people have no conscience???
Fortunately I had not welded in any of the newest tubes, so the biggest loss in time was prepping these bars after removing the original attaching bars. I ordered more lengths of tubing, and will be bending up a new pillar bar and main hoop (with better routing to be both stronger and lighter).
With the aforementioned March 25 chassis inspection event coming up, I really started busting my butt on the chassis fab area, working on it every night and early morning. In my recent Summit orders they have included either a Summit hat or a sample bottle of 5-hour Energy. Can you guess which one was used with this build?
I removed the rest of the original Funny Car cage:
Then I removed the rear frame section completely
Also removed the original "#1" bar, the main rear crossmember that positions the rear suspension (arguably the most important bar in the chassis):
This needed to be replaced since it needed to be one solid piece without any splices, but had a splice in it. I checked and found that the original bar was VERY crooked in the chassis. This thing would have launched crooked and dog-tracked after the launch!
I welded on "doublers" for the new 4-link brackets, something Chassisworks recommends for blown Pro Mod type chassis.
I squared the chassis up in the jig and welded in a new #1 bar, along with a passenger-side door sill bar (original was undersized).
At that point I noticed yet ANOTHER original weld that did not go all the way around a tube.
I cut out the original door bars
Of these, the main (from shoulder to foot) one on the passenger side was too small, and the driver's side one needed a bend to give me some elbow room. The X-brace parts were way too small, and did not properly connect to the main bars (they overlapped with a tiny weld between, rather than notching and fully welding).
I started notching the new main door bars to prepare them for welding:
At this point it looked like I might almost get all the bars done in time for the certification. However, I decided to wire brush off the paint in all of the areas where I would be doing some welding. That was when things came to a screeching halt, as I wire-brushed through a layer of bondo under the paint. After removing the paint this is what I found:
In two different critical spots someone had done an unreinforced butt weld, then went to great lengths to conceal it with grinding, bondo and paint.
As if there weren't already so many things wrong with this chassis, but this is downright criminal to put something together like this then go to great lengths to conceal it. The main hoop would not have been legal to splice at all in this area, but the pillar bar would have been okay with a properly inserted splice. The way it was done it would have been very unsafe in a wreck. It looks like the original builder just didn't have any long enough pieces of tubing left, so he just spliced and bondoed away. I swear if I ever meet the guy who built this chassis originally, there will be a few harsh words! I still can't believe a human being would let something out of his shop like that, knowing that someone is expecting it to protect them in the event of an accident. I feel the same way about the safety equipment manufacturer who approved a change to standard (flammable) thread in fire suits to save money, and more than one racer was badly burned as a consequence. Do these people have no conscience???
Fortunately I had not welded in any of the newest tubes, so the biggest loss in time was prepping these bars after removing the original attaching bars. I ordered more lengths of tubing, and will be bending up a new pillar bar and main hoop (with better routing to be both stronger and lighter).
Last edited:
Michael
Comp Diesel Sponsor
- Joined
- Apr 25, 2006
- Messages
- 3,411
Thanks Brandon! I'm not too worried about the fuel part, it was just a milestone I was trying to hit! I was hoping to get it certified before finishing it, so I could go out and start on the testing as soon as I get it running. I'll probably take it with me to an event to race my gasser and get it certified that way.
What's going on with your truck?
What's going on with your truck?
joefarmer
MR. Supreme Overlord
- Joined
- Jul 31, 2006
- Messages
- 6,137
The s10 will get a build thread sooner or later. Depends on the rod sponsor. The rusty truck is just taking its time. I'm in no hurry with either of them. If either work slows up on the 70 hour weeks or I run into a pile of cash, they'll be done sooner. If not, I'm enjoying the build process.Thanks Brandon! I'm not too worried about the fuel part, it was just a milestone I was trying to hit! I was hoping to get it certified before finishing it, so I could go out and start on the testing as soon as I get it running. I'll probably take it with me to an event to race my gasser and get it certified that way.
What's going on with your truck?
")
SmokeShow
New member
- Joined
- Apr 28, 2006
- Messages
- 4,715
was the truck originally built at a shop that commonly builds race vehicles or was it a garage enthusiasts over-zealous attempt? Just curious, but either way, I'm sorry to see you continually run into hurdles. So cool to see your work though. I've never been around a build like this and just seeing it in pictures is so cool.
Thanks again for sharing. It's truly inspiring.
Keep up the good work man!!
Thanks again for sharing. It's truly inspiring.
Keep up the good work man!!