Big Swole
MegaInterceptor
- Joined
- Jun 28, 2007
- Messages
- 16,950

He just told me that it was going to take a little too long to get it completely finished and he only has two weeks before starting school again. So he wanted to get it running with this manifold and new piping first. Then later he will take the time to finish the header.
Todays progress.
Sorry, been way too busy to keep up with this. This is the first two weeks I've had without either school or the wife wanting to go on vacation, so I'm trying to go buttholes and elbows on this get it up and running on the trip's. I've had the single back on it and have had it at the track a couple times just to hurt a few feelings of some folks that wanted to talk trash because they thought the truck was down.....that didn't work out so well for them and their wallets got a bit lighter.
Anyways, a question was asked about the header. Short answer....I just don't have the time to finish it and get this thing up and running in the 2 weeks I have available. I go back to school on the 17th and I want this thing at least most of the way done so, if anything, all I have left is the little odds and ends that I can do as I have a few minutes. It's sitting here, it's just a time issue that I'll work on later.
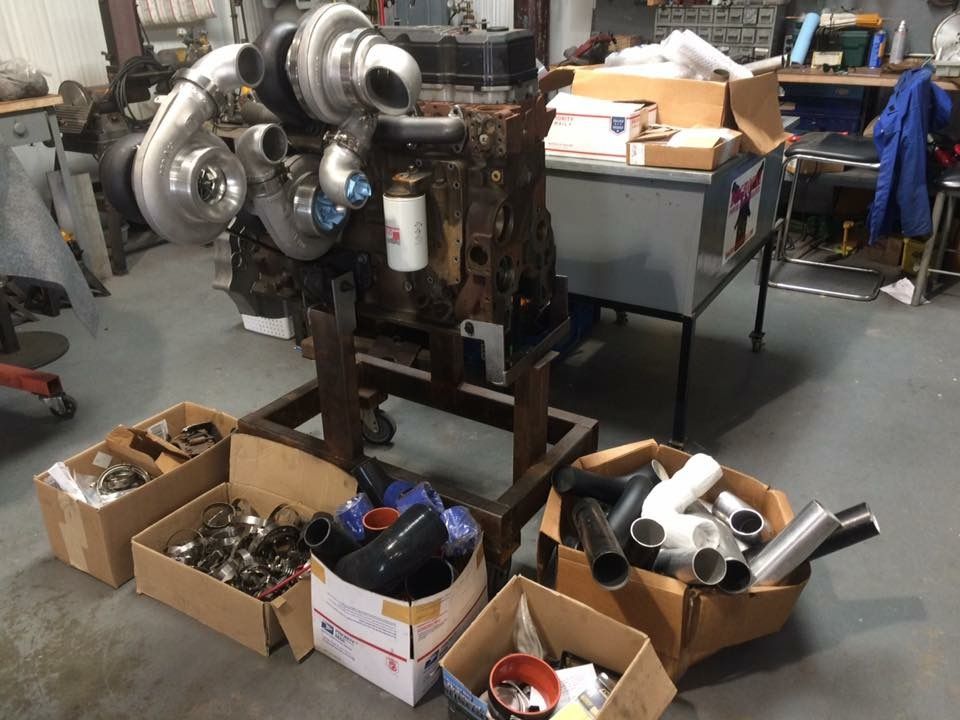
Okay, yesterday was just a lot of machine work that y'all have seen me do 100 times over. Had to make a new riser block to fit the single 60mm wastegate instead of the dual 50's, had to make studs to fit the manifold / riser block / secondary turbo, had to port the manifold to match the gaskets and riser block, had to remove the single turbo setup and test fit the trip's......that was yesterday....like I said, buttholes and elbows....
Making the new riser block....
Making the manifold studs.....
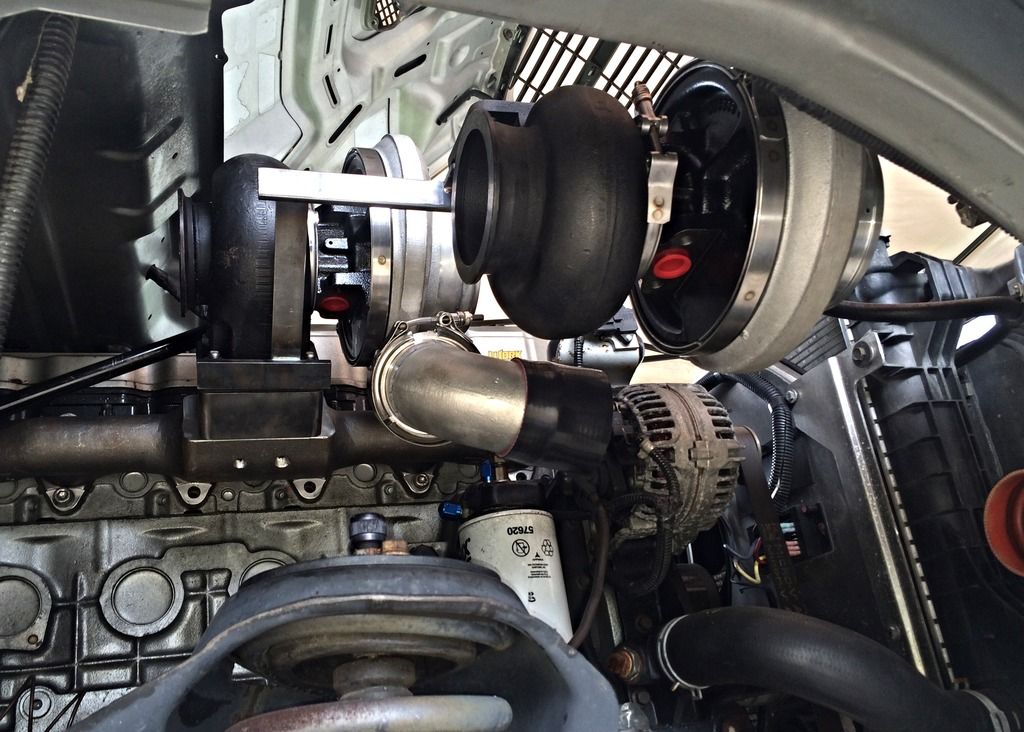
Pulling the single out.....
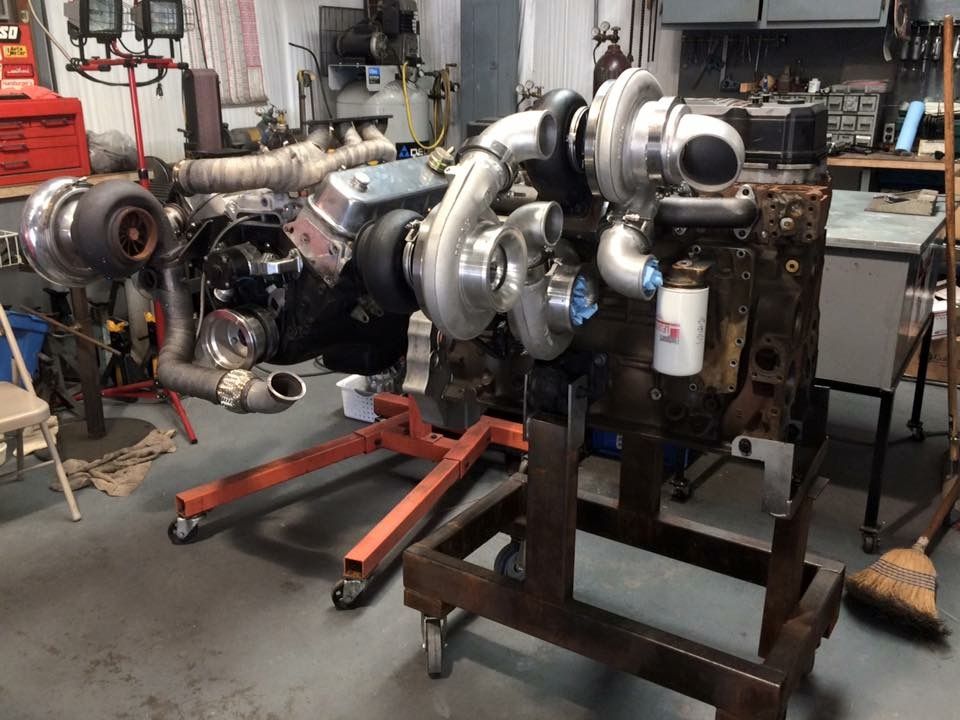
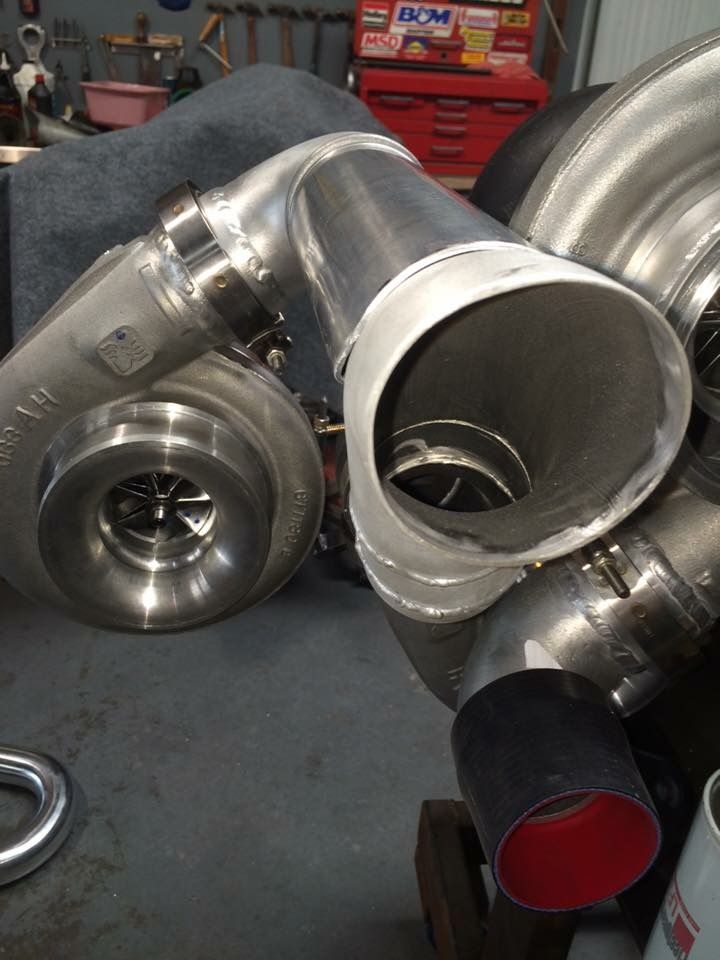
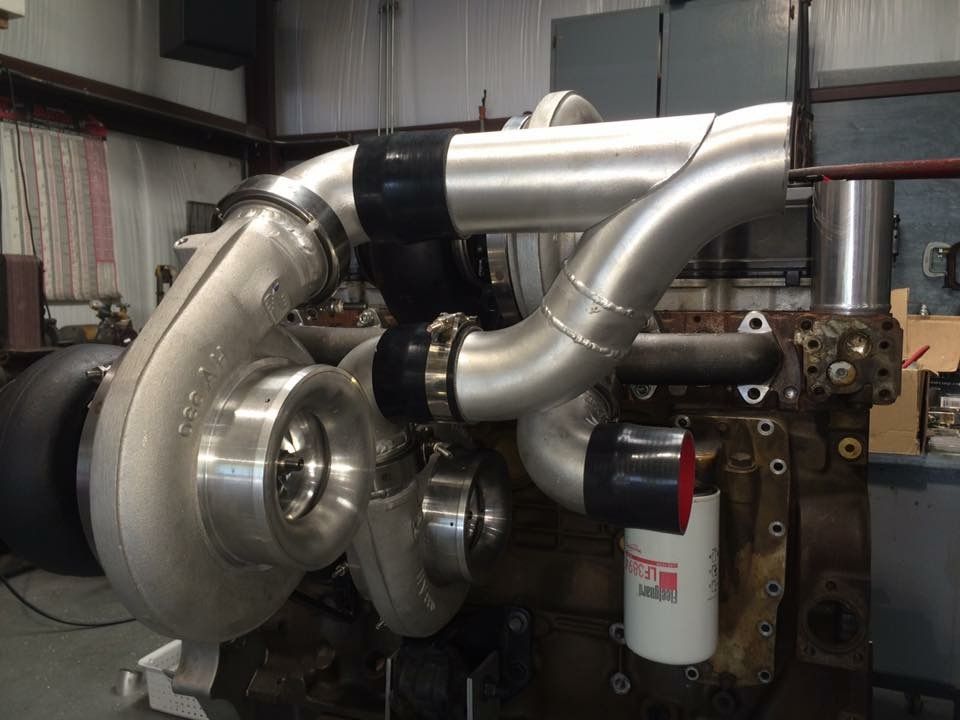
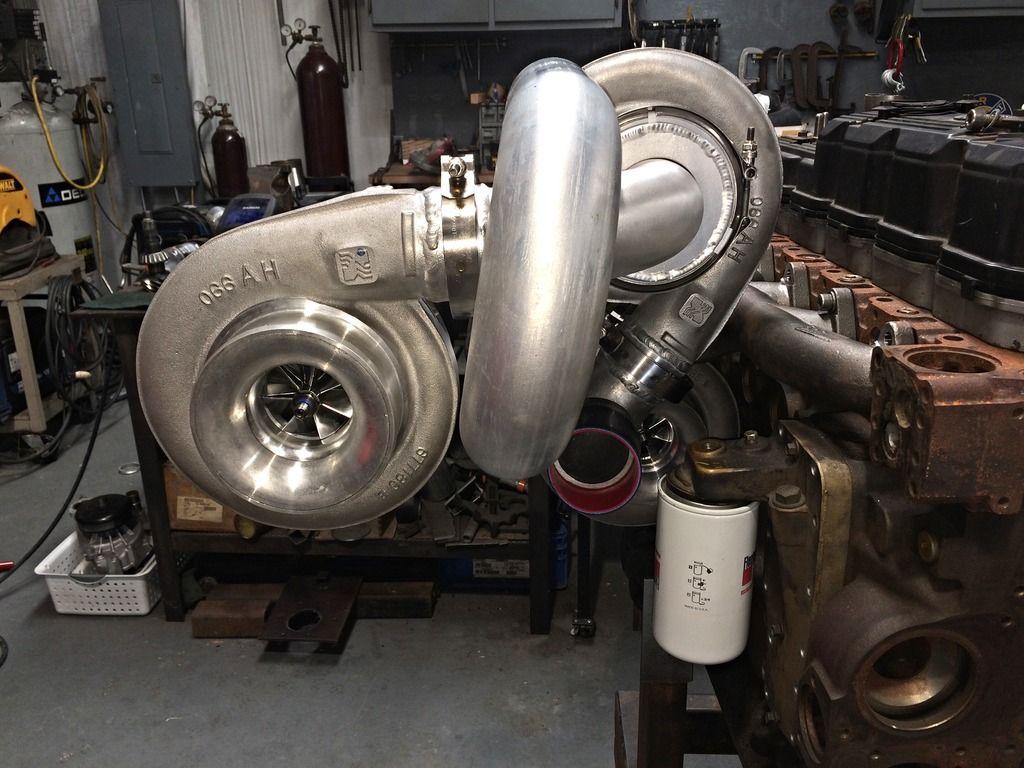
Test fitting the trips....
Now, the plan today is to pull the trips back out and move the third turbo (the one on the left) up and forward, almost even with the top turbo. I'm doing this for 2 reasons.... 1- I want to keep the fender liner intact to keep everything from getting covered in rubber every time this thing blows the damn tires off, and 2 - I want a little more clearance between the exhaust and the firewall. So I'll do some work on the bracket for the third turbo and move that up where I want it.
Once that's done, it's just running some piping, tying in the wastegate, and making some oil lines. I have 12 days left to get this sucker where I want it.....
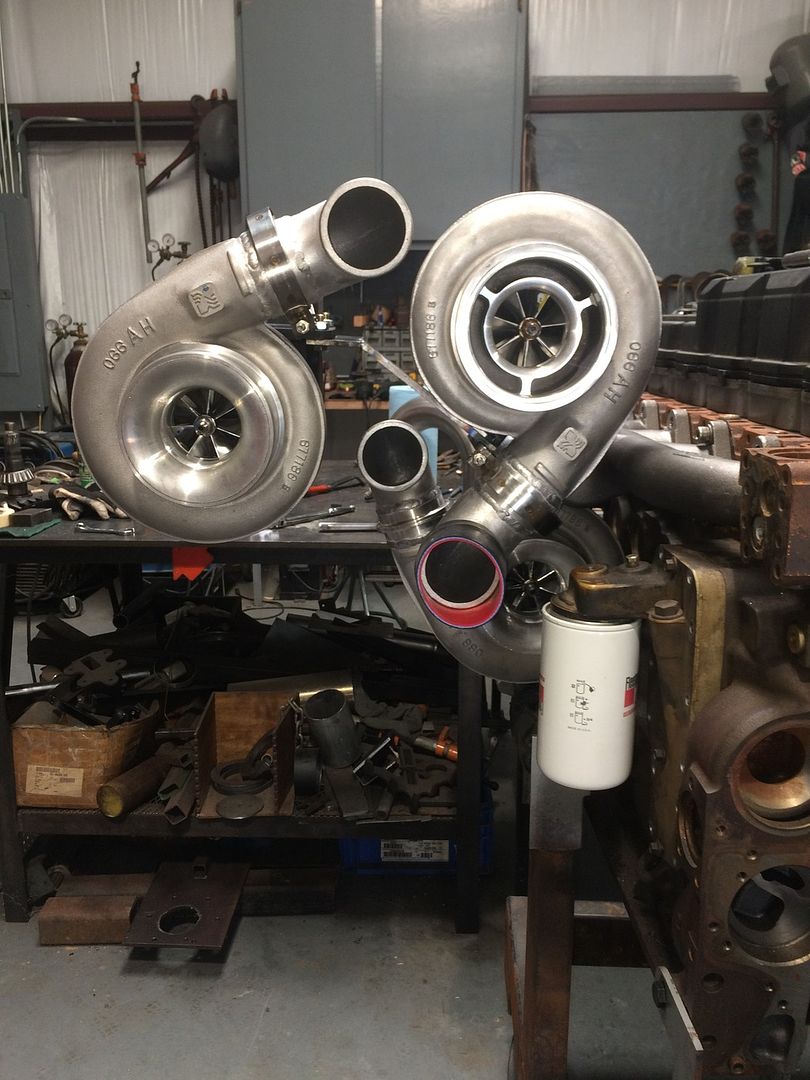
Rich, I notice you have a 57620 oil filter. I bring it up because of the rpms you run and was wondering your thoughts on flow. The 57620 is rated, by Wix, at 12-15 GPM. The oil pump is rated at 20.5 GPM @ 4200 rpms. Do you think that is an issue?
The Fleetguard is rated even lower at 8.72 GPM. The only filter I know of that is close is the Donaldson DBL 7349 at 20 GPM. The Donaldson also has the best filtration ratings, but I would be more concerned about flow at 4-5000 rpms.
Thoughts? May or may not be a big deal for you.
That's a interesting thought...I've had numerous trucks over 5k in the last year or so and never thought about oil flow being an issue....
That's a good point, especially considering that three S400's need approx 3 gals of oil per min EACH at full song. Might just have to swap that sucker out.....it needs an oil change before I fire these up anyways.
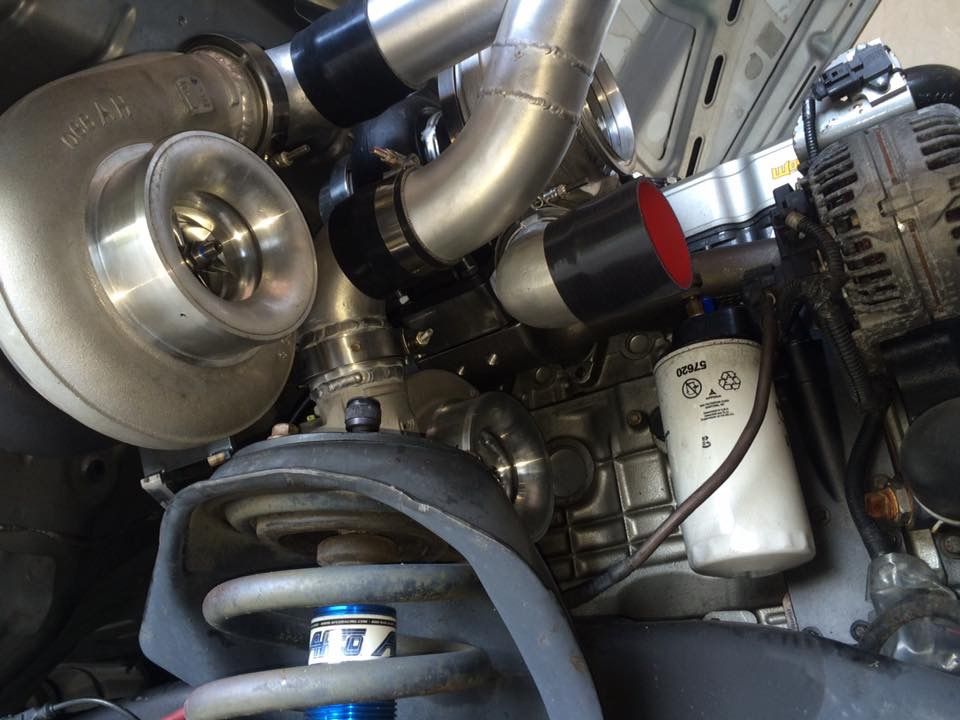
Here's the progress so far today.....I'm about to call it quits for a few hours......the lovely East Alabama climate has me suffering from a case of the bat wings..... ;-)
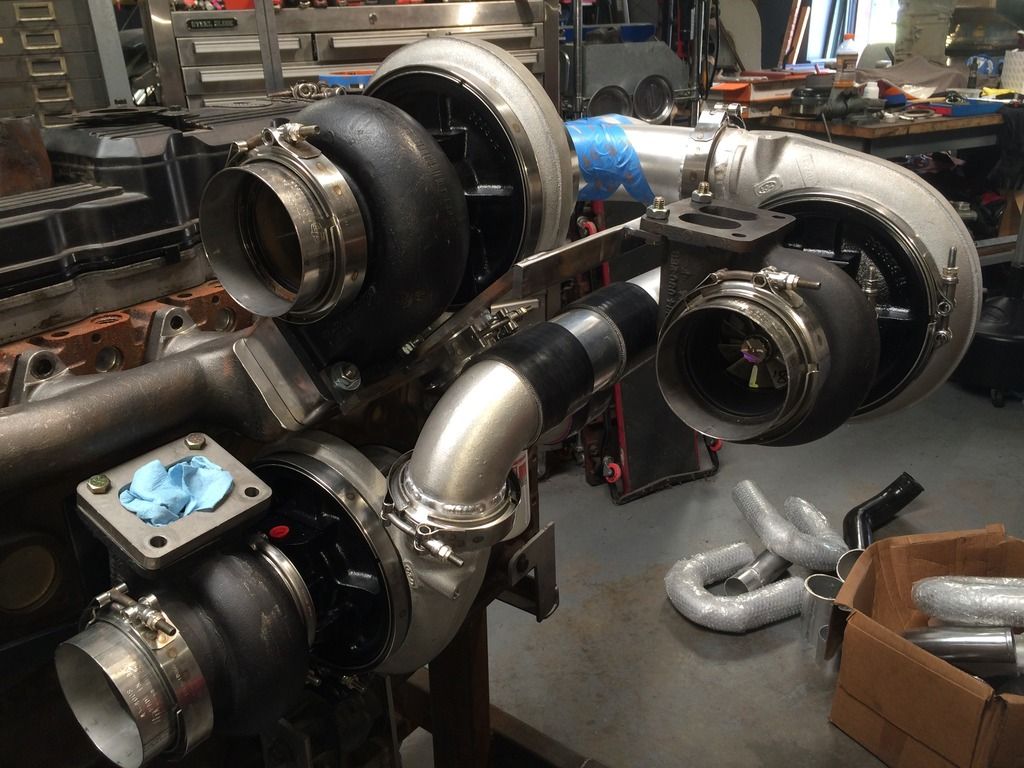
Anyways, the turbos are back out of the truck and I relocated the 3rd turbo up higher and further forward. I may still move it in and slightly down, just need to see what kind of clearance I have when I stuff it back in...
The plan today is to shorten the bracket on the 3rd turbo and bring it in and down about an inch each to get everything in a little tighter.
Here's where it was yesterday....
Here's where I have it now. I just tokk the bracket off, shortened the flange an inch and shortened the arm a half inch. Now we're cookin'....
I'm gonna slap the two top turbos back on the truck now and see how it all fits. Might not get too much more done today, gotta run Tom to the airport this afternoon.
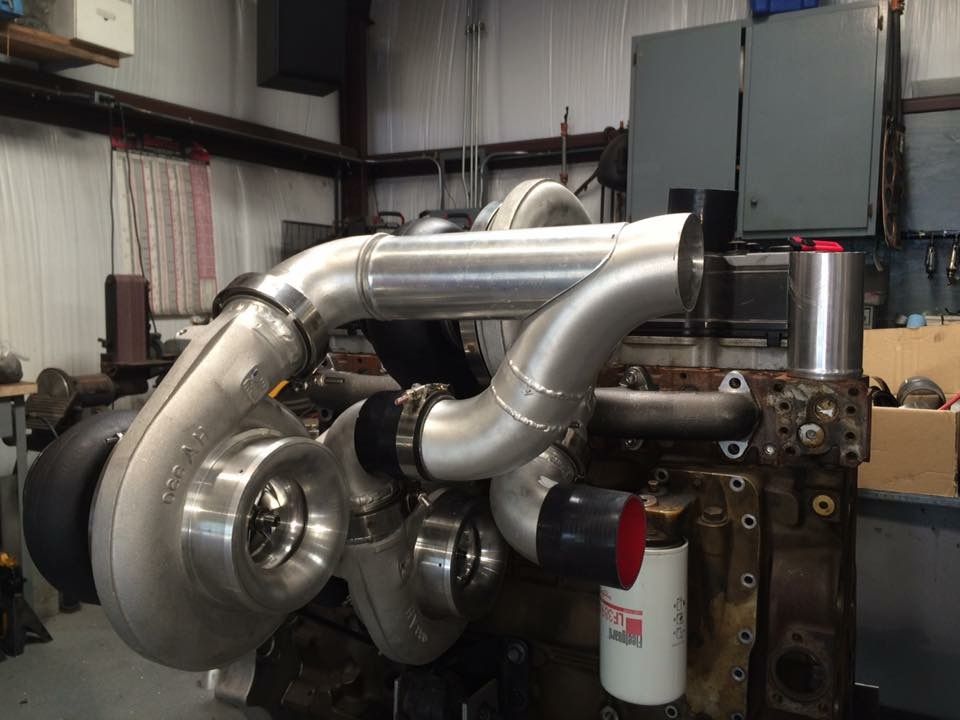
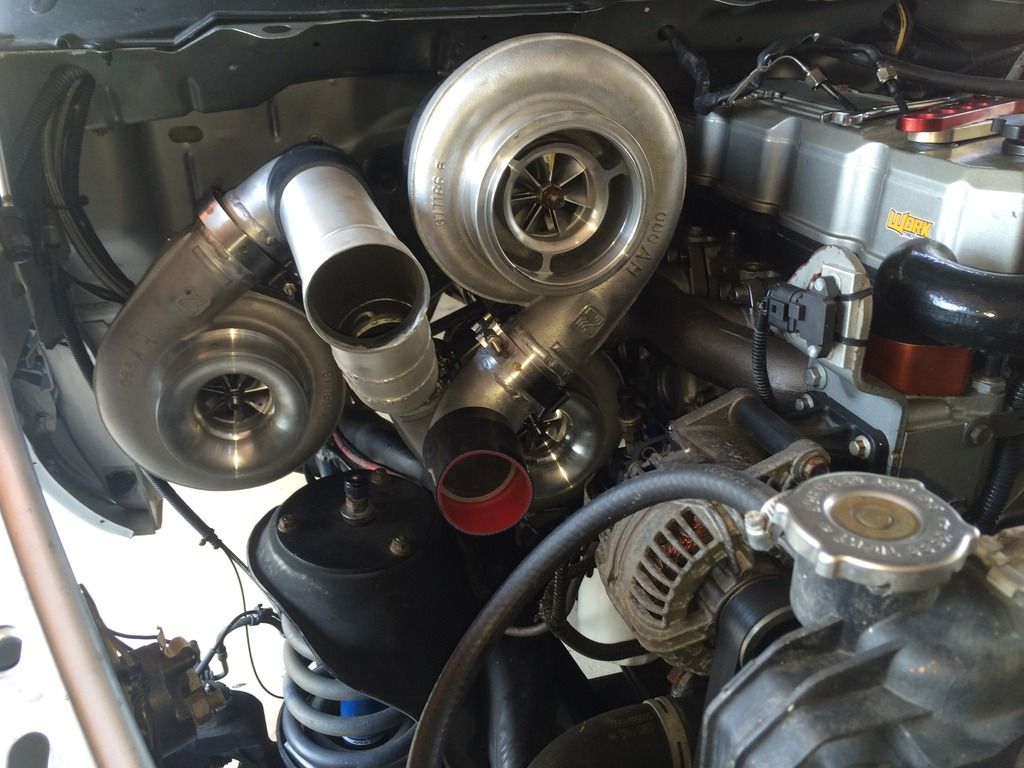
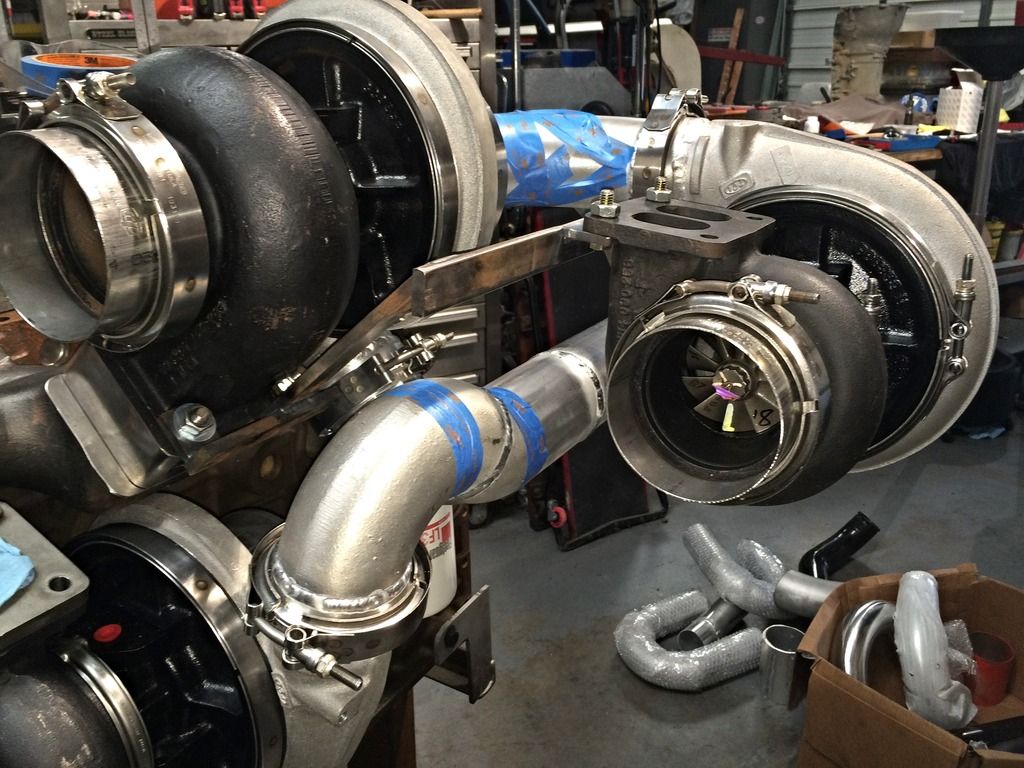
Alright, I wasn't totally happy with the position of the third turbo and how I'd have to run the exhaust so I did a little rework of the bracket and I think I'm finally happy with how it's sitting....
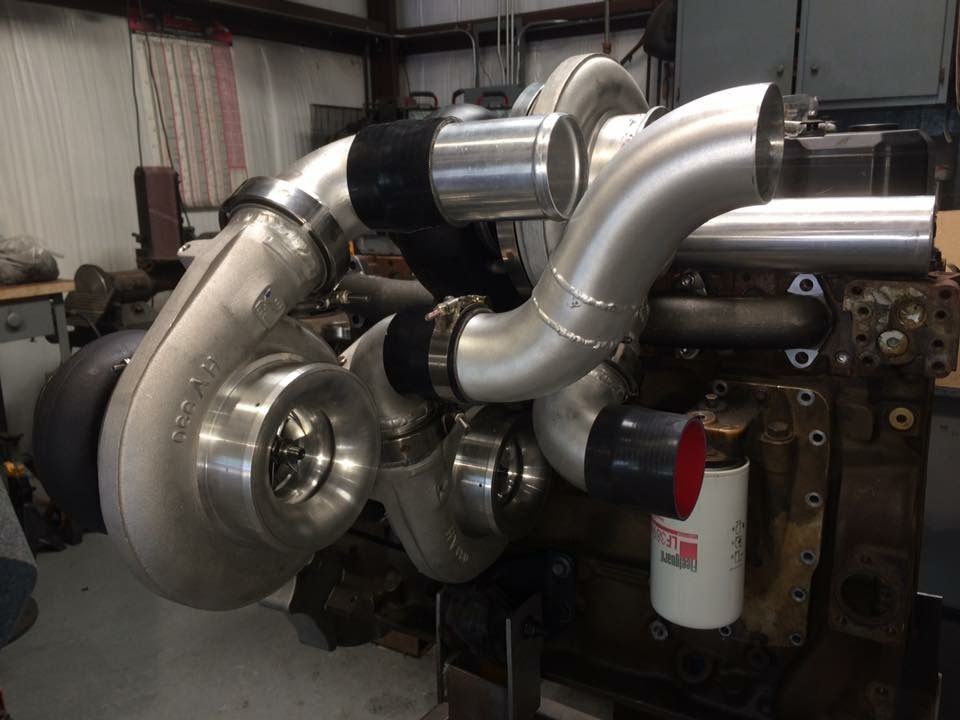
Okay, this should give you an idea how I'm tying this all together. Obviously the pipes aren't cut or clocked yet but you should be able to see how this is gonna go. But, this'll be it for today, I'm tappin' out like I'm gettin' whooped on by Ronda Rousey.....
Here's all I got done today....had too much other stuff to get done today...
I'm gonna redo that front pipe today, I'm not totally happy with it. The radius was so tight that the outside wall got really thin and I'm not chancing that with the boost it's gonna see.
Gonna try and get all the cold side finished today and stuff it in the truck to check the fitment.
Easier thing to do is take a piece of paper and wrap it around the pipe you'll be cutting to fit. Then you simply slide the paper out start trimming it to fit the profile you need to merge smoothly with the pipe you're welding to. Once you get a good clean fit all the way around with the paper, you slide it back and trace it onto the pipe you're actually going to cut. Then you just cut it out, leaving a little excess for final fitment and you're good.
Ya gotta remember with aluminum you MUST have tight fits when you're TIG welding. It burns back so fast that if you screw it up you're kind F'd. You can hit it with the spool gun and fill it, but looks like a smashed bag of butt holes.
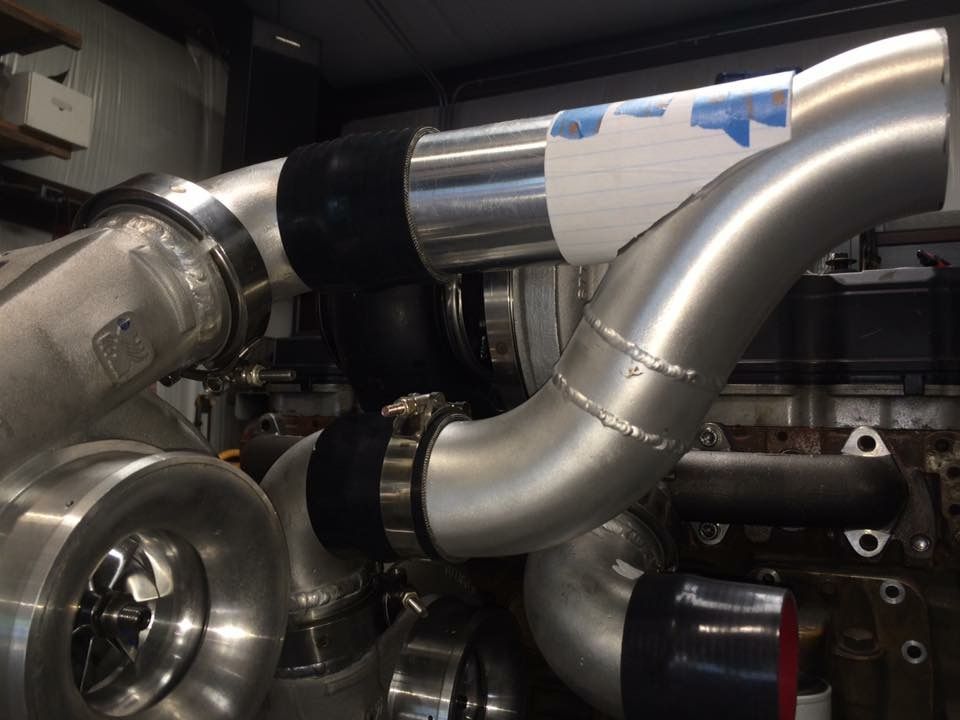
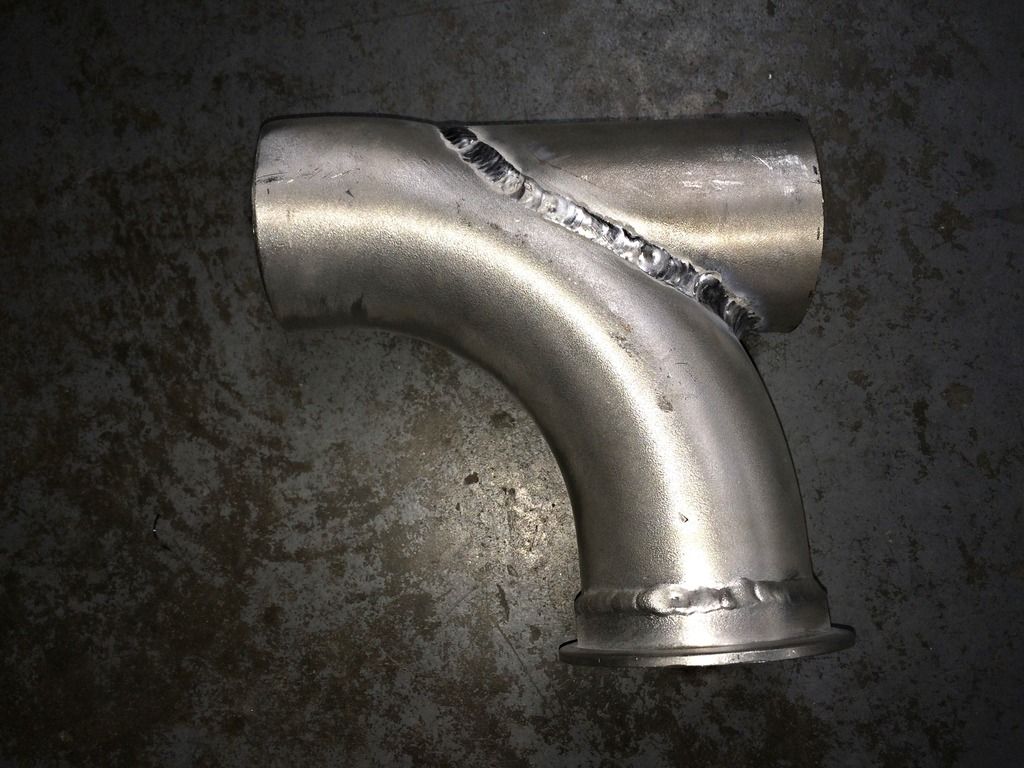
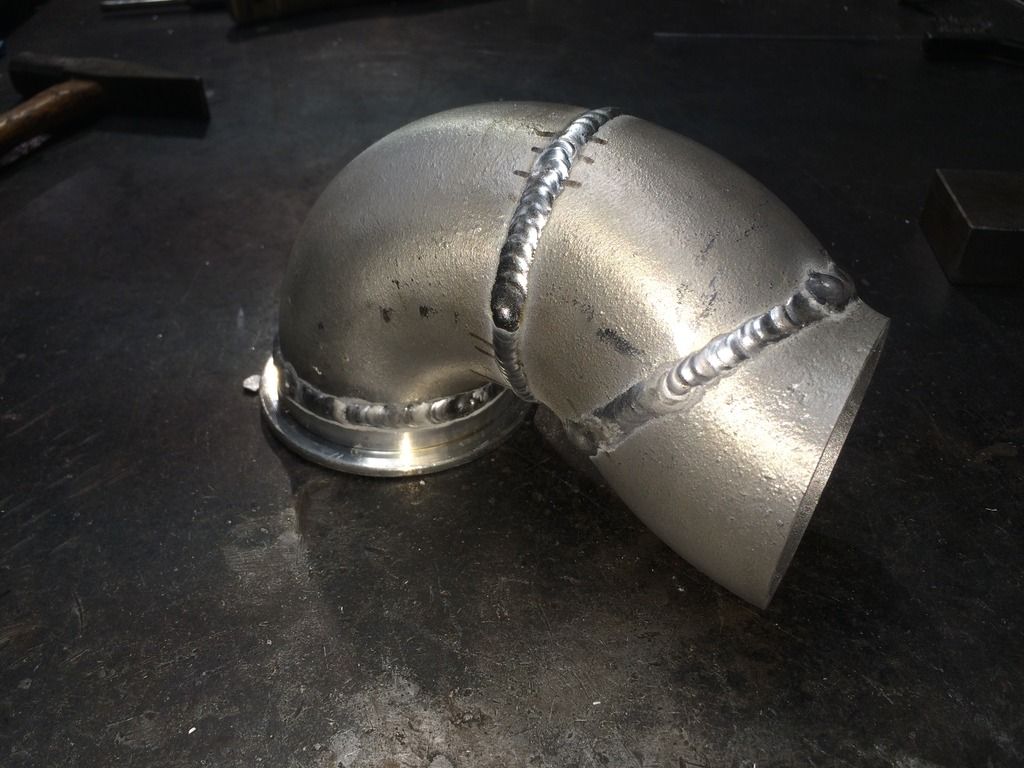
Alright, I redid that front charge pipe. I'm much happier with it now.
Took an aluminum 90* elbow, cut it in half, rotated it, and made an offset to give the right distance for a solid piece of tubing without butt welding in the middle of the radius....
Yeah, I wasn't happy with it at all. Said screw it, redo the pipe.
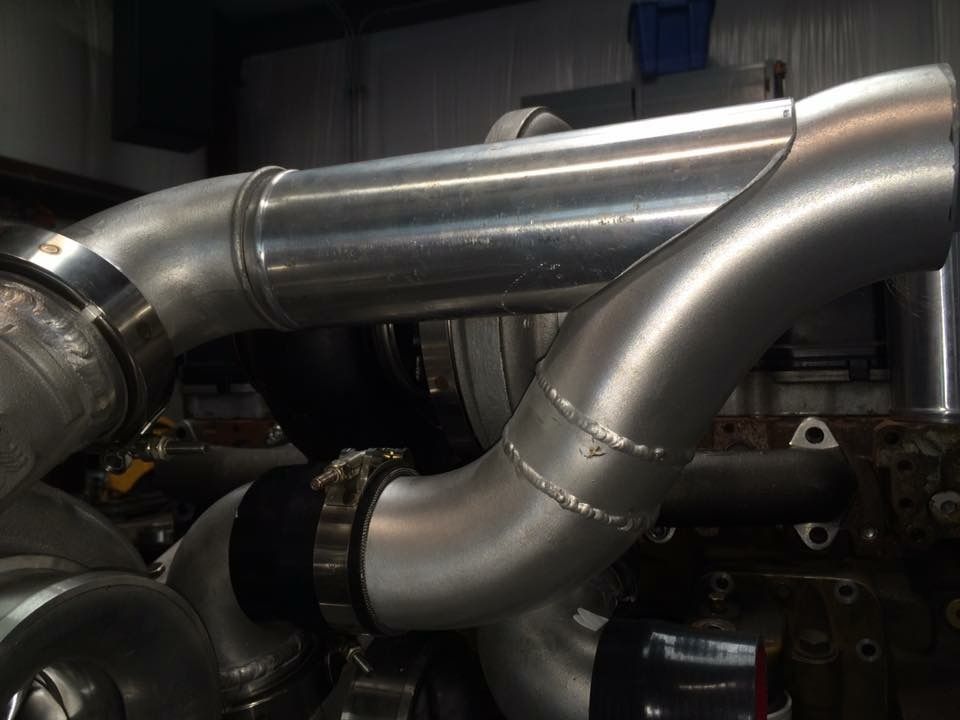
Alright, this part sucks....trimming out the short charge pipe to merge them together.....
Rough out....anybody need dental work?...
Final fit....seriously, if you have a problem at the dentist this would make your teeth hurt...
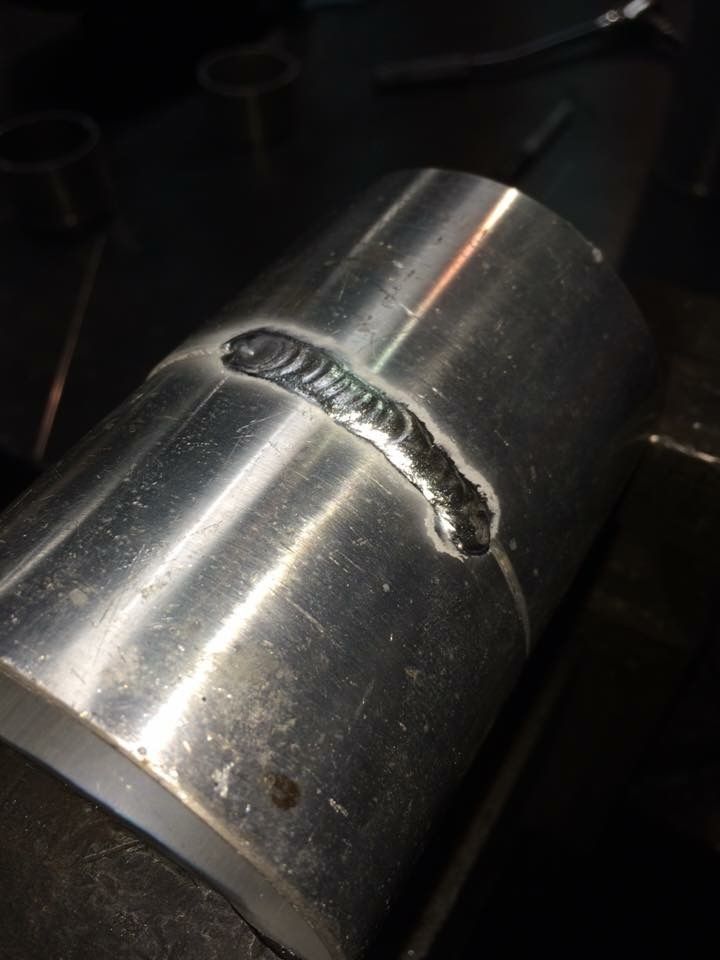
Now lets see if can NOT screw up the welding.
Well, I didn't destroy it, but it certainly looks like my aluminum welding.....lol
The offset for the bottom turbo is done. Just 2 more thing to weld and it'll be ready to go in the truck to check fit.
High pressure into the two lows, 4" from the lows merging into a single 5 then out to the stack.
I think I'm calling it quits for the day....

Rich, how are you planning on doing the exhaust side? Are you gonna run from the low pressure to both the high pressure then basically have dual exhaust?
High pressure into the two lows, 4" from the lows merging into a single 5 then out to the stack.