One thing led to another. Build thread.

Awesome build man ? For you that shifter you got whats different about that shifter than just your regular ratchet shifter. I'm wanting to run one but I'm new to the diesel game an when I say I'm new I mean I'm the village idiot.
 
Awesome build man ? For you that shifter you got whats different about that shifter than just your regular ratchet shifter. I'm wanting to run one but I'm new to the diesel game an when I say I'm new I mean I'm the village idiot.

I'm no expert on shifters.

A ratchet shifter is going to keep the shifter handle in the same location for every shift. A gate shifter moves position when shifted. With a gate shifter, you can downshift through several gears at once with a pull of the handle vs having to bump a ratchet several times.

On the ppp power shift, there is a co2 actuated ram that moves the shifter, allowing you to shift via a button on the steering wheel. I figured that might be a good idea in a 4X4 that might be all over the place at the 1-2 shift.
 
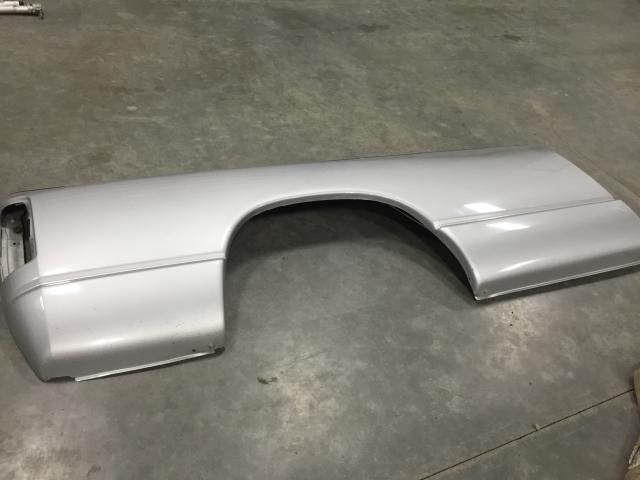
Got a couple little things done this week, but not much picture wise. I ordered a bellmouth for a headlight intake, and a couple other goodies. Plans are to work on gutting the bed. I'd rather just buy bedsides / rear quarter panels, but I can't seem to find any for a 3rd gen long bed. So, hacking my bed is in order.

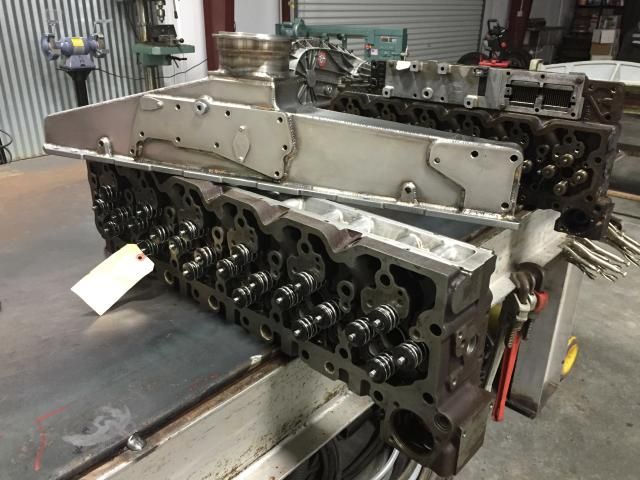
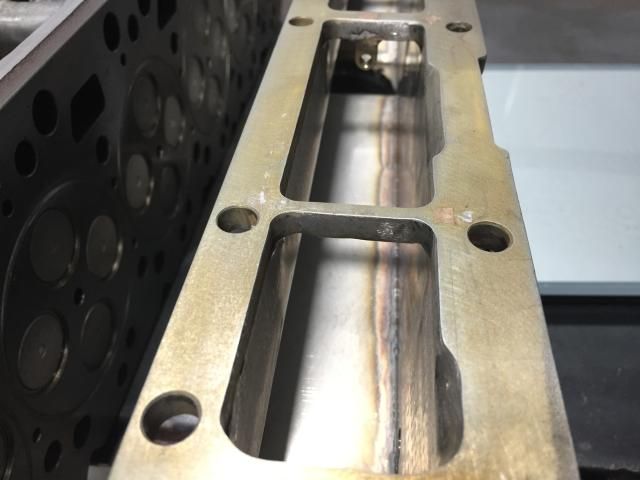
I got the head and manifold cleaned up a little. It had some surface rust from sitting on the shelf at Scheid for a while. I'm going to pull out all of the valves and give it a good cleaning before assembly. Have any of you ran dual valve springs with 200# on the seat with a flat tappet cam? Any advice there?

I noticed the flange on the manifold is not completely flat, but I plan on running a bead of clear silicone around the flange, then letting it set up just a little bit before fastening it to the head. What methods work for you guys when mounting the manifold to the head?

6A335CFE-F68F-446D-A1D5-4041654BEDB5_zpsclszilfo.jpg


4D6199B8-0255-4065-A788-F2B5C894B0EB_zpsglvthggj.jpg

JP check out the FiberwerX bedsides. http://fiberwerx.com/listing/02-08-dodge-ram-bedsides/

I believe these are the ones being used on the Bully Dog 2WD drag truck...

I am running their 1-piece front end conversion on my Duramax and I have the bedsides to match for when we do the shortbed conversion on my truck... Good products at a good price!!!

I don't care for anything that looks like fiberglass, or non-factory. I'm going for a stealth look. Factory looking from the stands.

Is here enough room on the flange to machine it for an o-ring?

I'll look again, because that would be the cleanest way to do it.
 
stock head with valves and springs

8B72A21A-BEDD-41C1-8574-A97D9A33B321_zpsajd209rr.jpg


stock head, ported, plenum removed, valves and springs

23394862-9C61-4428-B04E-79413E536CBD_zpsrfsxpbvj.jpg


zz fab ss manifold

AC82AF3E-EEEF-447E-8E64-B31B25103527_zpsussjv5ve.jpg


That's an expensive 6.2 lb weight loss.
 
I don't care for anything that looks like fiberglass, or non-factory. I'm going for a stealth look. Factory looking from the stands.

They don't look like fiberglass once they are painted, they just look an inch or so wider than the stock bedsides and they help to cover the wheels so they don't stick out so much... While most people wouldn't know where they came from or what makes them look different from the stands they would not look stock... Just letting you know that there are some options. I think they look great on the Bully Dog truck!!! But that's just me.
 
I didn't plan on gutting the bed this year, but since my block is still at the machine shop, and my truck is still getting the cage worked on, this happened. About a hundred spot welds later, and some cutting with the grinder and sawzall, it finally came loose. On to the other side tomorrow.

62211BB9-E90F-45D9-B5D9-DD071042B075_zpsennviieg.jpg


6DC0DDC2-2C01-4E59-81BD-D360D3559D05_zpslid1etll.jpg
 
Once that "right stuff" sets up you will have to beat the manifold off with a hammer. We have been using it for years without issue, other than when we need to remove the manifold.
 
Lots of good quality information with detailed explanations and pictures in one thread. Don't see as much of this today.

Looks sleek! Keep up the top notch work JP.
 
Once that "right stuff" sets up you will have to beat the manifold off with a hammer. We have been using it for years without issue, other than when we need to remove the manifold.
Yep. Figured out the hard way to add relief grooves to assist chiseling the two surfaces apart later with the Right Stuff.
 
Lots of good quality information with detailed explanations and pictures in one thread. Don't see as much of this today.

Looks sleek! Keep up the top notch work JP.

Thank you. I appreciate your comment.


Gutted door. No glass, no mirror. I have these available if anyone needs them.

9A00493C-8008-4D44-A5DC-C5FDD67E9737_zpsrlimf35j.jpg


The bedside weighs right at 54 lbs.
 
Battery box is in. Initially we were going to scale the truck before determining battery placement, but plans changed. The battery will be mounted upside down.

4E097E75-05A5-4056-9F14-D10932CA93CA_zpso2q3oswt.jpg


E714F280-2CEC-4459-8DEF-DC852A84C940_zpsjhtbosxf.jpg


590DF198-01A7-4C4A-B7EE-8C2DDB2773C5_zpsinnnknon.jpg
 
Back
Top