12valve porting... in progress?

HRDROKN

Prestige Worldwide
Joined
Apr 16, 2008
Messages
621
Hey Guys,

I'm knee deep so to speak.... this will be my first multi-cylinder port job and as such I'm keeping it pretty basic! I'm thinking that I might not take the gasket match all the way to the line.... maybe a 32nd short? Just to compensate for any error on my alignment and/or any gasket expansion?

What do you all experts think?

A053109-2.jpg


A053109-4.jpg


A053109-3.jpg


:Cheer:
 
Ha.... didn't think there was any ****in experts!

Thats ok though.... trial and error the hard way! Then you all can suck the wad! I'll help all that ask regardless......

:kick:
 
Last edited:
the most important place for the grinder is in the bowls...


Ya.... those things were horendous! Making progress though... I will post up some pics of my before and roughed up shots of the intakes. It looks as though the intakes were designed to promote a swirl pattern of the intake charge and I'm doing my best to maintain that theory!

Thanks!

:Cheer:
 
This so reminds me of my first port clean-up job when I was like 15 years old.... good times!

Anybody have some finished bowl shots that they would like to post...?

:Cheer:
 
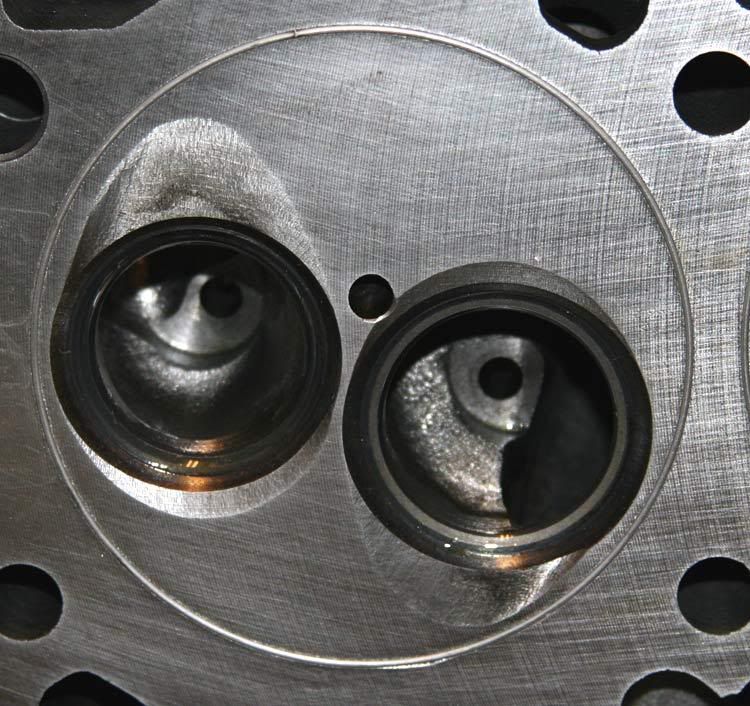
OK... have the intake and exhaust bowls ruffed in. Not sure about these pics, but they were the best of the bunch.

Comments and suggestions....

A060109-3.jpg


A060109-4.jpg


Looking at this pic... is it safe for me to remove more material from the 7-8 o'clock are of the exhaust bowl...???

A060109-1.jpg


:Cheer:
 
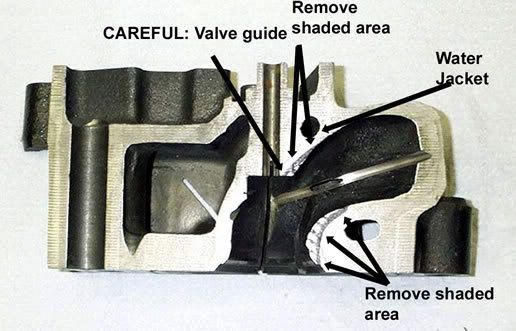
Make sure you leave a "swirl" pattern in the exhaust bowl, this is to direct the exhaust flow to the runner. Looks good so far but the pics are kinda blurry lol. On the exhaust be careful on taking material out of that 7 o'clock area because there is a water jacket right there.
 
Stock 06' Common Rail exhaust bowl on cylinder #1. Looks a little different than the stock 12 valve exhaust bowl.
 
Last edited:
Hope this helps . . .

UnshroudValves.jpg


Intake Bowl . .
IntakeBowl.jpg


Exhaust Bowl . ..
ExhaustIn.jpg


Exhaust port roof ..
ExhaustOut.jpg


Exhaust port floor . . .
ExhaustFloor.jpg


From the old PDR website . .

porthead1_lg.jpg
 
Thanks for the direction and pics! It looks like I'm on track so far... I will get some pics in "macro" up this afternoon....

:Cheer:
 
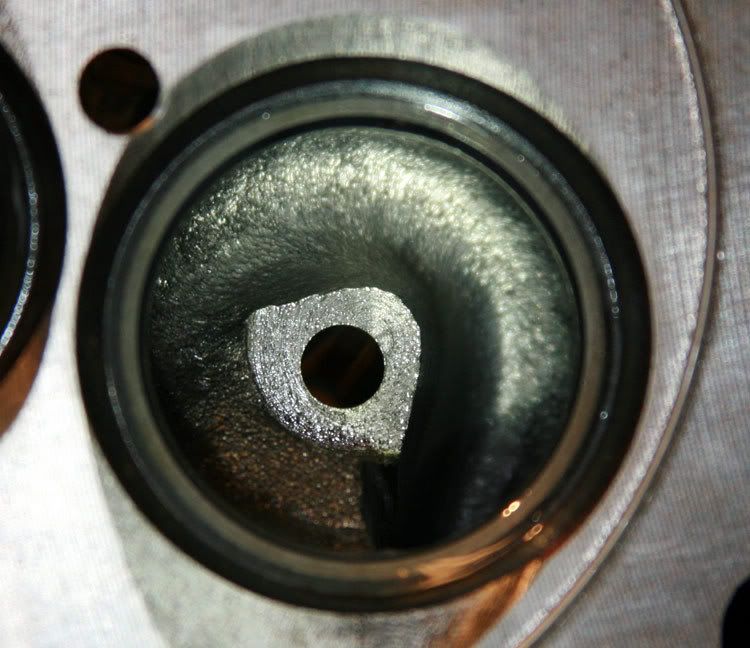
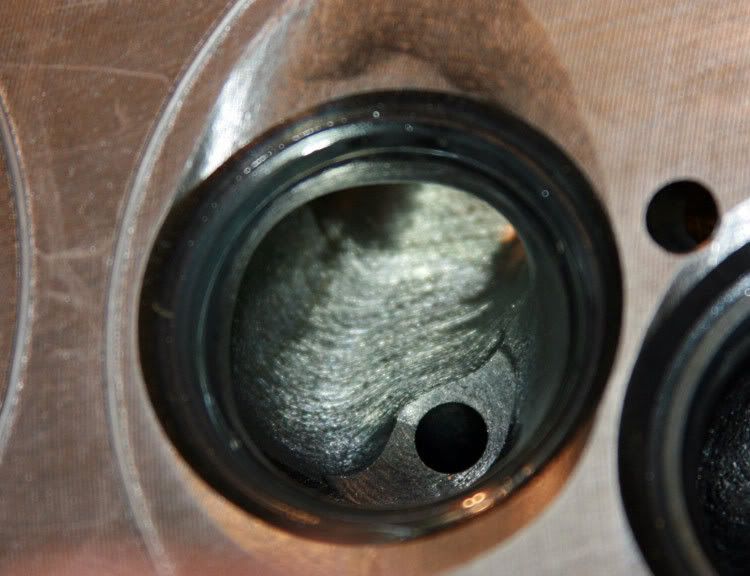
OK... I re-shot the pics. Kinda figured out how my camera is suposed to work. :hehe:

OK... have the intake and exhaust bowls ruffed in. Not sure about these pics, but they were the best of the bunch.

Comments and suggestions....

Exhaust...
A060109-3.jpg


A060109-2.jpg


Intake....
A060109-4.jpg


Looking at this pic... is it safe for me to remove more material from the 7-8 o'clock are of the exhaust bowl...???

A060109-1.jpg

:Cheer:
 
Another thought/question.....

I've been careful to do the same work to each port, but do you think that there would be any benefit for me to cc the exhaust side for equal volume? I don't see how I would do this on the intake side with the intake plenum in place so maybe doing so on the exhaust is all a mute point?

:what:
 
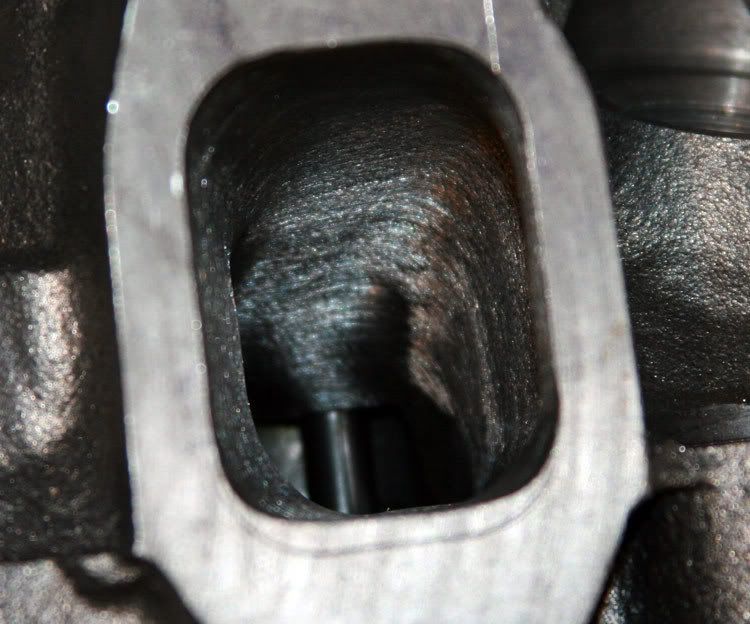
Just about all done with the exhaust ports.... I still want to work the bottom of the valve guides a bit.

Comments/suggestions?

A060409-1.jpg


A060409-2.jpg


A060409-3.jpg


:Cheer:
 
where are you guys getting the needed de-buring tools and sanding material? I need to find a place online as I can't find a good source up here in Ontario other than real short stuff.

Ryan
 
I got my long burrs from Summit. I'm not sure if they have long sanding scrolls or not, but they definitely have the short ones.
 
Back
Top