
You are using an out of date browser. It may not display this or other websites correctly.
You should upgrade or use an alternative browser.
You should upgrade or use an alternative browser.
"OLD UGLY" Re-Visited Build Thread #RonA #DPF Challenge 2016
- Thread starter Freezingsystems
- Start date
Freezingsystems
Modify Everything
- Joined
- Jan 18, 2010
- Messages
- 1,130
I can't read this thread anymore, you've already caused me to buy a 93 reg cab W350, already have a pullout 6.7.......and now I'm looking for a rolling 3rd gen donor frame :doh:
Lol, what you're building here is my dream truck bud!
On another note, I've had the Carli 2.5 pintop kit on my 15 megacab for about 500 miles now and LOVE it! I was worried when I bought the kit that it'd be to stiff and ruin the ride, but just like you said, it just soaks up anything and rides amazing. And CJC got me the hookup on the full system also, they're good dudes.
Nice! It's crazy what a good setup will do for a truck. Just remember to go back and re-torque everything.
Freezingsystems, have you got a build thread on your 2012 Mega? I'd be interested in the details on it. Kind of thinking of building my 2014 mega. What transmission are you running? Thanks and sorry to derail the old ugly thread.
Derail is not an issue for my thread.
I haven't had time to do a build thread but really there is nothing unique plenty of built 4th Gen's out there. Here is a quick rundown because after all this is Comp D. :evil
Transmission I'm running a Revmax 68RFE 1000 series since I built the new motor in late Fall of 13 IIRC. Prior to that was the 850 series but since I hurt the motor and I was in process of building it bigger I had Revmax upgrade me to the 1000 series.
Here's my 2012 Mega Laramie build shortlist:
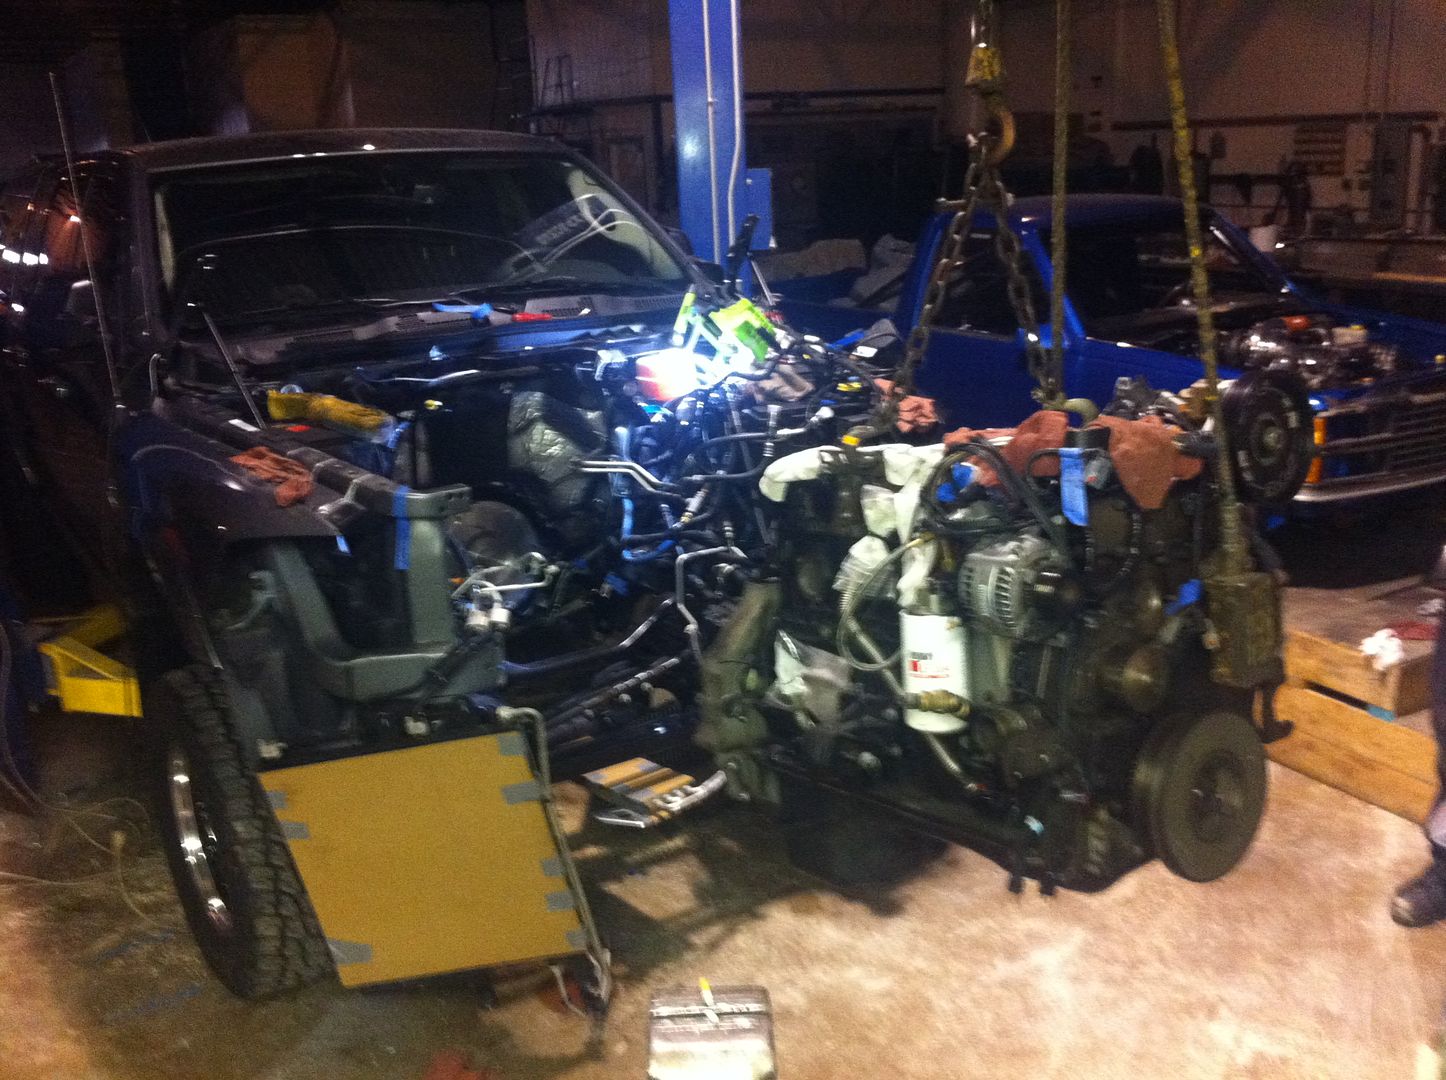
The original motor made it about 12,000 miles.
All 6 rods bent on average .110" :hehe: This came as no surprise it was bound to happen running quick spooling compounds with maybe 800 ish on tap. I was pleased they didn't snap and destroy itself. Truck now averages in the 930's maybe more now.
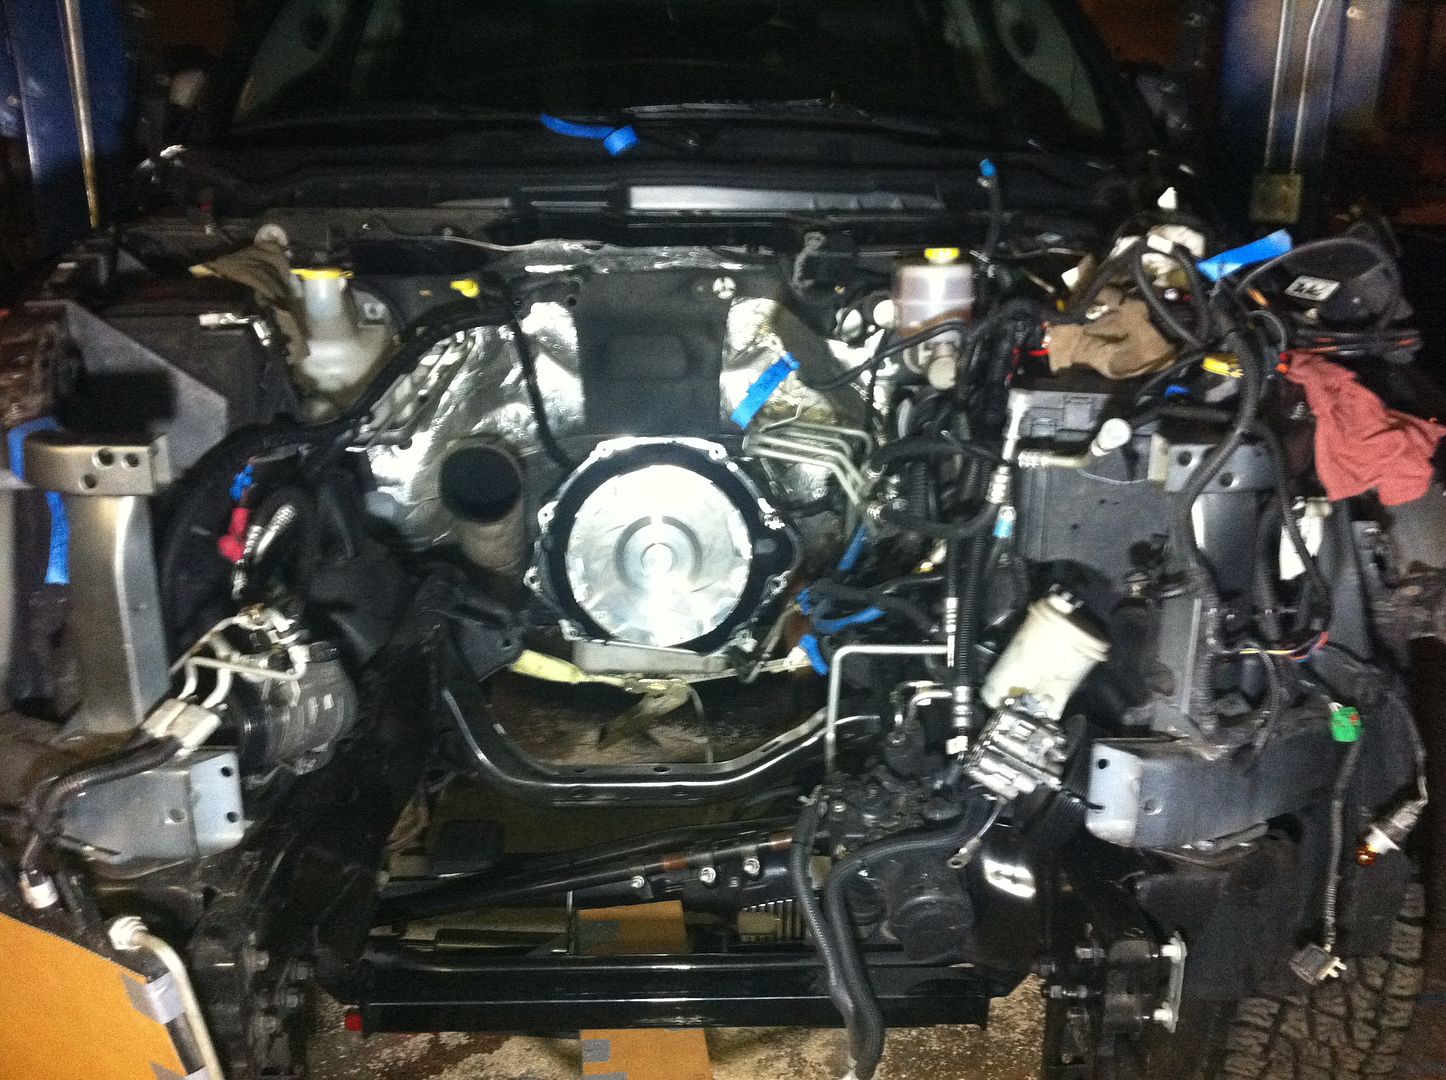
So I pulled the motor and built it like it should have came from the factory <<<"Copyright signature of Joesixpack"<<<
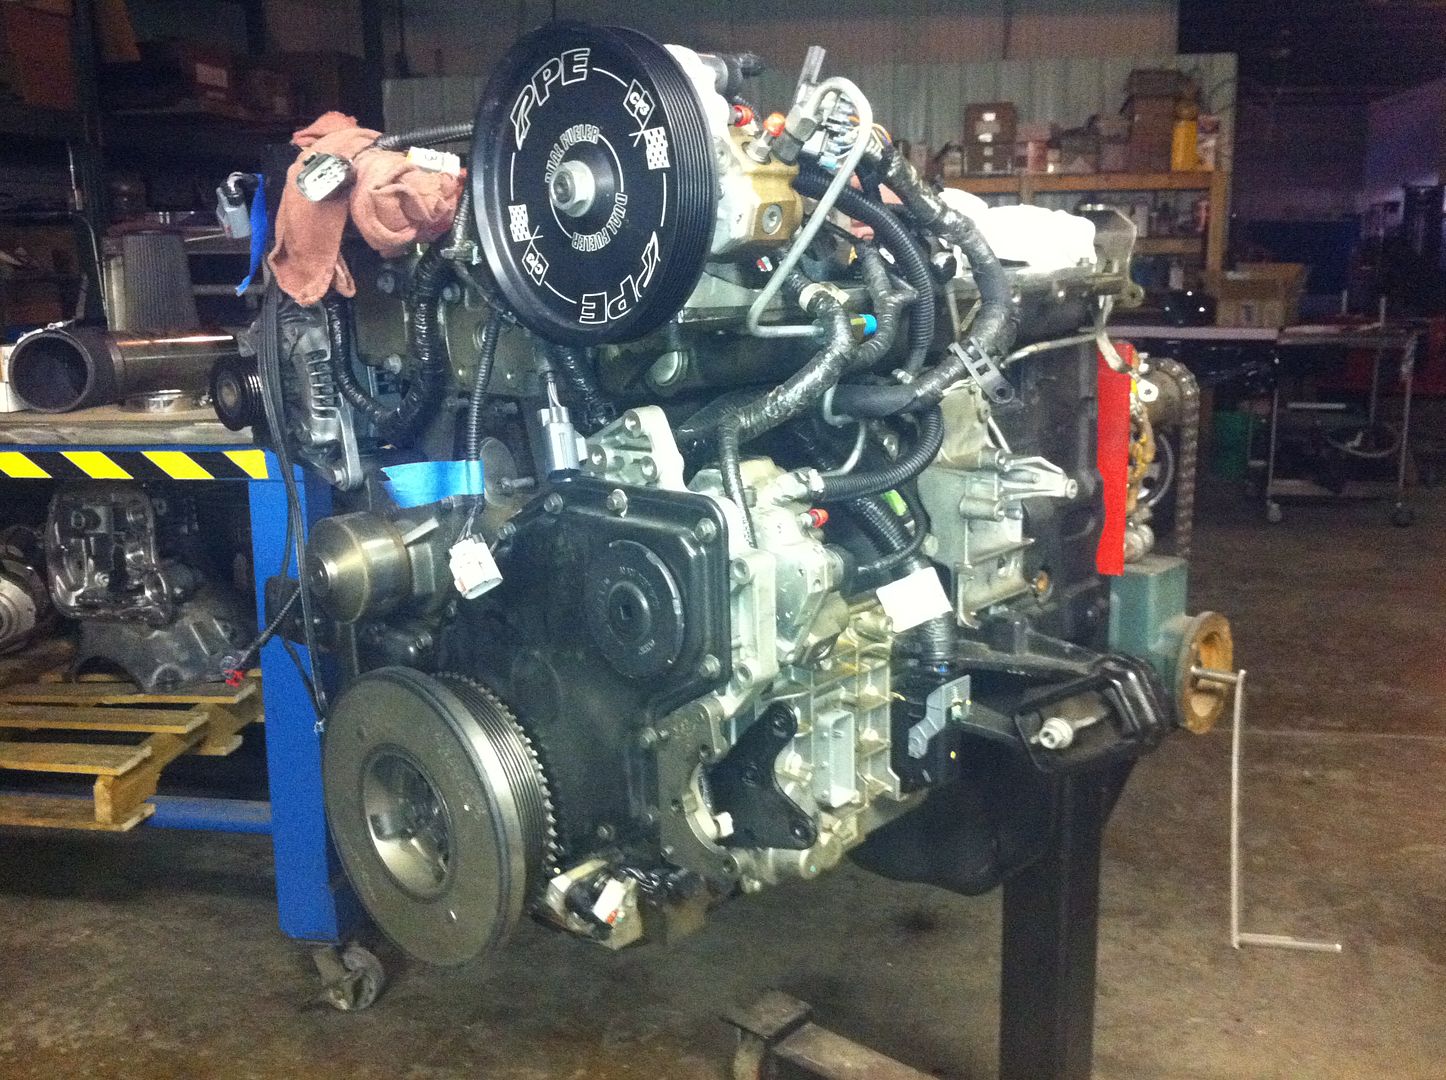
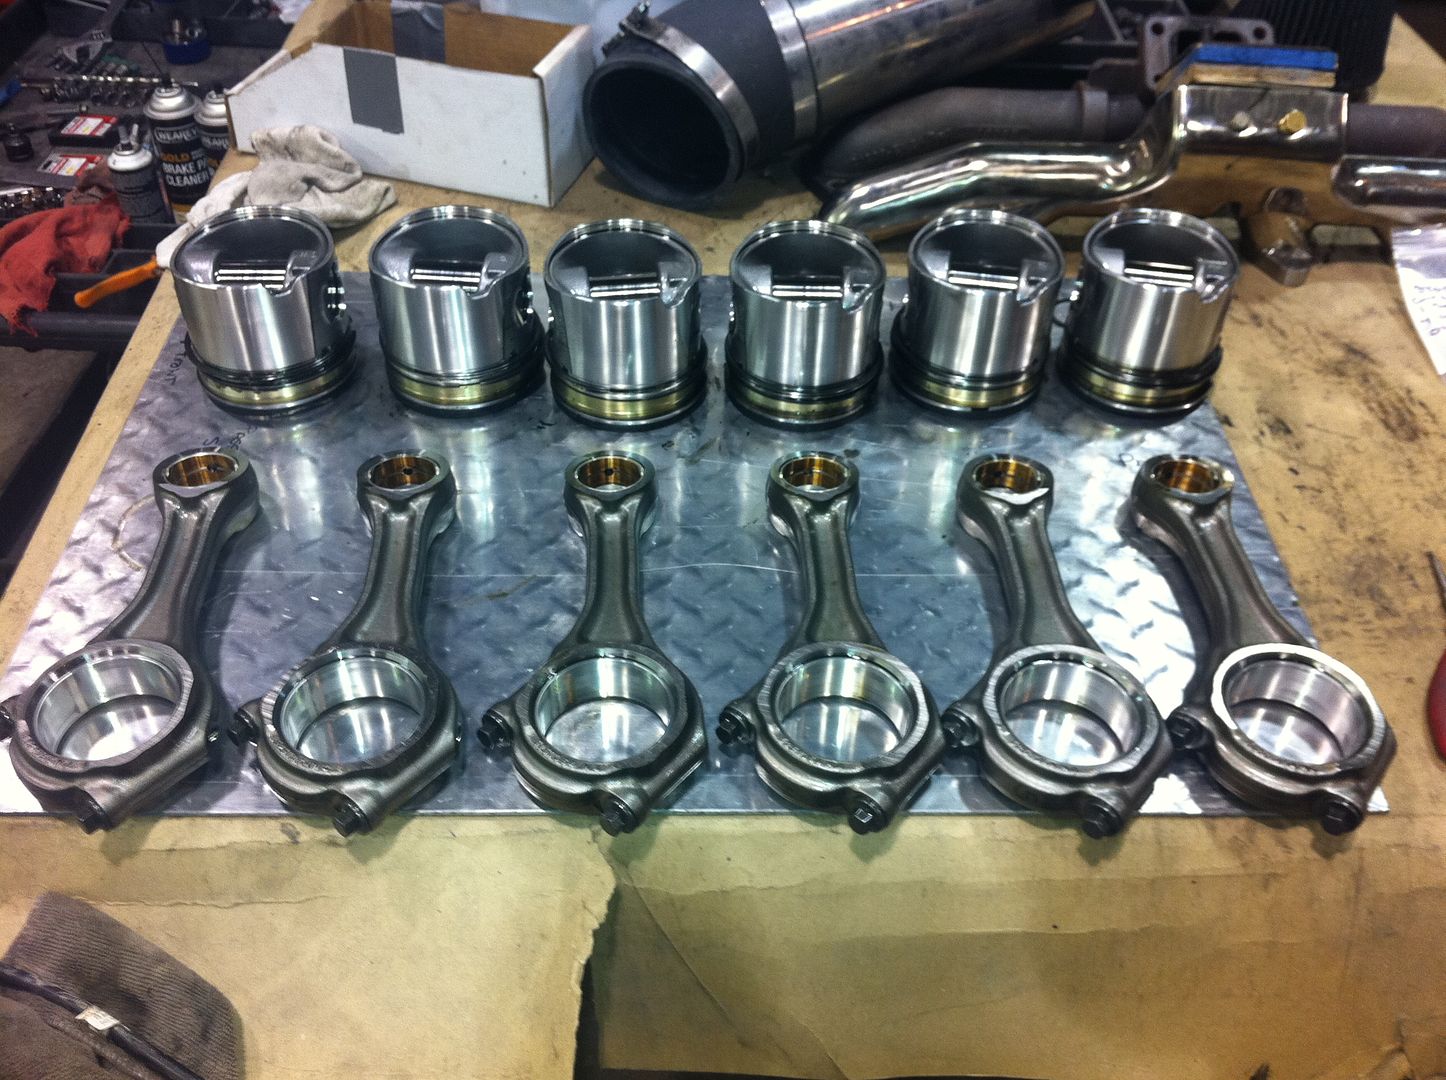
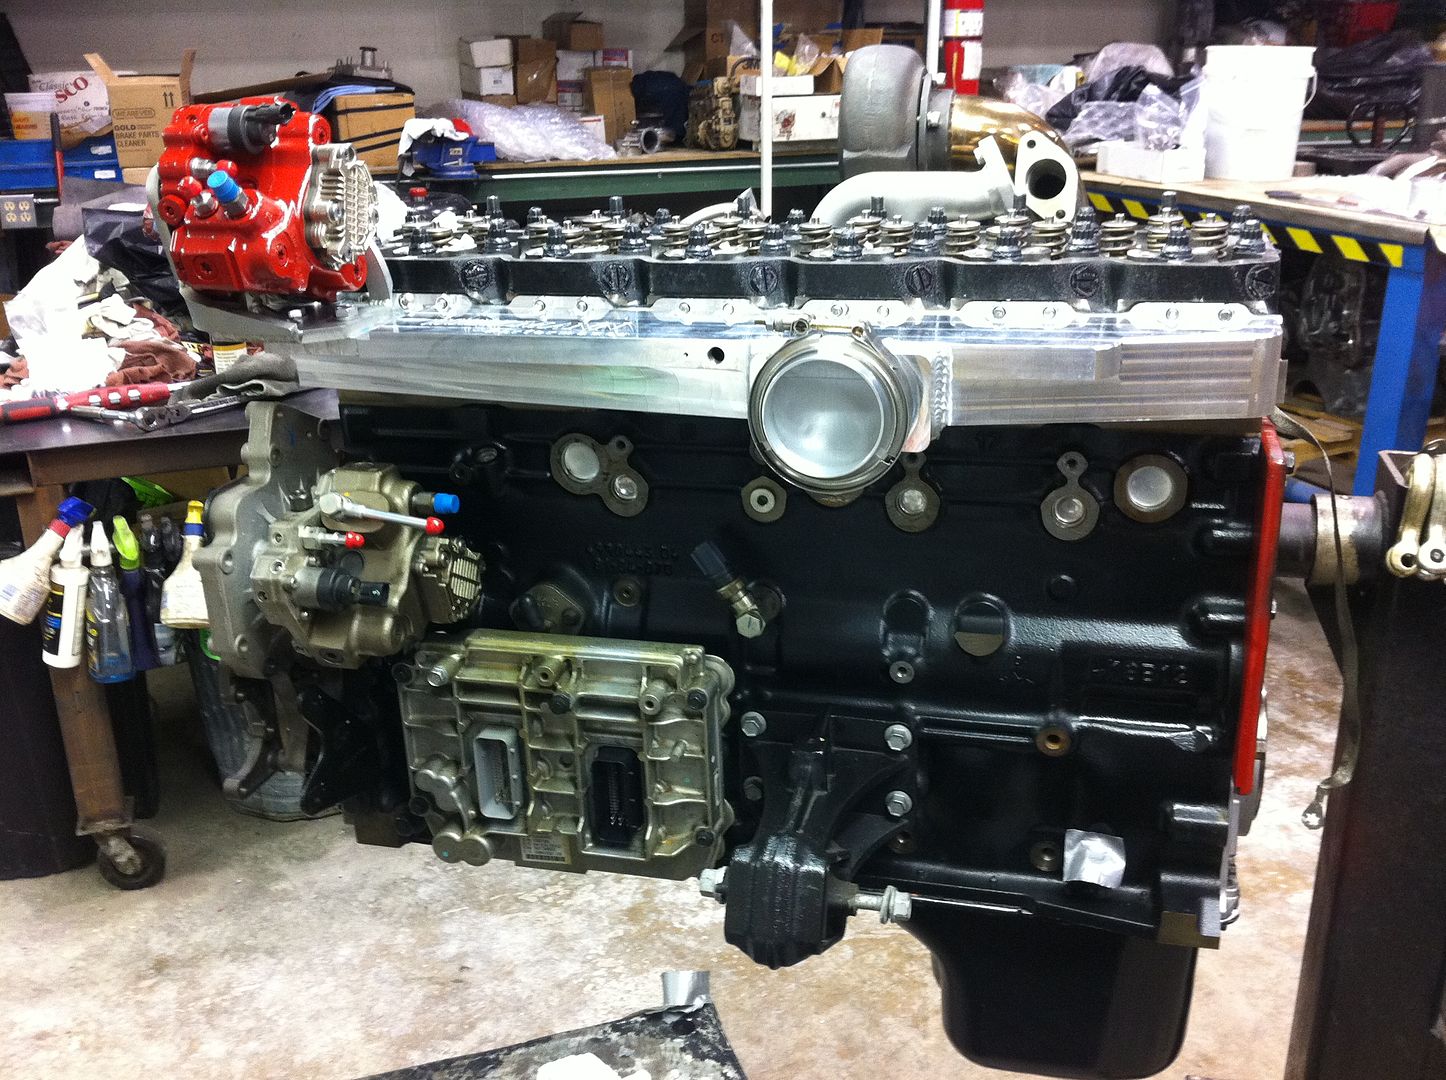
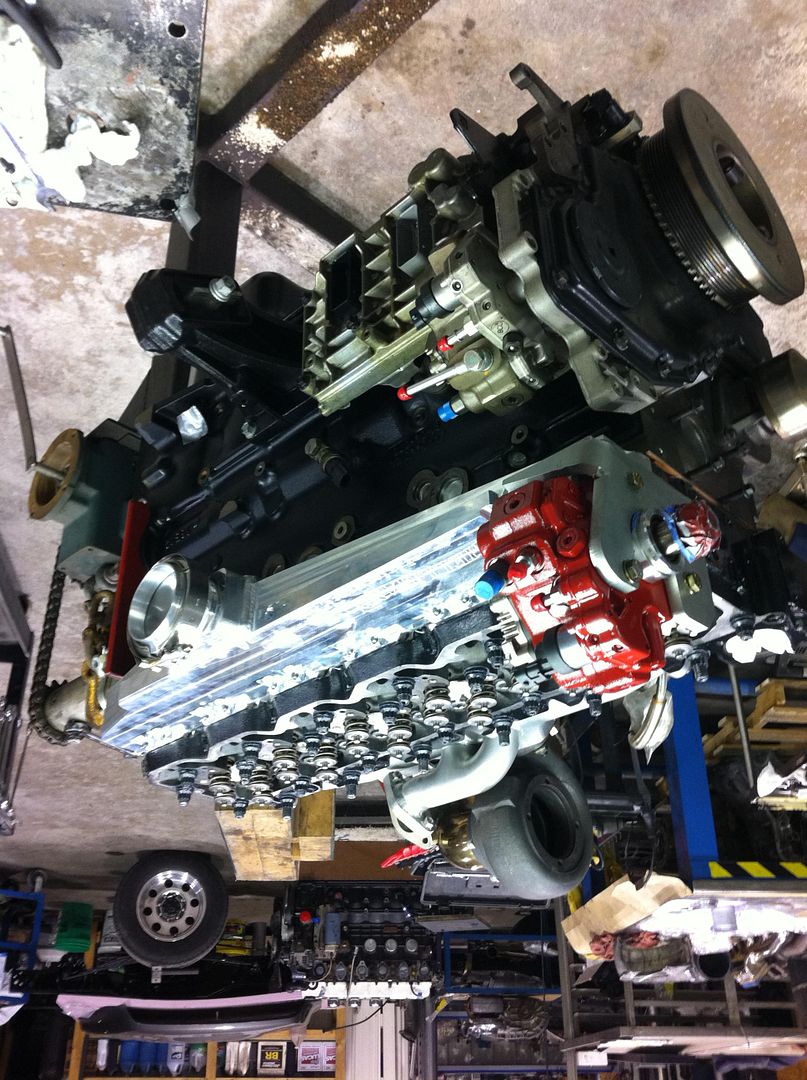
This is the new engine I put together to replace it:
Original 6.7 Block STD Bore with a fresh hone.
Balanced and polished 6.7 crank
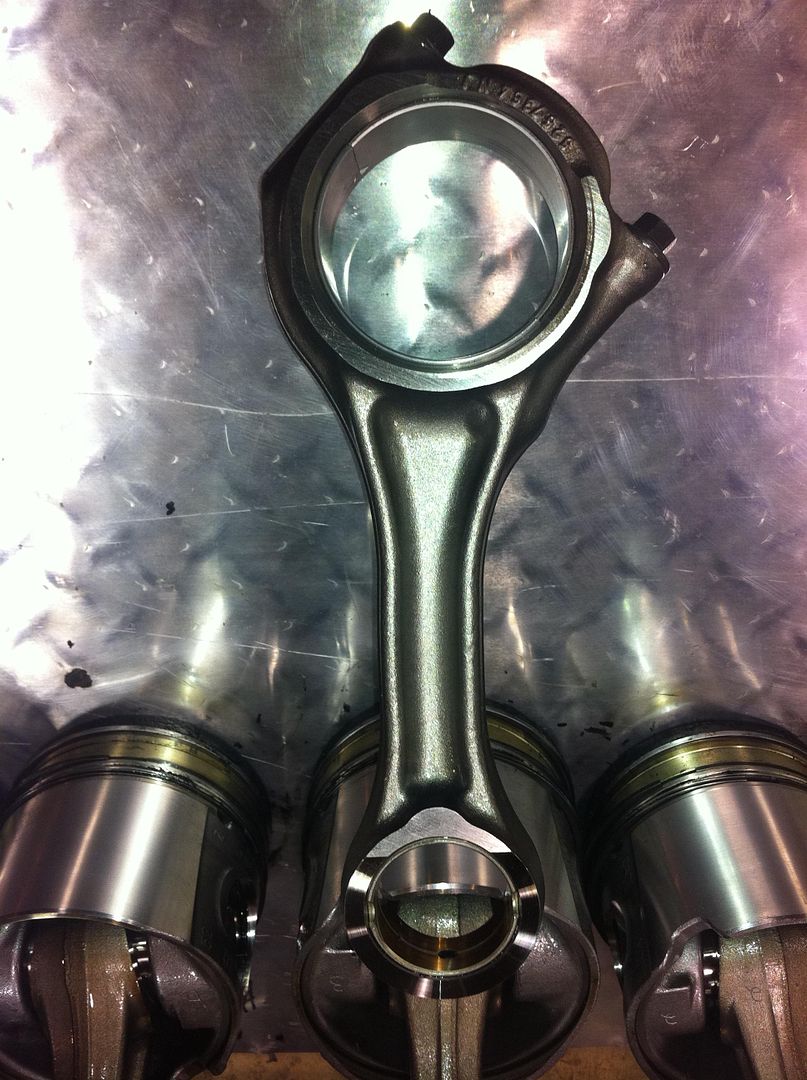
Carrillo Rods/Multi-phase Bolts
6.7 Pistons with slight bowl and skirt work done.
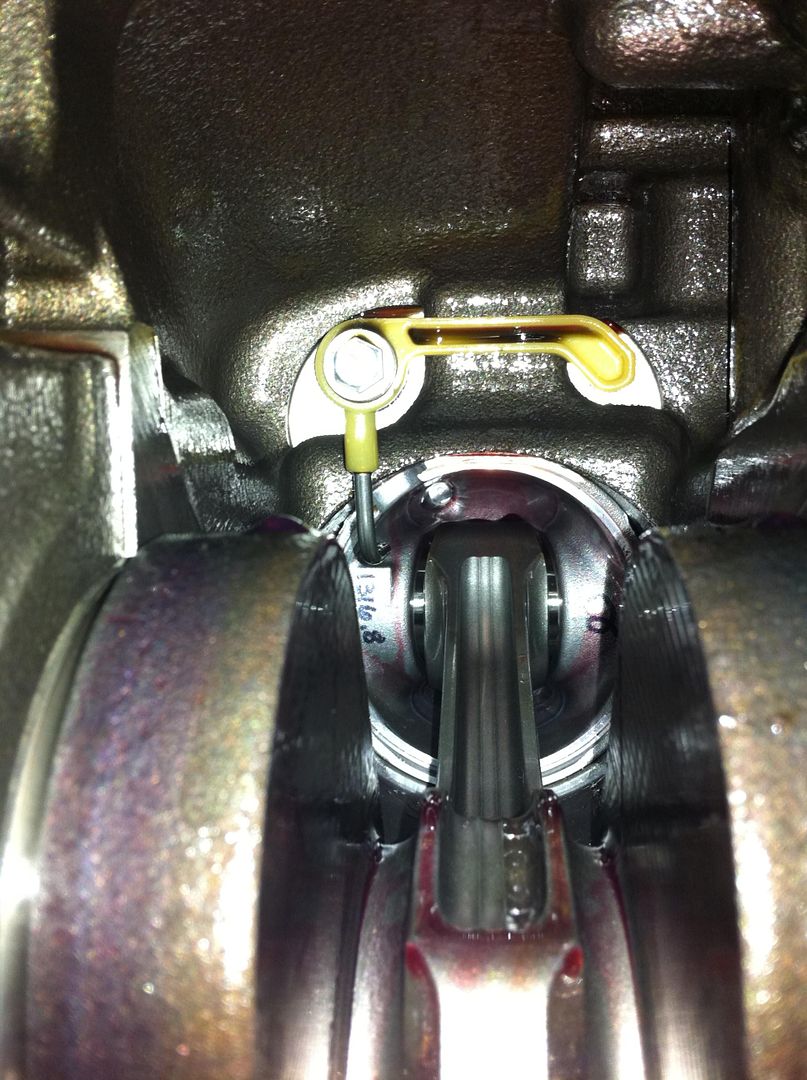
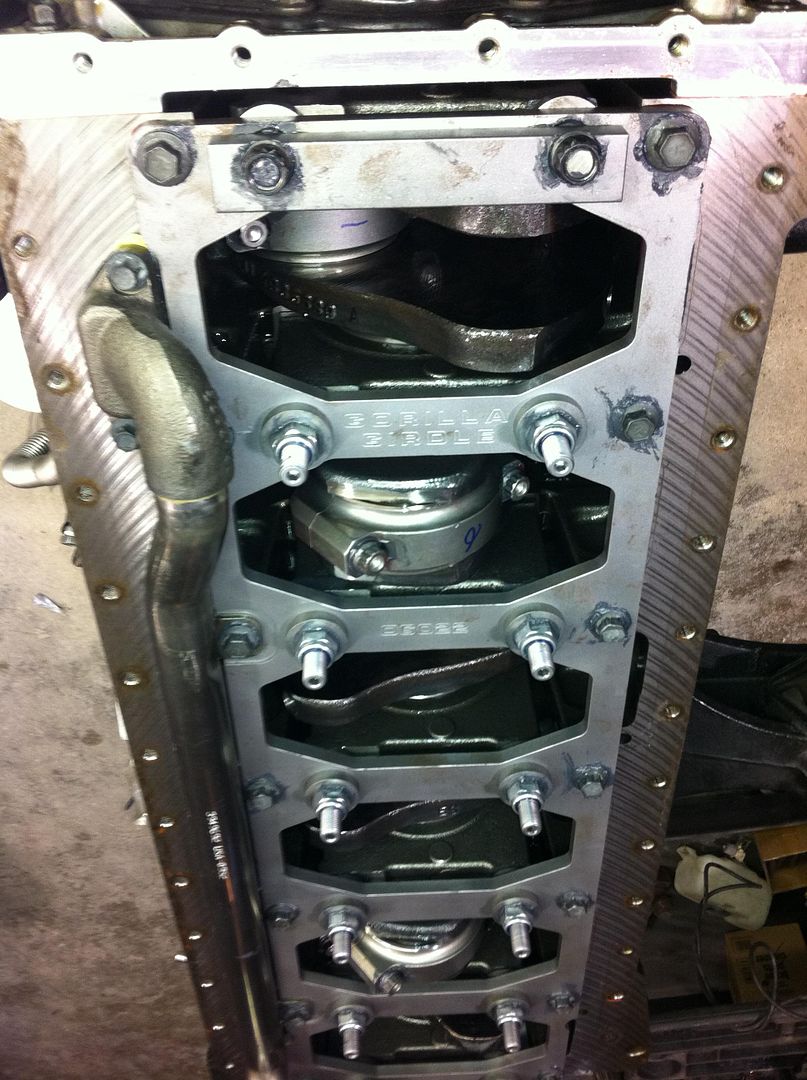
RM Girdle and H11 XL mains and line honed.
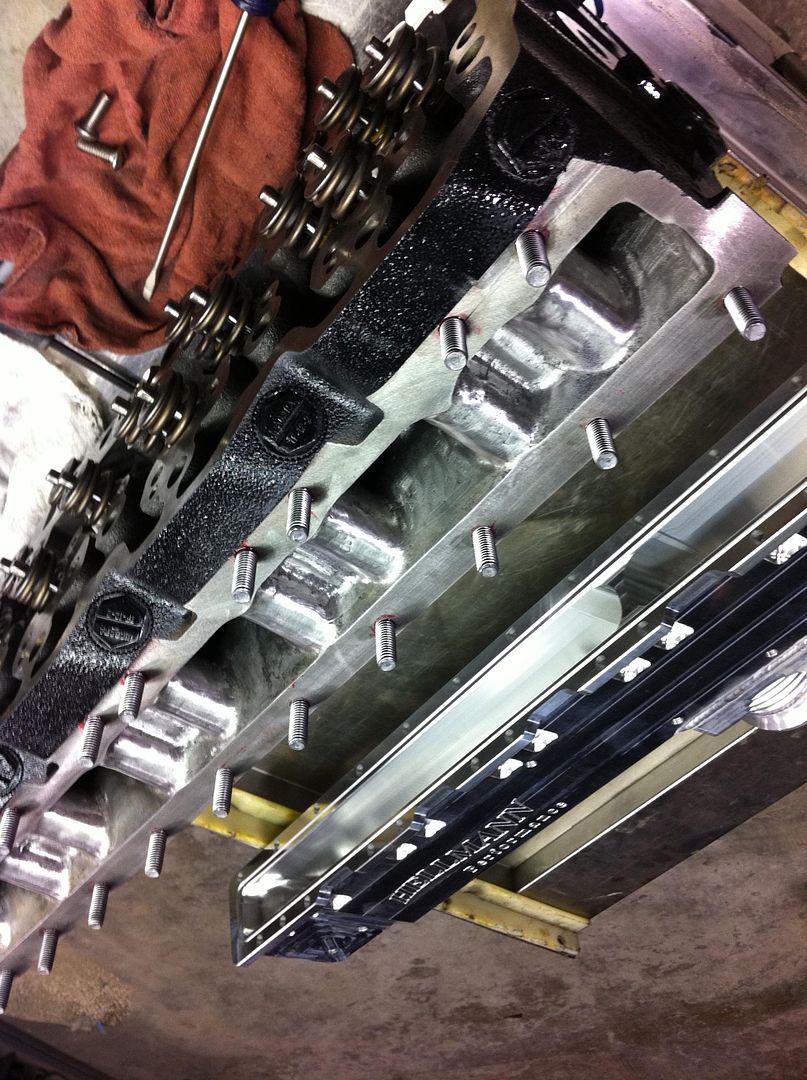
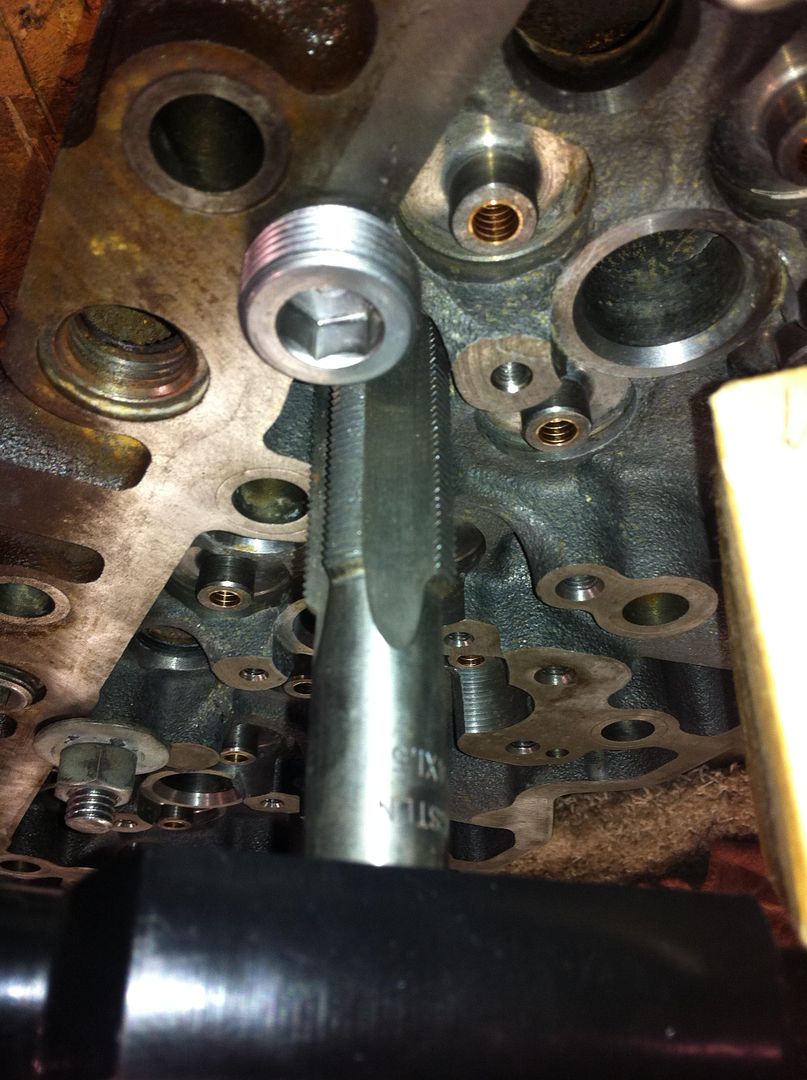
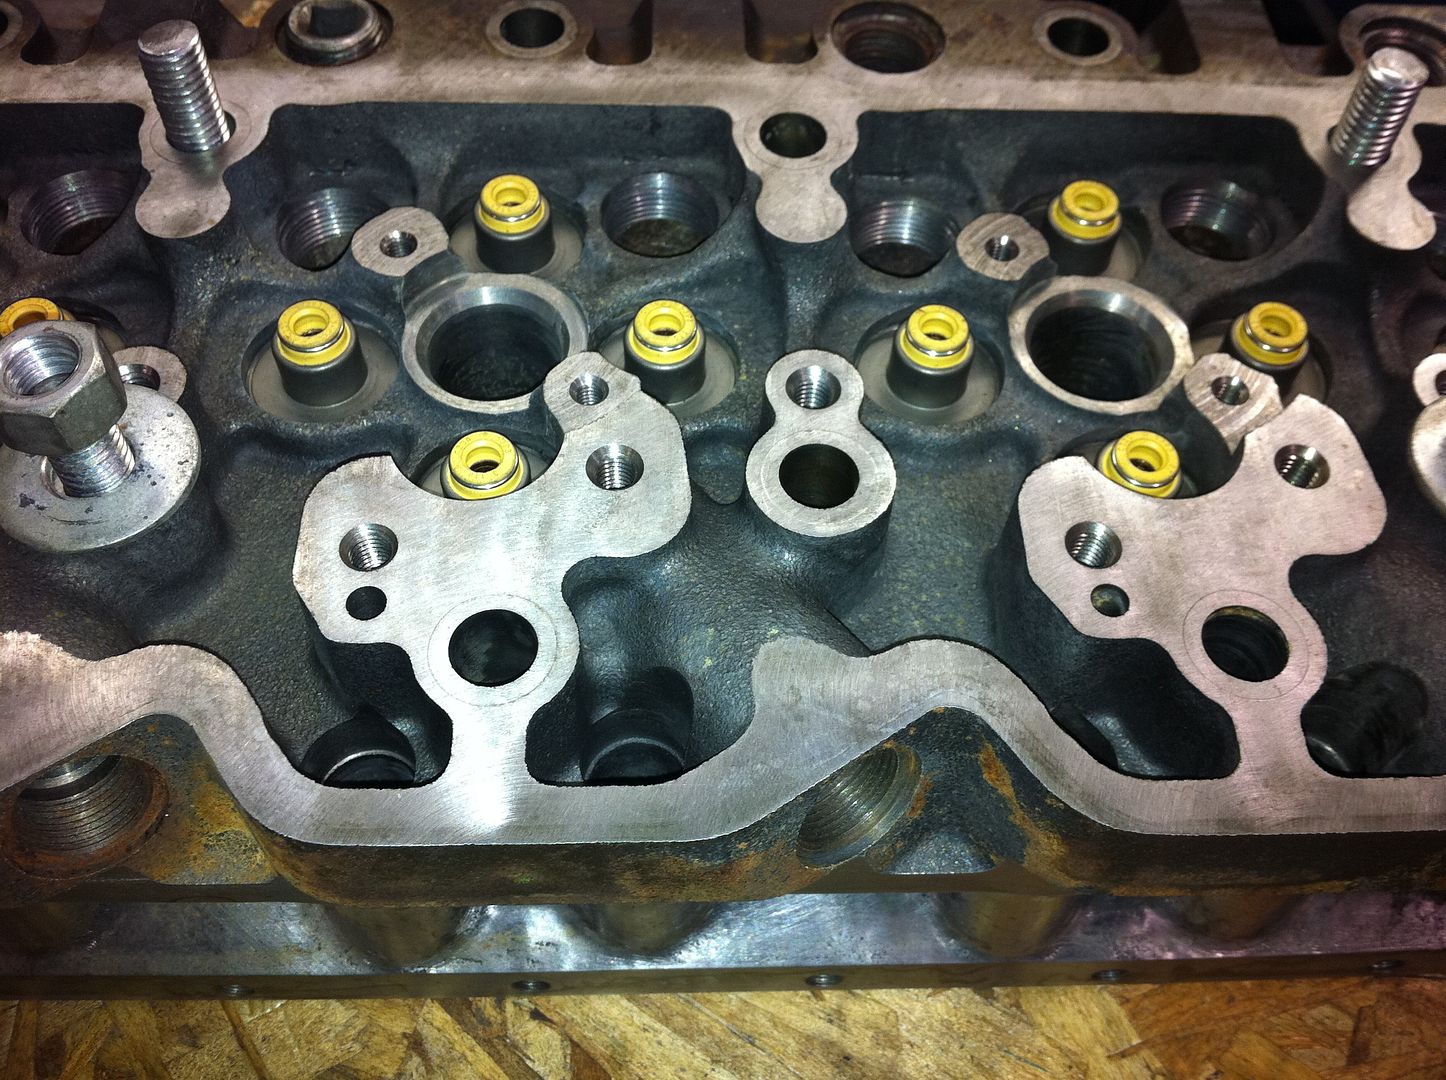
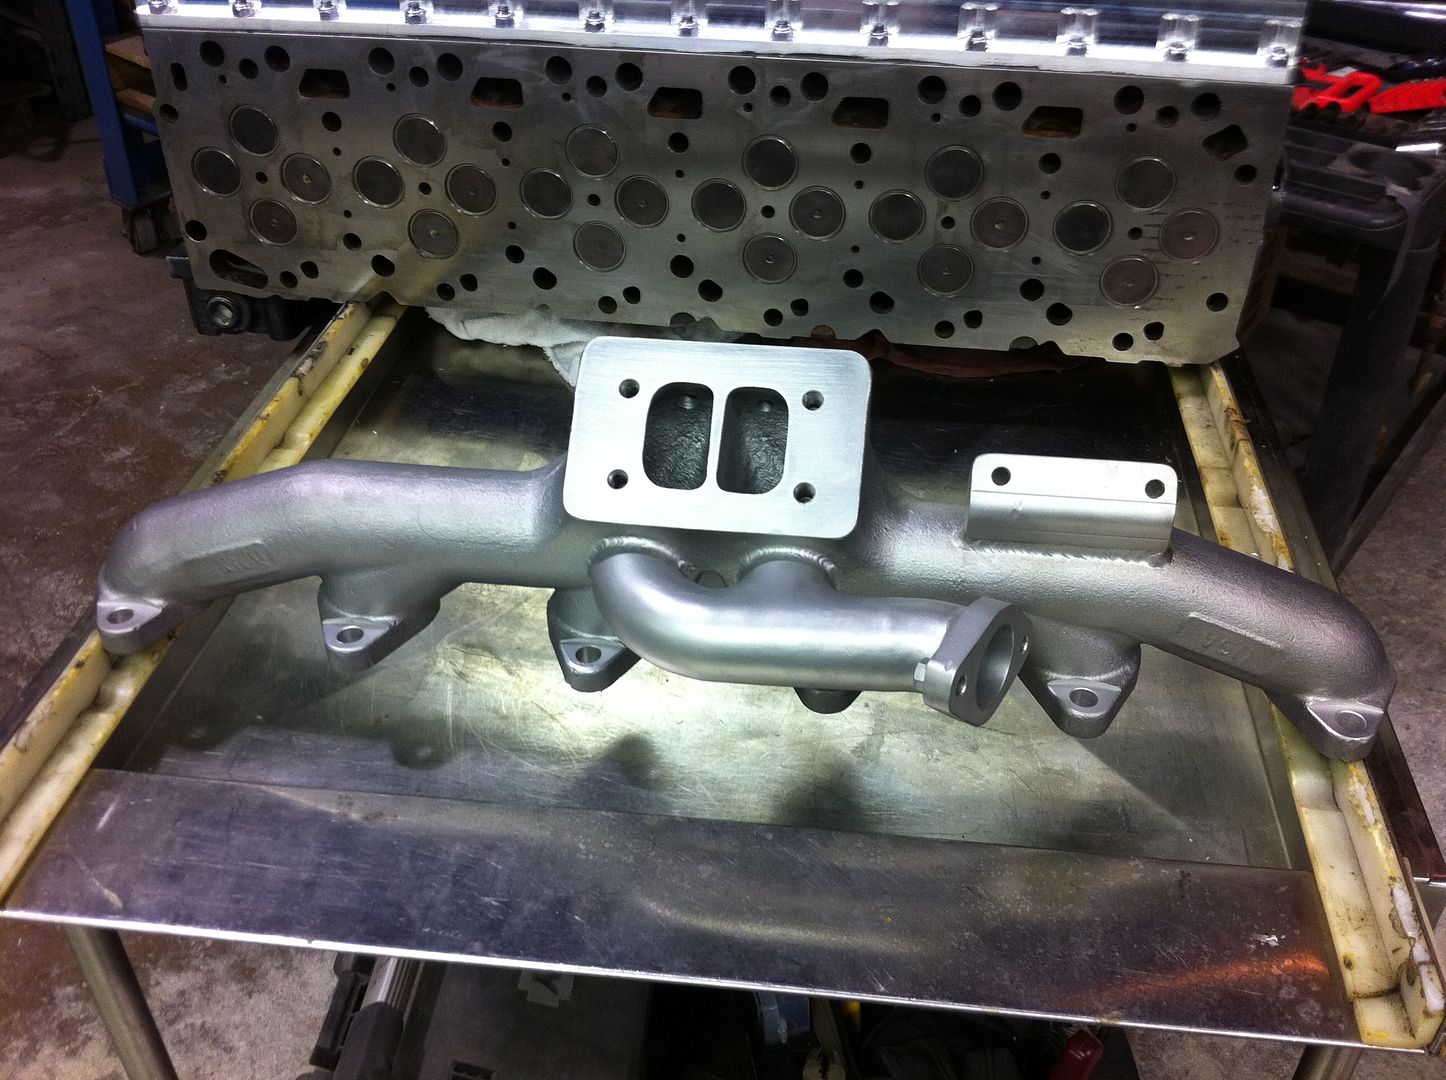
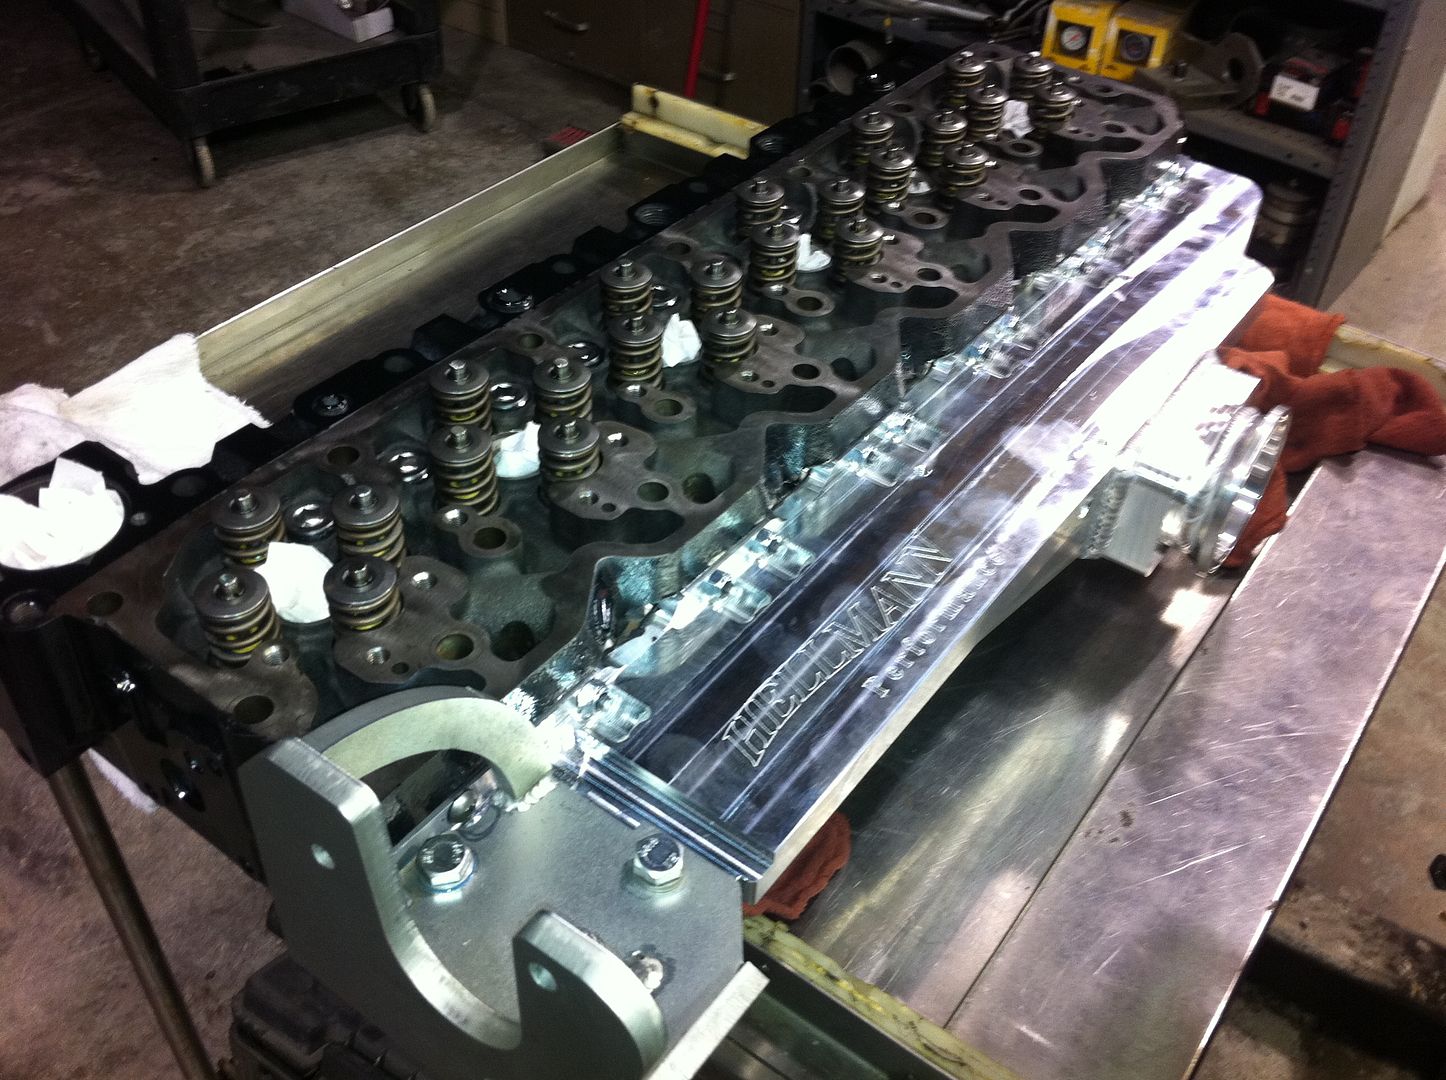
6.7 Head we did here at my shop.
Intake shelf removed
Slight porting just removed casting flash and smooth the runners.
Hellman Intake
Removed soft plugs and tapped M24 X 1.5
Hamilton springs and push rods
Performance valve grind.
ARP 625 studs and MLS gasket.
Fuel:
Dual CP3's stock
Exergy 100% over
Shimmed relief.
Air:
S366/74/1.0 X S488/96/1.32 compounds and 40mm JGS gate on manifold.
Building a new set using the SXE69mm over a S485.
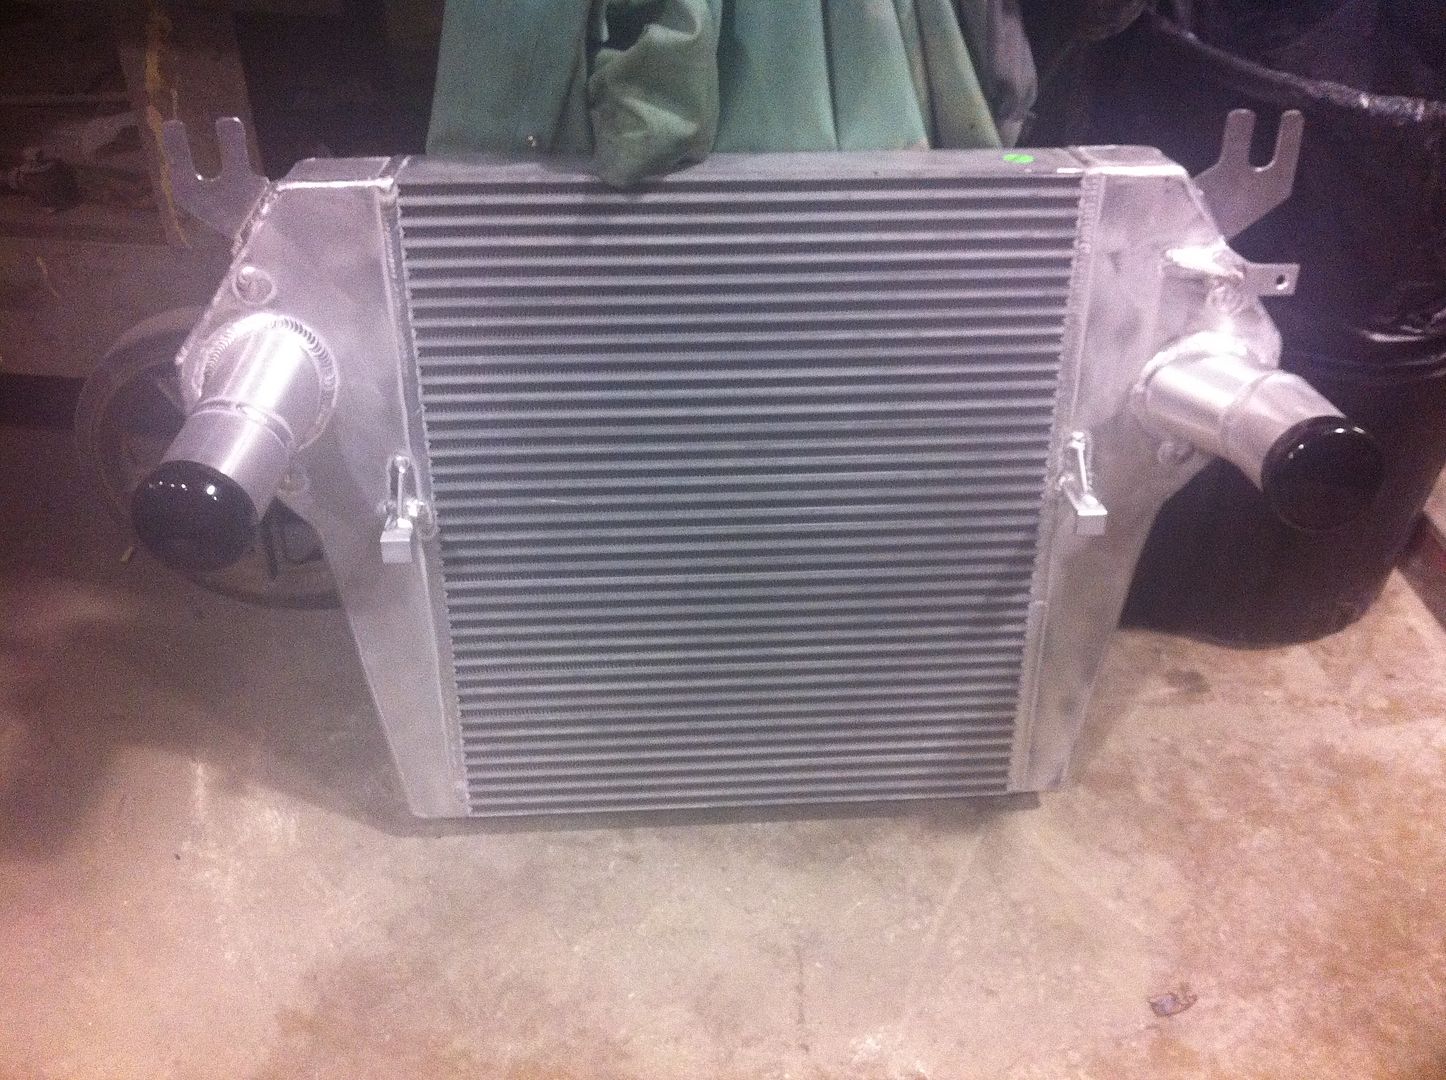
AFE Intercooler with custom V band piping connections.
Tuning:
MCC by Ryan and MCC by Dave.
Revmax Specific Trans Tuning
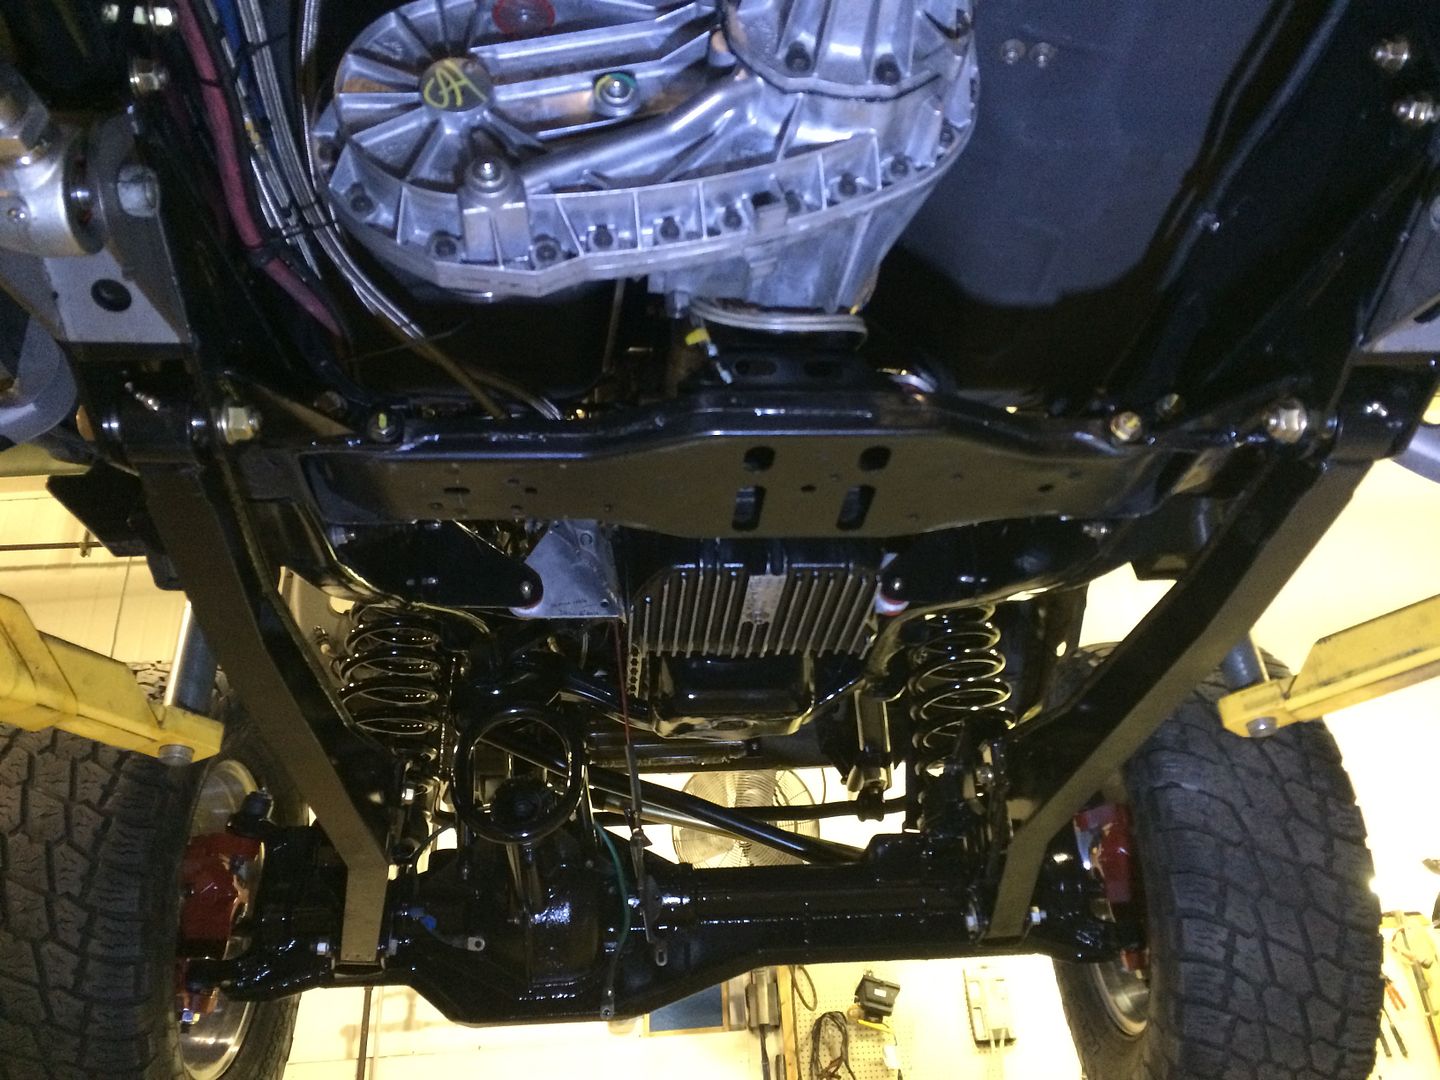
Suspension:
Carli/King 2.5 3"
Carli Trac-bar, EMF joint
Full Carli/Deaver Leafs
Carli Sway
Carli 3" progressive coils
Carli Ball Joints
Carli long travel bags
Carli stab
Exhaust Hidden:
Full 5" down pipe to 5" Hushpower muffler then down turned over axle no reveal.
Amp Steps, ARE Z series cap, Bed rug etc.
Helluva theft and recovery system.
That's the jist of it.
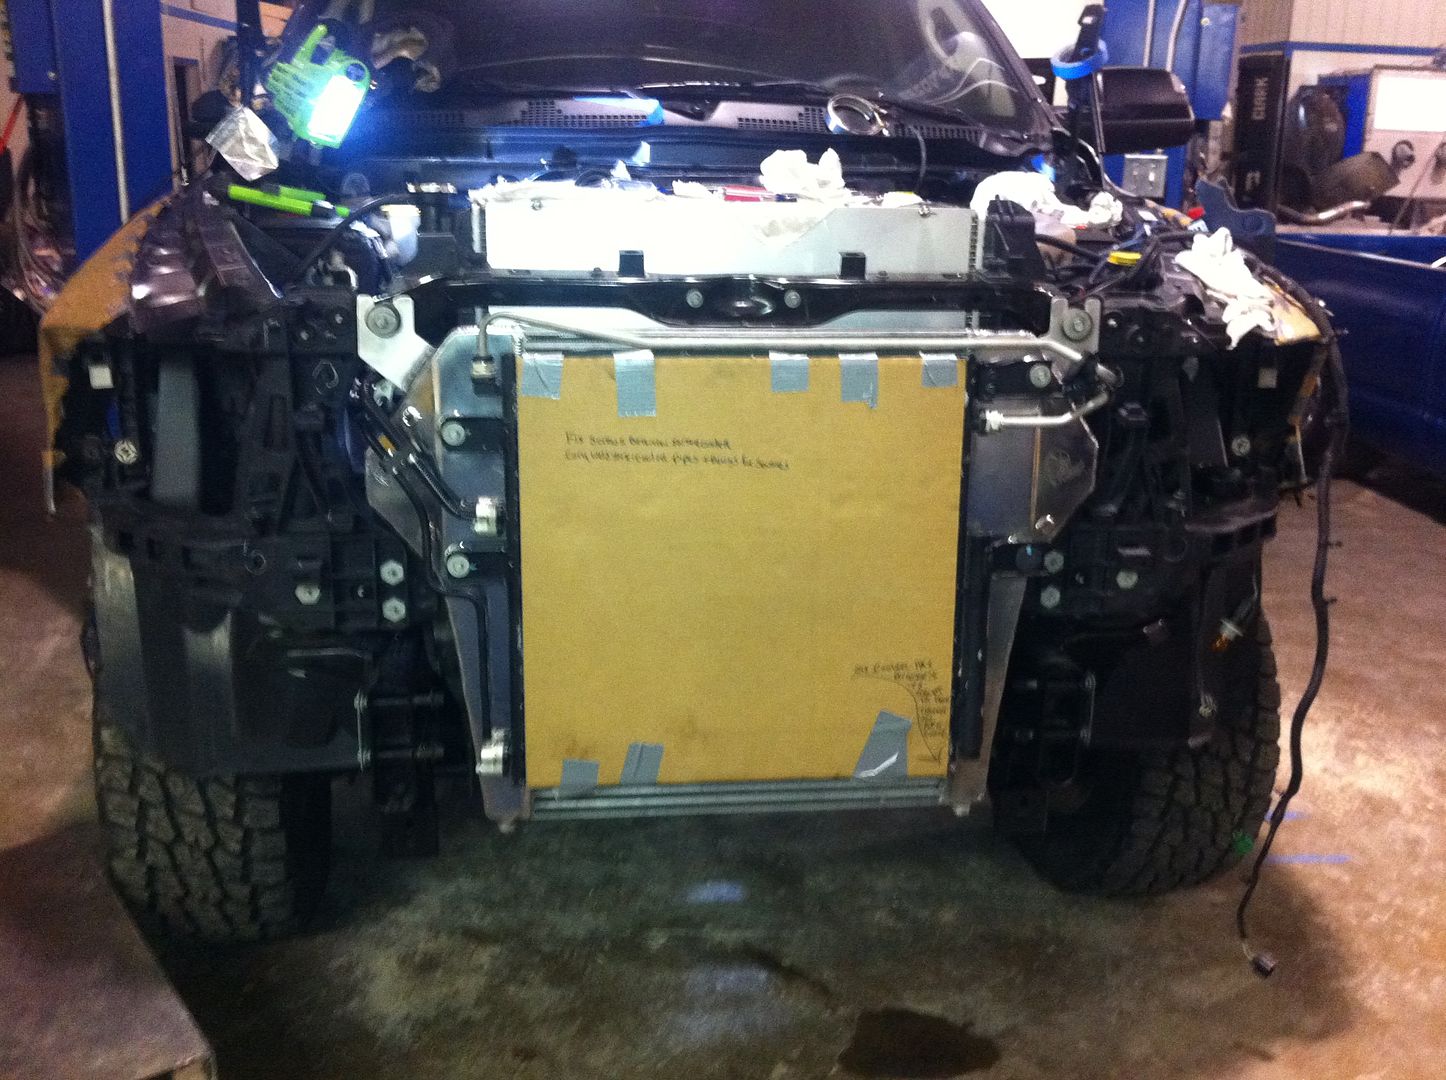
My wife walked back to my diesel man cave area and was standing behind my truck from a distance and asked why my new truck was torn apart. I told her I'm changing the oil and fixing/adding a few things while doing so.
Scooter's Roofing
New member
- Joined
- Oct 16, 2006
- Messages
- 17,007
dude...
DO YOU SLEEP!?!?
DO YOU SLEEP!?!?
Freezingsystems
Modify Everything
- Joined
- Jan 18, 2010
- Messages
- 1,130
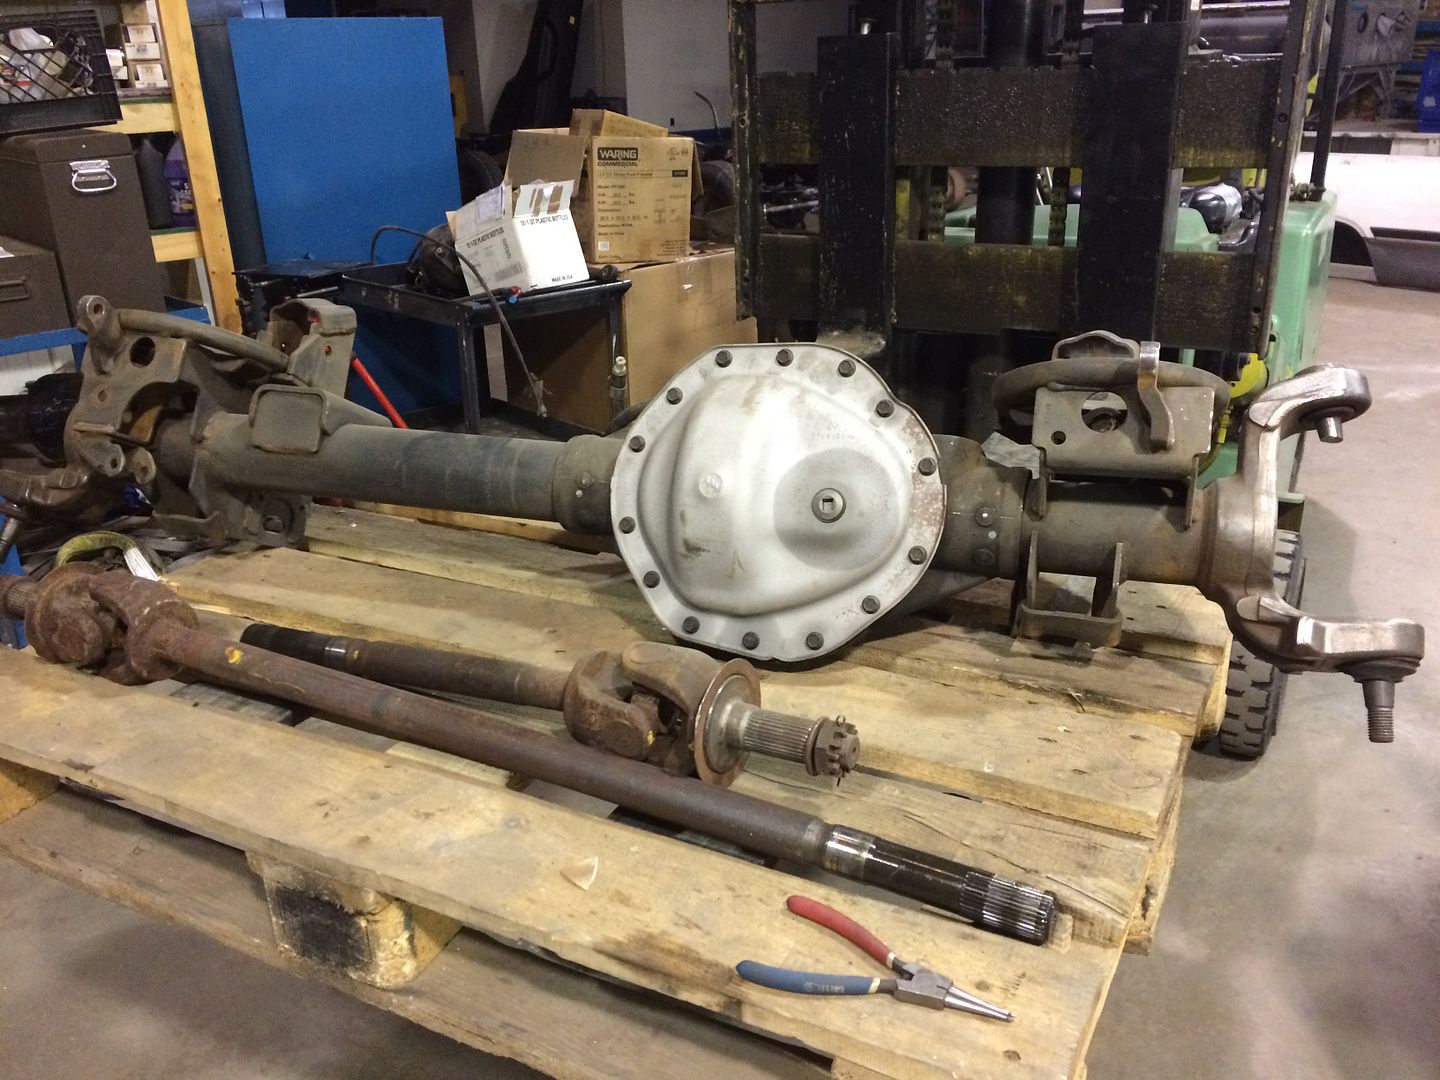
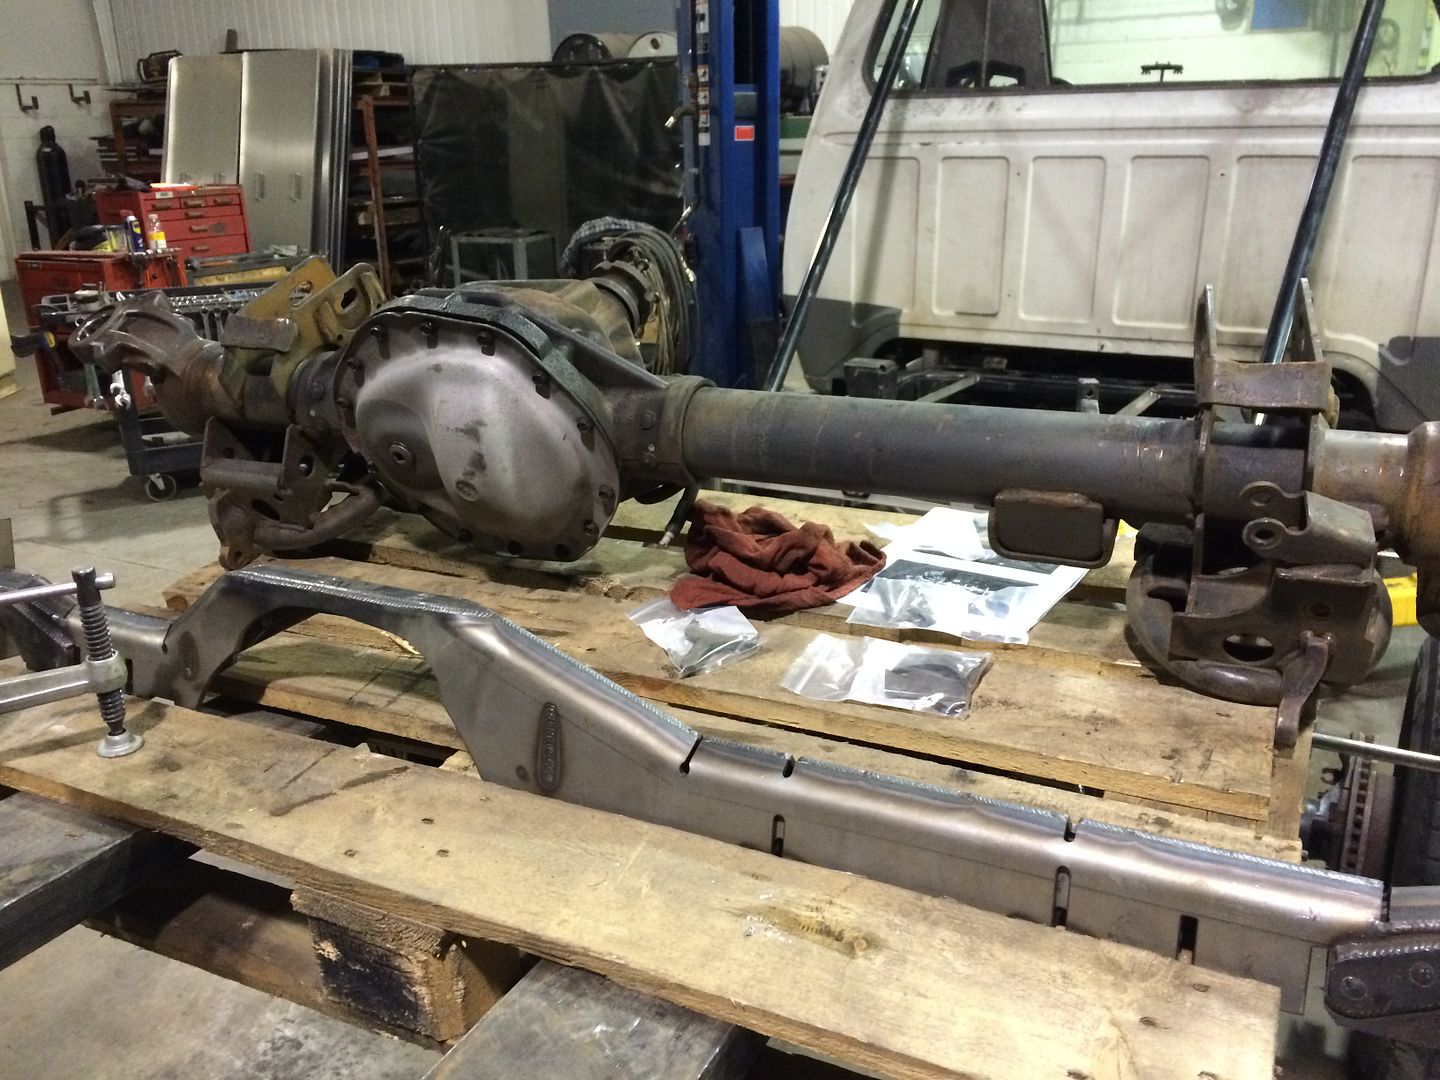
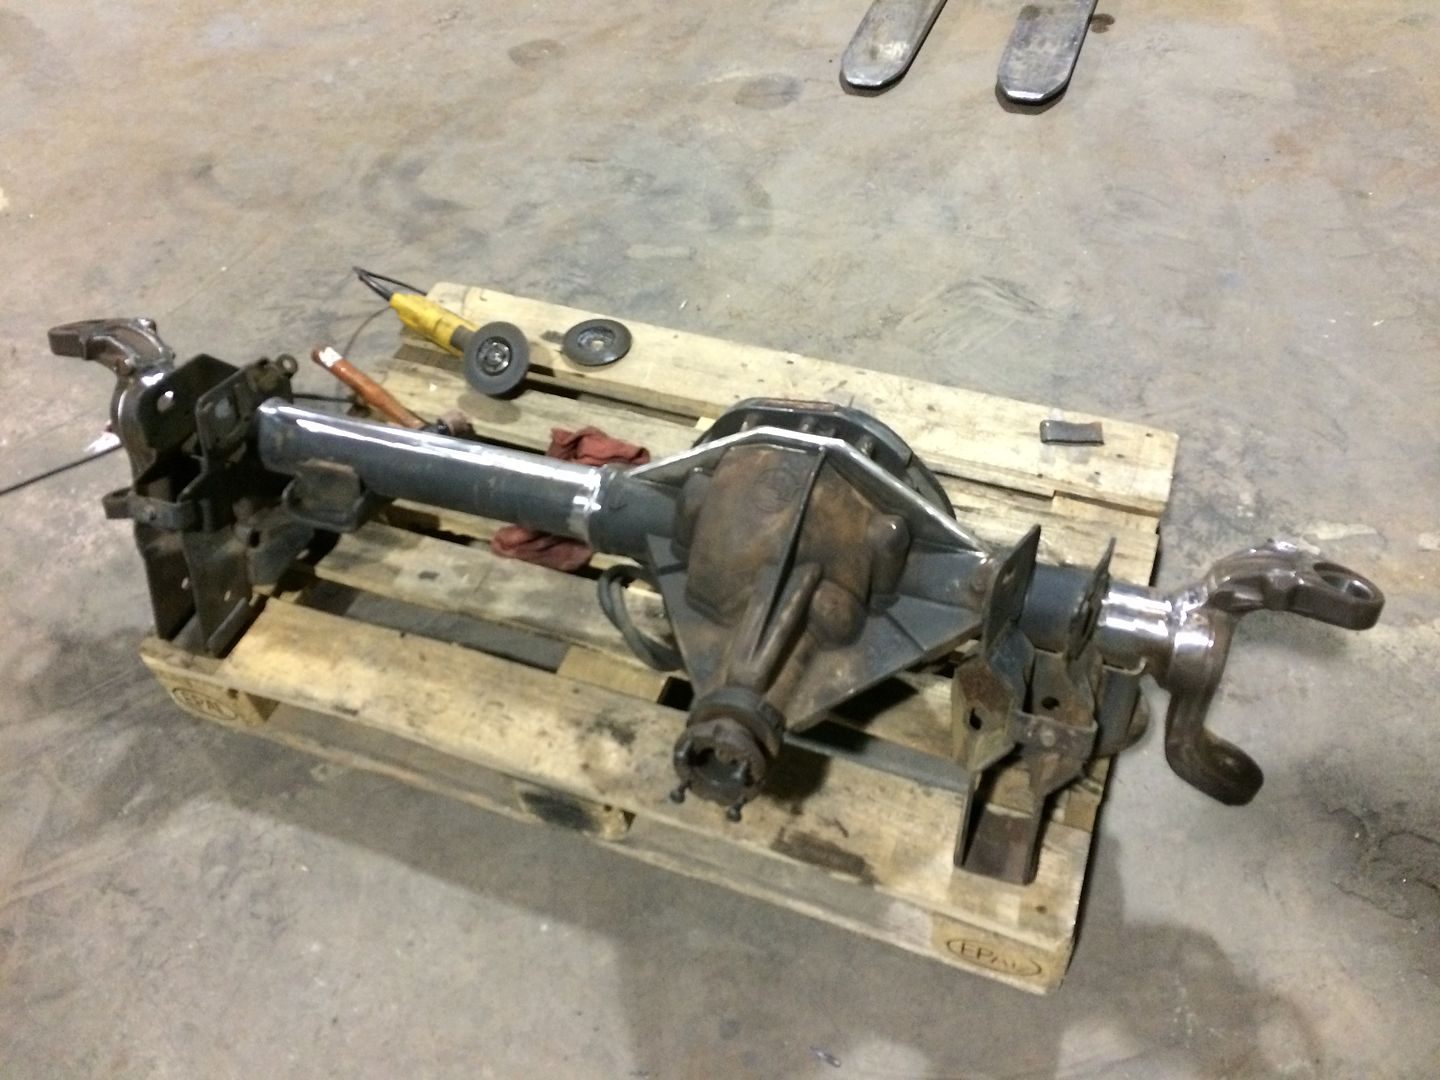
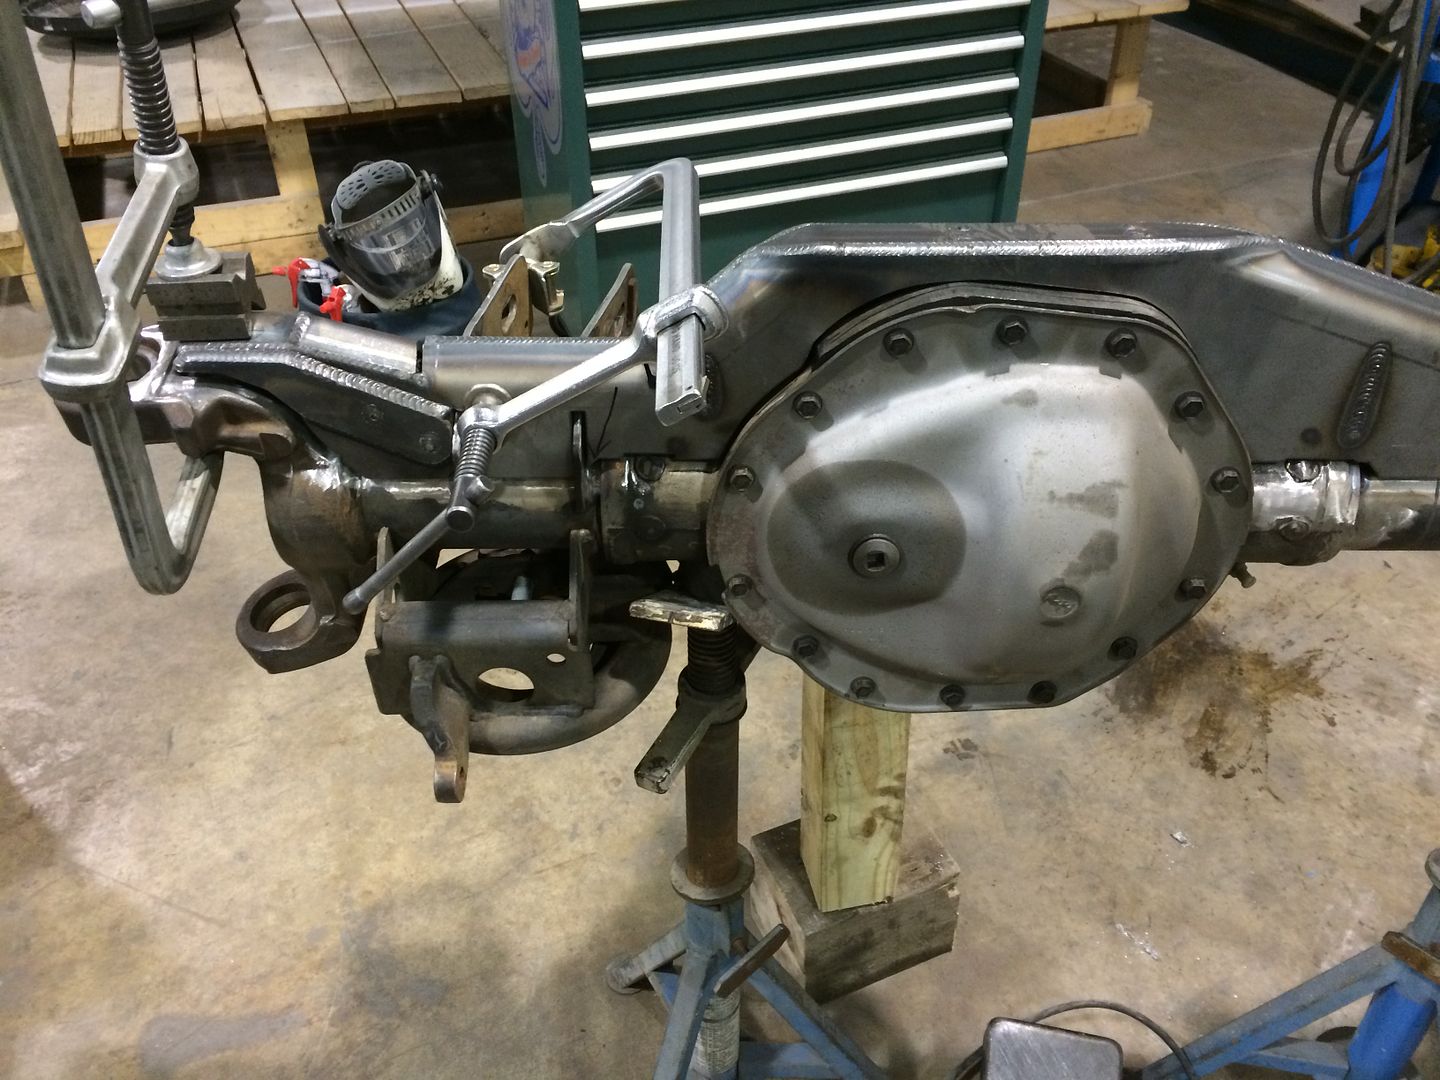
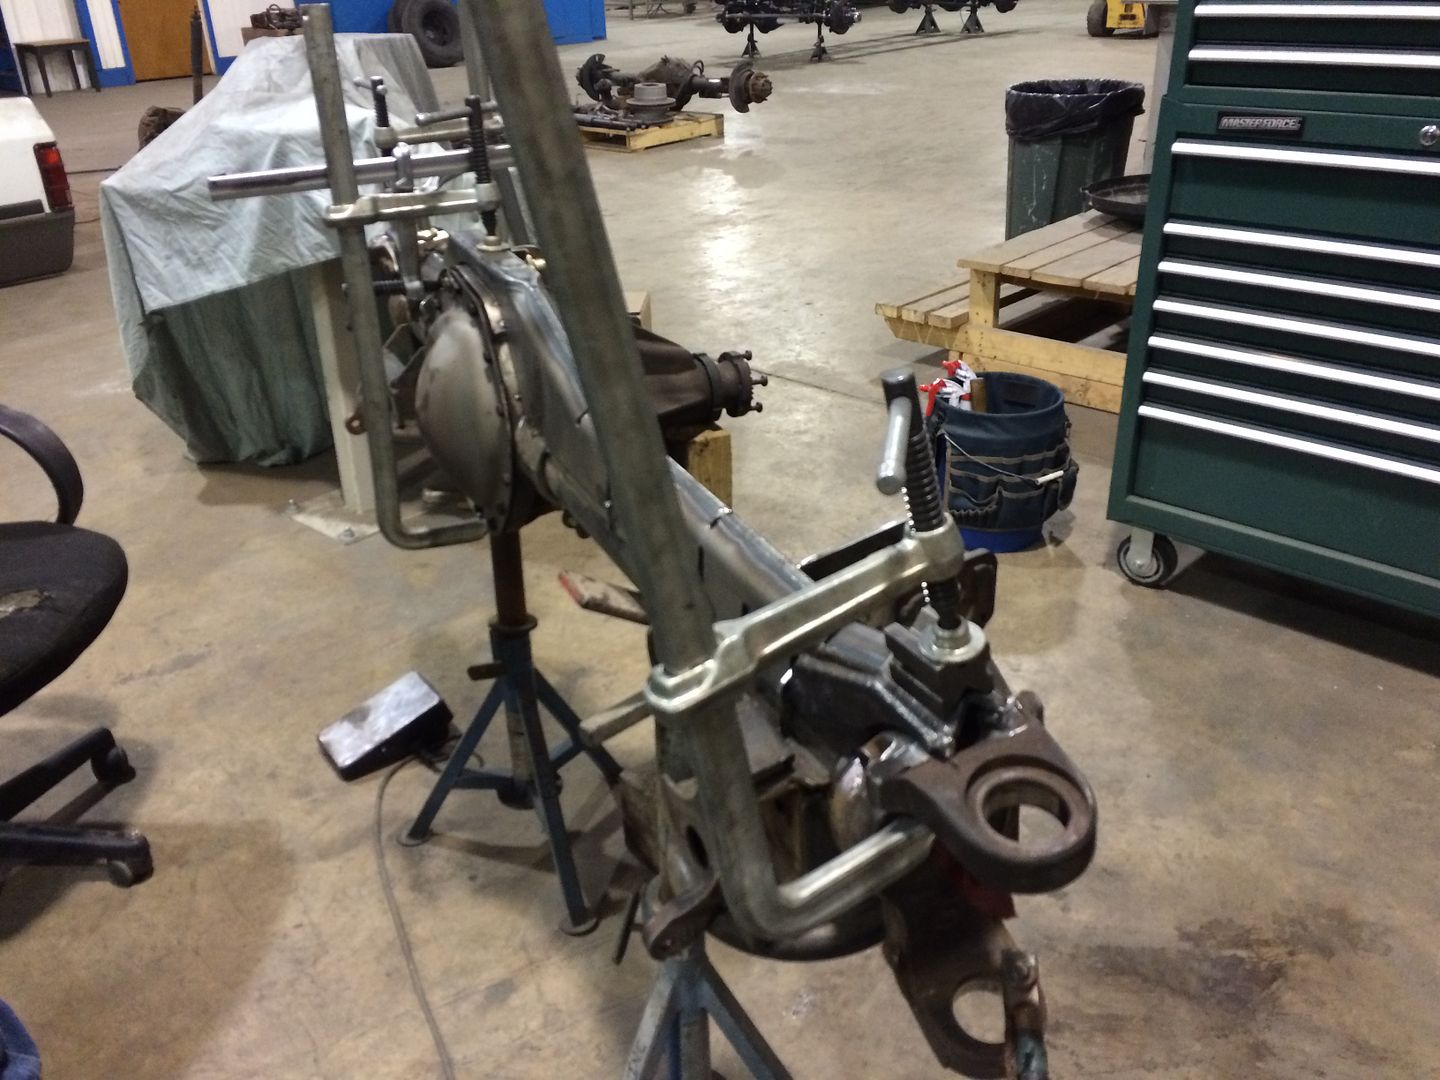
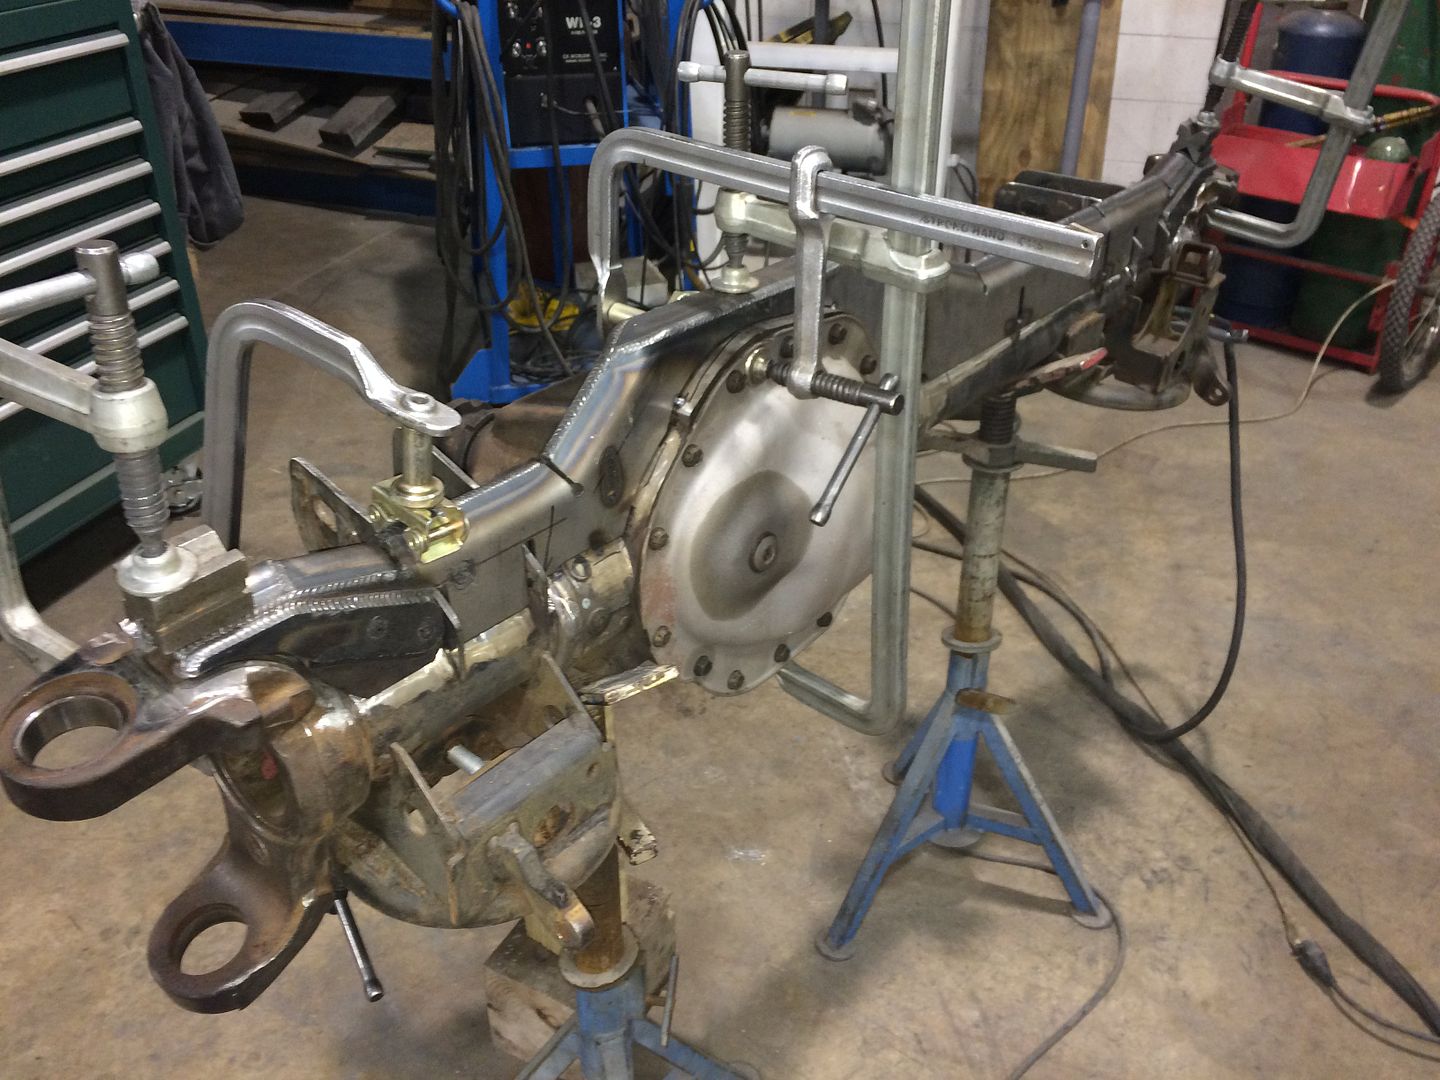
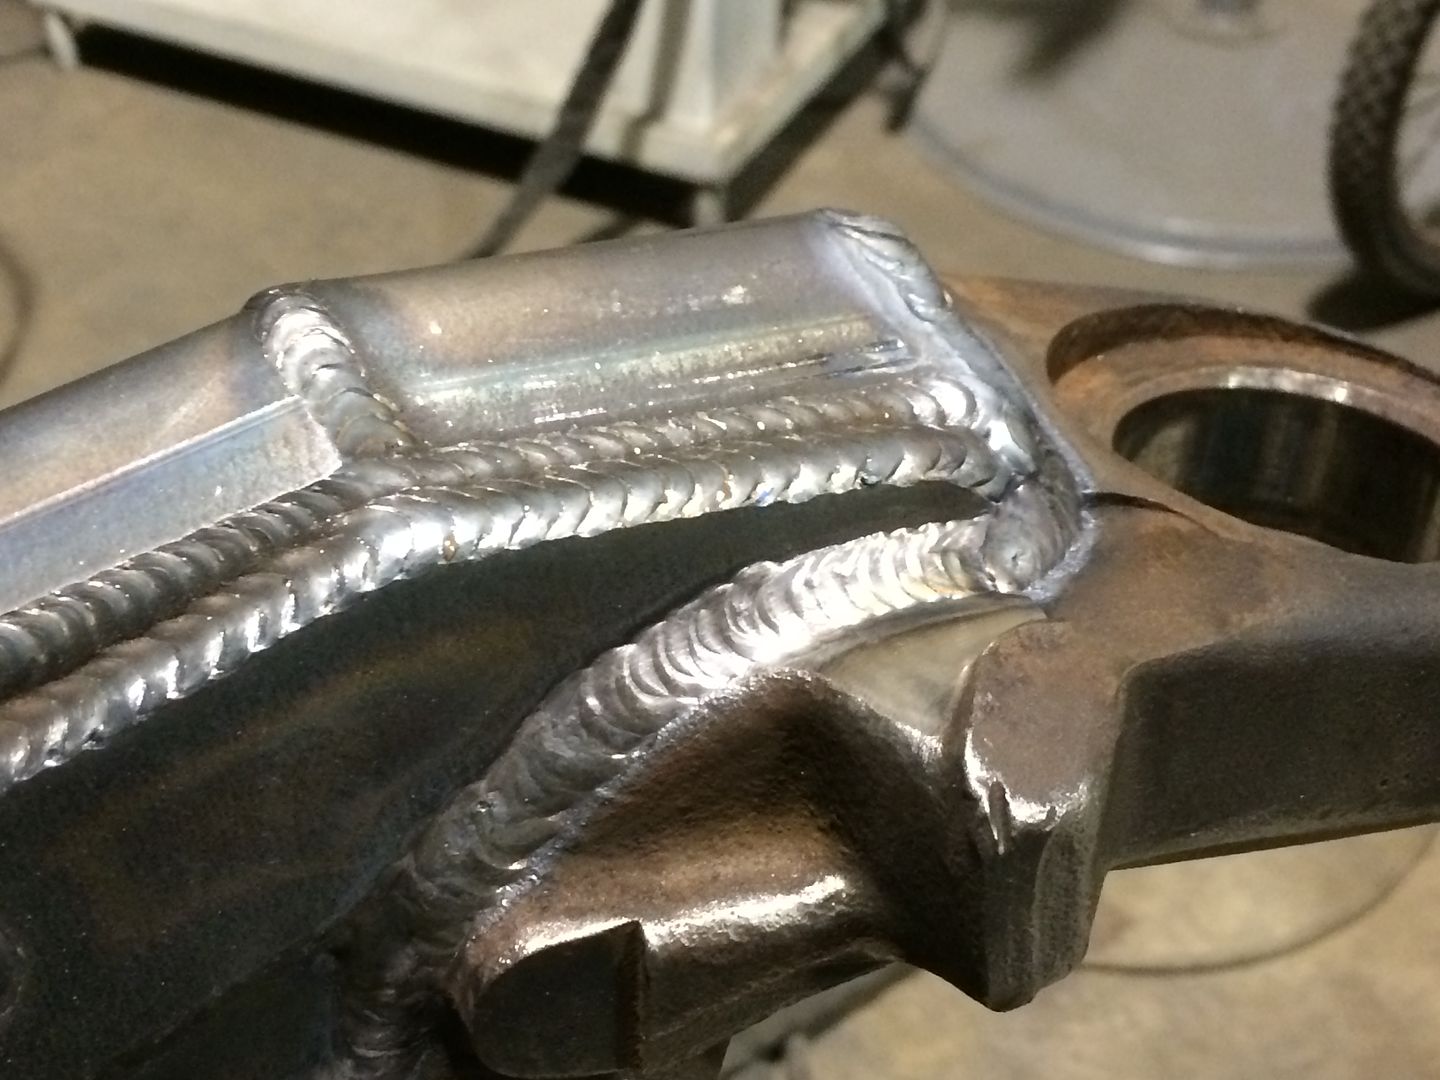
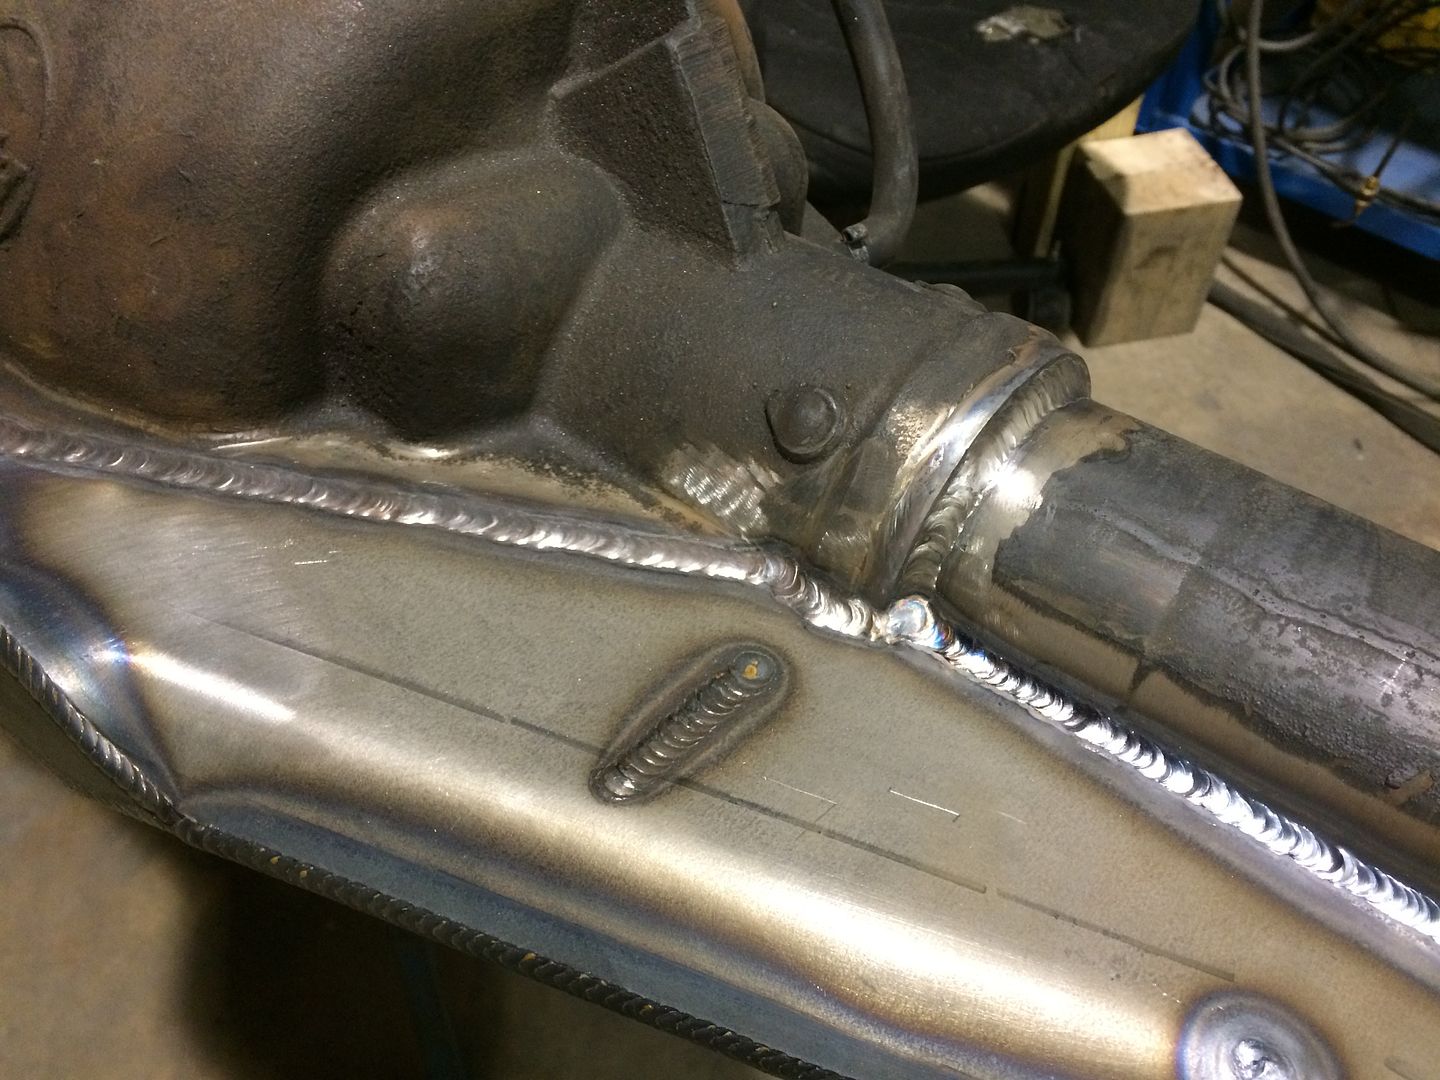
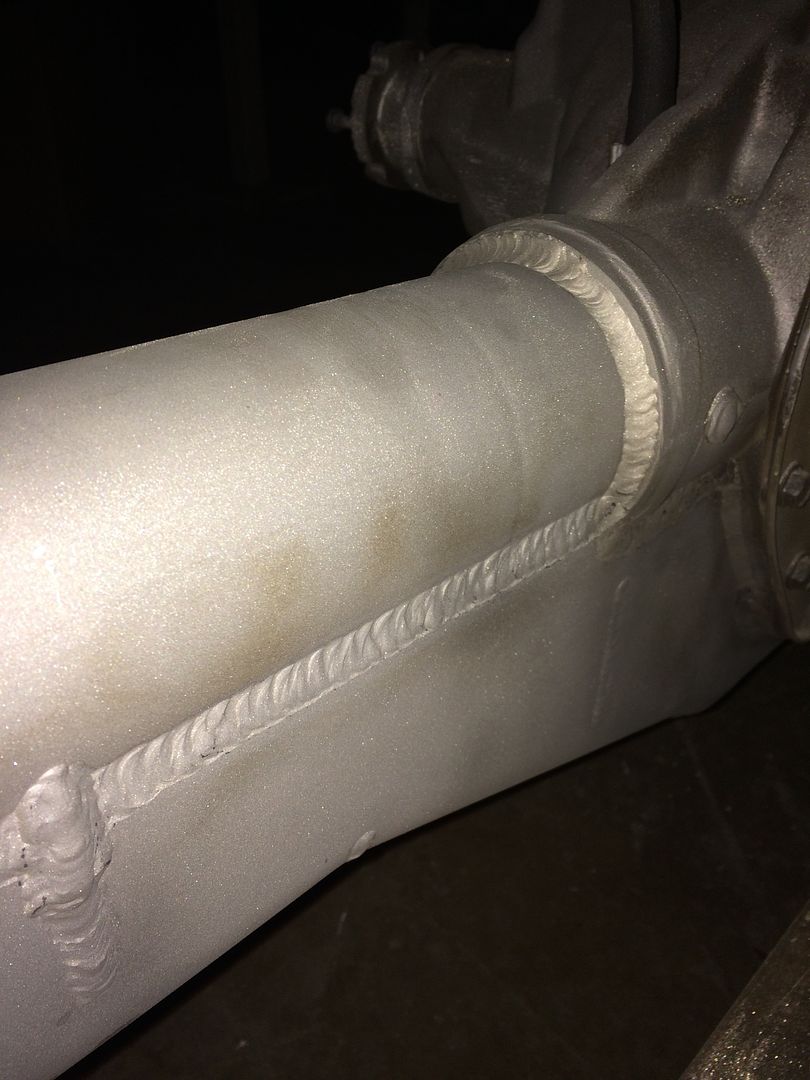
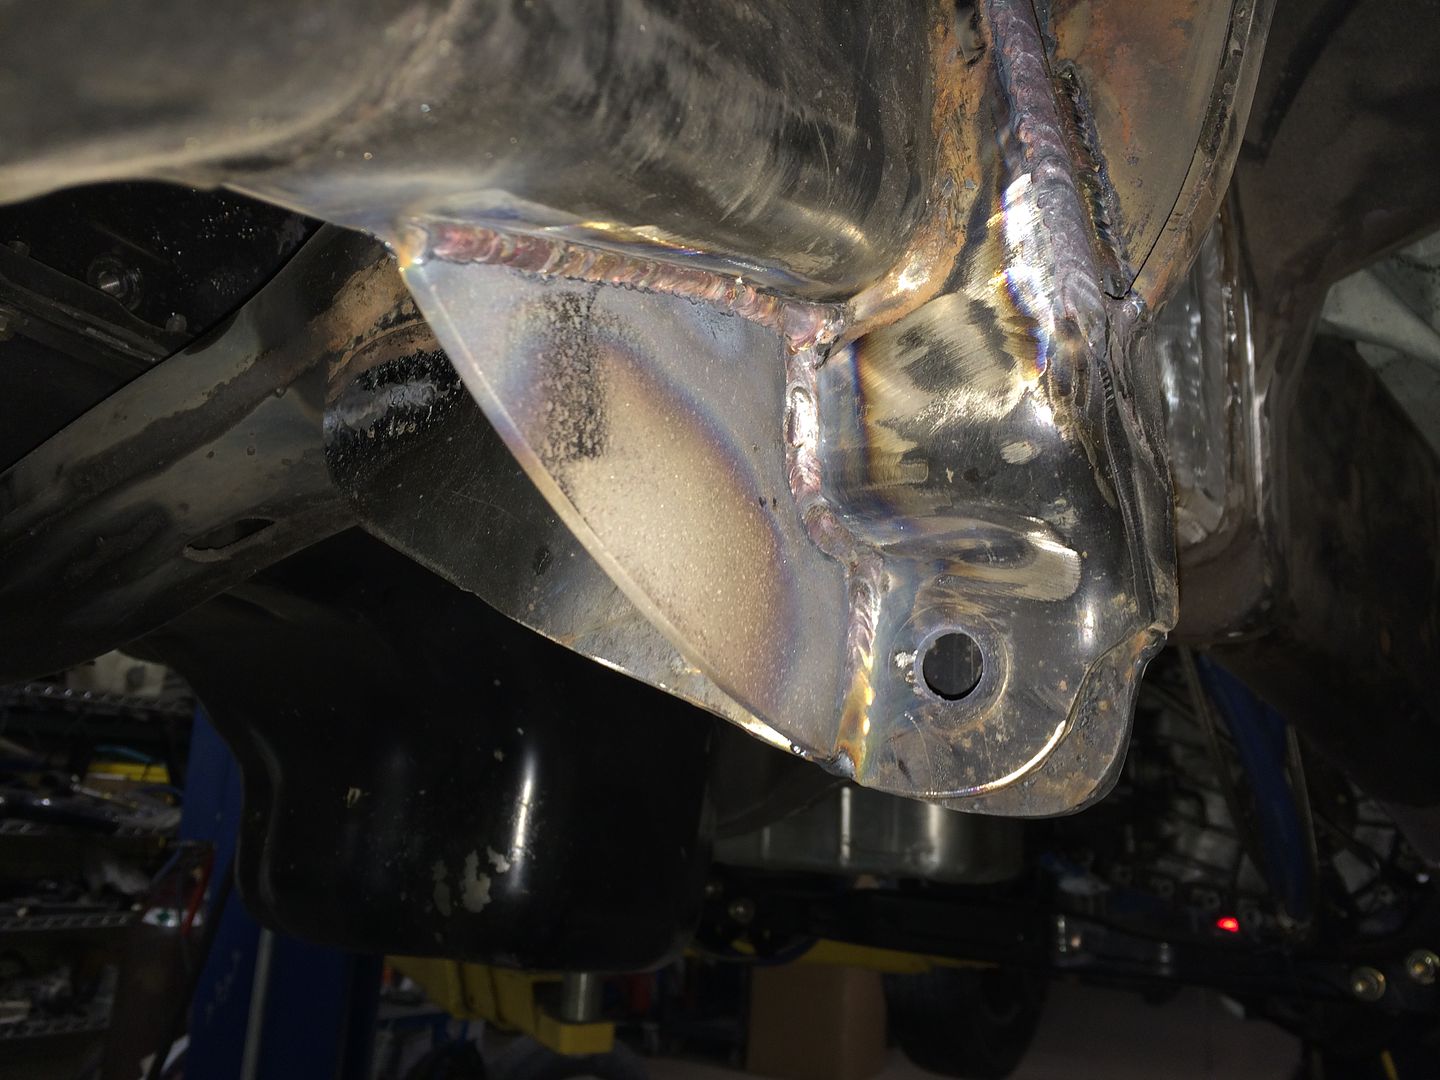
Ok back on track here. Carli Truss Time. Some here may have never seen one so I put a few pictures up. This is often overlooked area when your beating on the truck which I have every intention on doing so. The AAM 9.25 is weak by design and will smile quickly when your tires leave the ground repeatably.
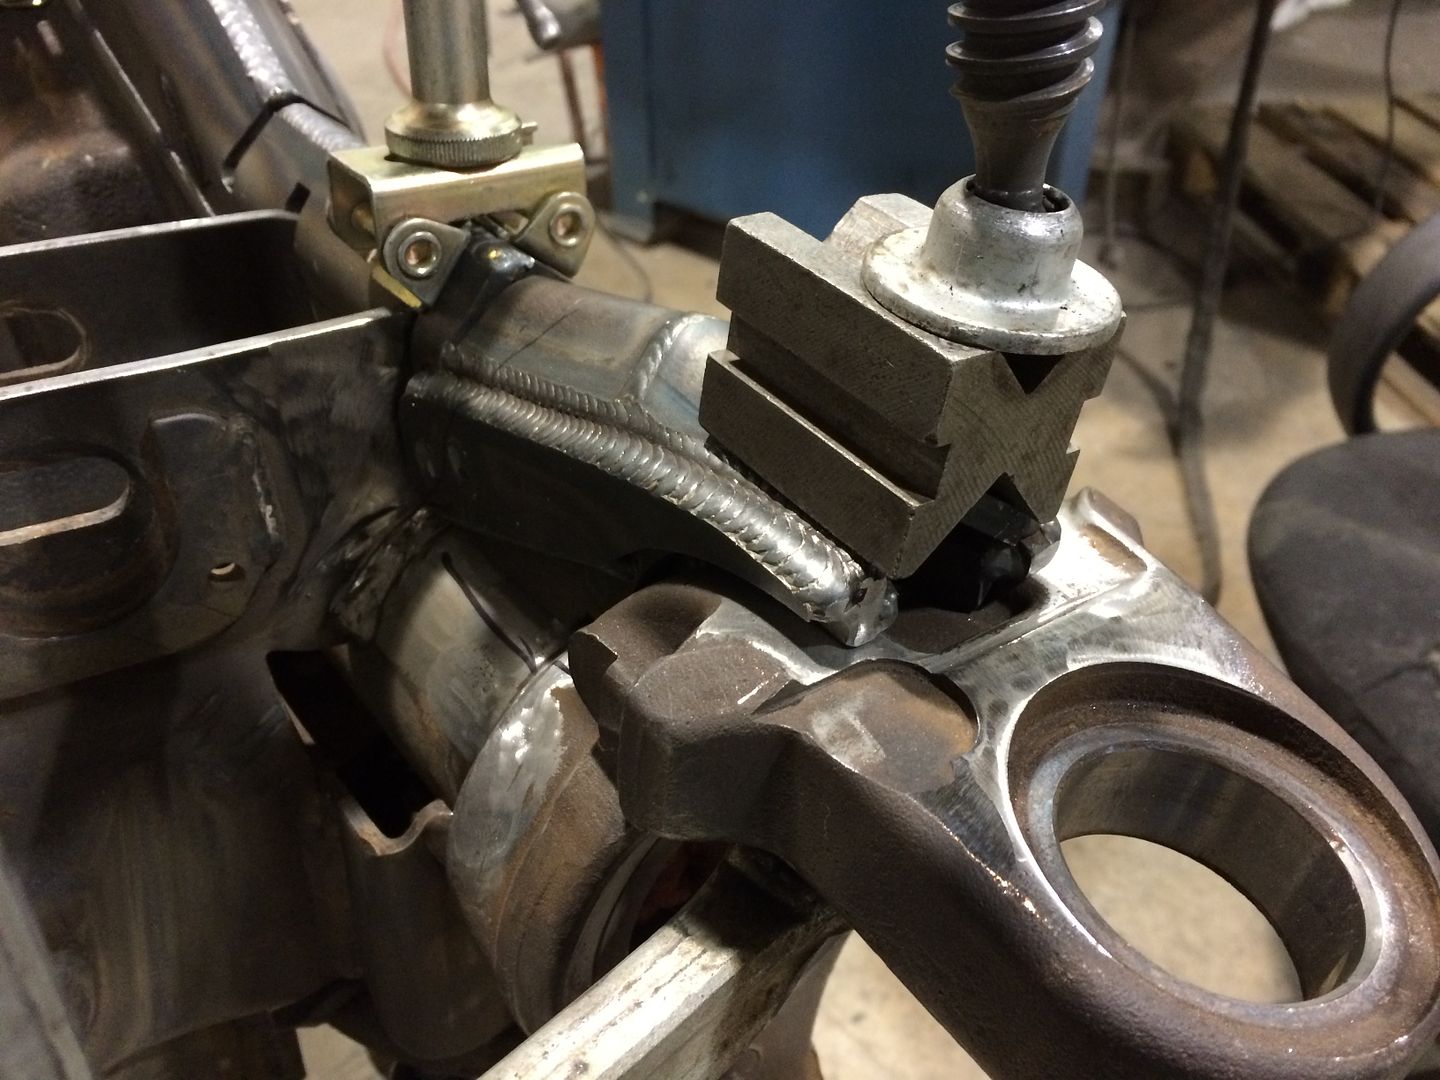
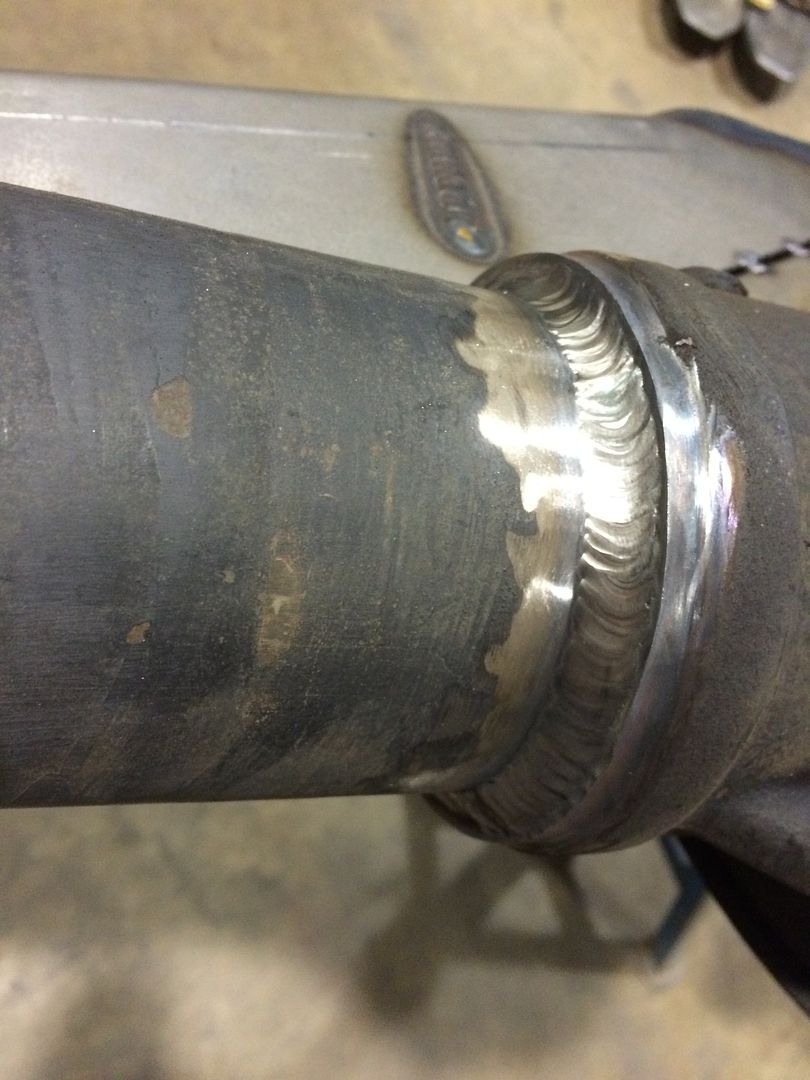
Cleaned up the axle and getting it stripped and prepped for tig welding the truss on. We used Ni-Rod and knocked the flux off to use as a fat tig rod. We had no issues of cracking laid in decent.
 [/URL]
 [/URL]
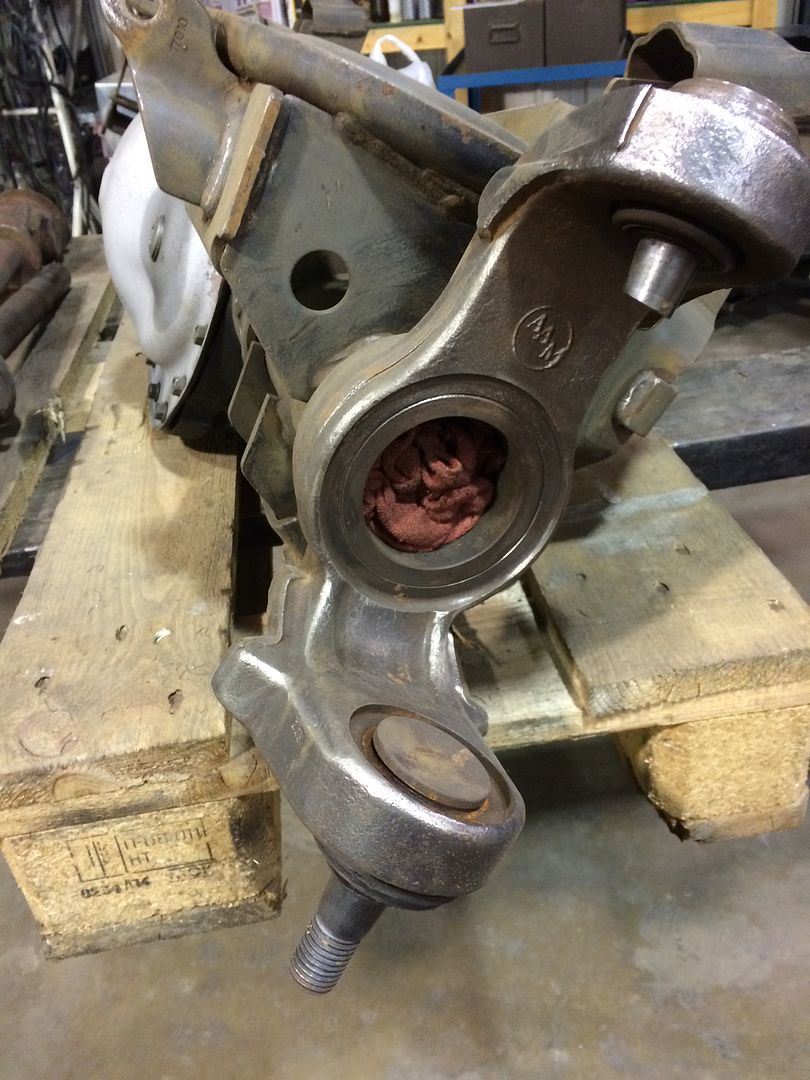
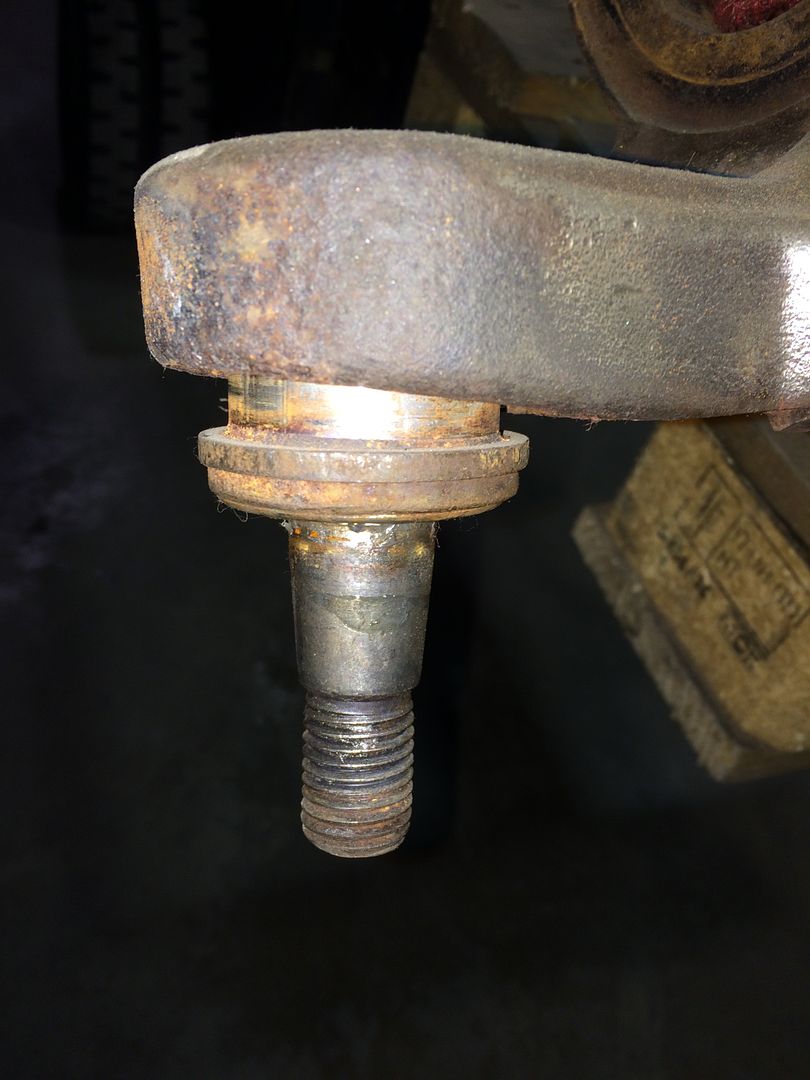
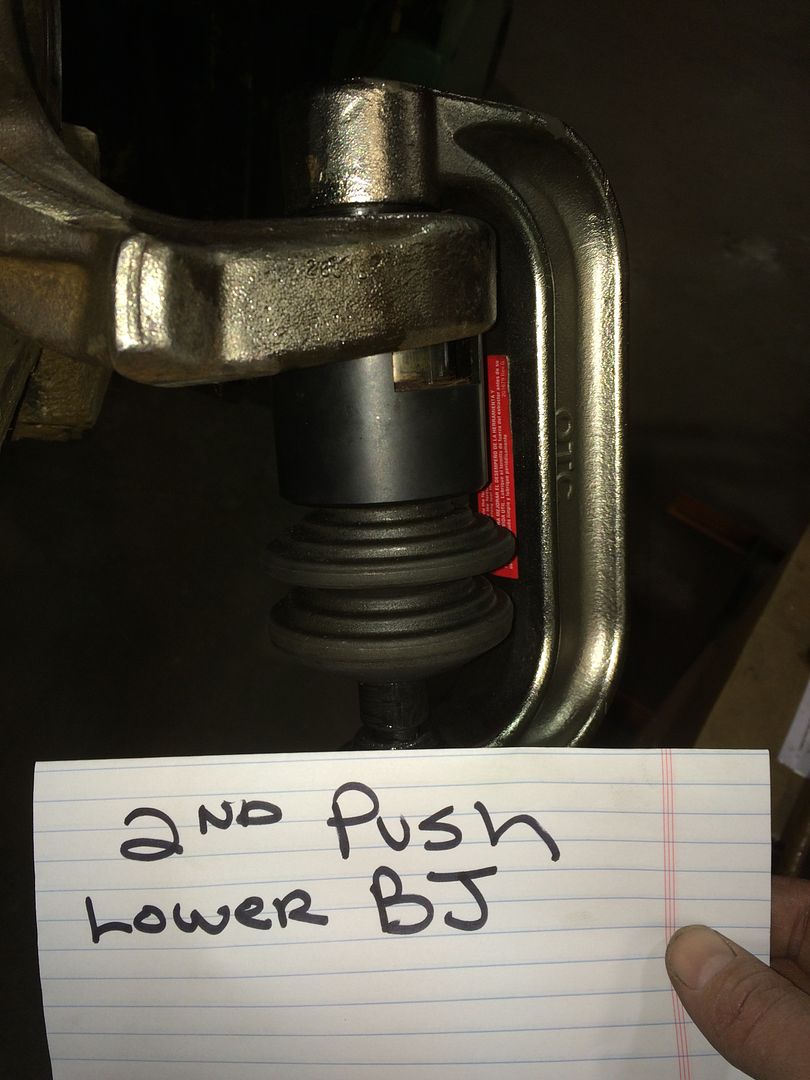
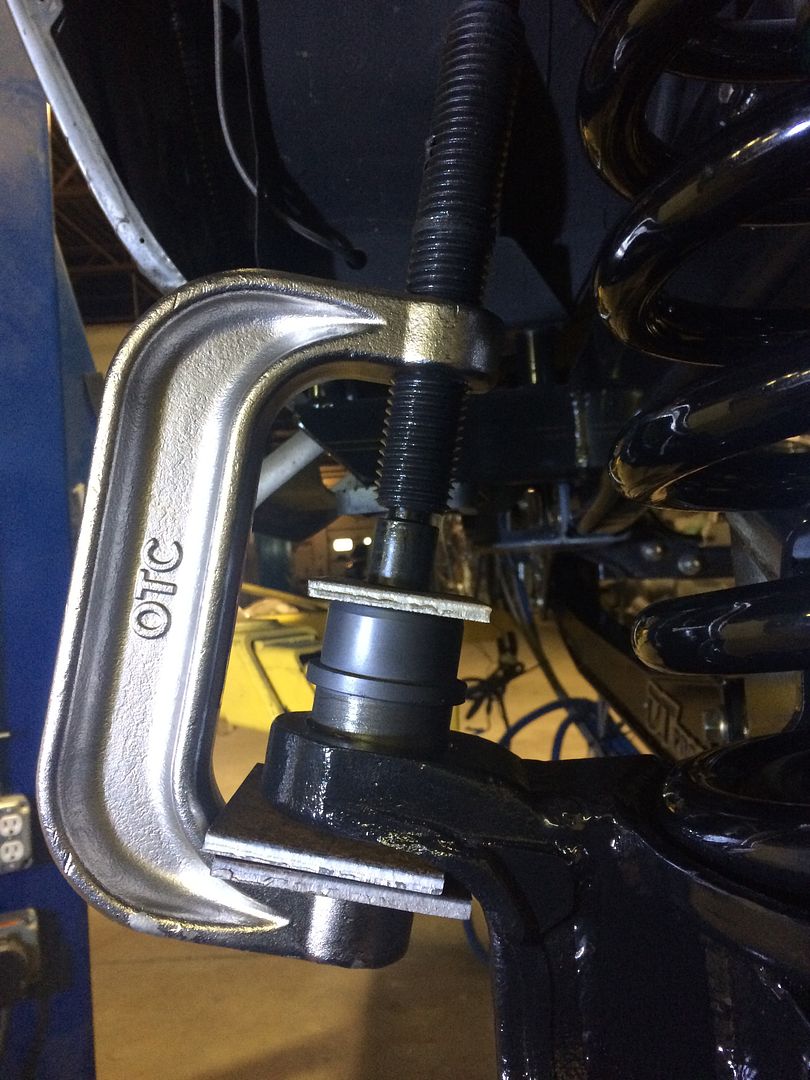
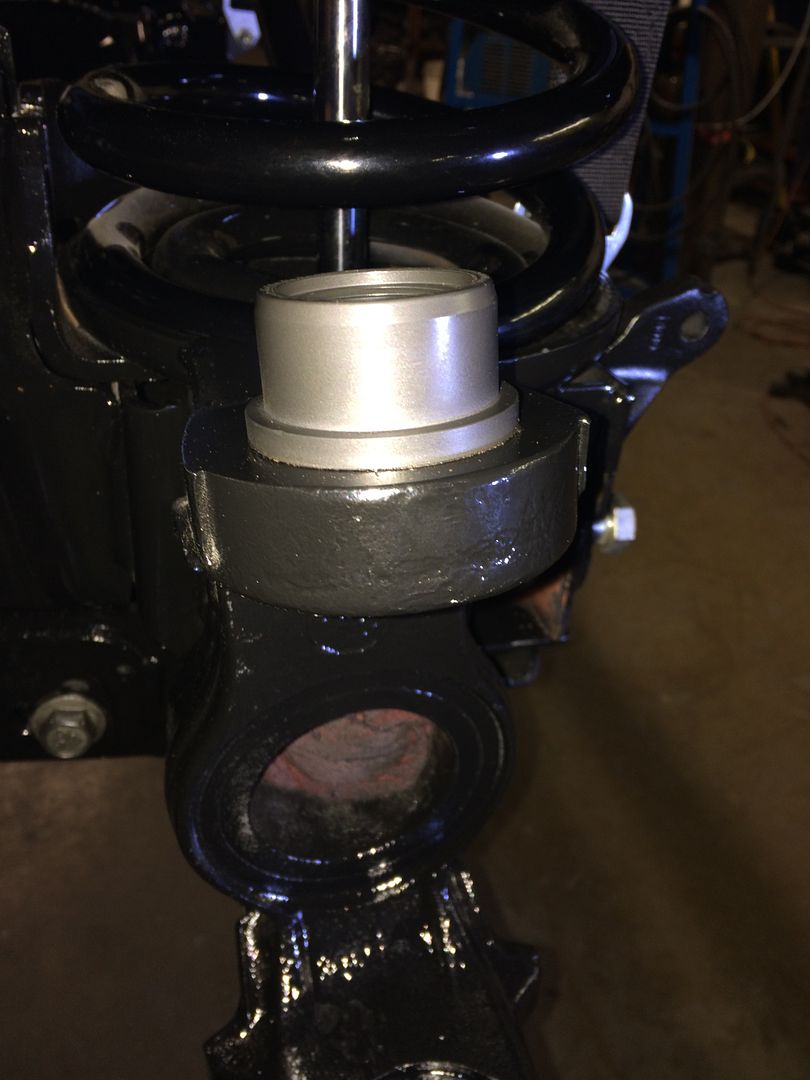
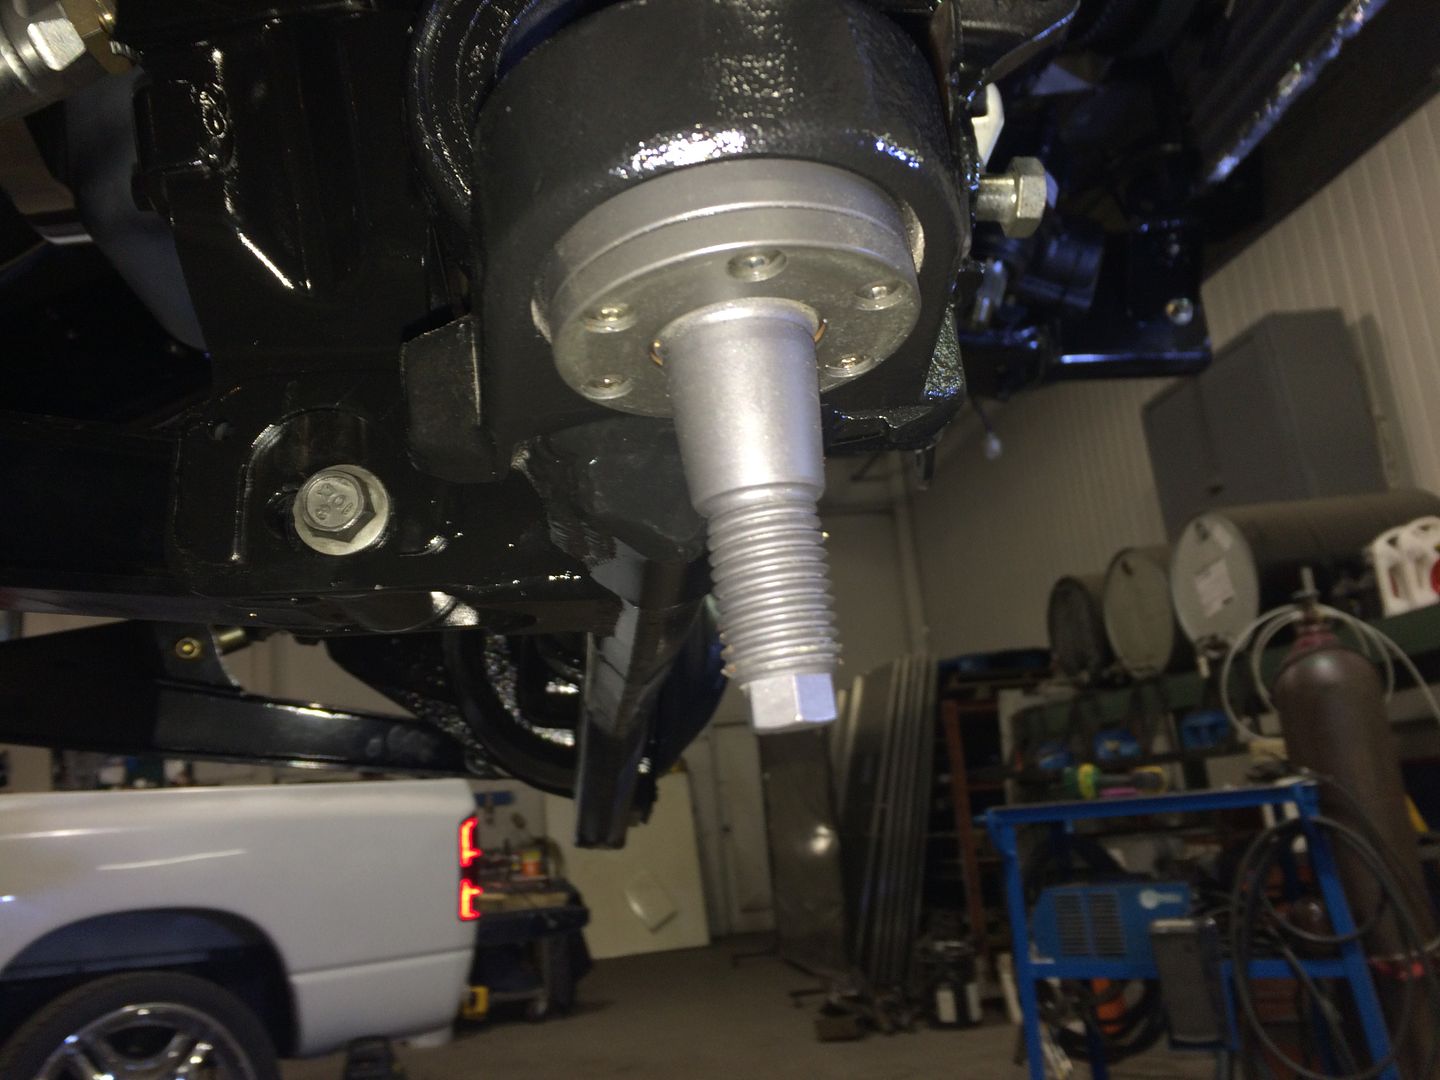
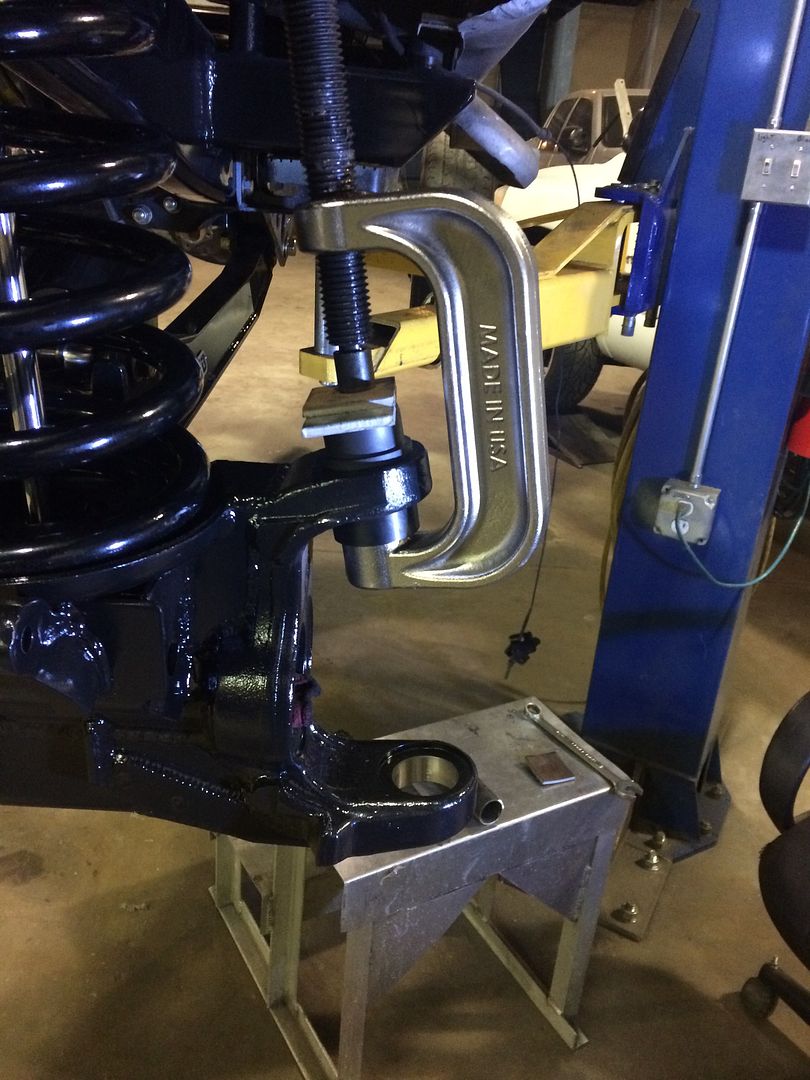
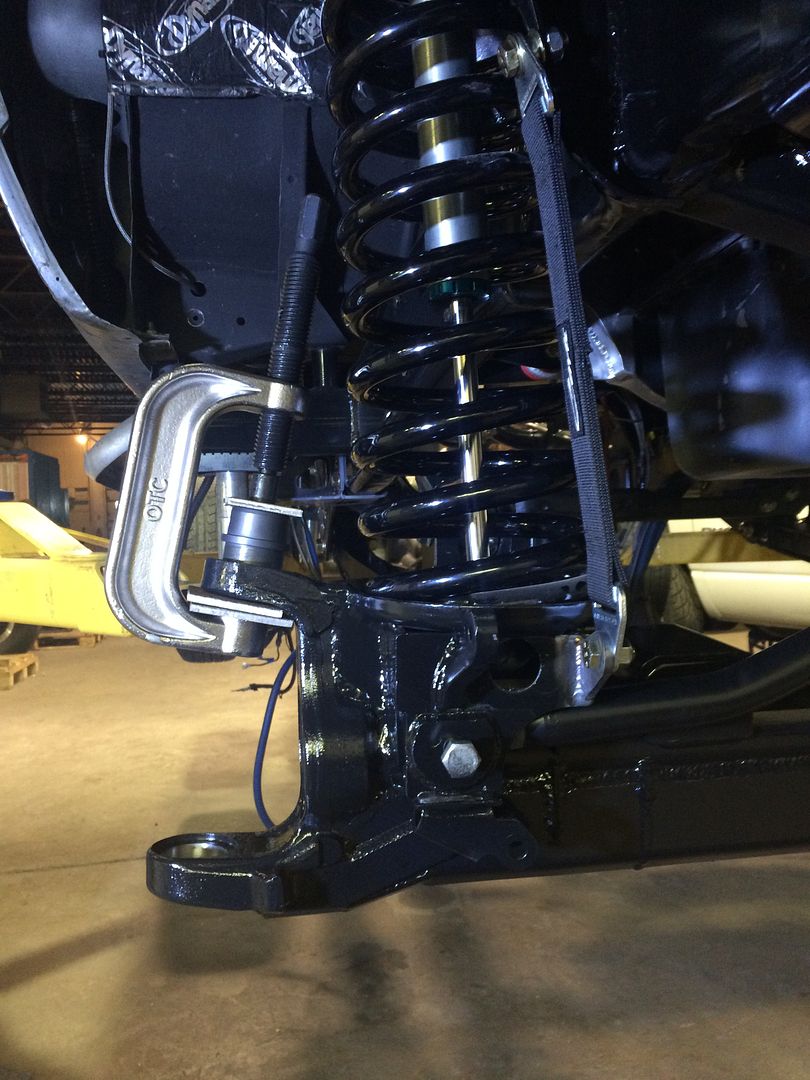
Pushing out these damn worn out BJ's. Finally bought me a OTC kit very nice no more silly rental tool. Had to take pictues of the stack up so next time will be faster. :hehe:
 [/URL]
 [/URL]
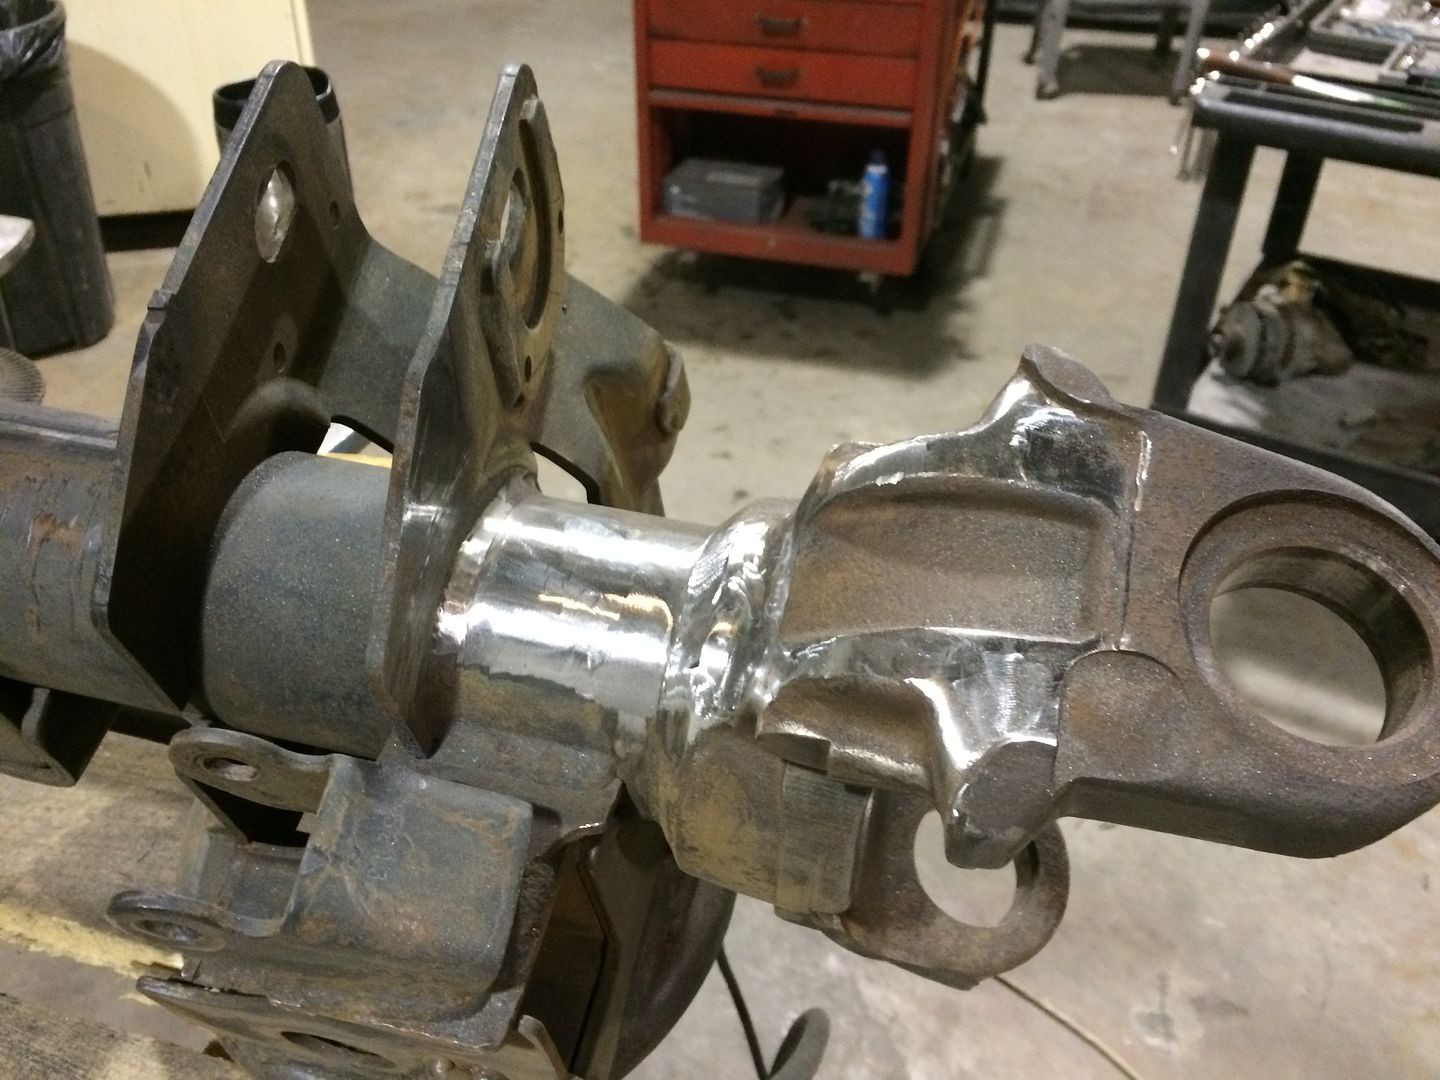
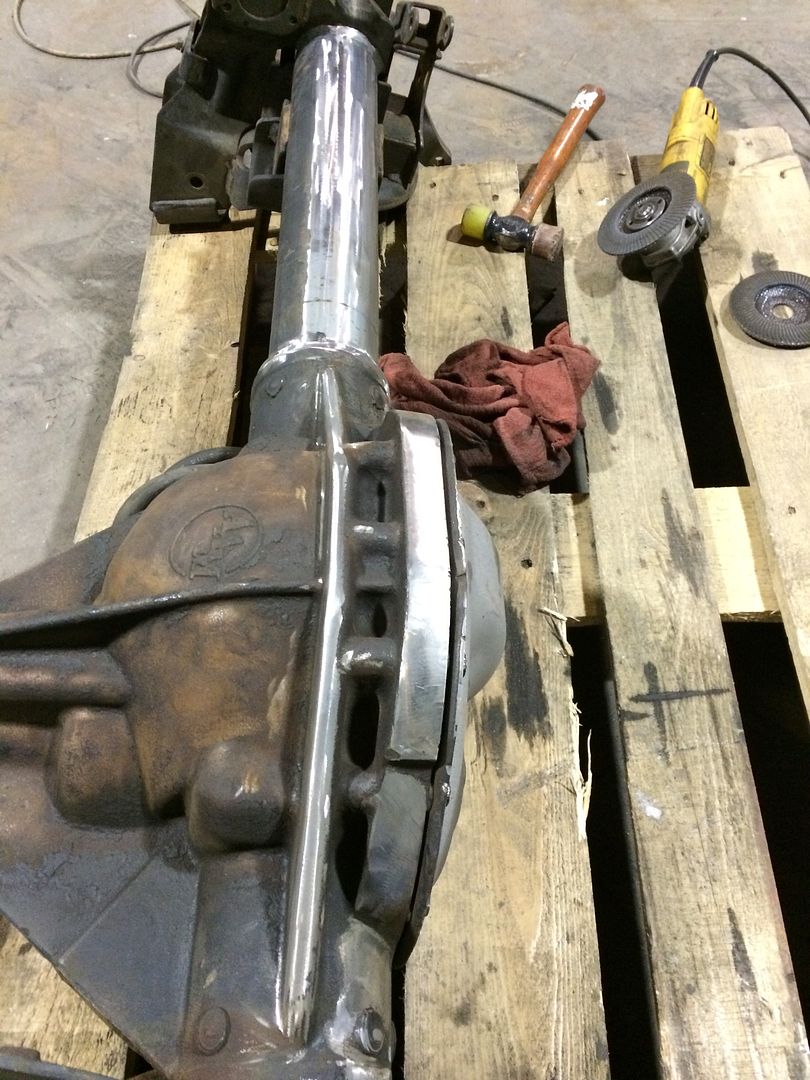
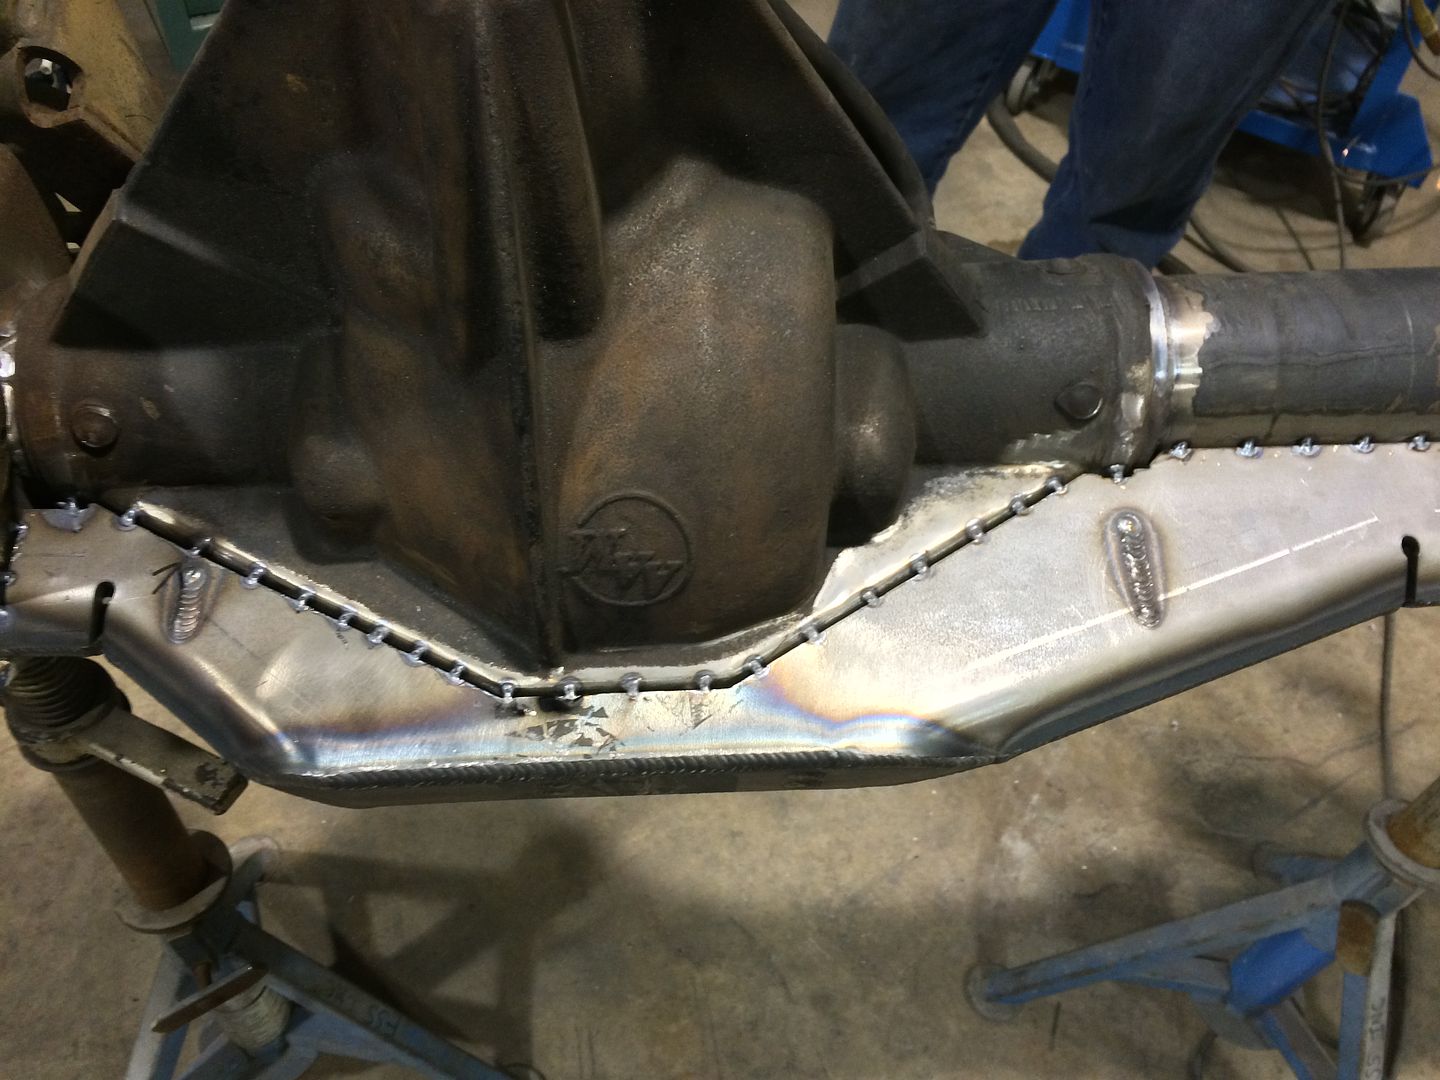
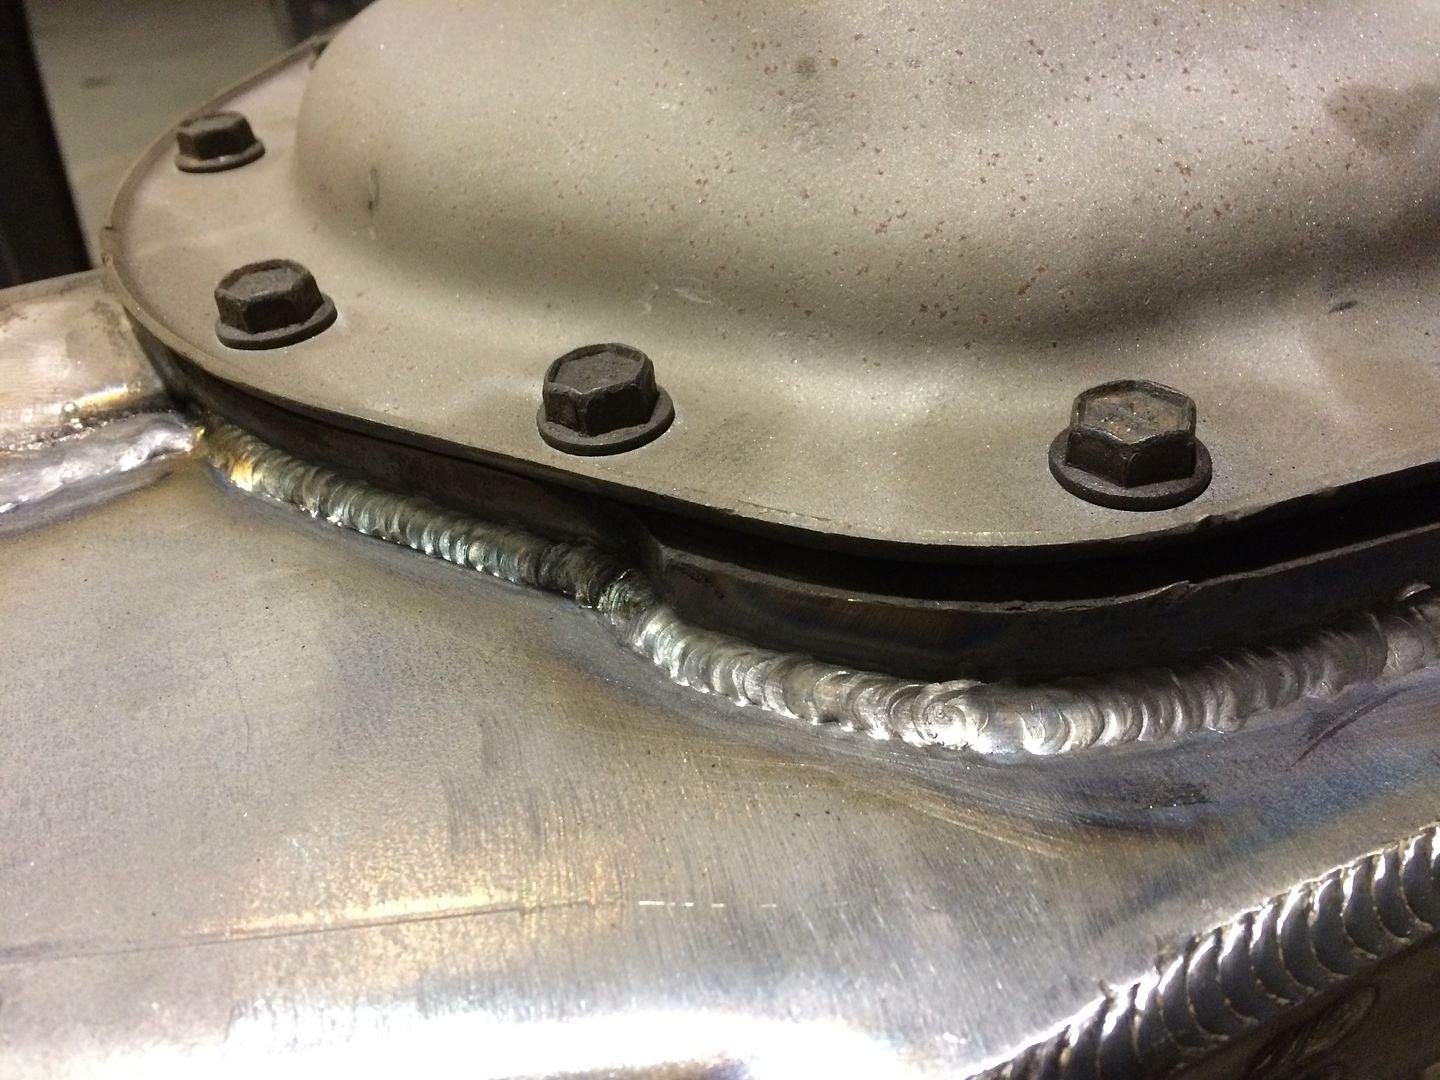
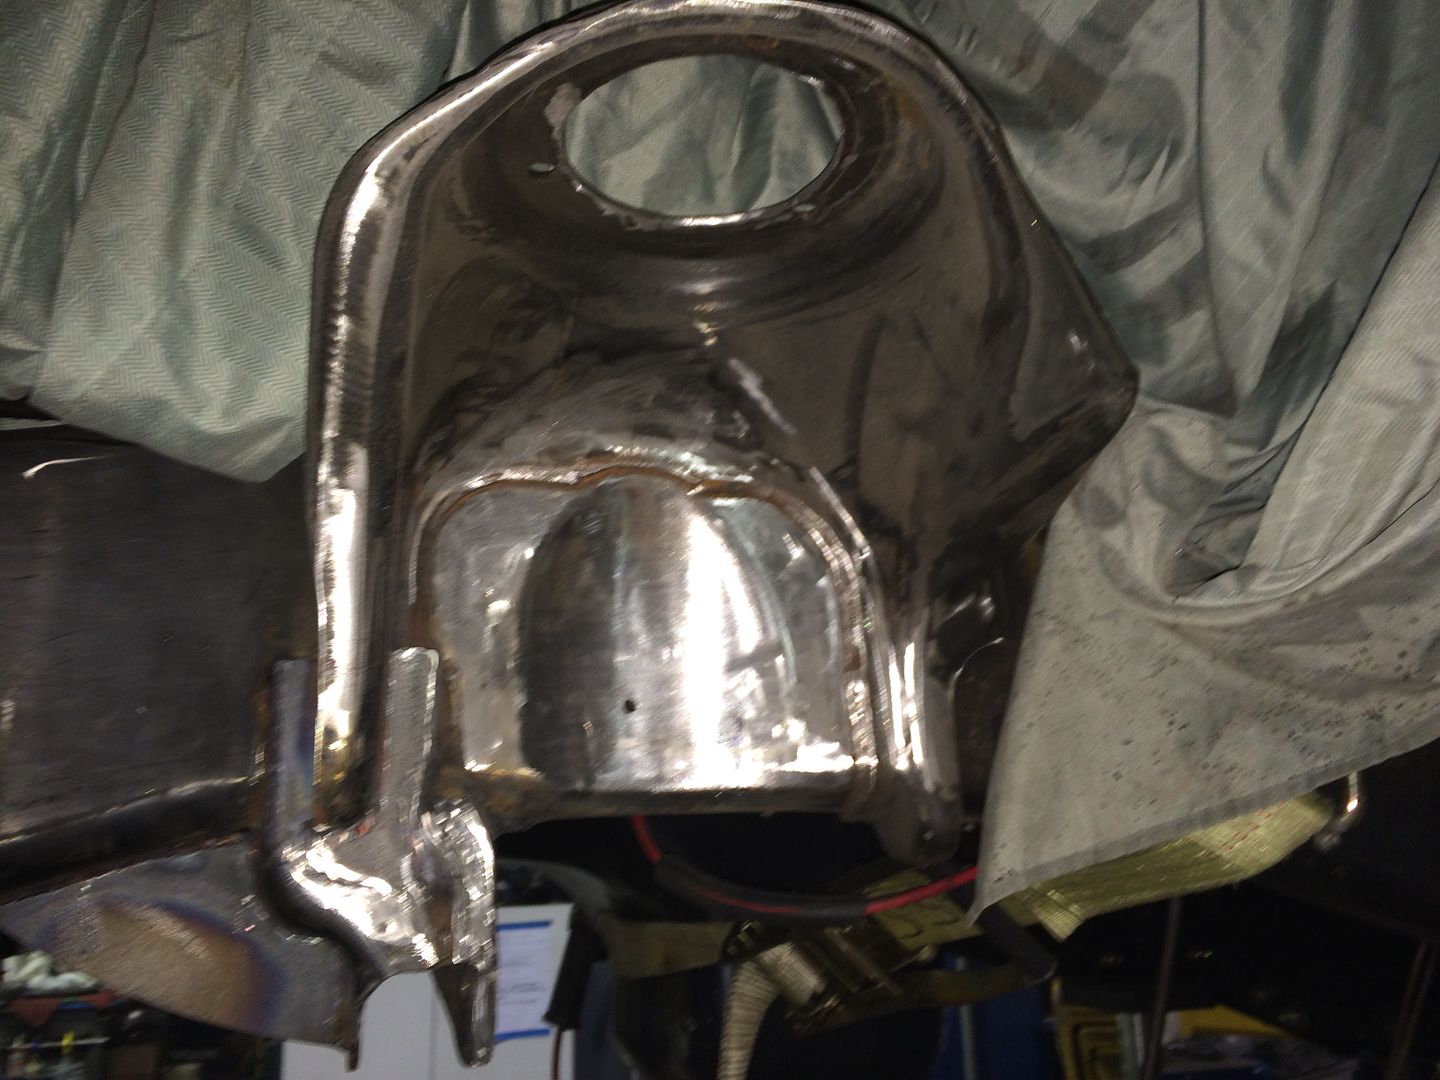
Carli Truss
 [/URL]
Have to grind everything clean prior to welding.
 [/URL]
 [/URL]
 [/URL]
 [/URL]
 [/URL]
 [/URL]
 [/URL]
 [/URL]
 [/URL]
 [/URL]
 [/URL]
 [/URL]
 [/URL]
 [/URL]
 [/URL]
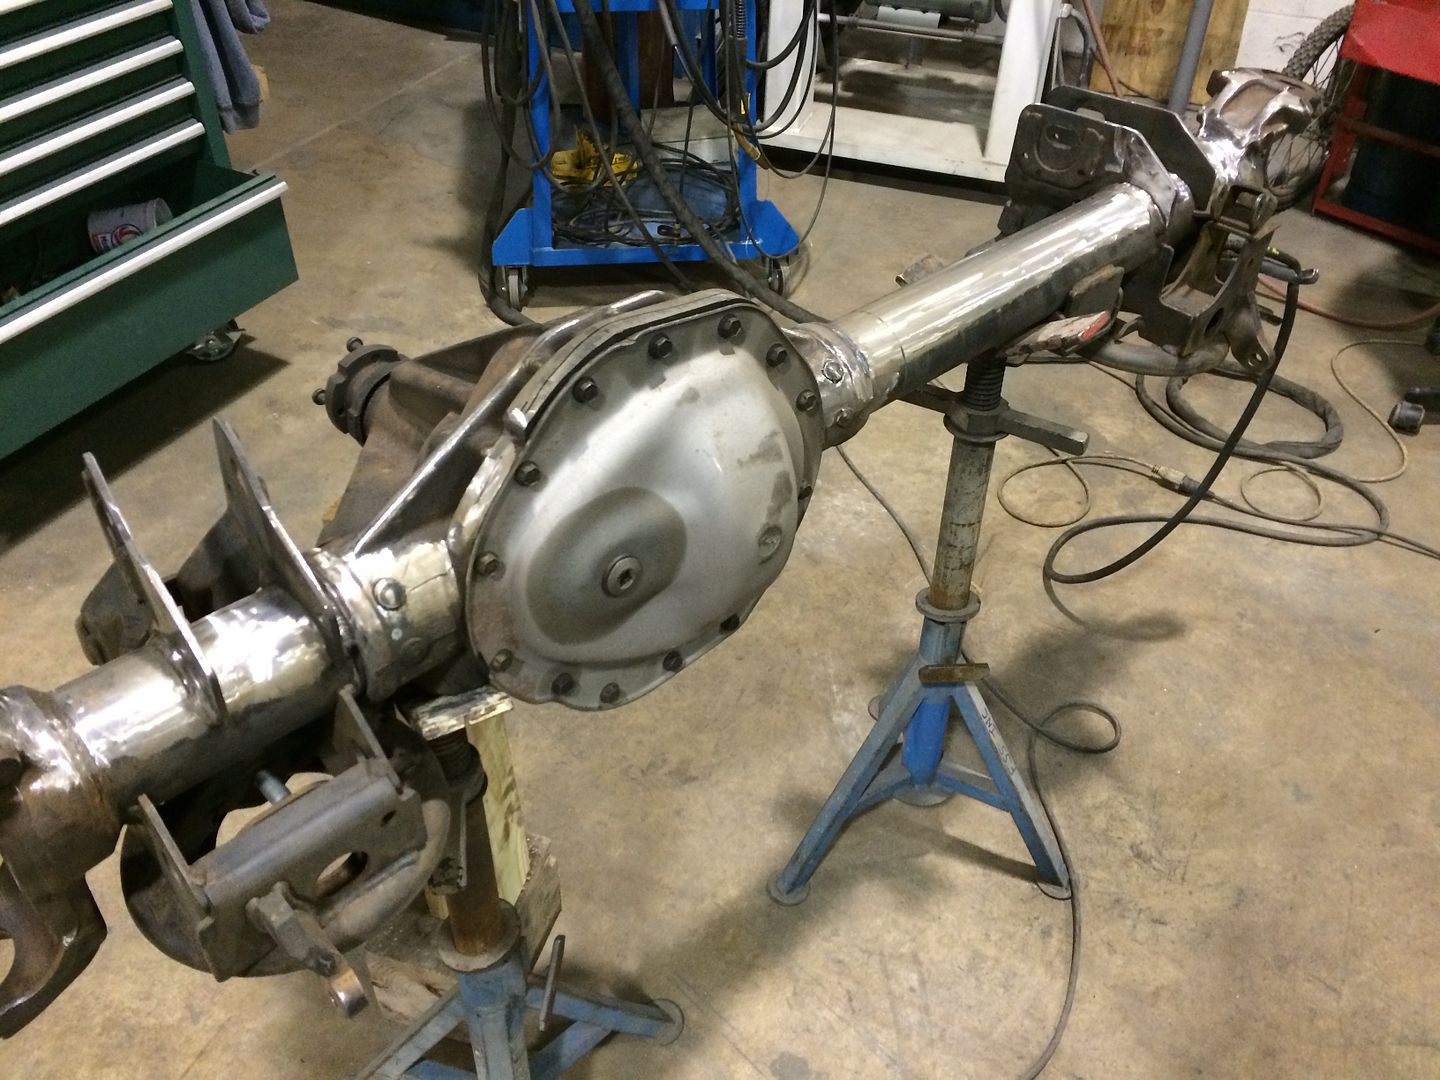
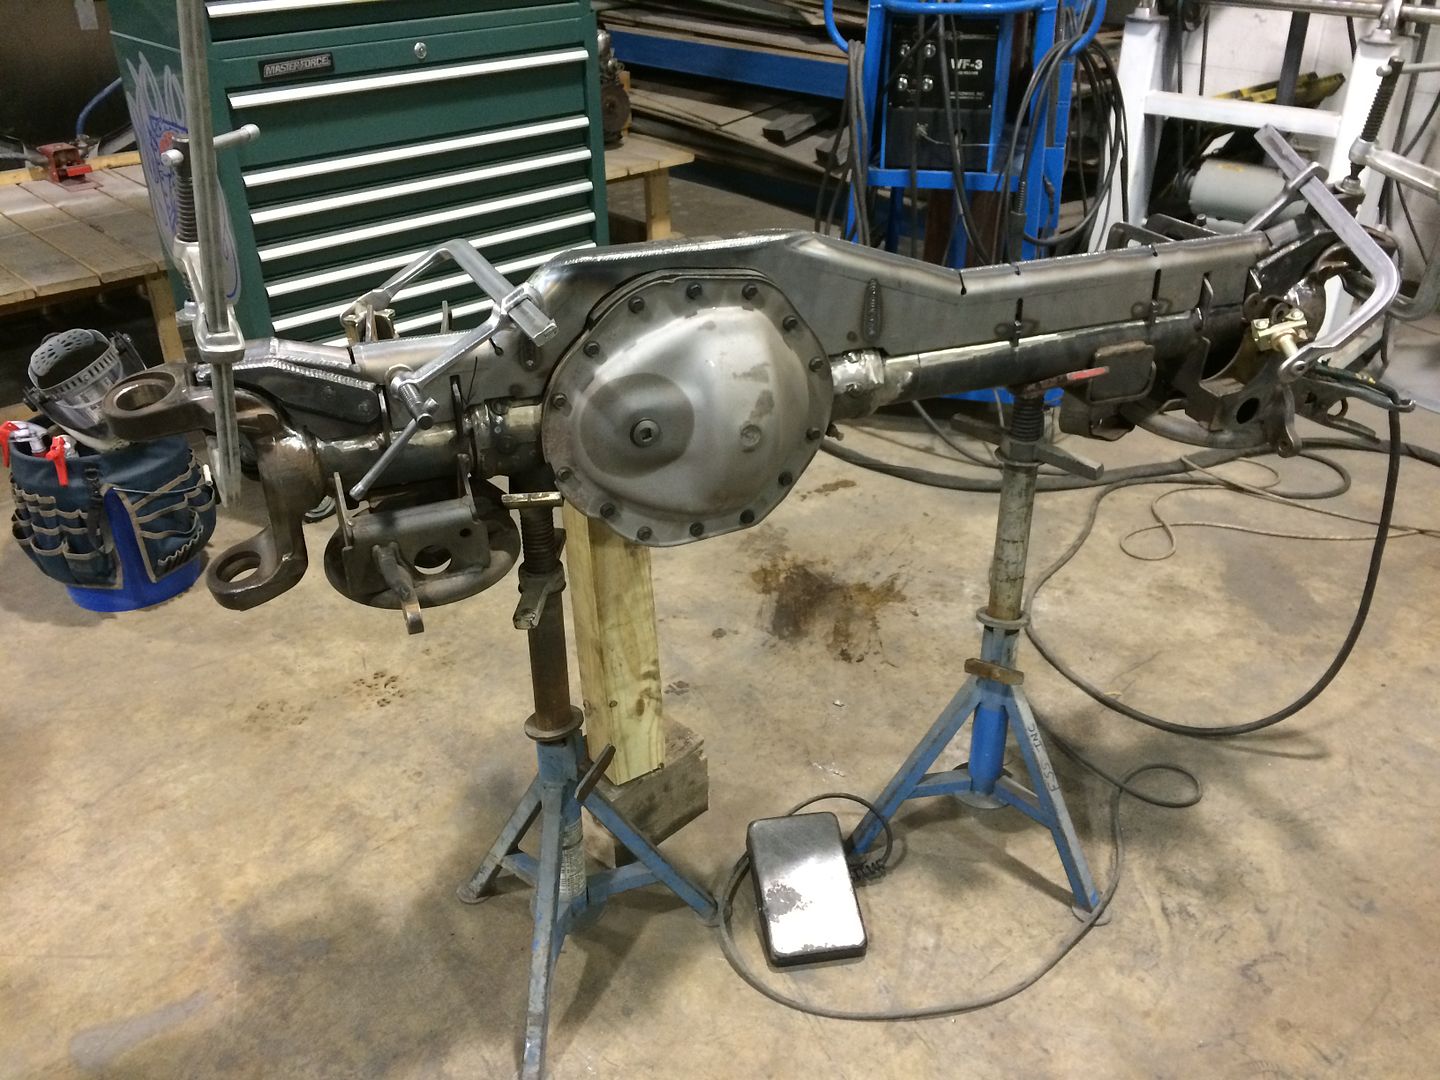
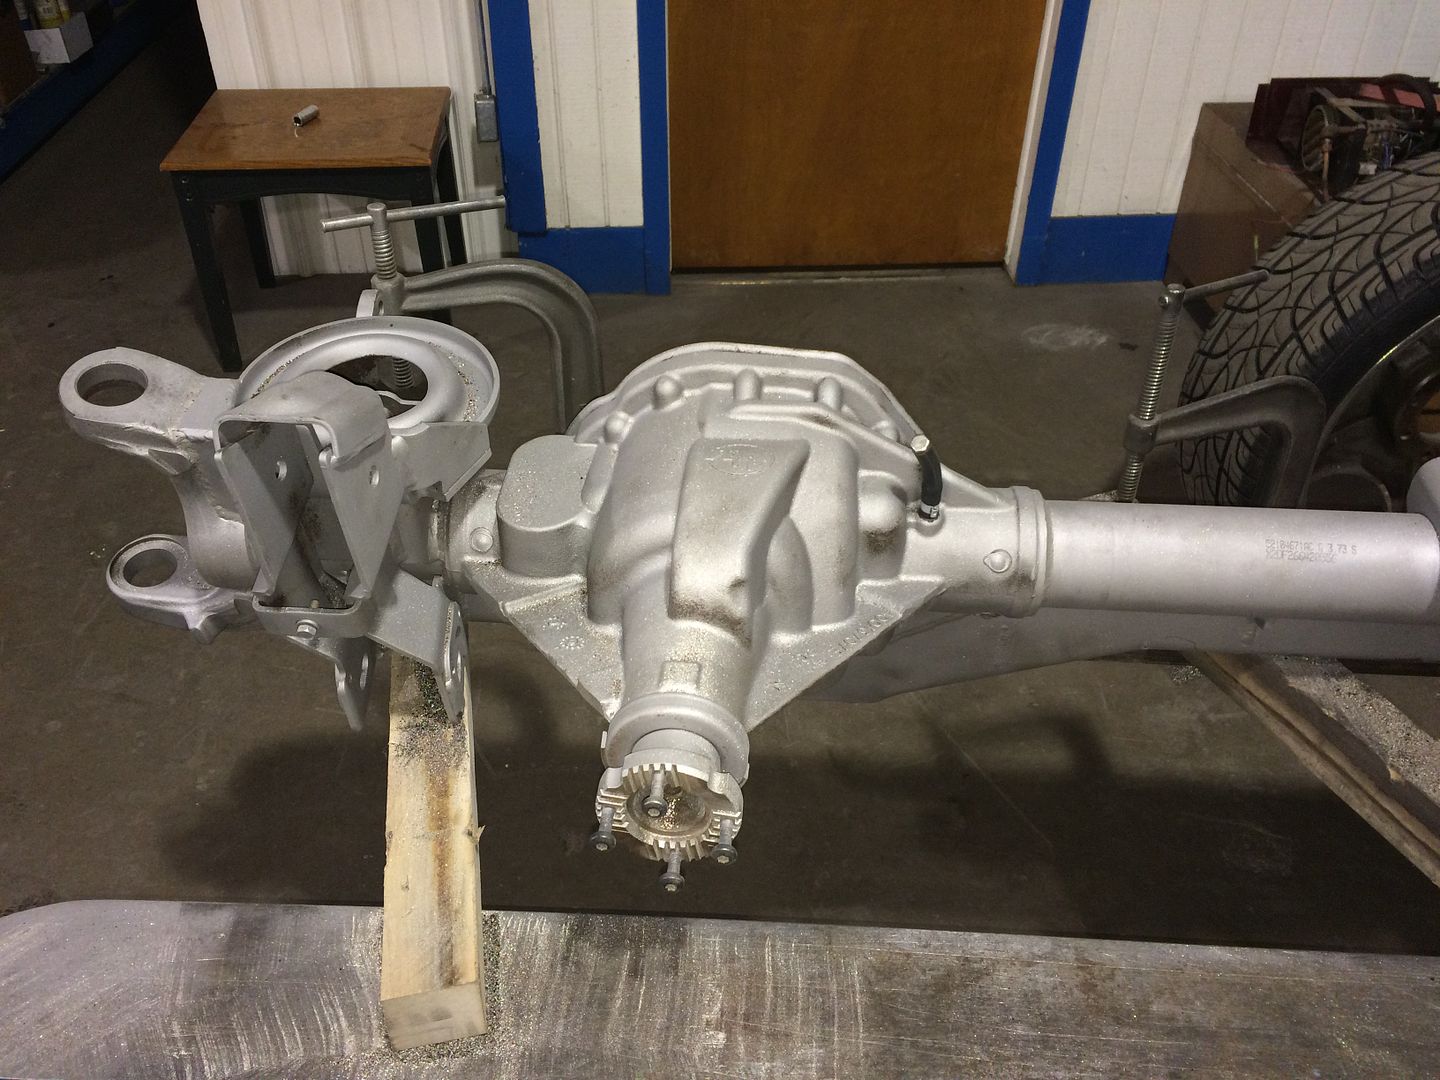
Blasted the axle clean to prep for paint etc.
 [/URL]
 [/URL]
 [/URL]
 [/URL]
More to come on this! Sorry for posting so many pictures of the same thing. I'm one who likes to see pictures. Hopefully it will help someone doing this in the future.
Cleaned up the axle and getting it stripped and prepped for tig welding the truss on. We used Ni-Rod and knocked the flux off to use as a fat tig rod. We had no issues of cracking laid in decent.
Pushing out these damn worn out BJ's. Finally bought me a OTC kit very nice no more silly rental tool. Had to take pictues of the stack up so next time will be faster. :hehe:
Carli Truss
Have to grind everything clean prior to welding.
Blasted the axle clean to prep for paint etc.
More to come on this! Sorry for posting so many pictures of the same thing. I'm one who likes to see pictures. Hopefully it will help someone doing this in the future.
Freezingsystems
Modify Everything
- Joined
- Jan 18, 2010
- Messages
- 1,130
dude...
DO YOU SLEEP!?!?
:lolly: I needed that Forrest that was to funny. Yeah I sleep some but I'm working almost all the time and this is my sick form of relaxation.
Freezingsystems
Modify Everything
- Joined
- Jan 18, 2010
- Messages
- 1,130
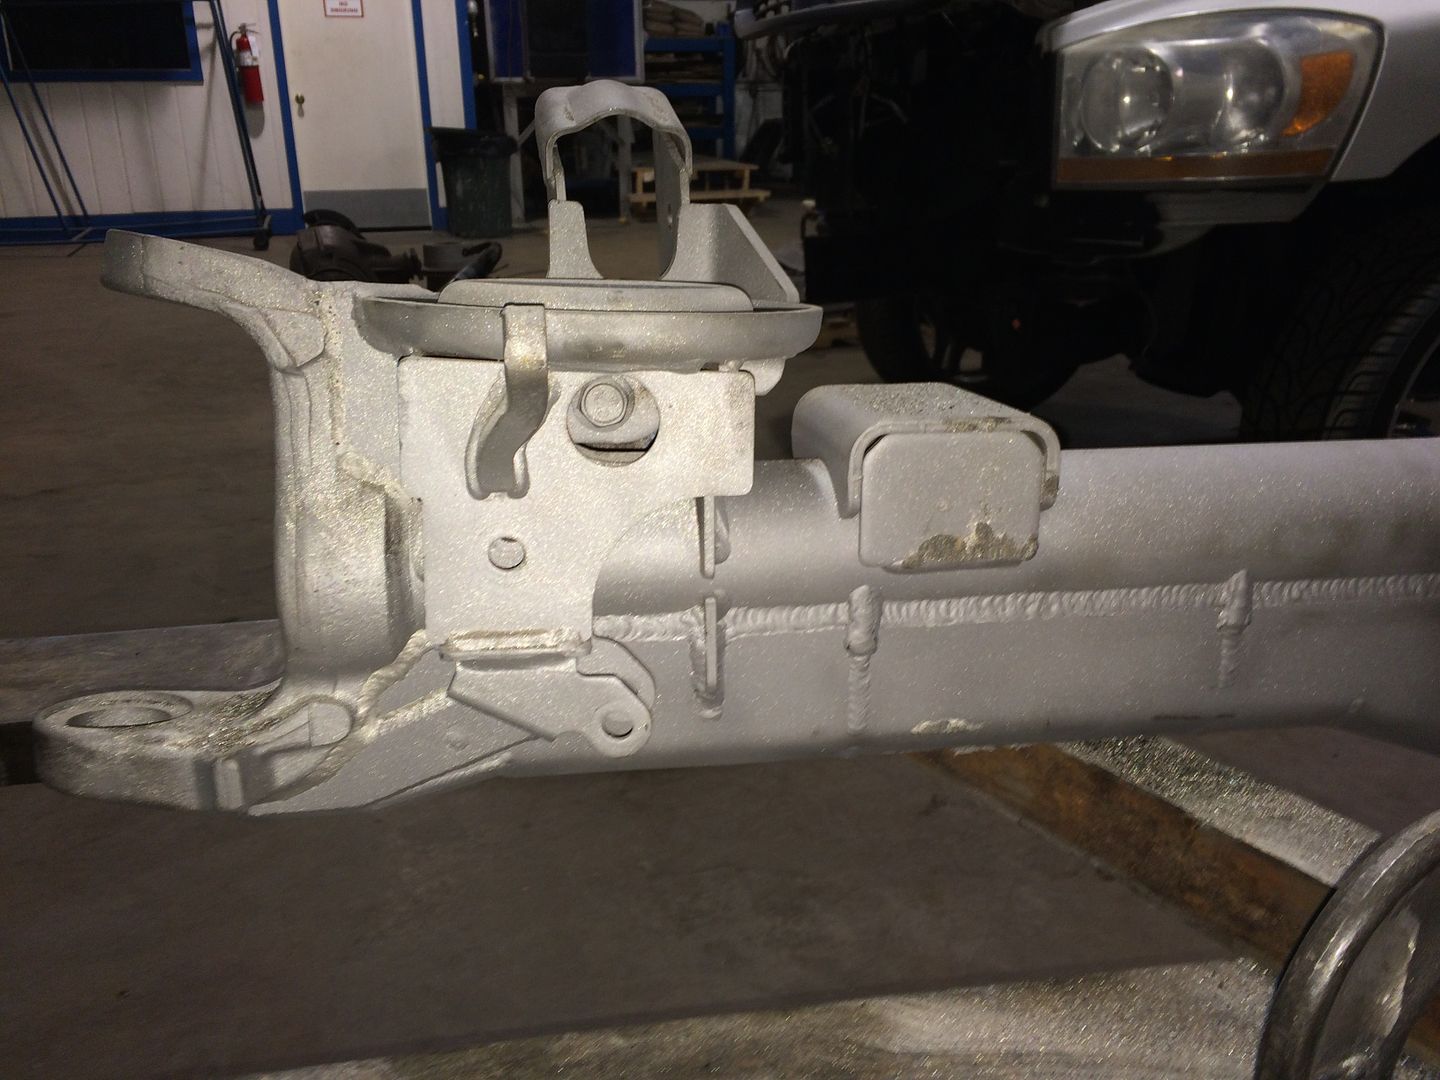
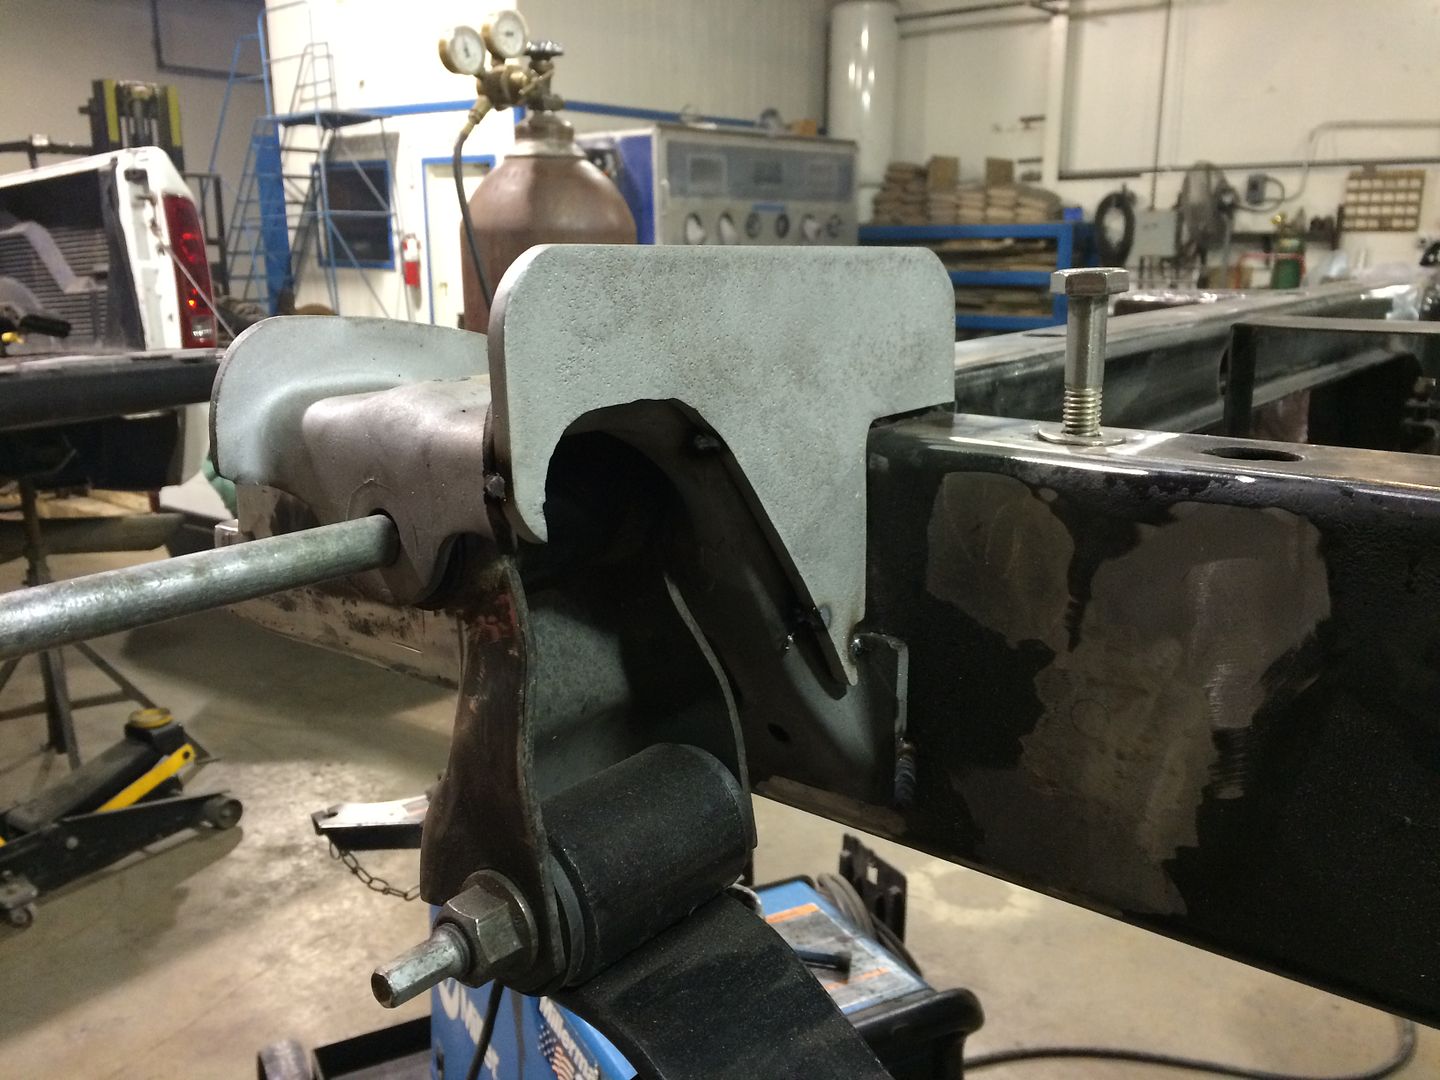
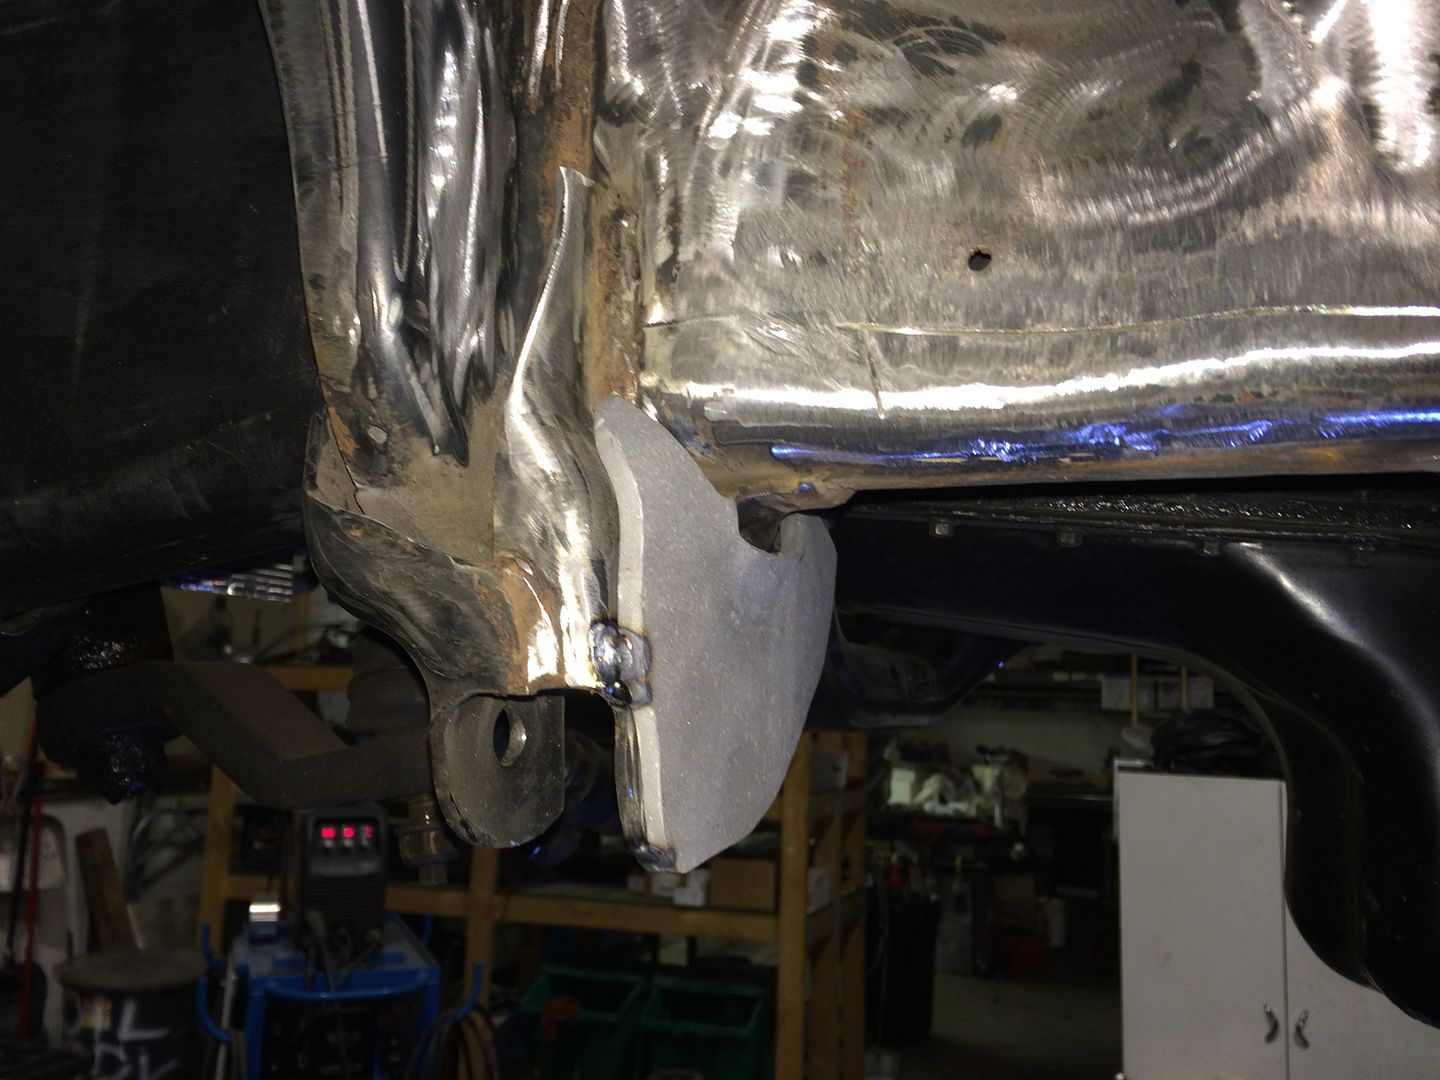
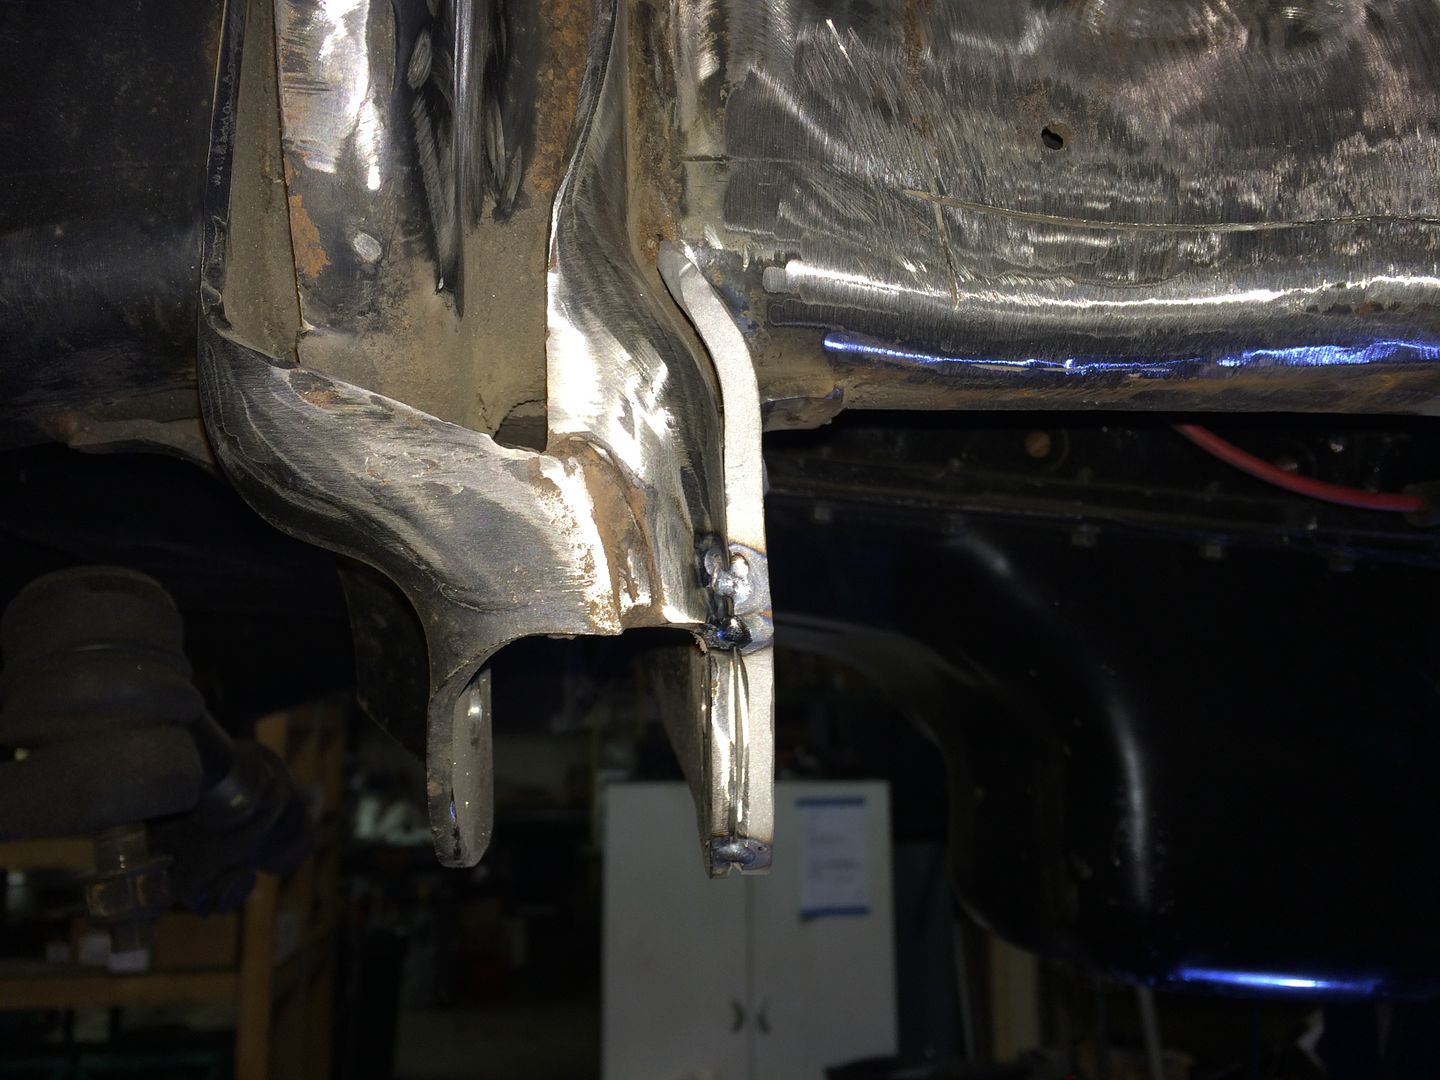
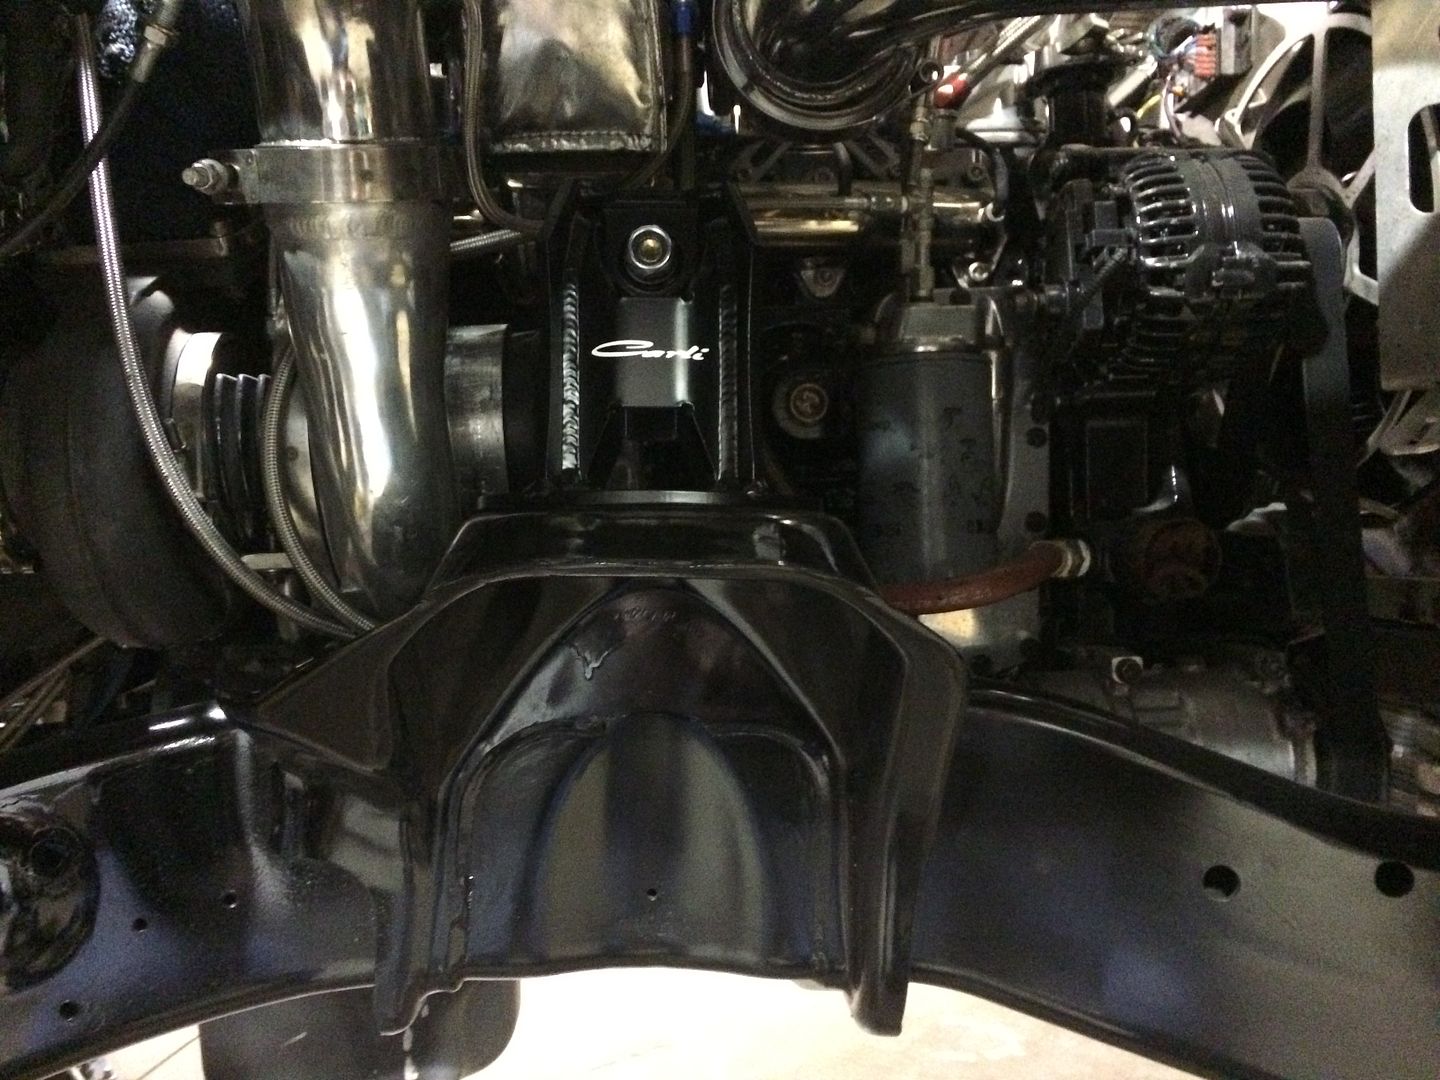
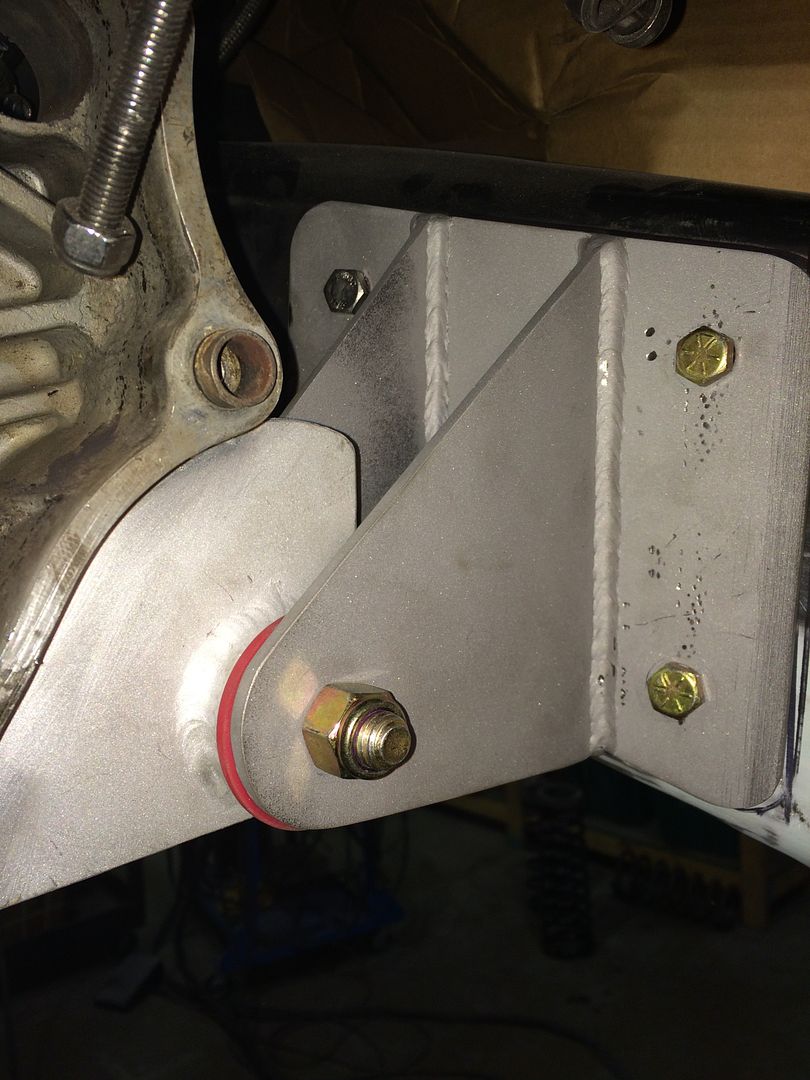
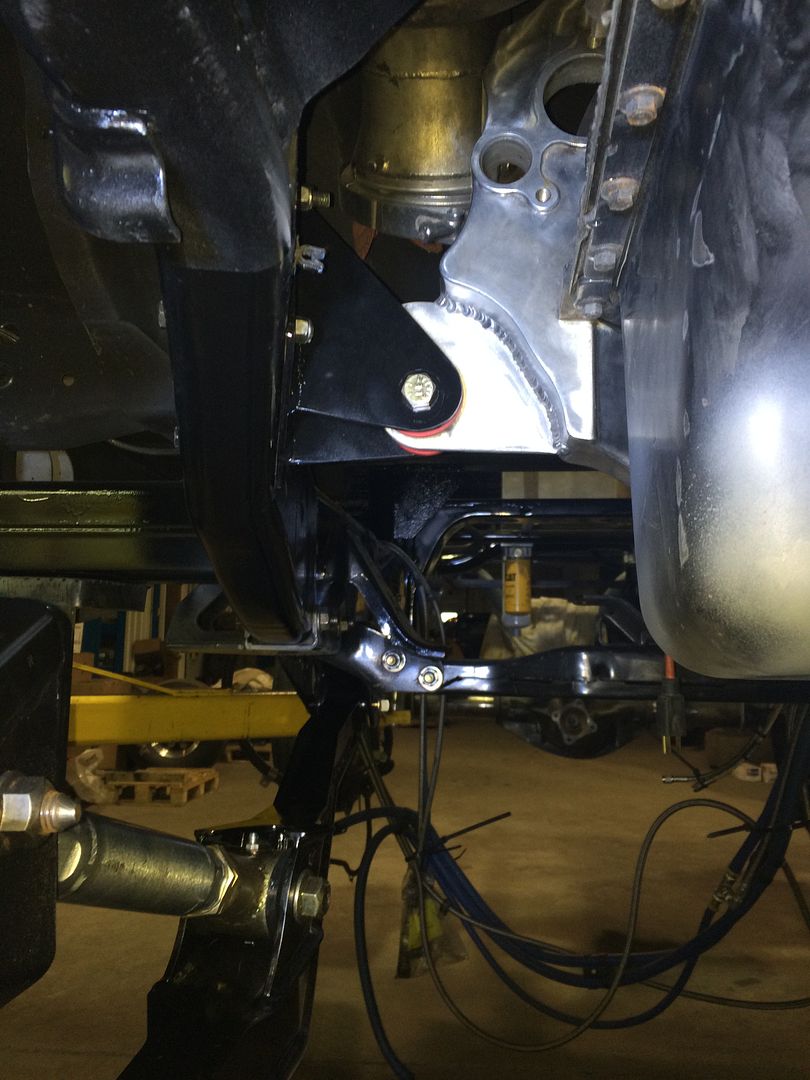
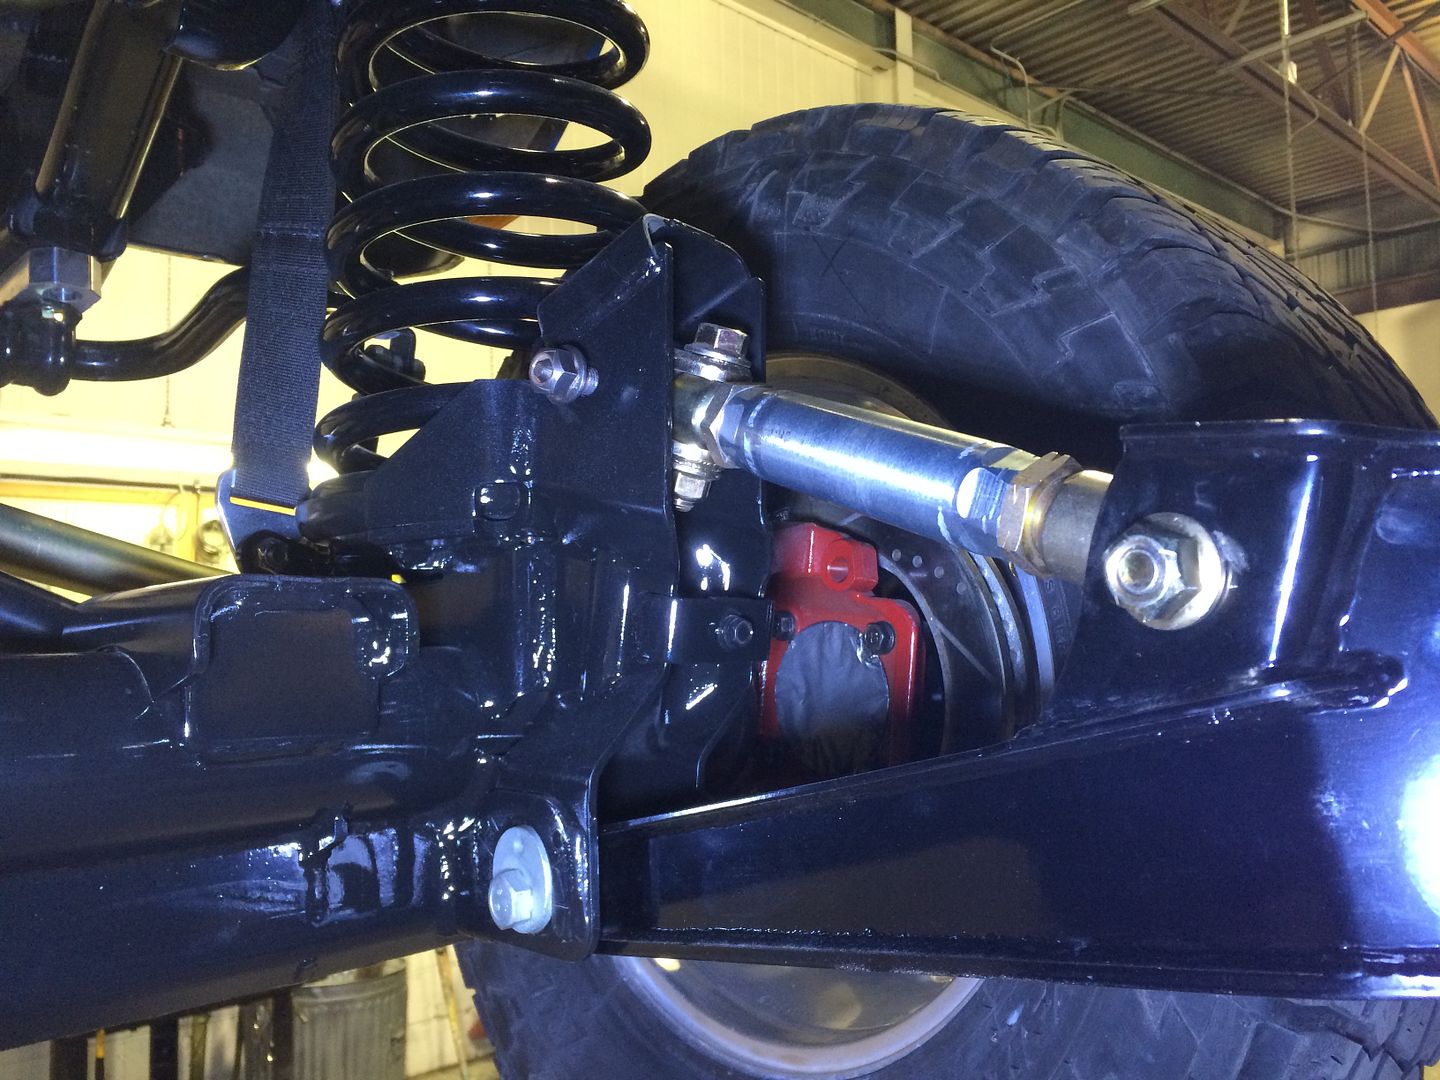
Since the truck can leave the ground at times I decided to beef up the factory spring mounts that we relocated. More then likely was not needed but Its done.
 [/URL]
 [/URL]
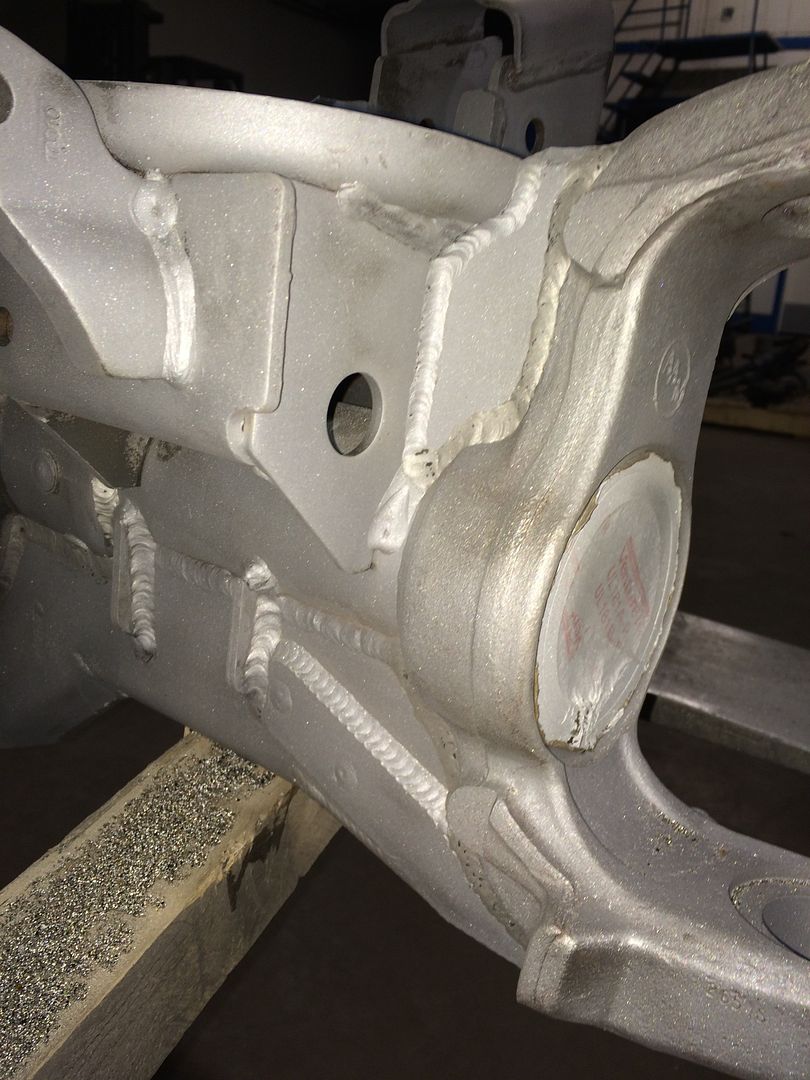
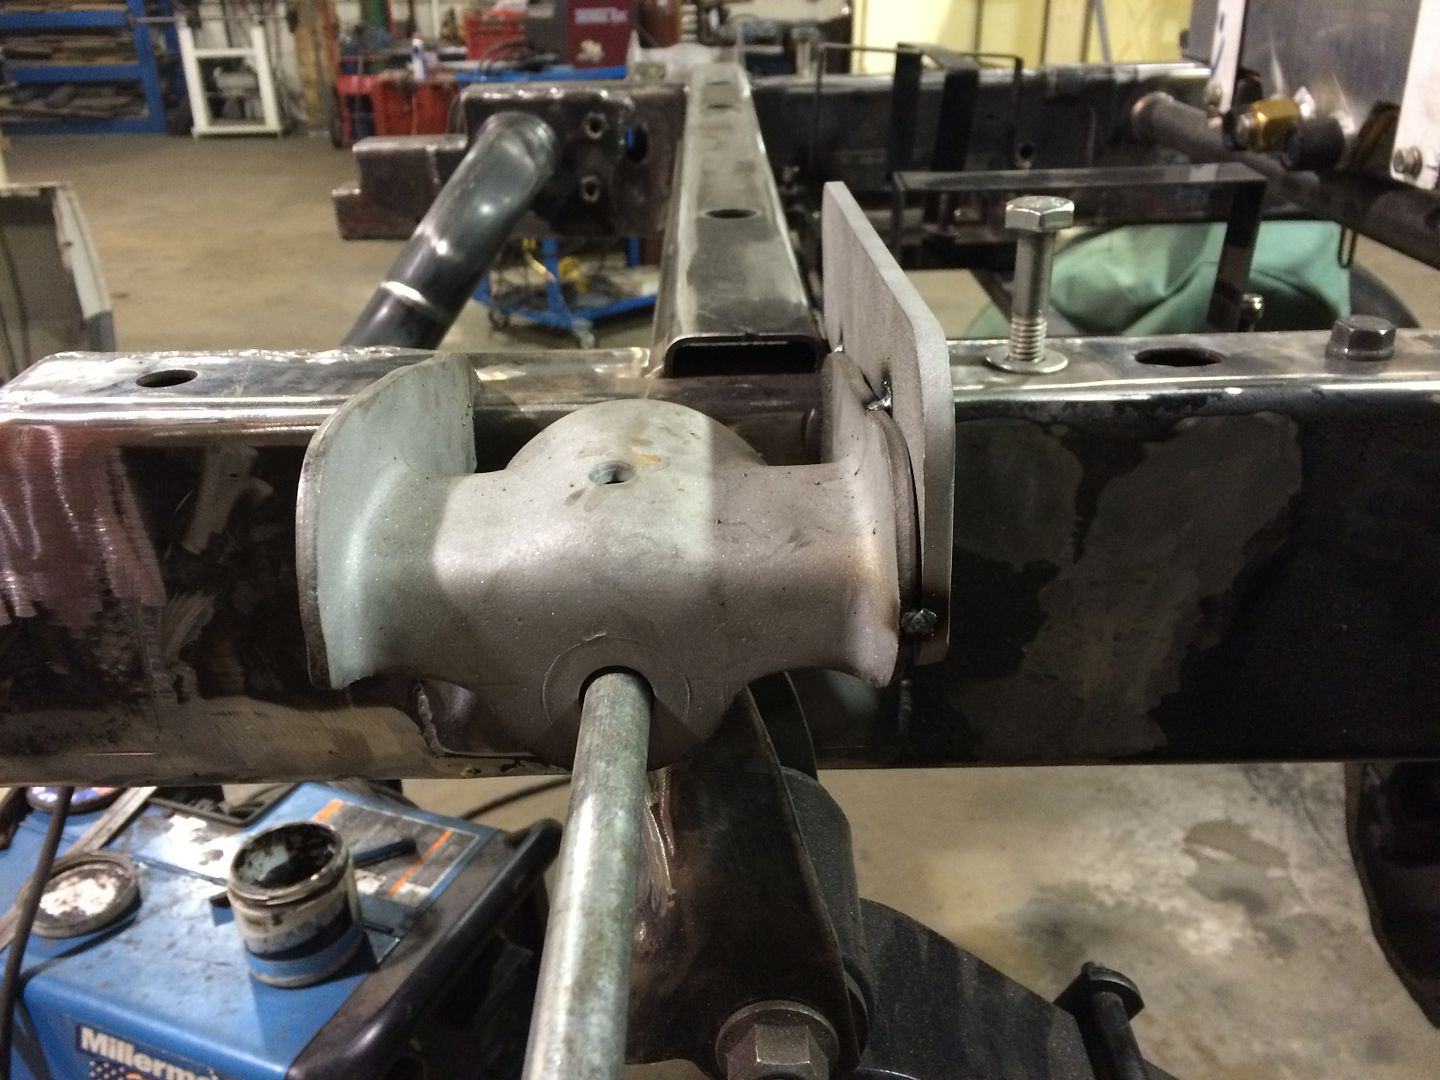
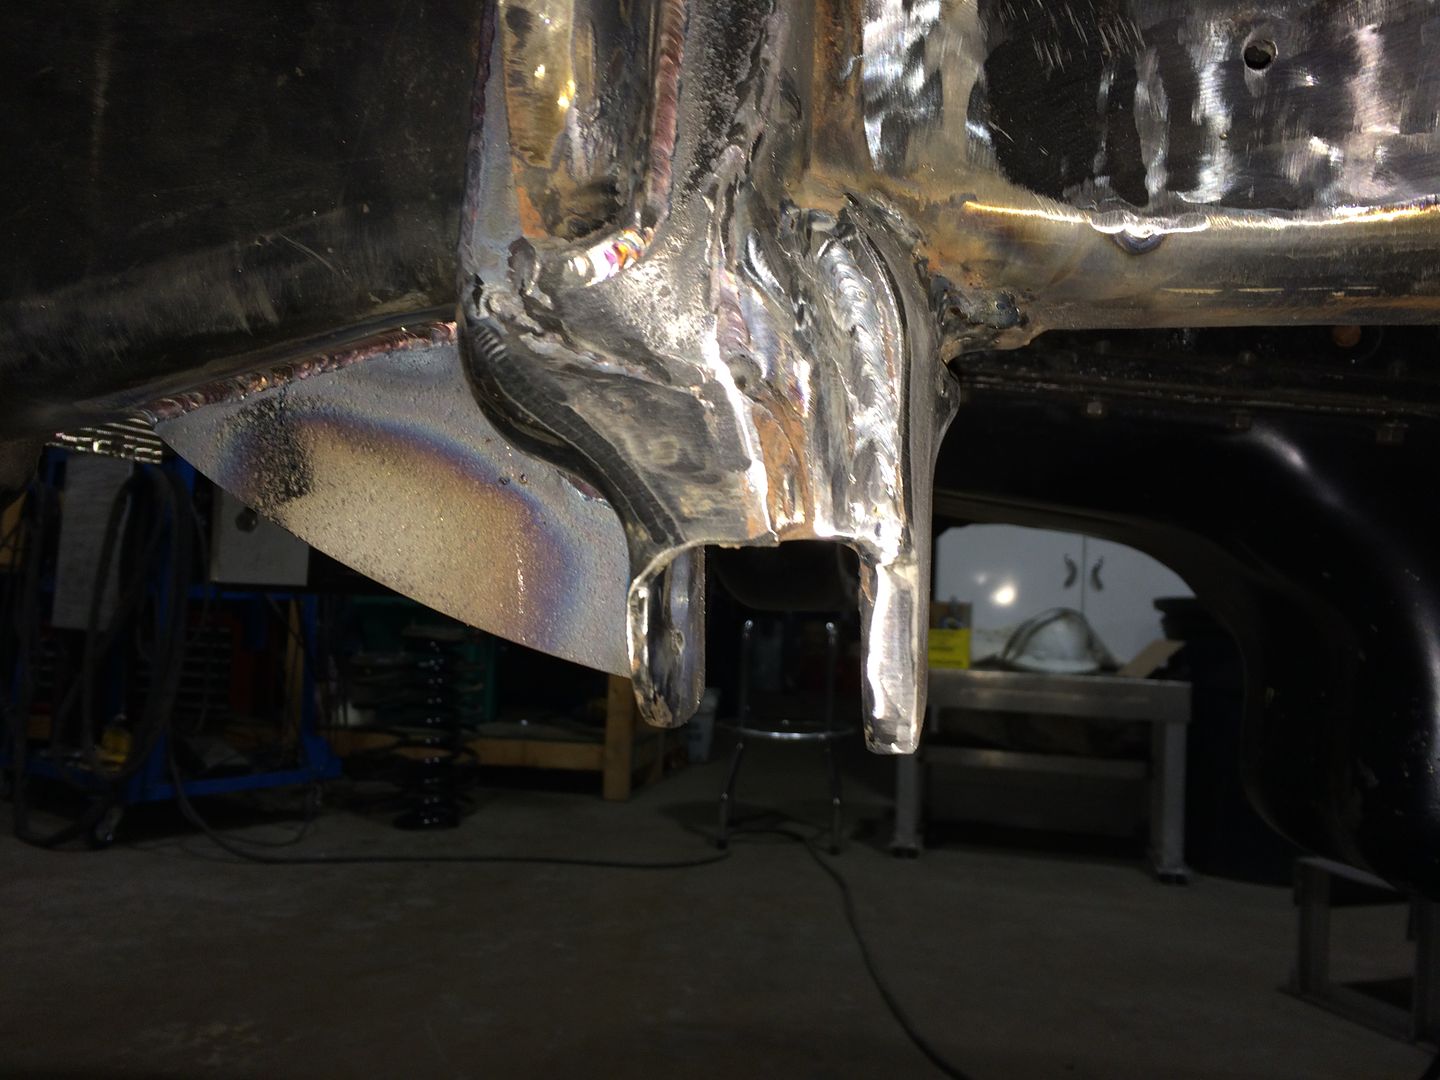
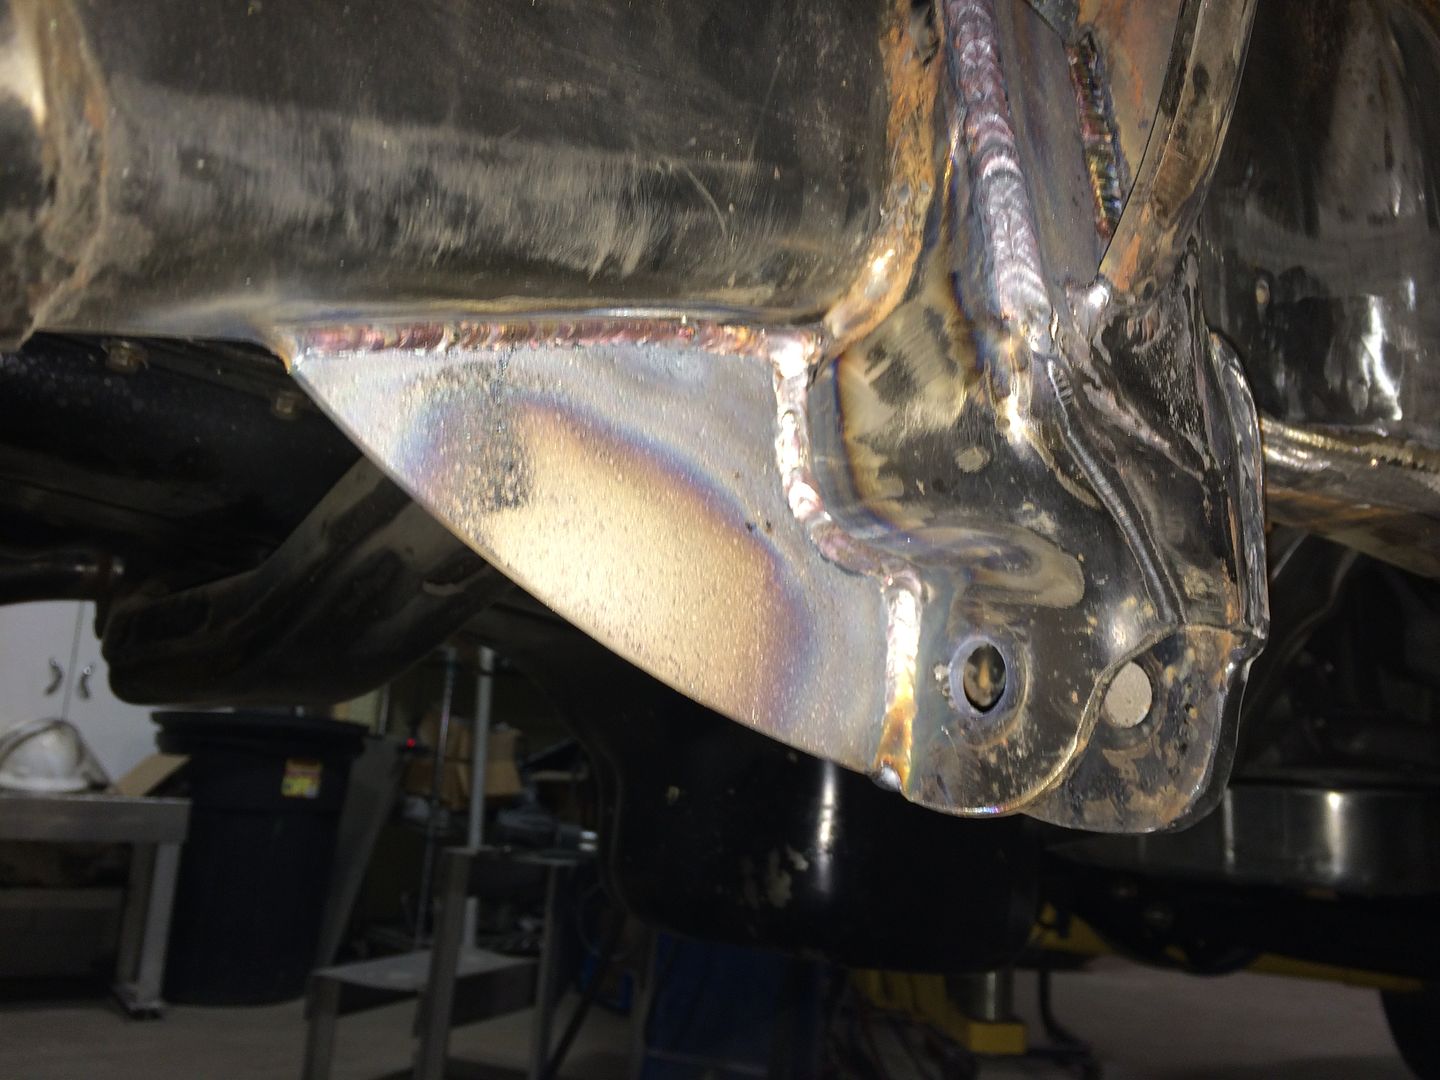
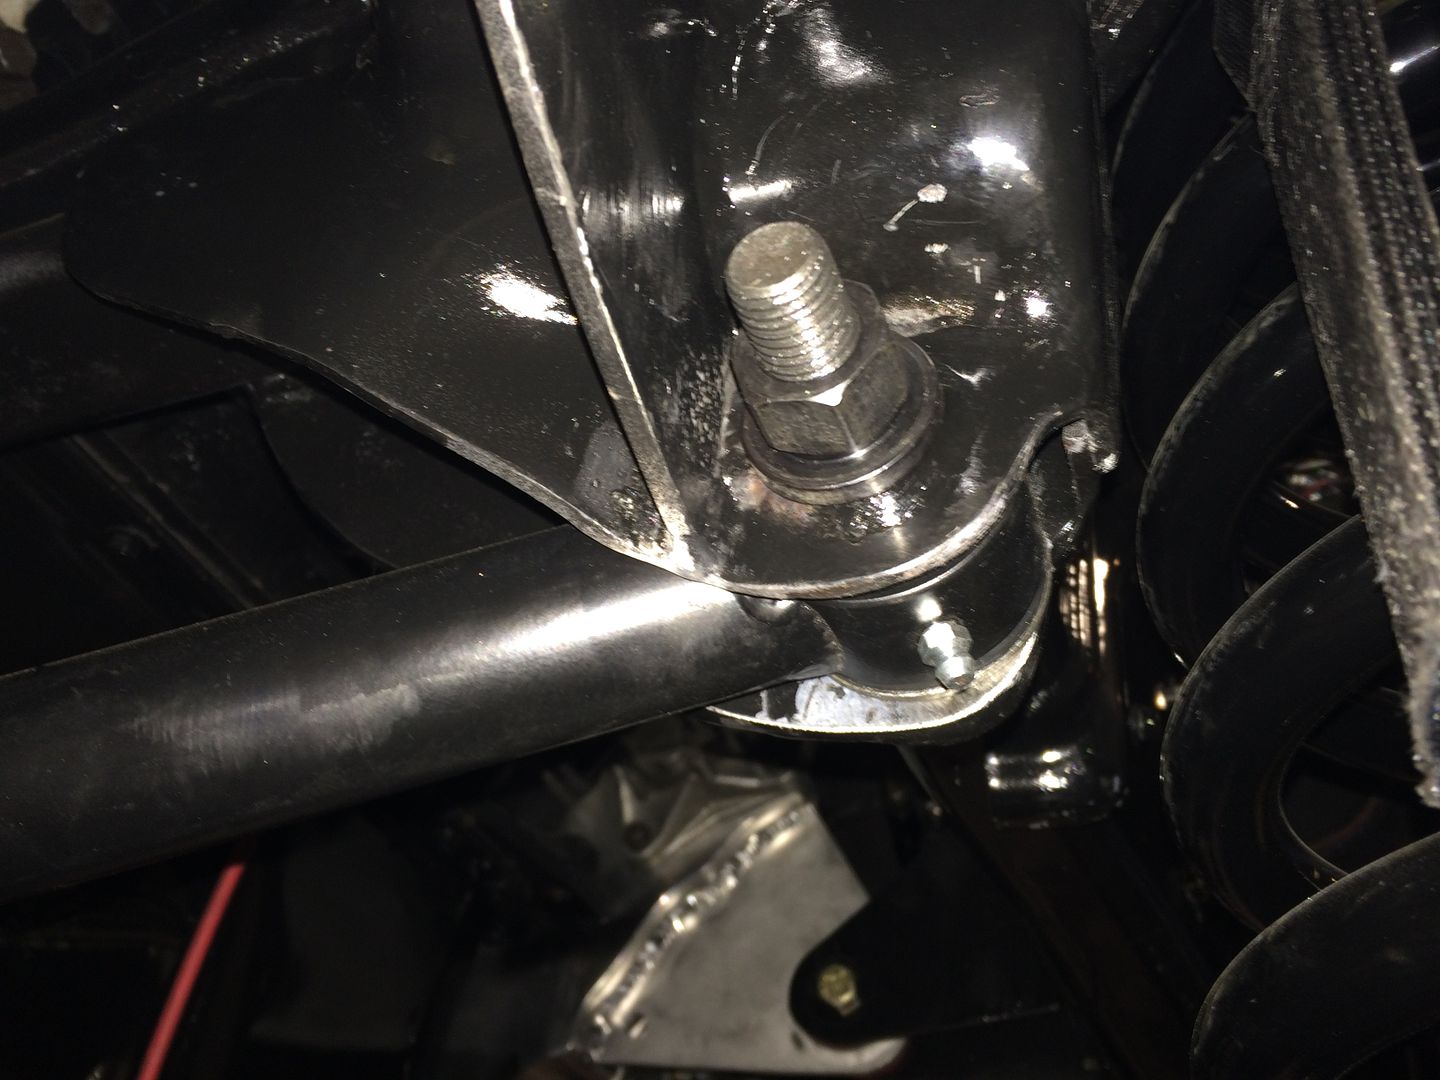
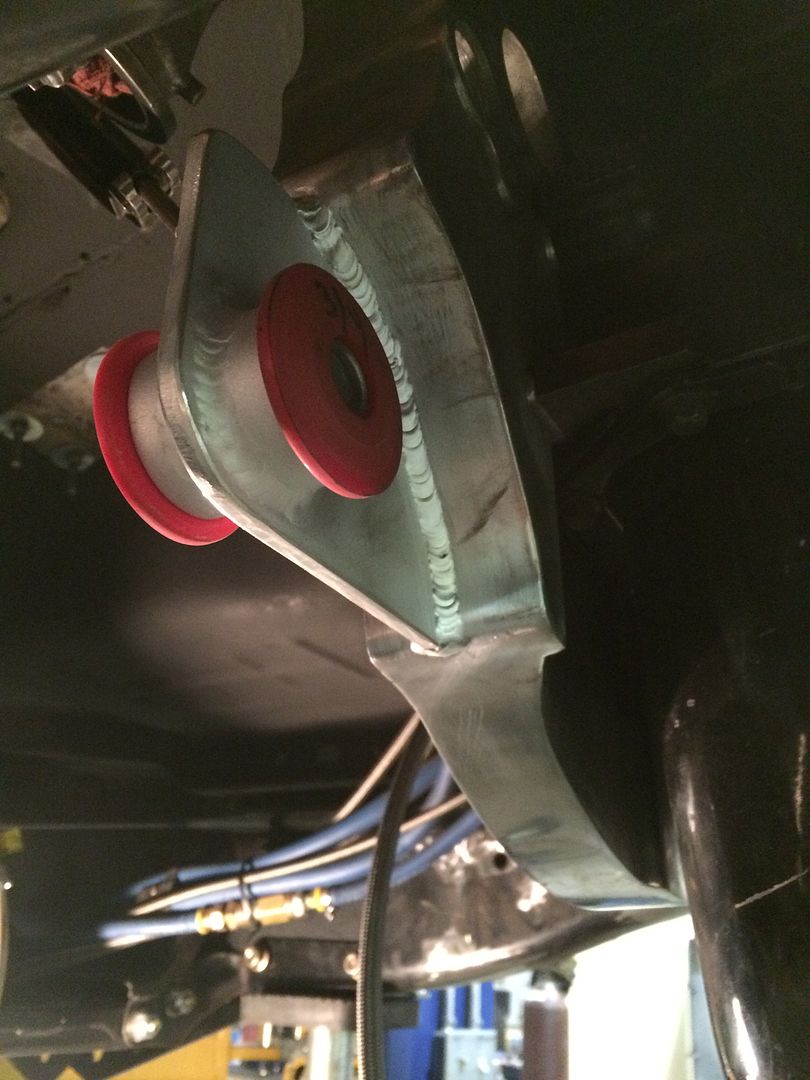
I also beefed up the trac-bar mount area which is an area that gets pounded out when pushing the suspension hard. All hardware was drilled and upgraded to 16mm.
 [/URL]
 [/URL]
 [/URL]
 [/URL]
 [/URL]
Making room for bigger shocks!
 [/URL]
 [/URL]
 [/URL]
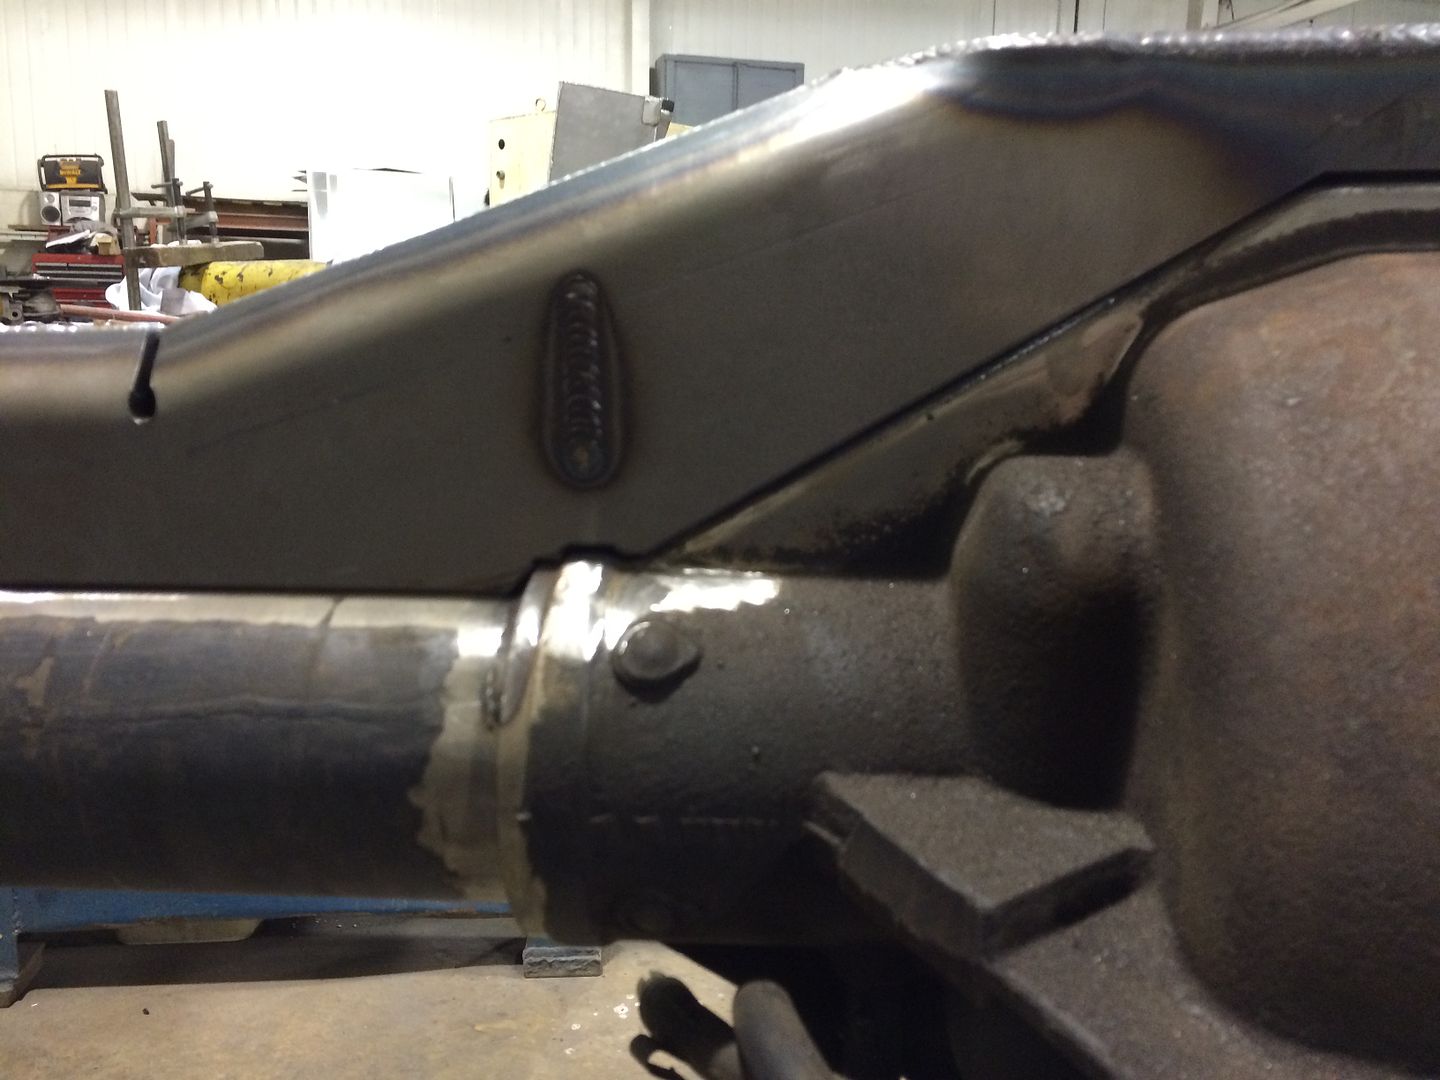
Welded up any abrasive marks, sanded, filled and primed the frame up.
 [/URL]
I also beefed up the trac-bar mount area which is an area that gets pounded out when pushing the suspension hard. All hardware was drilled and upgraded to 16mm.
Making room for bigger shocks!
Welded up any abrasive marks, sanded, filled and primed the frame up.
not enoughsmoke
floatin in tha gulf
- Joined
- Dec 28, 2008
- Messages
- 5,730
I'm thinking television spin off called " Frozen Guys Garage"?
I jest, but am in awe of your project.
RonA
Hell i would watch it lol
Freezingsystems
Modify Everything
- Joined
- Jan 18, 2010
- Messages
- 1,130
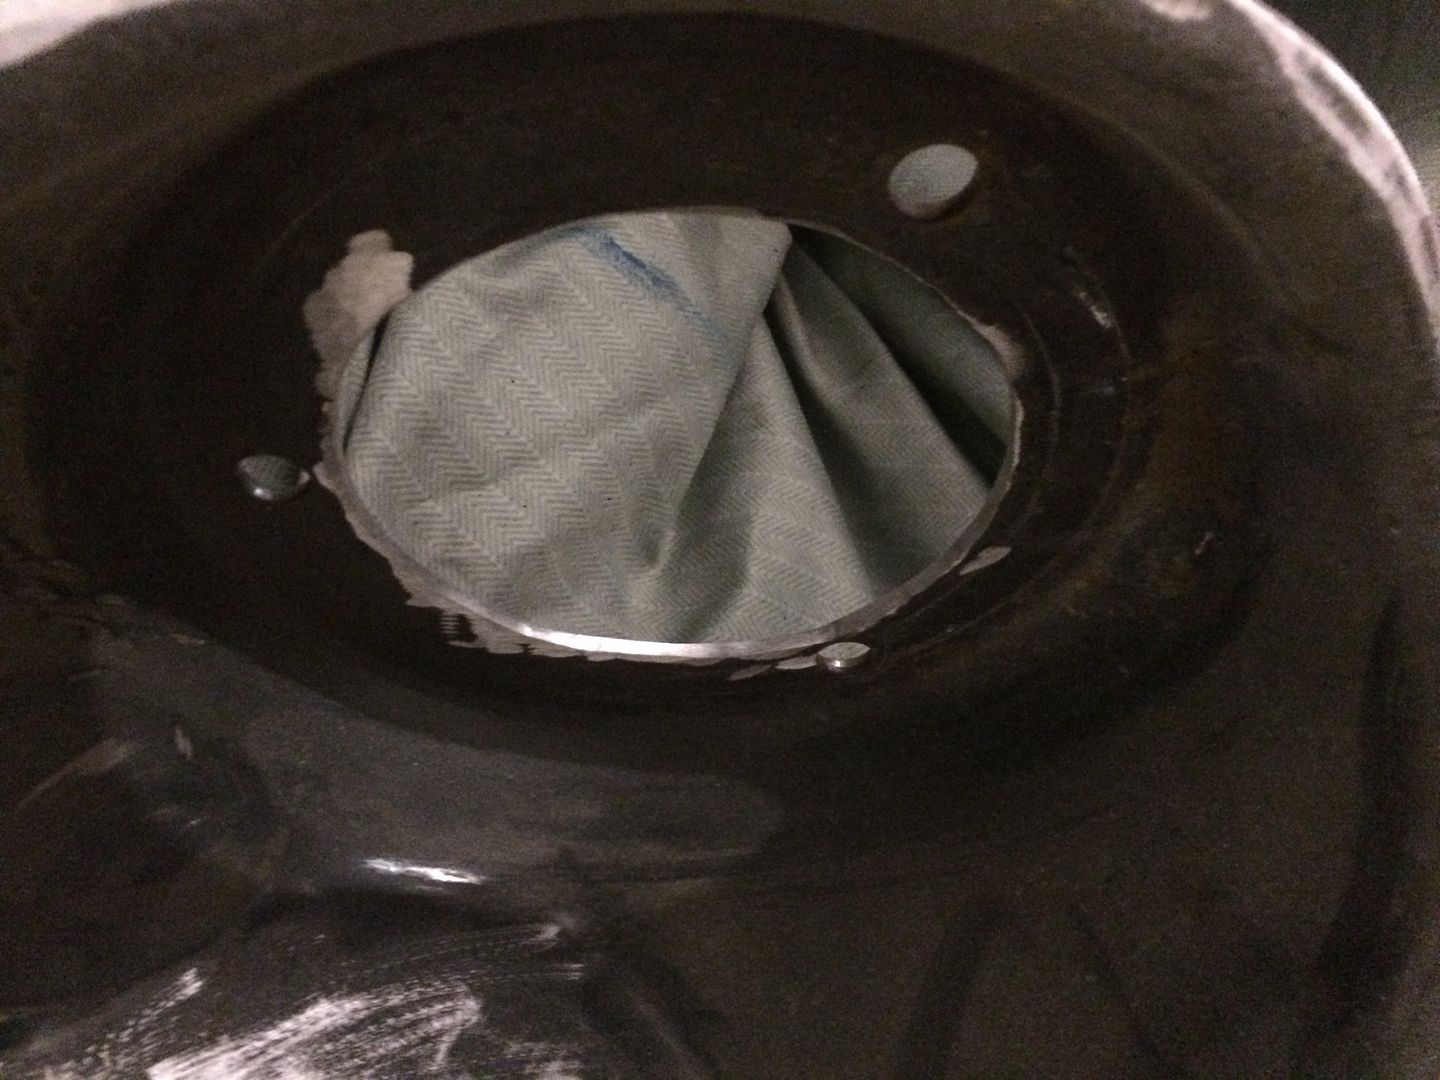
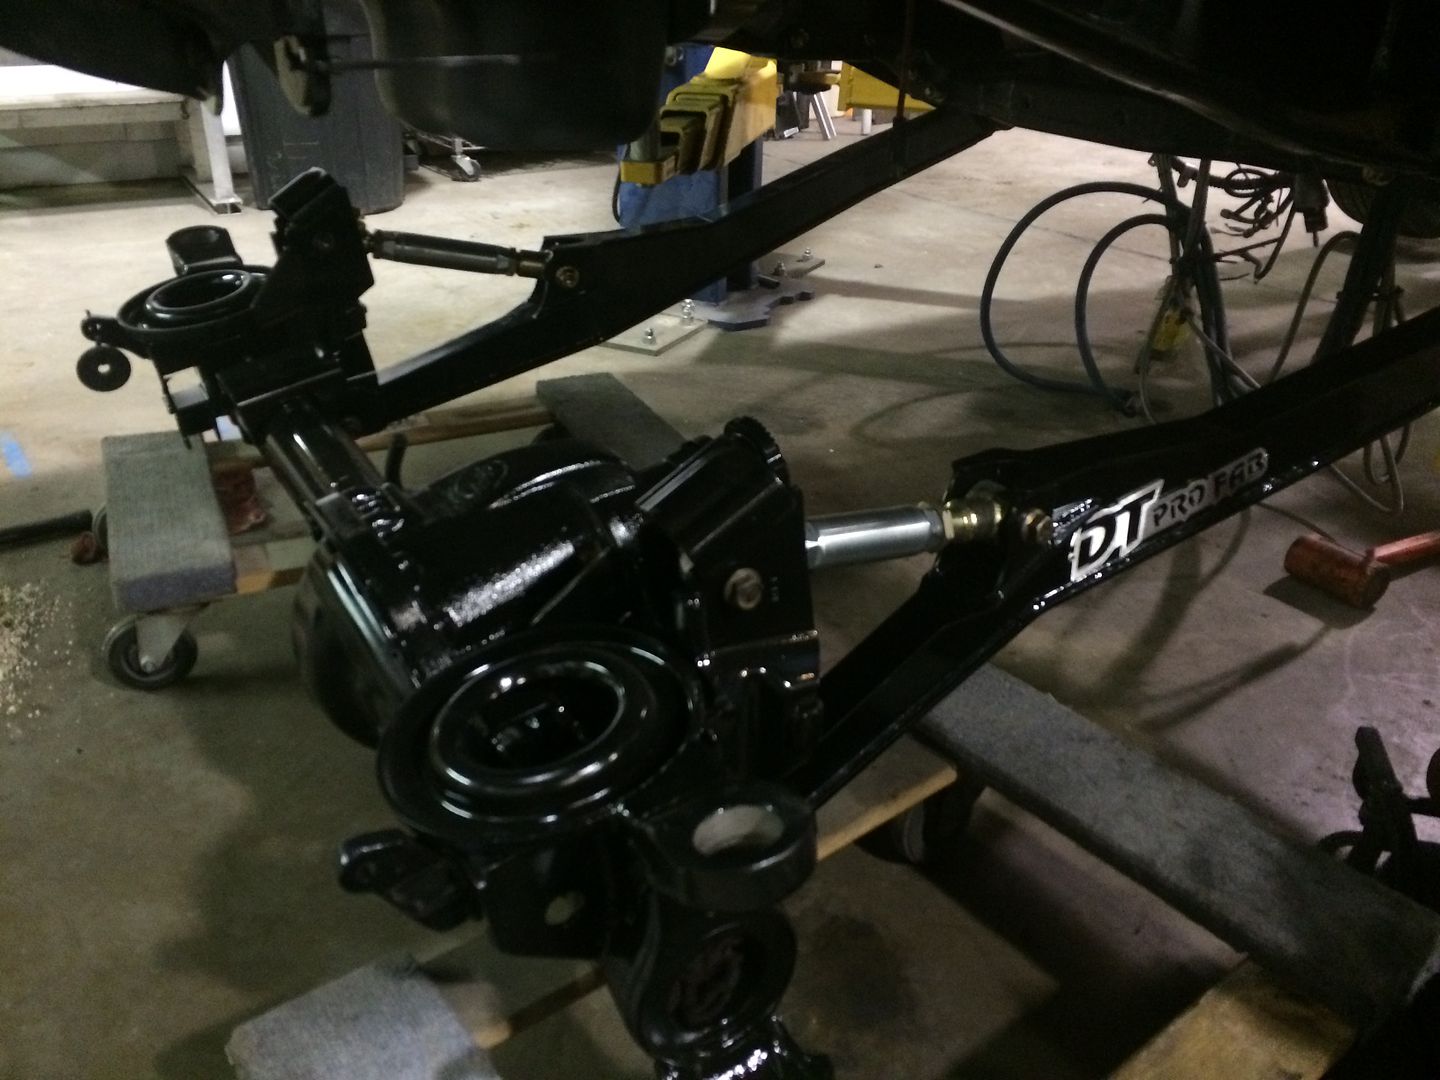
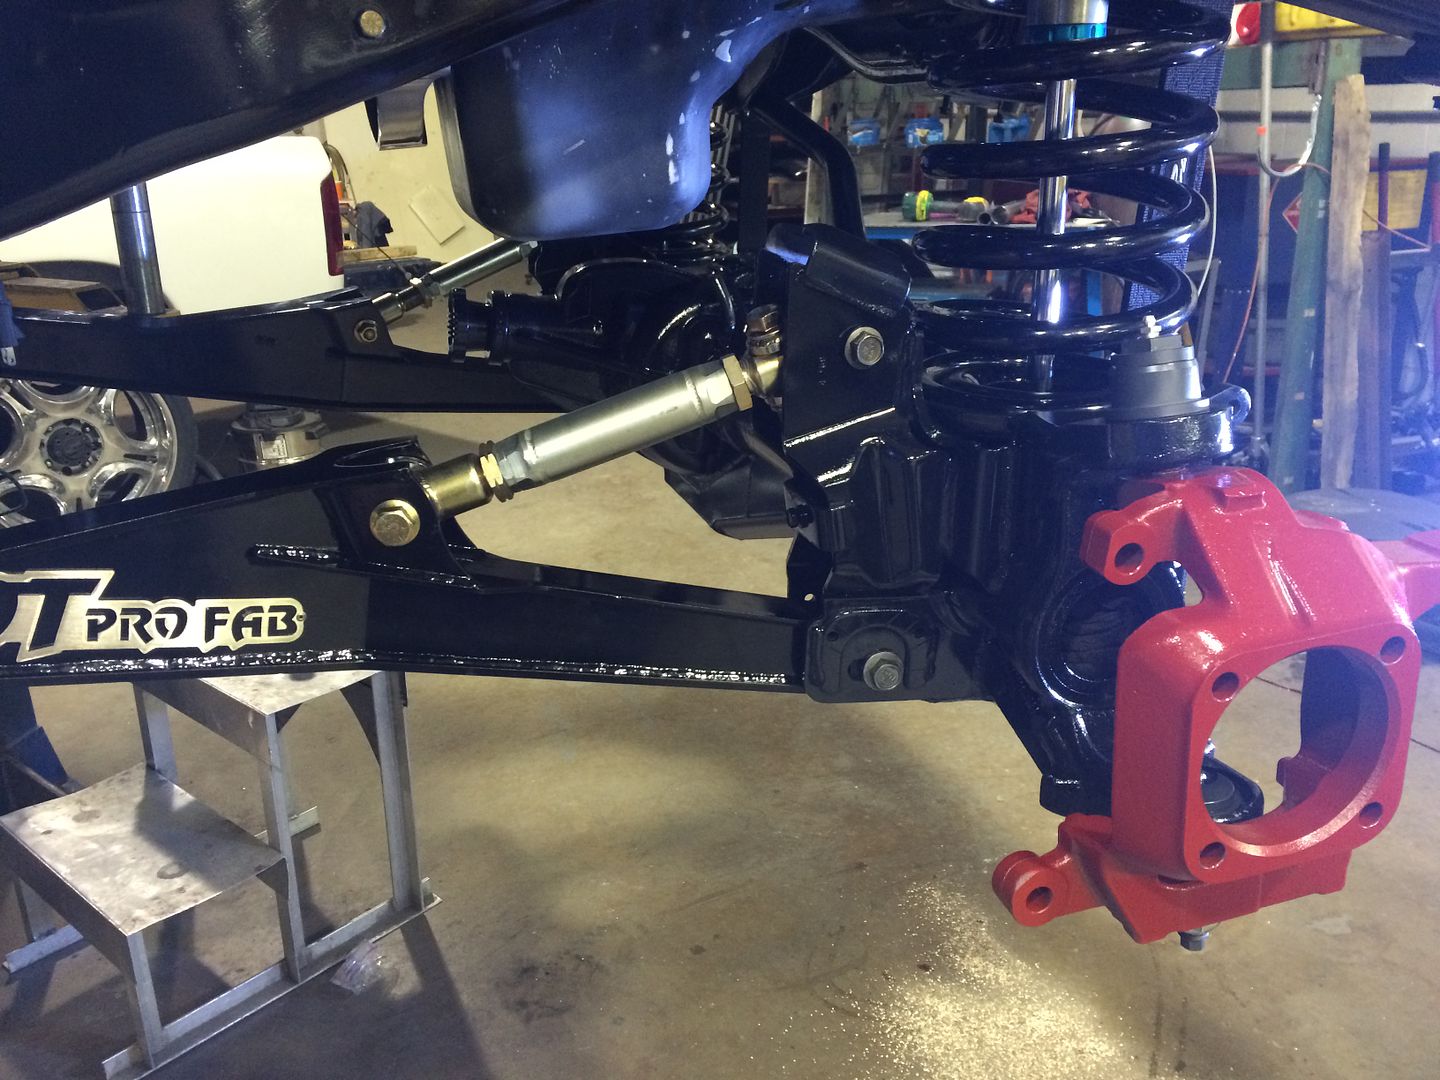
The AAM 9.25 front axle was stripped inside and out, removed open carrier, cleaned and painted after welding on truss. New inner AAM seals were installed to ensure its leak free when it gets reassembled with all the new parts.
The radius arms were partially assembled and bolted to frame and cross member mounts shown in earlier post.
 [/URL]
 [/URL]
 [/URL]
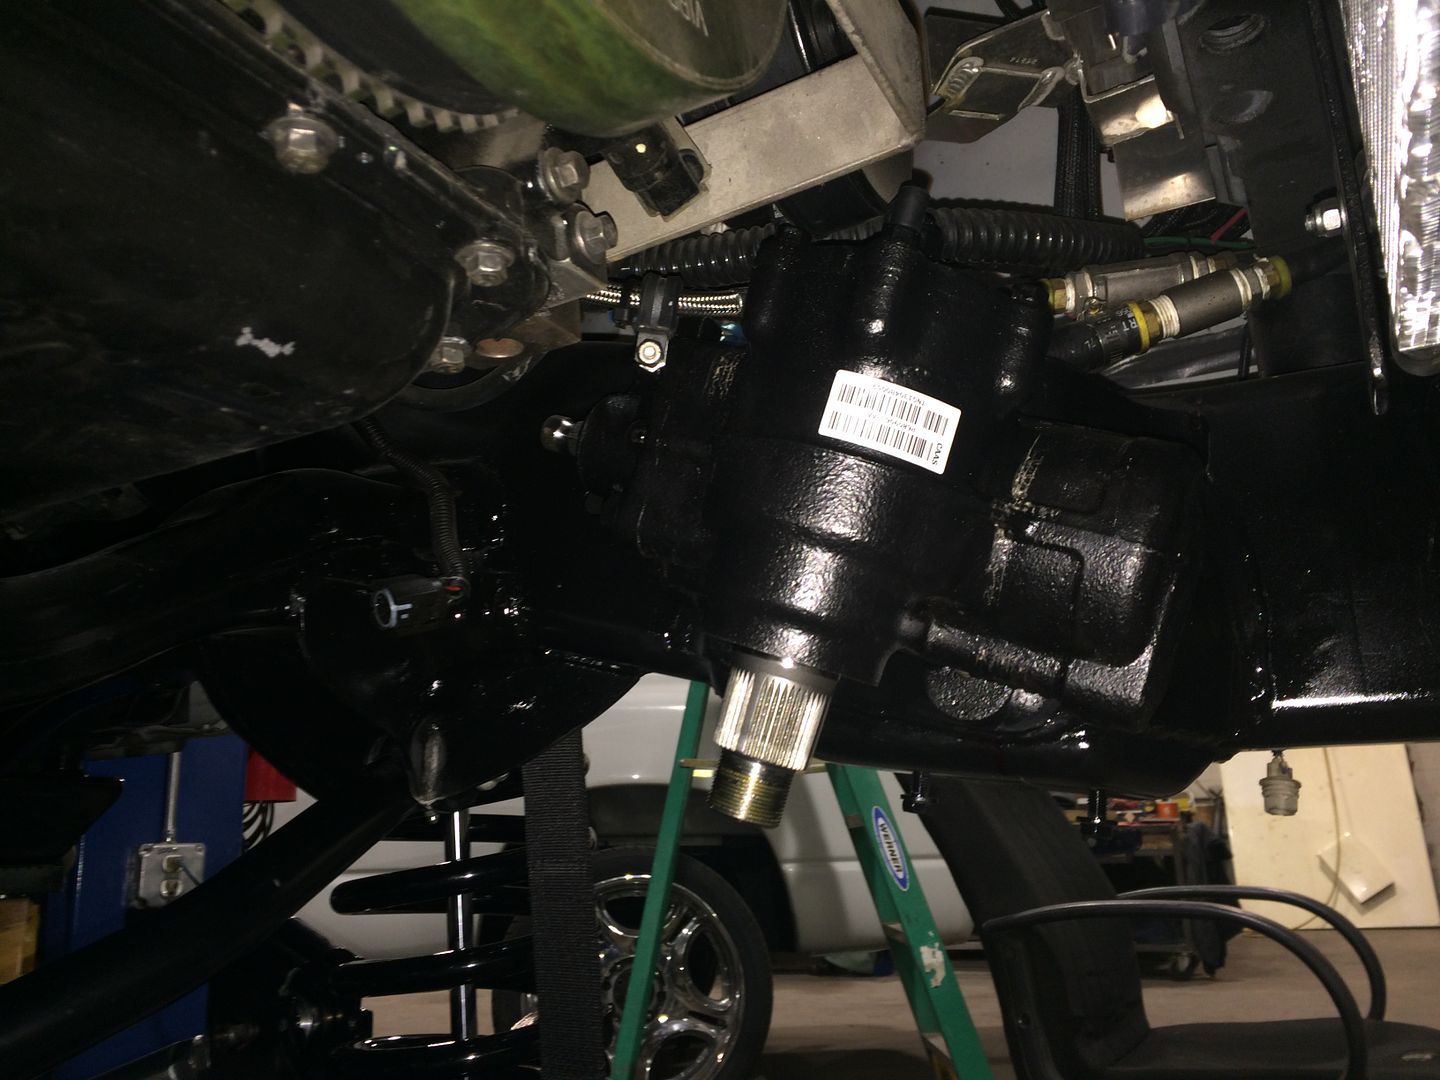
New Big Borg Steering box upgrade to go with the new EMF steering.
 [/URL]
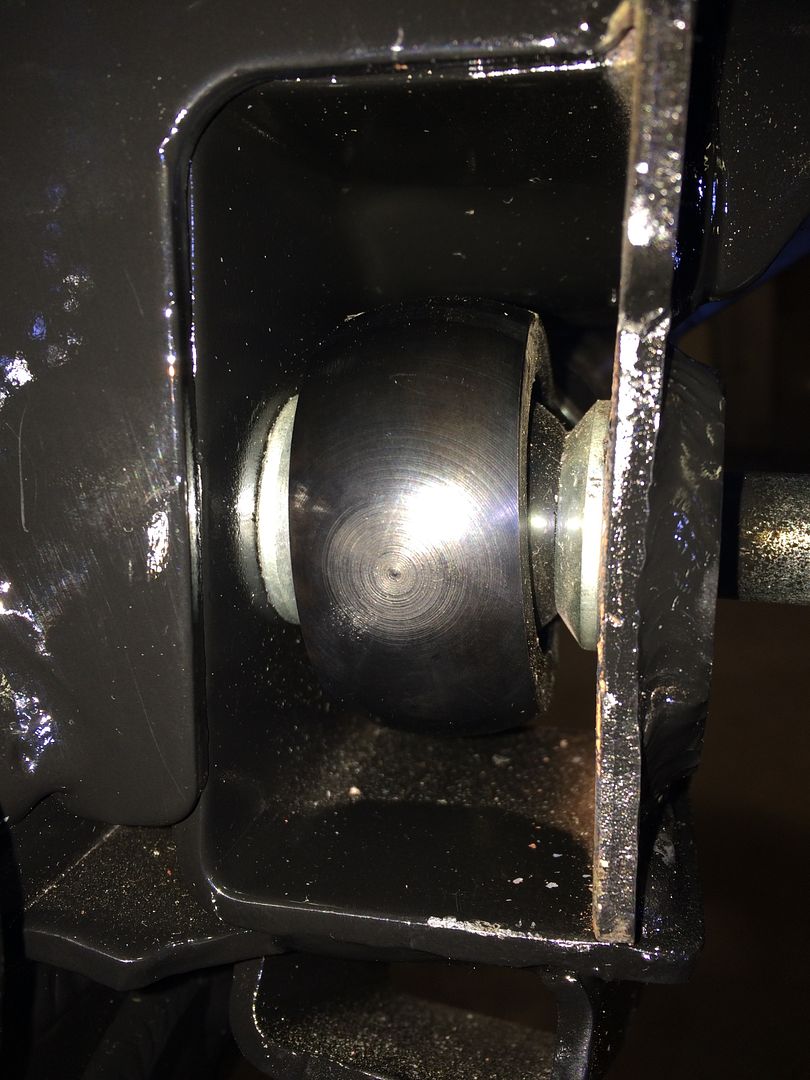
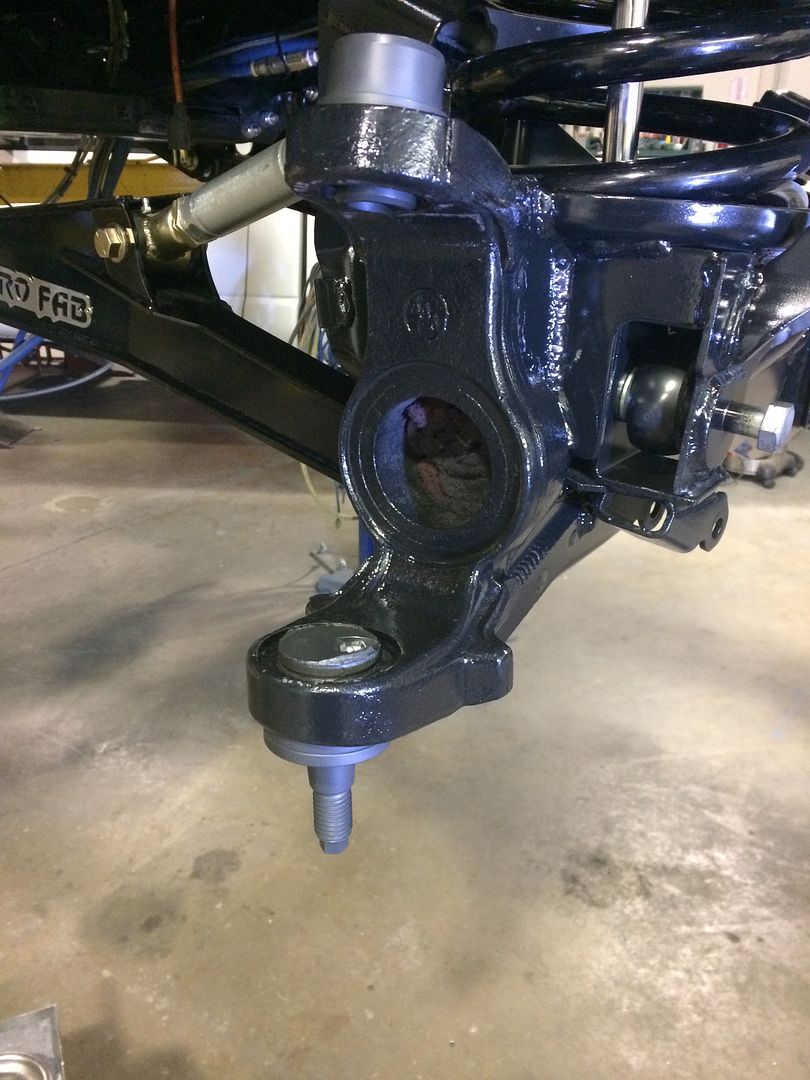
Installing the new sexy Carli BJ's. Part of the BJ was stored in the freezer for a few days prior to pressing in place.
[
 [/URL]
 [/URL]
 [/URL]
 [/URL]
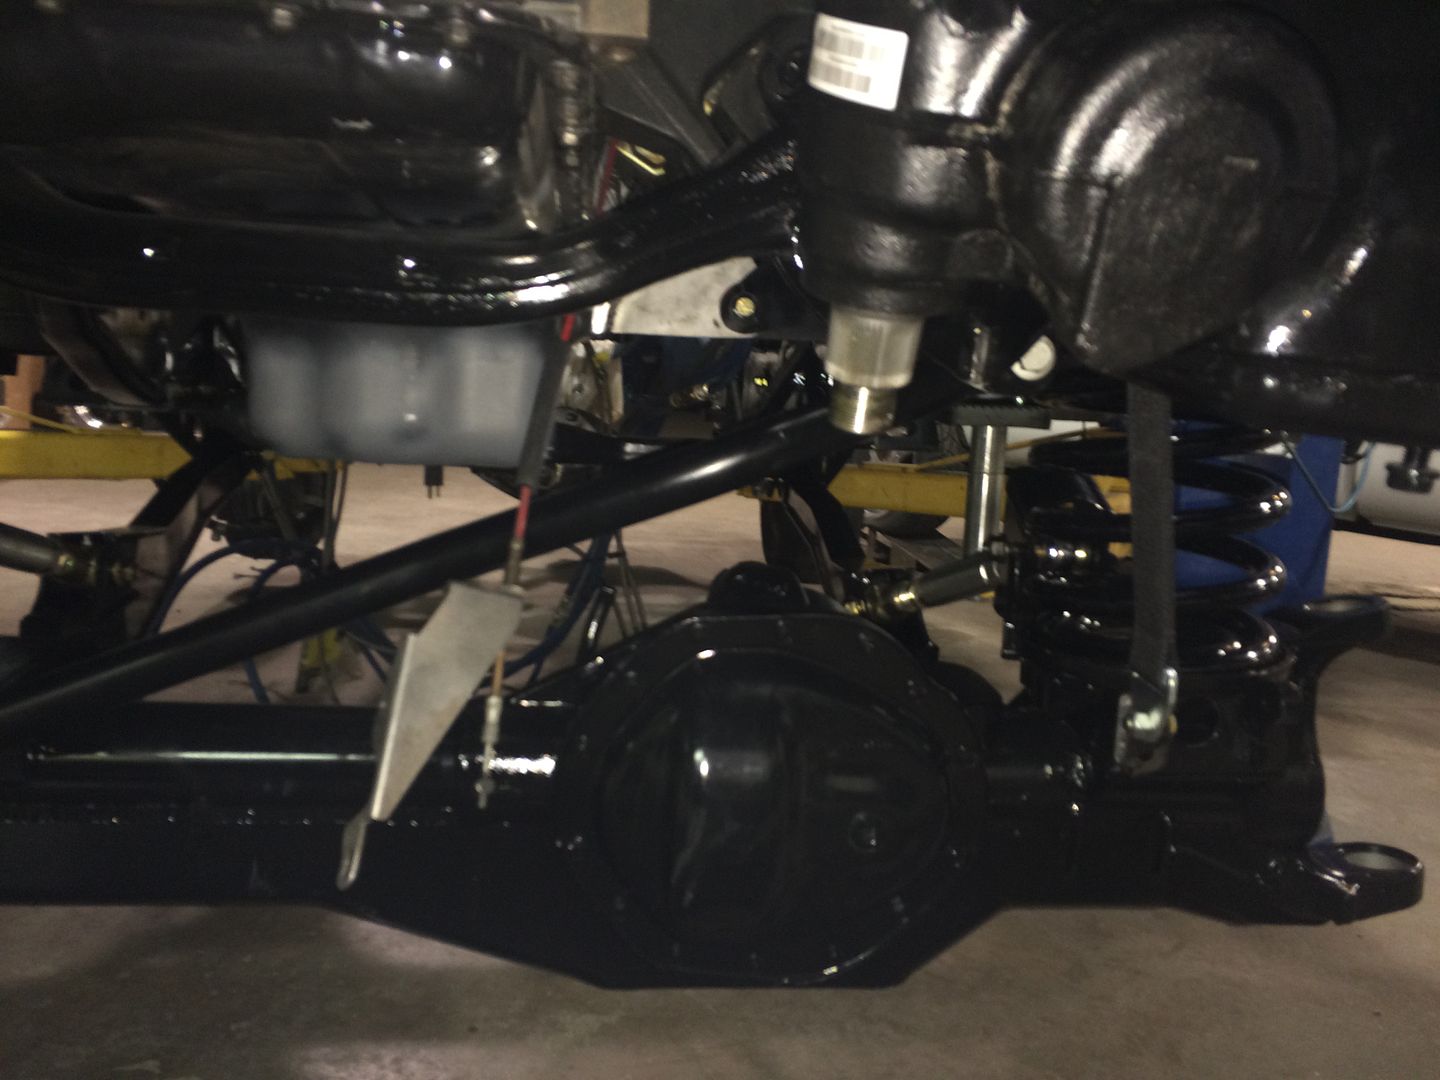
At this point I was waiting for the new shocks to be built so I picked up some slightly used Carli 2.0's for mock up and possible road testing as the new shock builds take a long time to get. We were also able to get the limit straps mounted.
 [/URL]
New EMF tracbar end axle side. Upgraded the hardware on tracbar to 16mm and beefed up the axle end.
 [/URL]
 [/URL]
The radius arms were partially assembled and bolted to frame and cross member mounts shown in earlier post.
New Big Borg Steering box upgrade to go with the new EMF steering.
Installing the new sexy Carli BJ's. Part of the BJ was stored in the freezer for a few days prior to pressing in place.
[
At this point I was waiting for the new shocks to be built so I picked up some slightly used Carli 2.0's for mock up and possible road testing as the new shock builds take a long time to get. We were also able to get the limit straps mounted.
New EMF tracbar end axle side. Upgraded the hardware on tracbar to 16mm and beefed up the axle end.
ENafziger
New member
- Joined
- Oct 22, 2008
- Messages
- 843
Wow...every time you post another update, I'm more impressed. Tremendous work. I'm glad to see so much effort being put into the suspension. Power is fun. A good suspension is almost more fun. But both together...well, you just don't see that very often. Especially at this quality.
I didn't catch it in the pics, but I'm sure you beefed up the rear shock mounts as well? I'm sure you know the uppers can rip lose when pounding hard.
Thanks for taking the time to share.
I didn't catch it in the pics, but I'm sure you beefed up the rear shock mounts as well? I'm sure you know the uppers can rip lose when pounding hard.
Thanks for taking the time to share.
Signature600
THA MAN!
- Joined
- Aug 5, 2006
- Messages
- 11,995
H.O.L.Y Crap.
Absolutely awesome.
Chris
Absolutely awesome.
Chris
CorneliusRox
Seasoned Rookie
- Joined
- Dec 13, 2012
- Messages
- 4,154
Let me know when you get sick of this truck and want to sell it... ha ha Holy **** man. Awesome work!
Freezingsystems
Modify Everything
- Joined
- Jan 18, 2010
- Messages
- 1,130
Wow...every time you post another update, I'm more impressed. Tremendous work. I'm glad to see so much effort being put into the suspension. Power is fun. A good suspension is almost more fun. But both together...well, you just don't see that very often. Especially at this quality.
I didn't catch it in the pics, but I'm sure you beefed up the rear shock mounts as well? I'm sure you know the uppers can rip lose when pounding hard.
Thanks for taking the time to share.
Thanks appreciate and I agree having both is a treat. We fabricated all new CM mounts for the rear bypass shocks axle and frame. They are mounted in a different configuration then standard third gens. :evil.
Many more pictures and details coming.
H.O.L.Y Crap.
Absolutely awesome.
Chris
Thanks!
Wow Chris! The words extreme and crazy come to mind when I see this thread but its totally awesome.
Ha ha. You know the deal :lolly:
Let me know when you get sick of this truck and want to sell it... ha ha Holy **** man. Awesome work!
Thanks!!! No prob it can be yours for three easy payments. LOL.
Freezingsystems
Modify Everything
- Joined
- Jan 18, 2010
- Messages
- 1,130
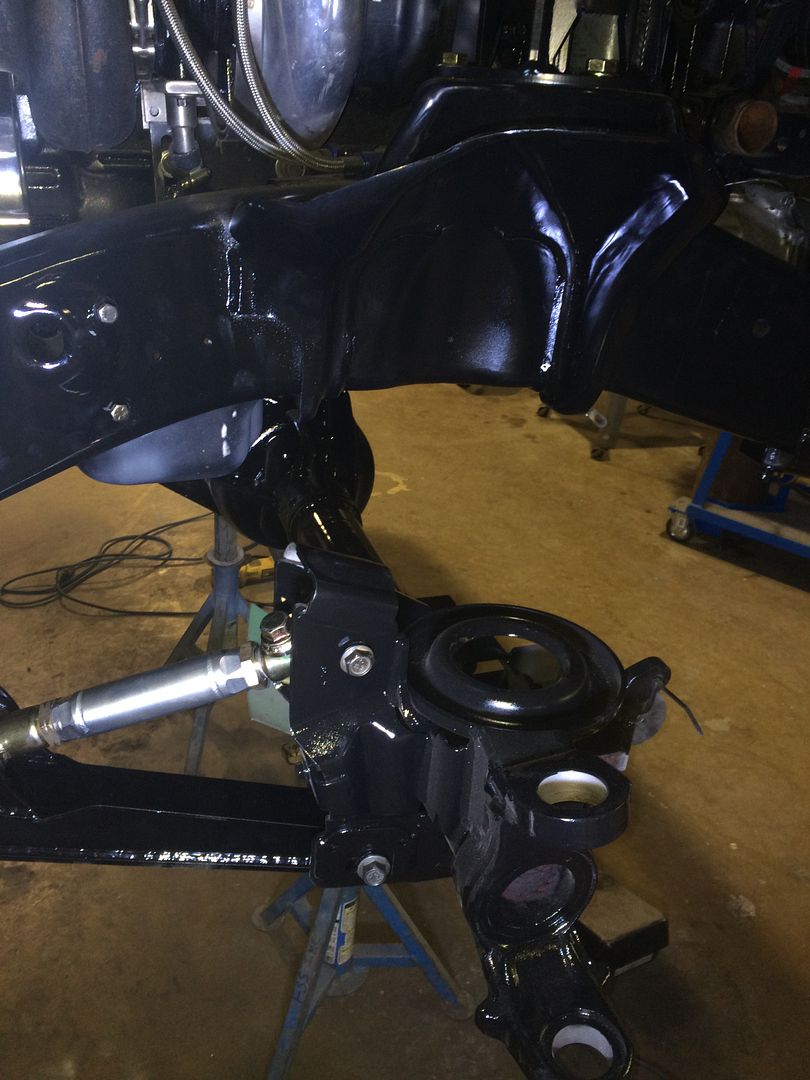
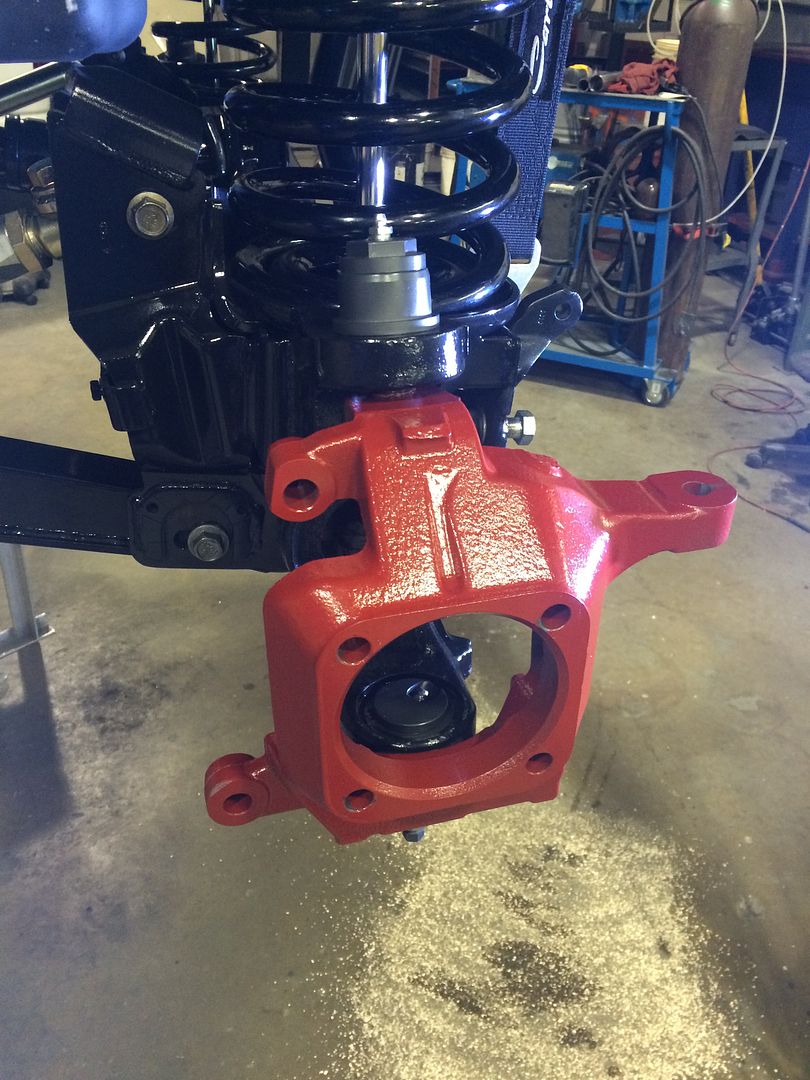
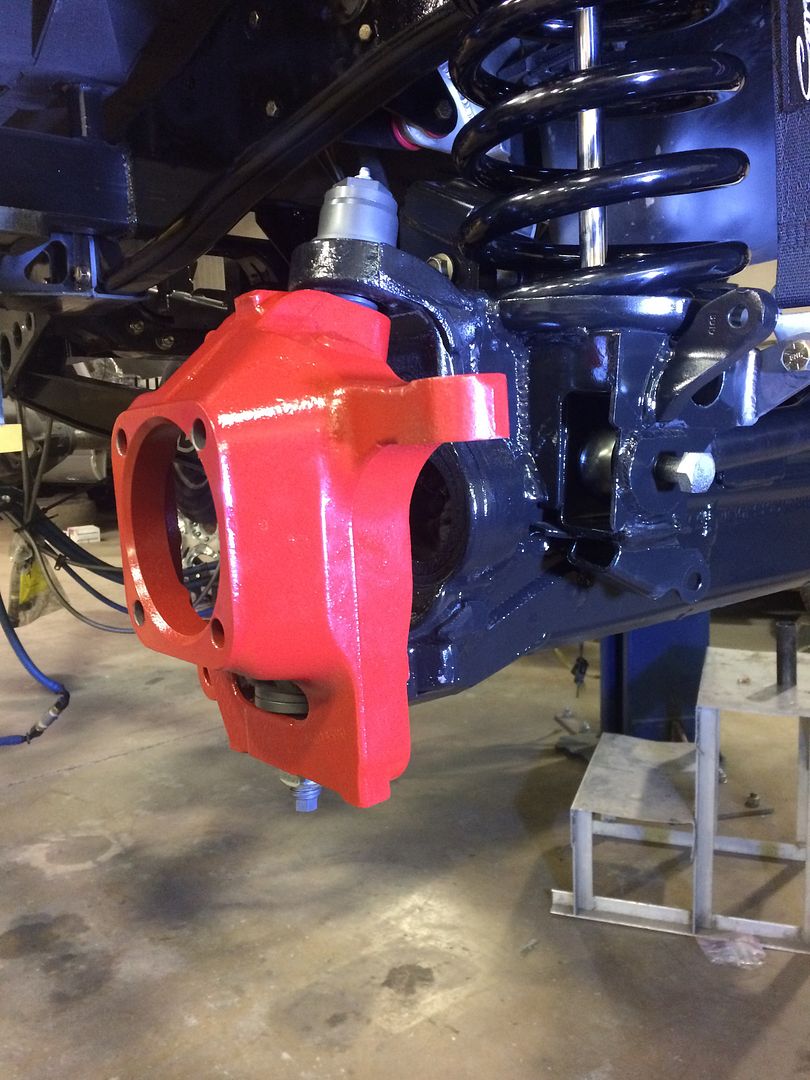
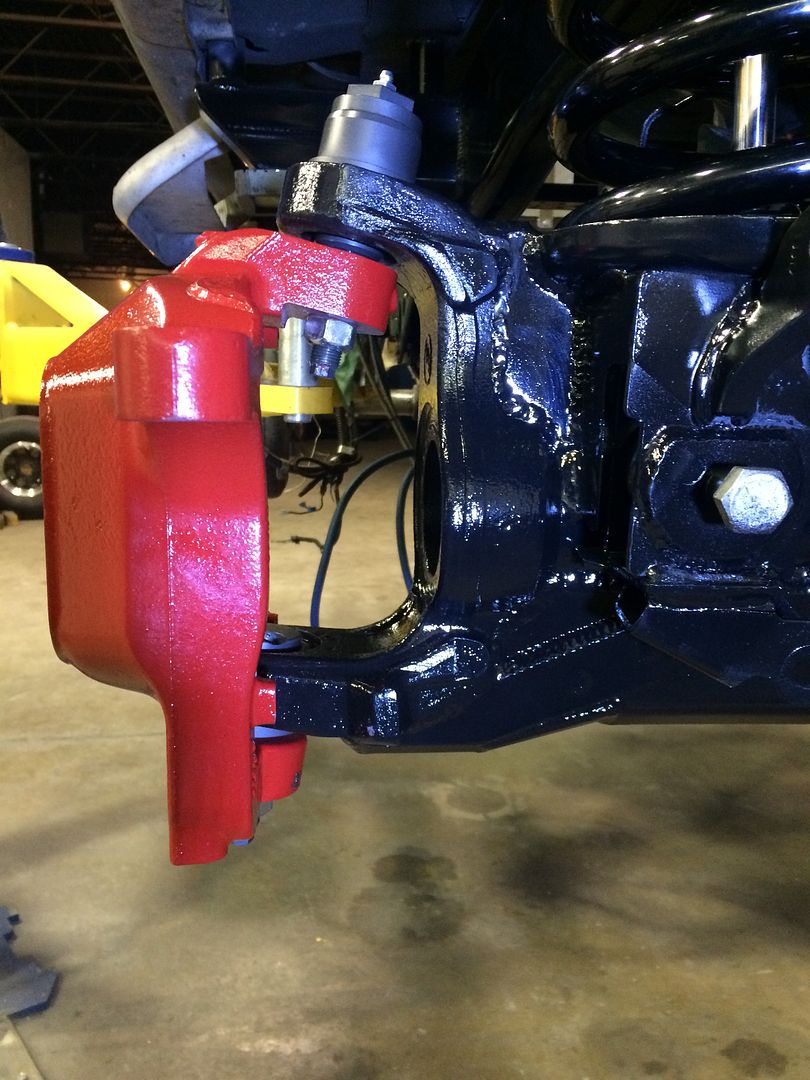
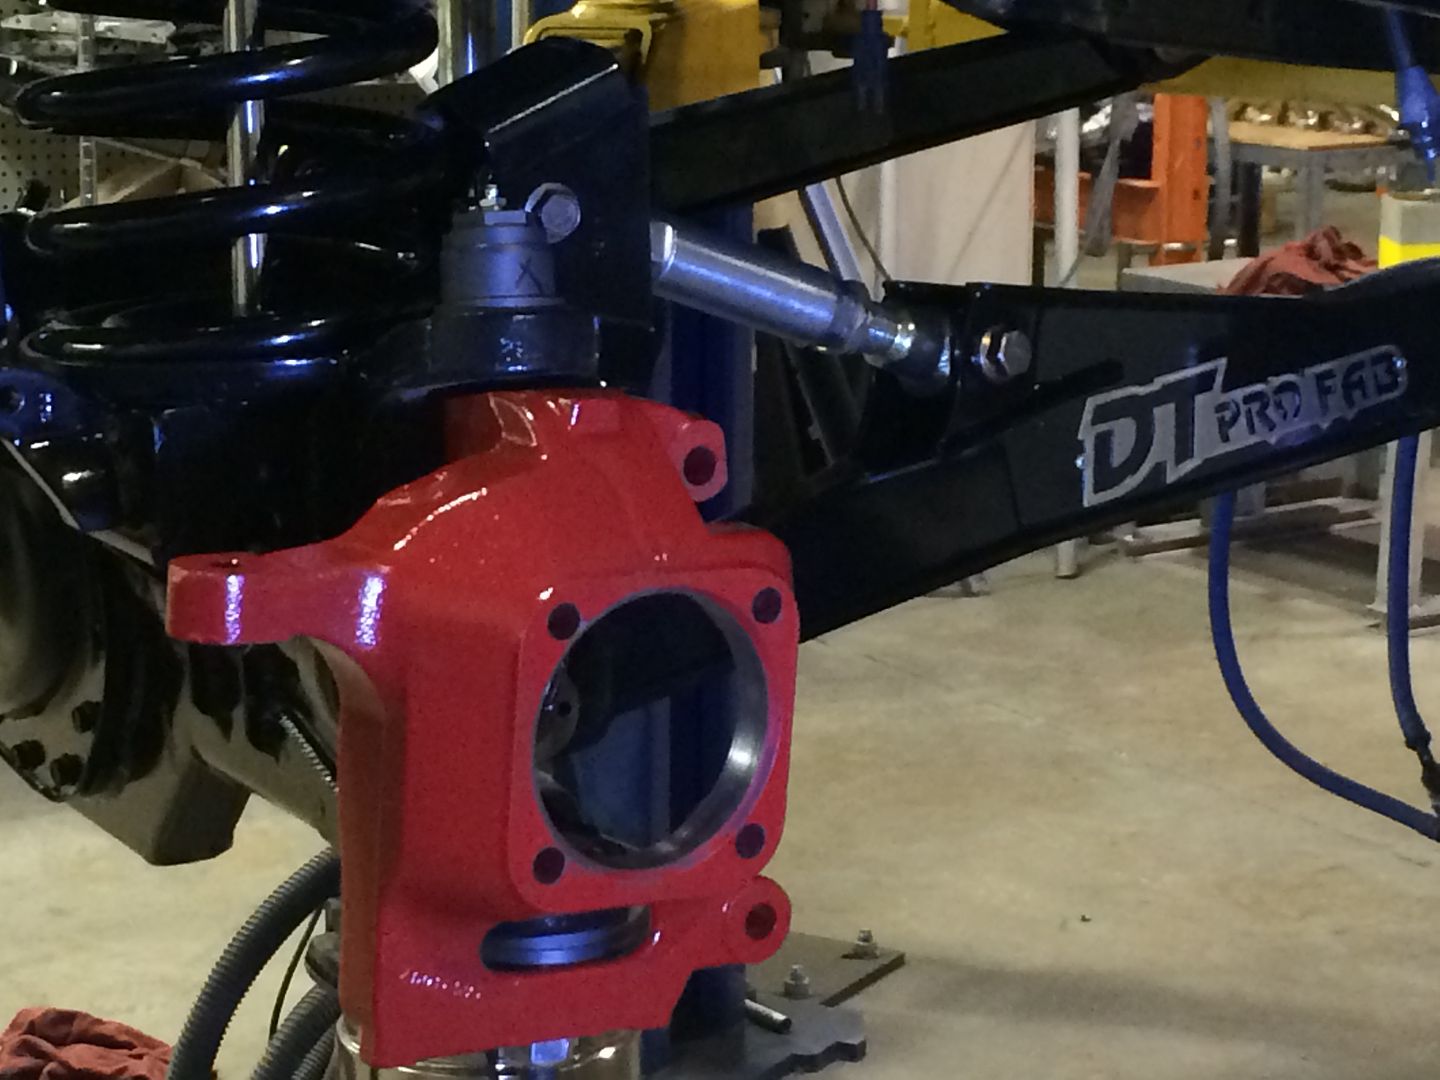
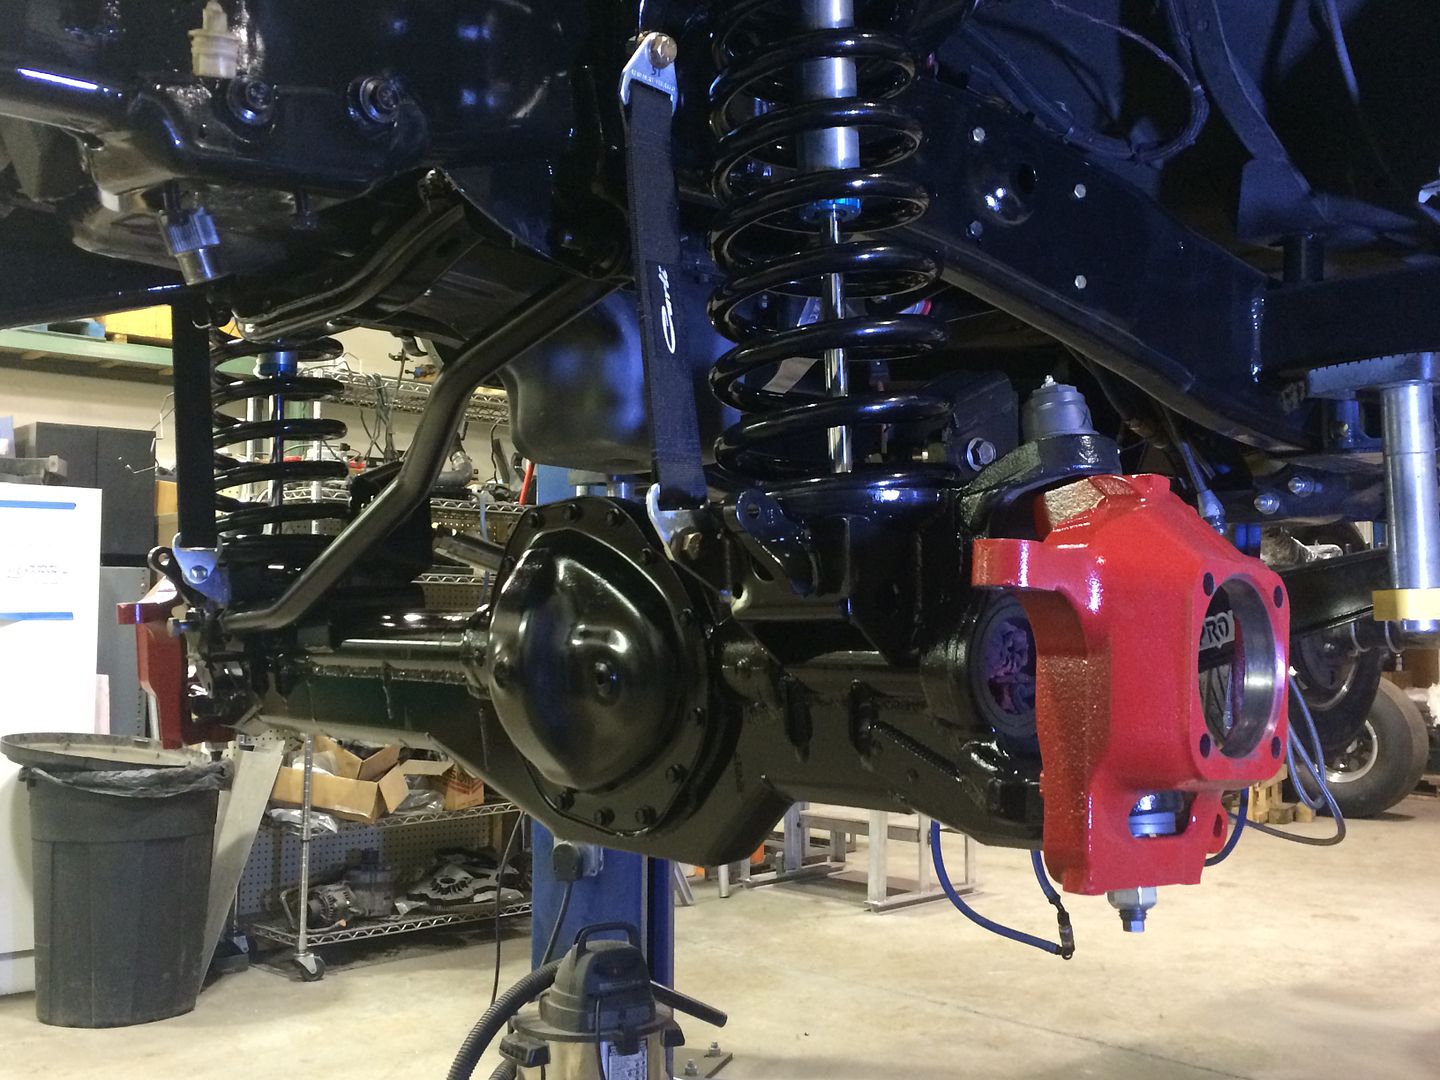
Blasted and painted knuckles.
 [/URL]
 [/URL]
 [/URL]
 [/URL]
 [/URL]
This was a good feeling seeing parts and fabrication work coming together!
 [/URL]
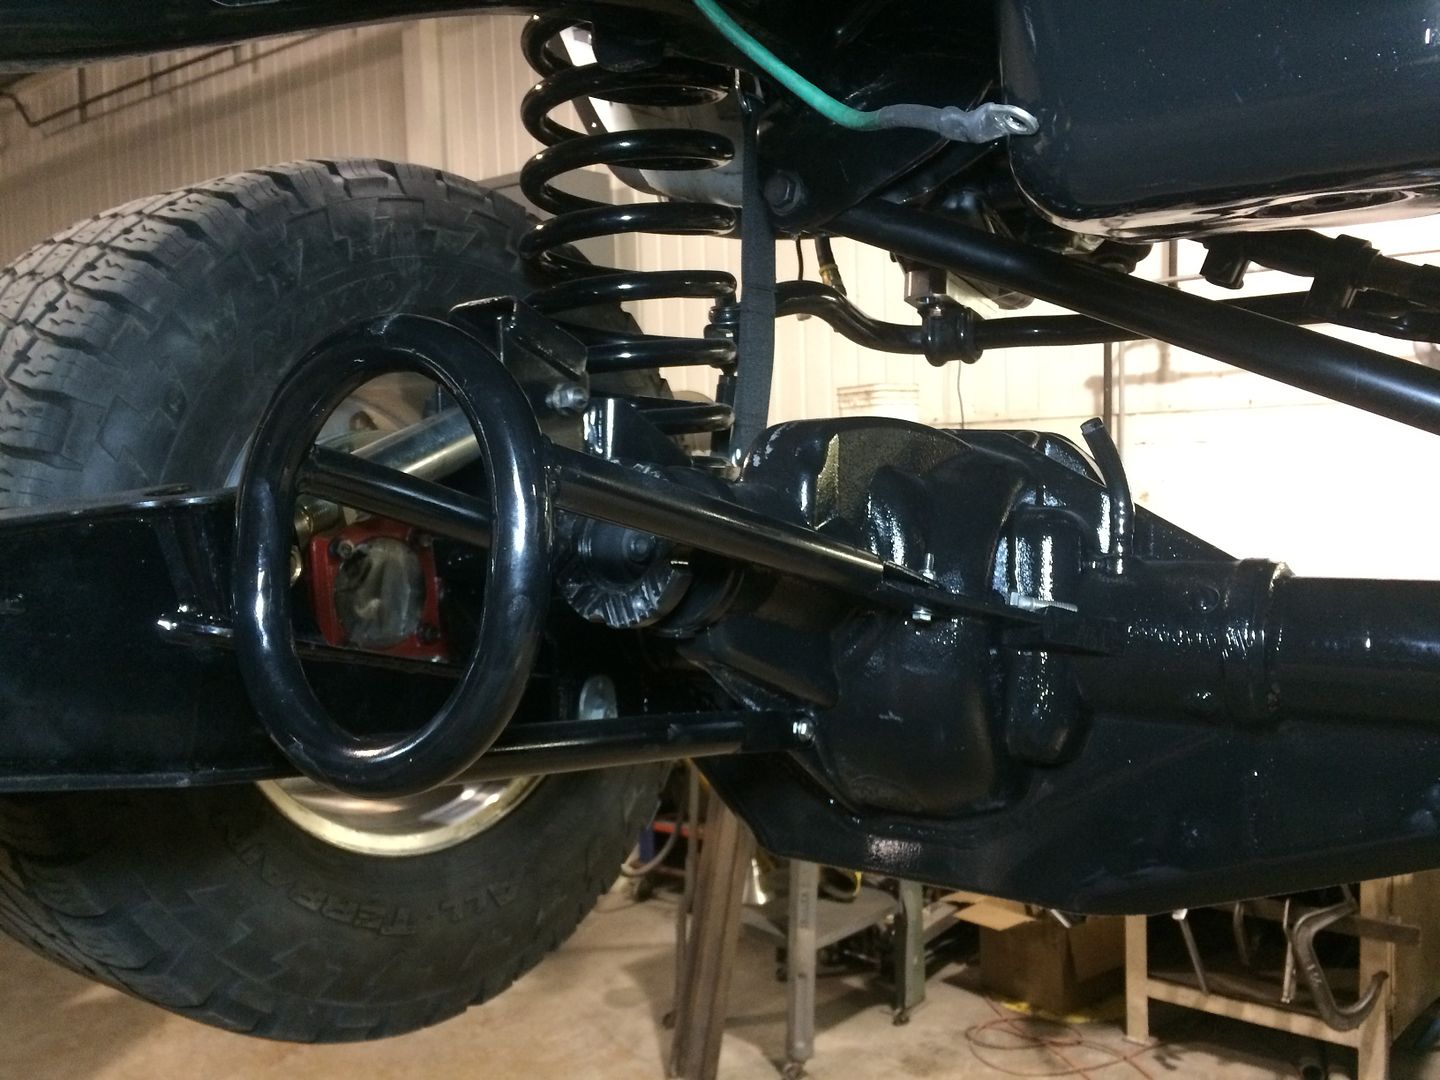
We fabricated a new drive shaft loop from some CM tubing and I decided to make up this loop that will travel with the suspension and yet be very strong if chit happens. This is a bolt on deal and easy to mount.
 [/URL]
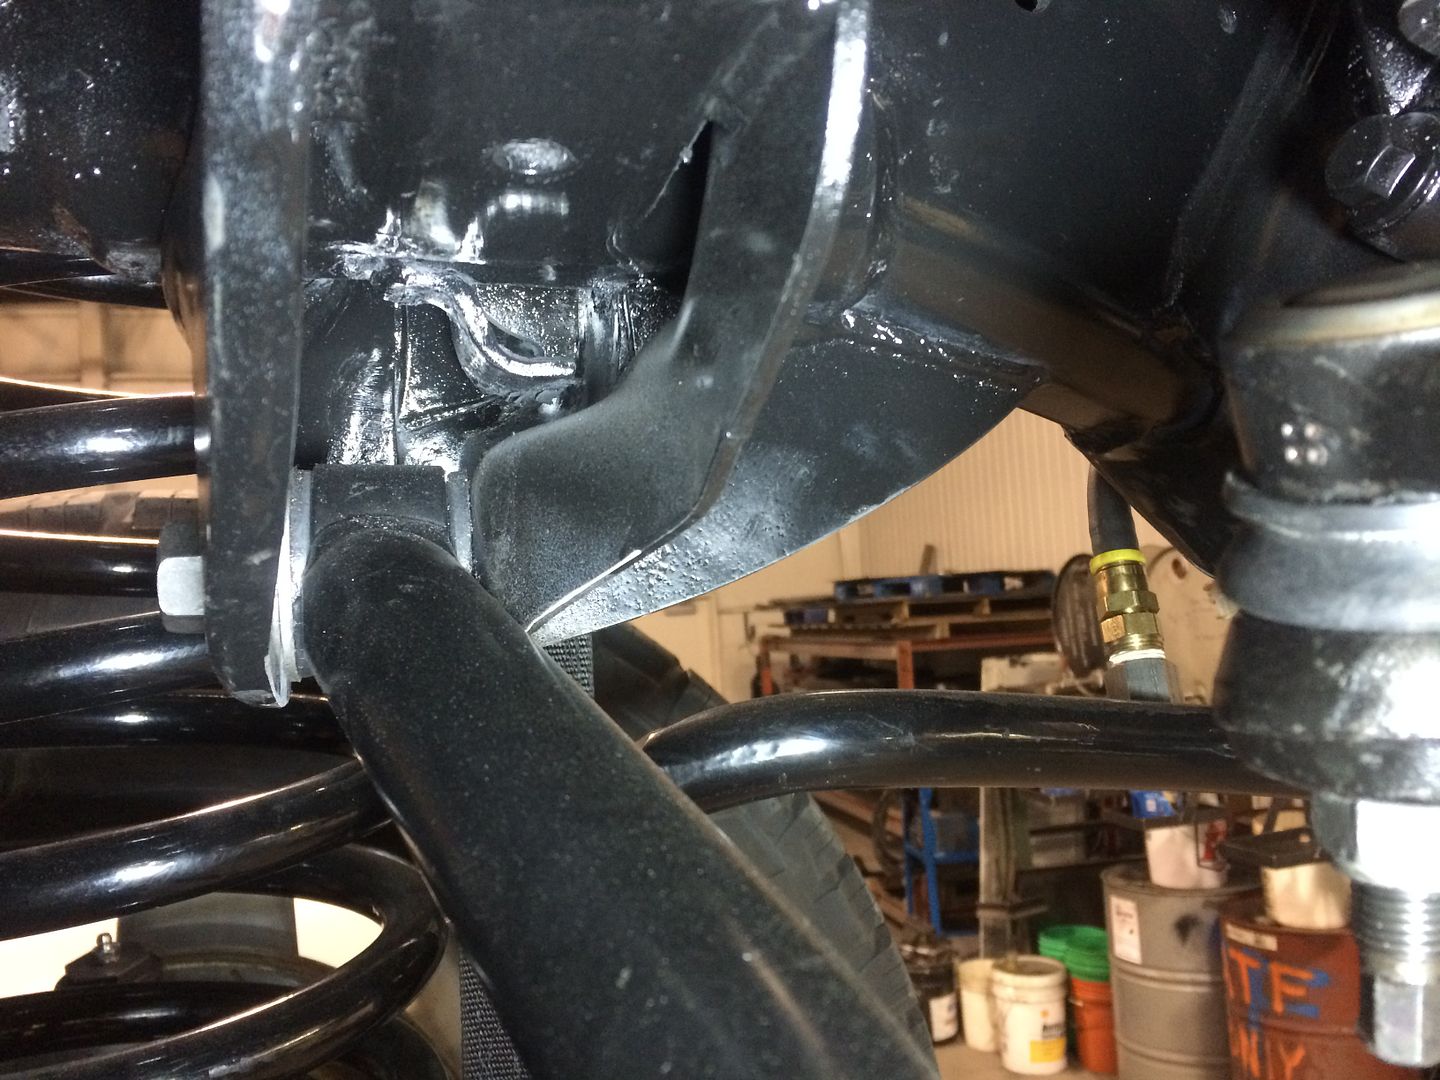
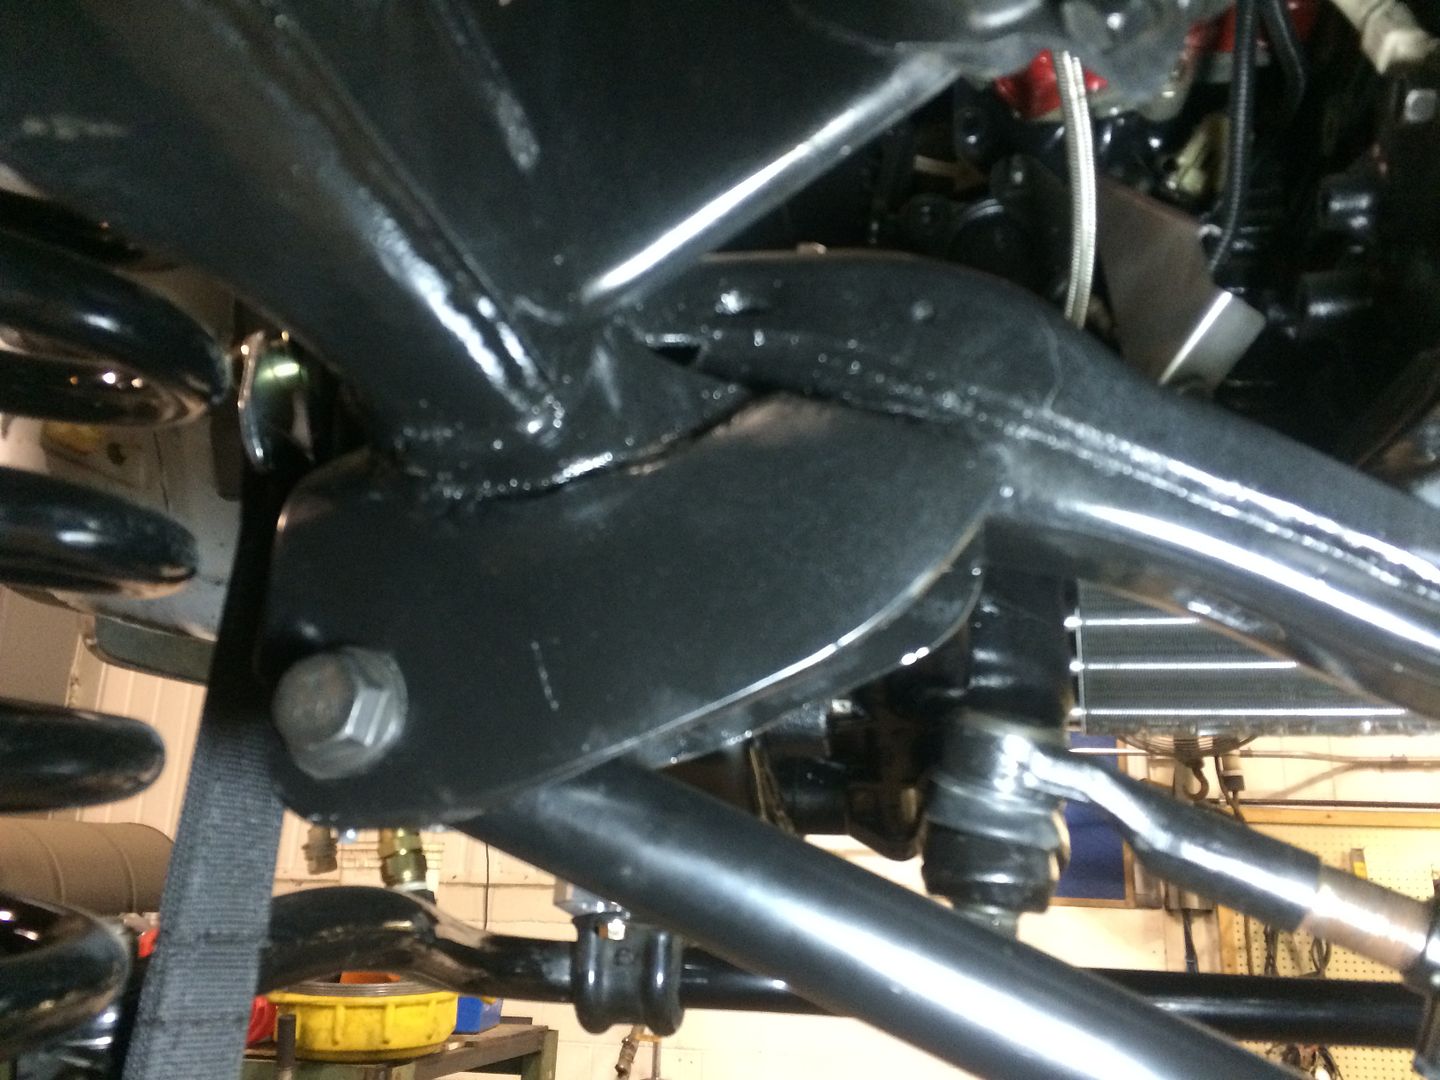
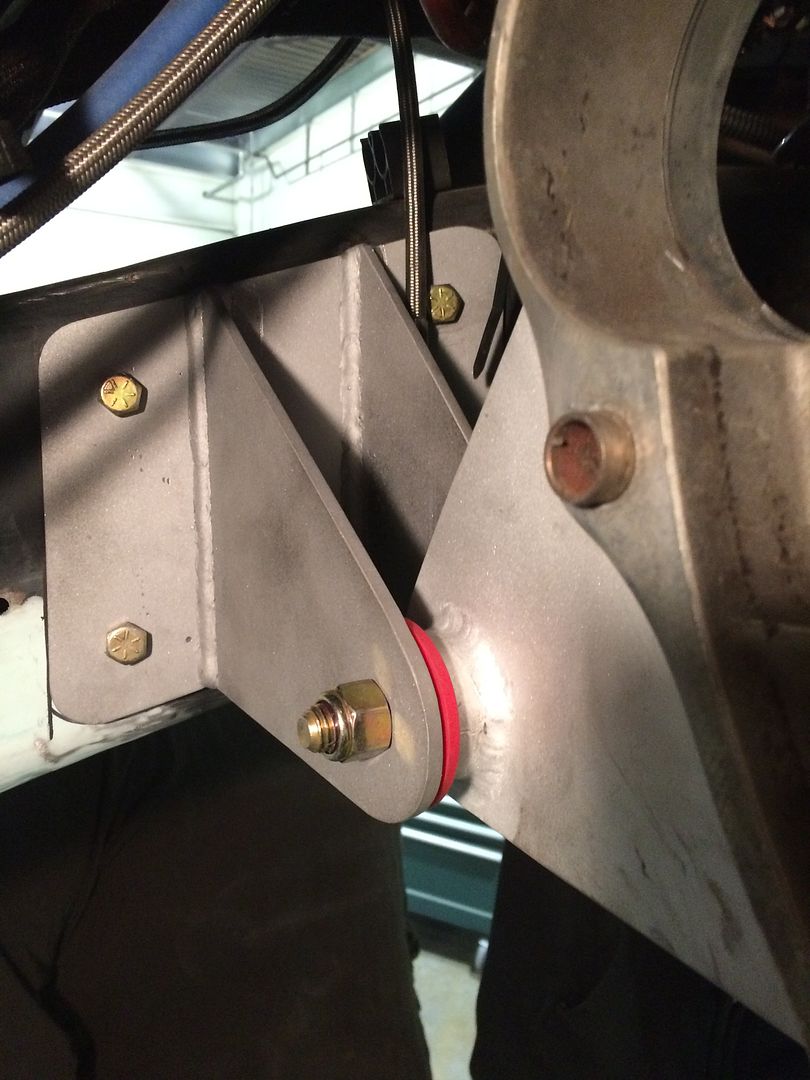
Pictures of the extra plating we did to the trac-bar mount. Installed longer 16mm grade 12.9 shoulder bolts for both to accommodate for the thicker mounting plates and gussets. Absolutely no give front to back and keep the front end in check.
 [/URL]
 [/URL]
 [/URL]
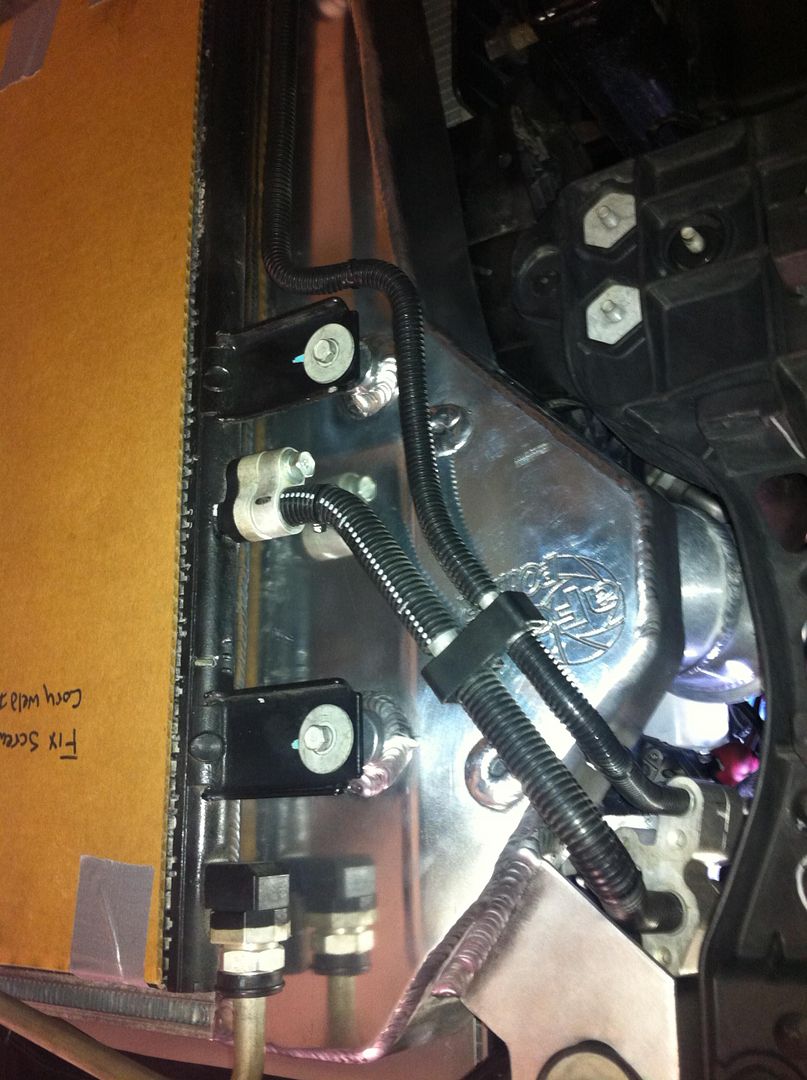
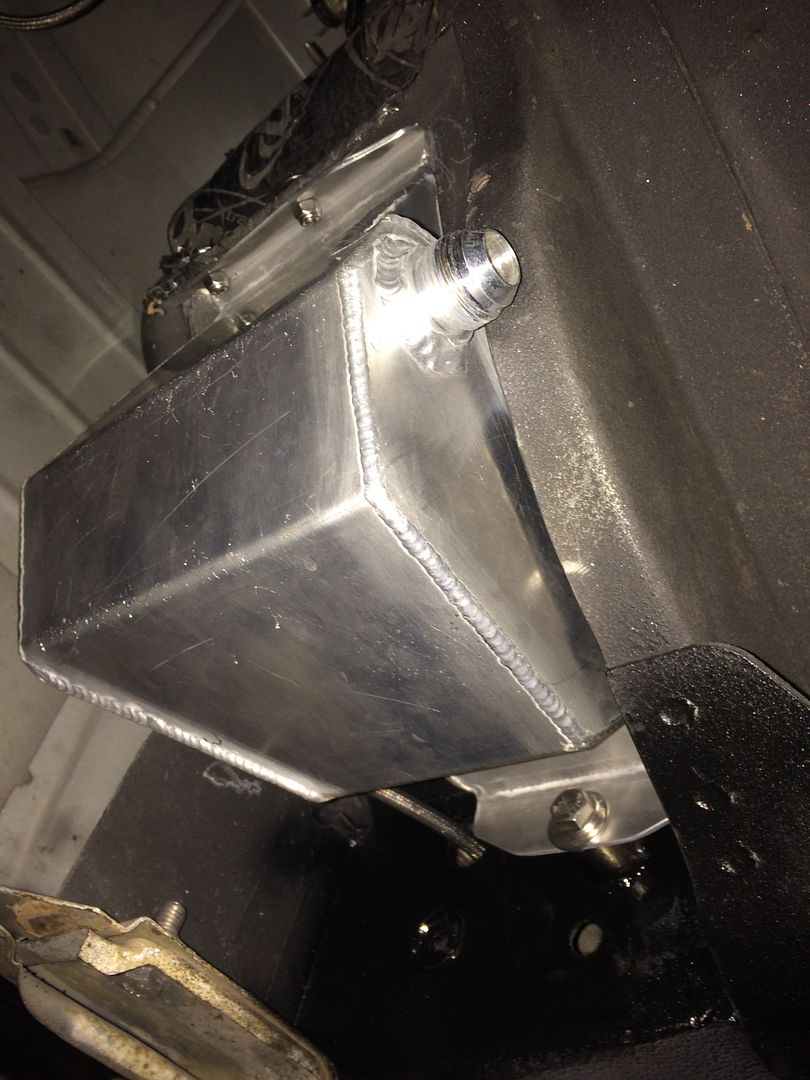
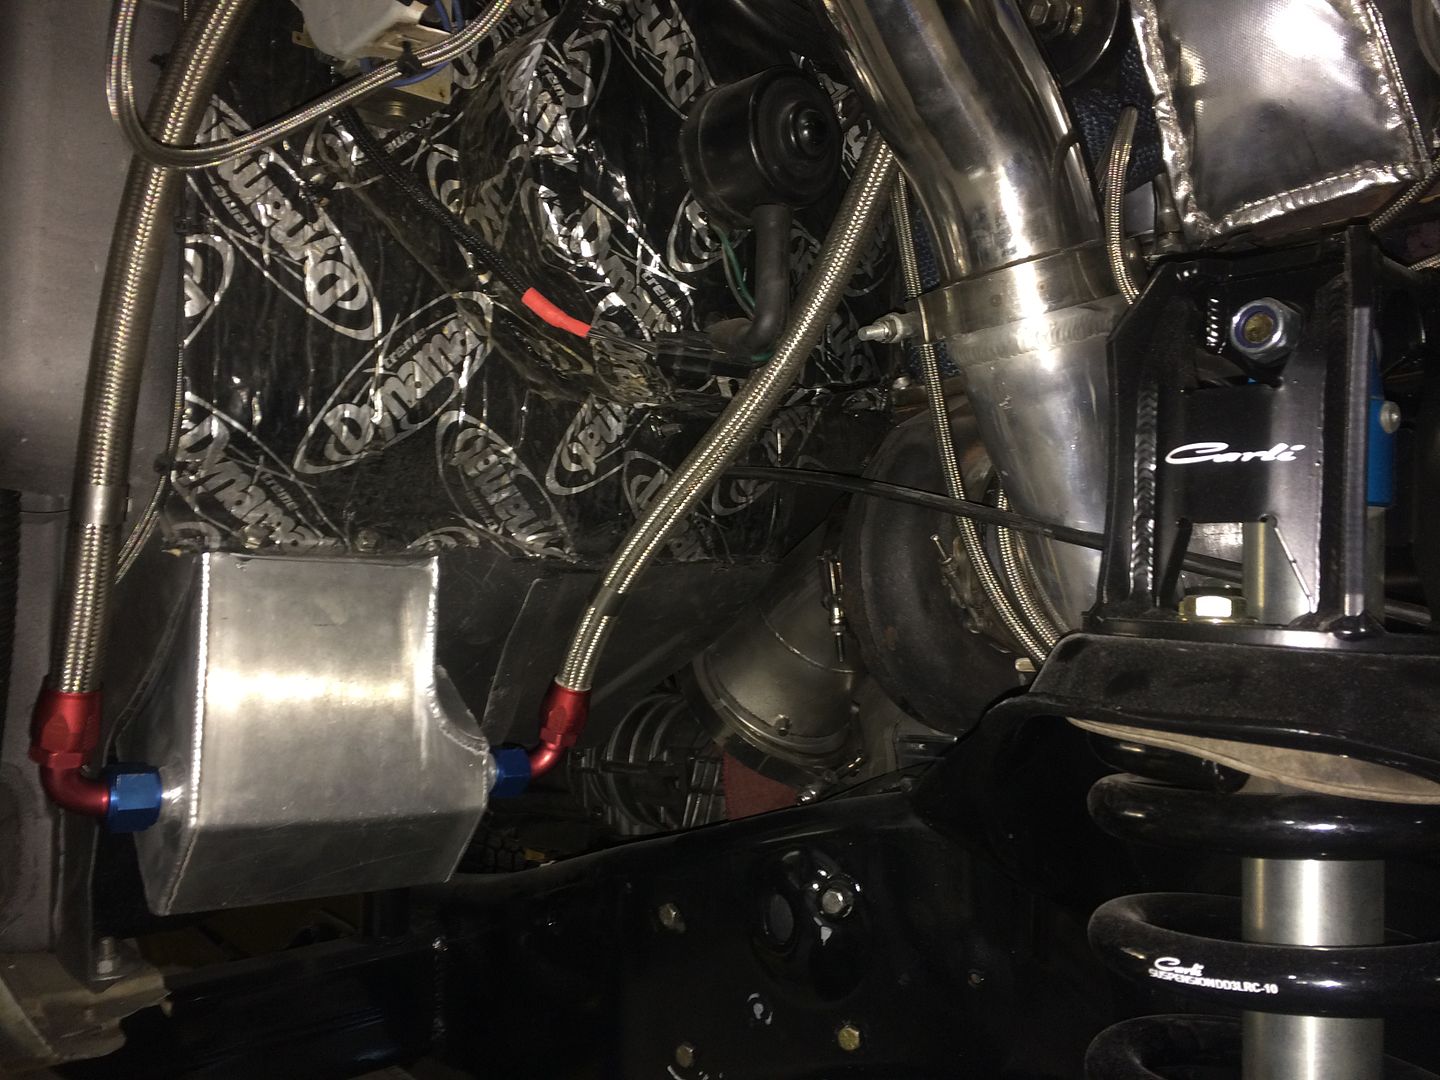
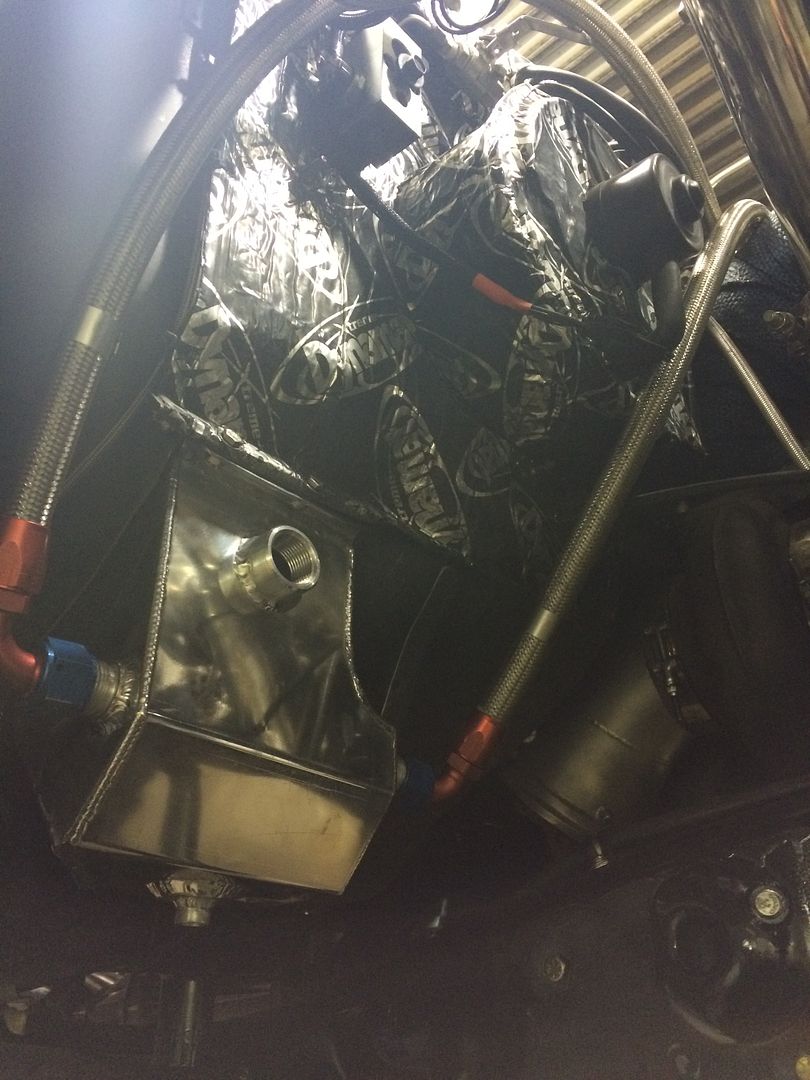
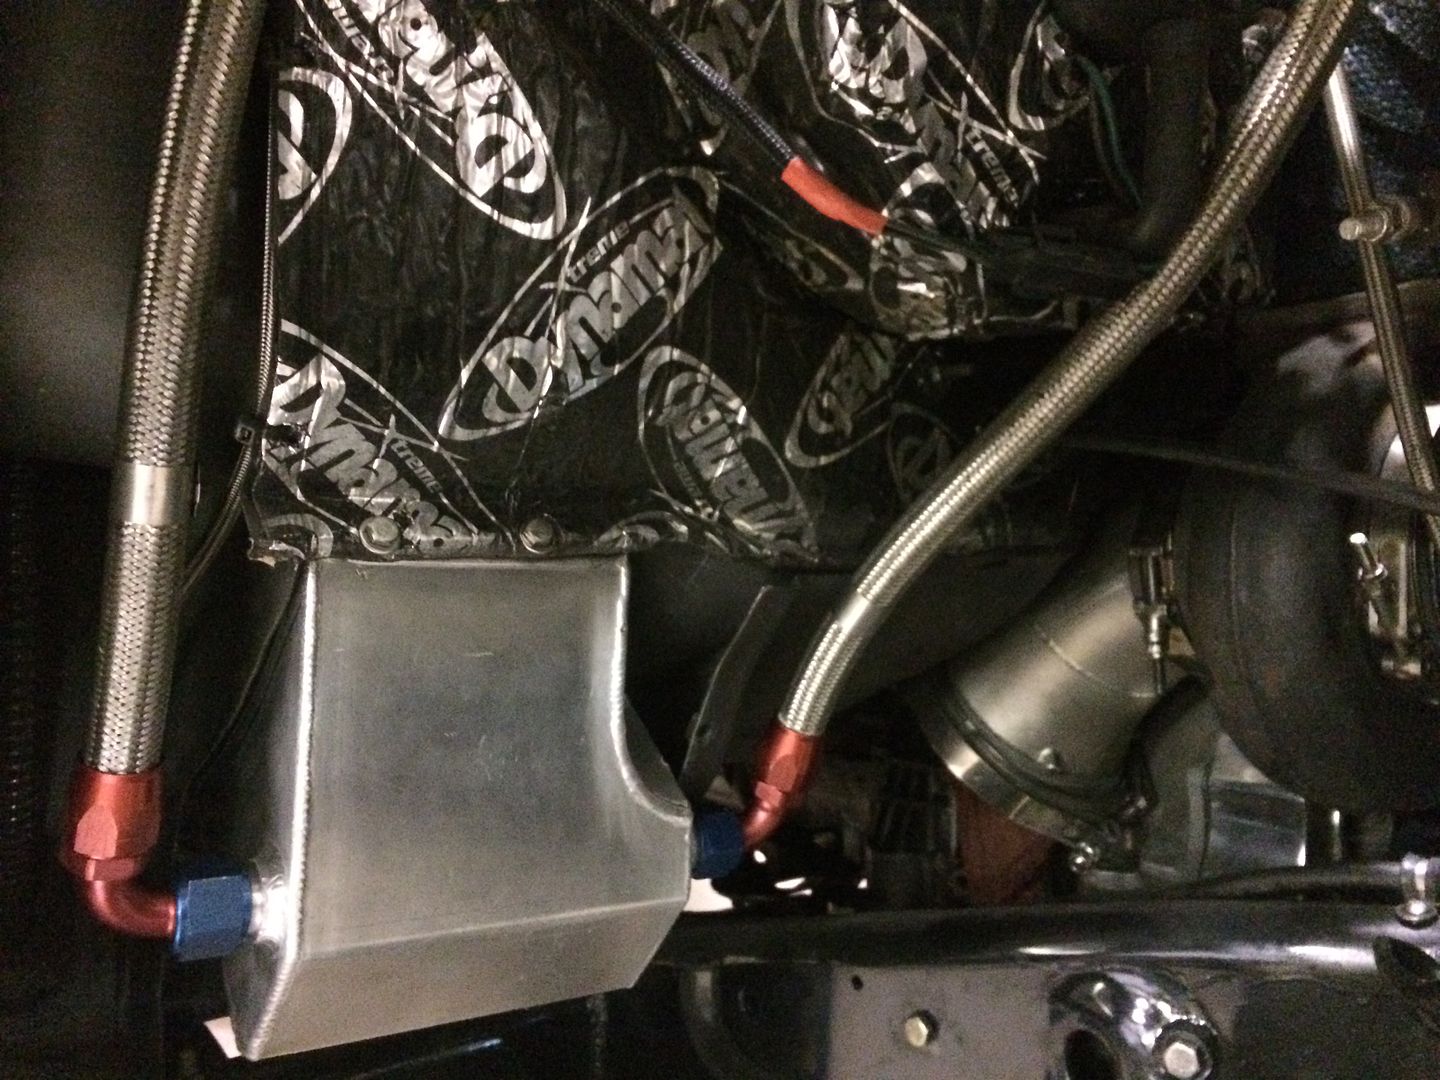
We built a custom breather box and tucked it up into the passenger firewall which is tight and fits the contour for wheel clearance. Two #12 lines from the VC.
 [/URL]
 [/URL]
 [/URL]
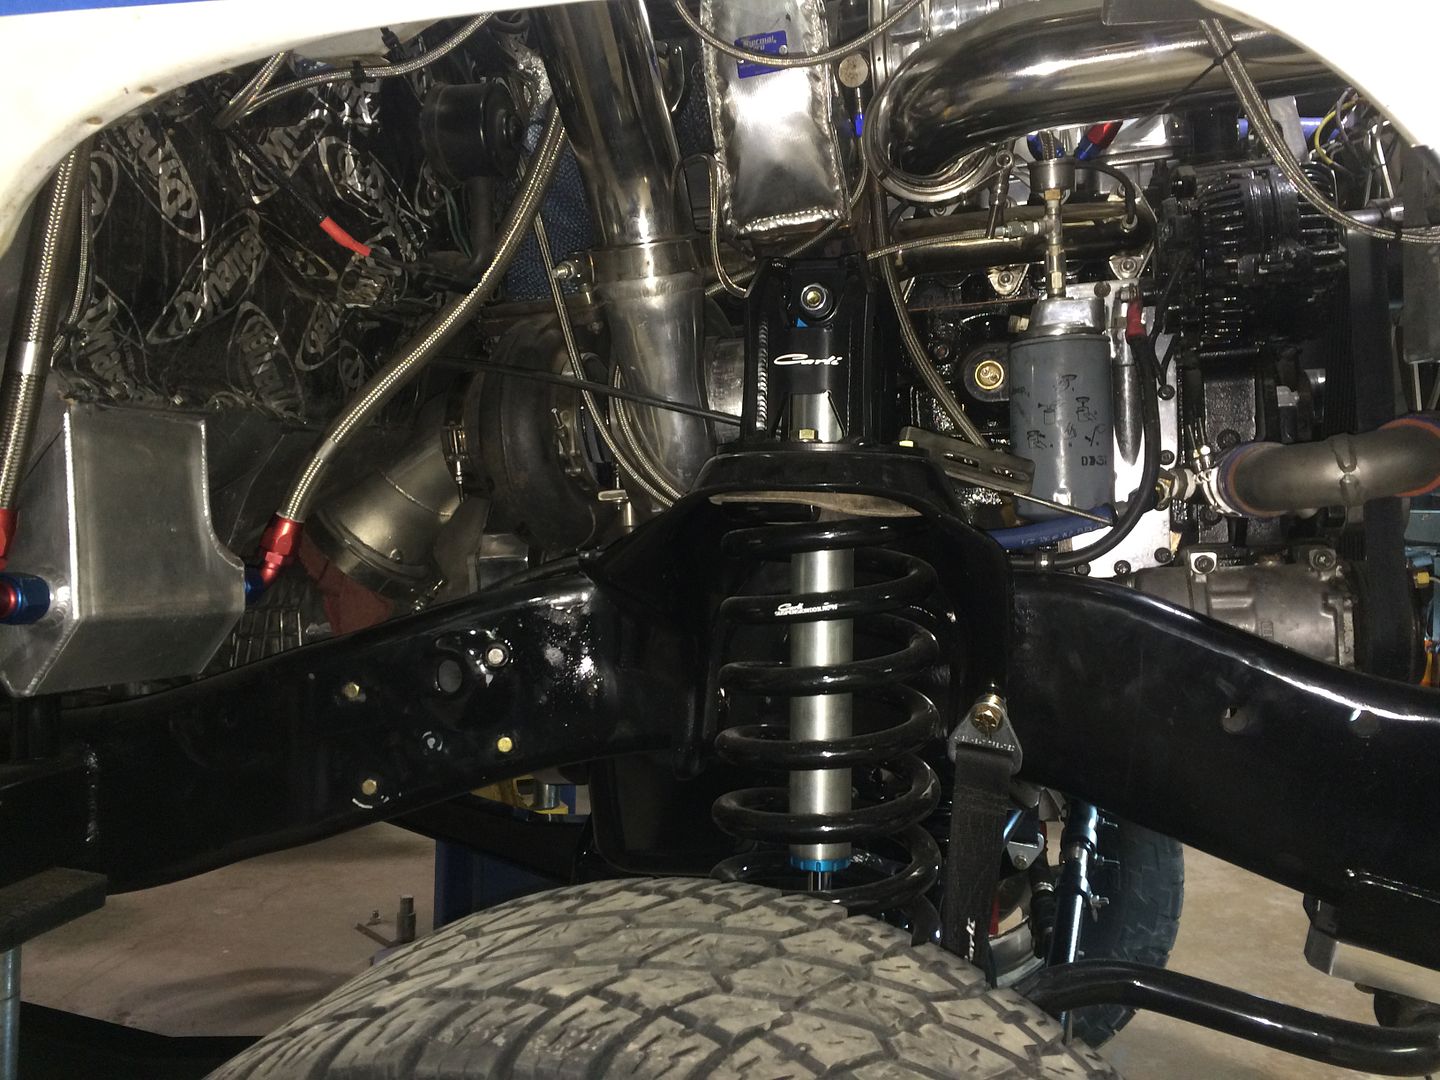
It does look silly with those temp 2.0 shocks in there and beefy towers :hehe:
 [/URL]
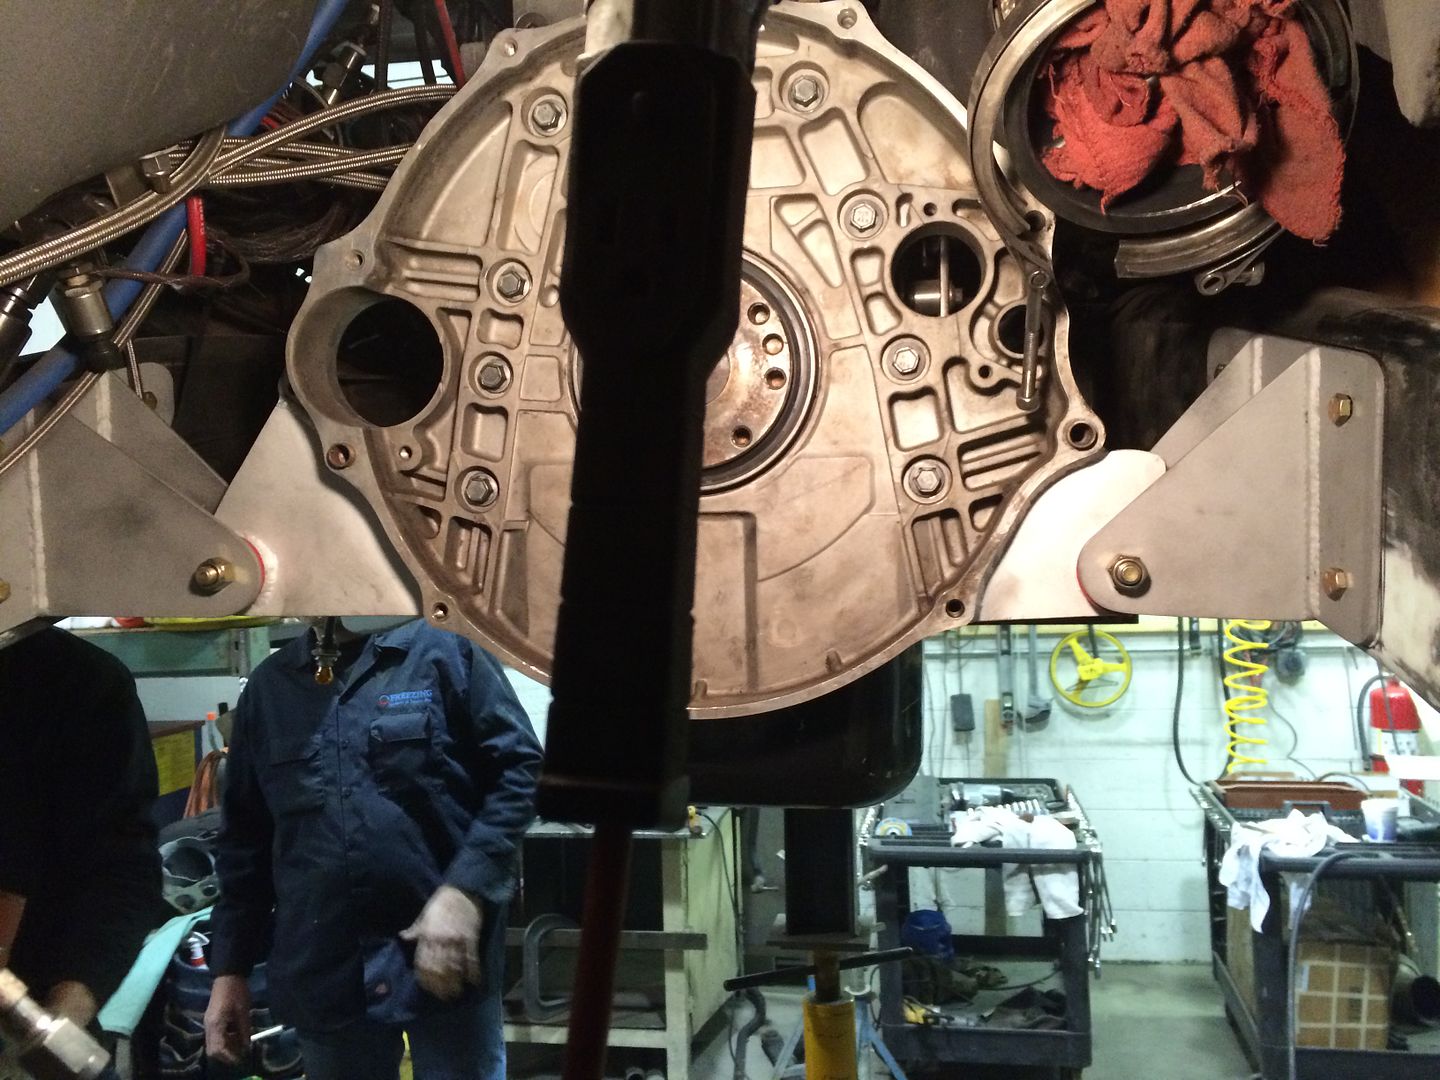
Since the motor can take a beating from impact and torque we fabricated up some rear engine mounting plates. Turned some holders in the lathe to fit and welded the ear's to the trans adapter plate. The frame mounts we made to bolt on. Surprisingly it did not add to much more vibration in the cab and chassis.
 [/URL]
 [/URL]
 [/URL]
 [/URL]
 [/URL]
This was a good feeling seeing parts and fabrication work coming together!
We fabricated a new drive shaft loop from some CM tubing and I decided to make up this loop that will travel with the suspension and yet be very strong if chit happens. This is a bolt on deal and easy to mount.
Pictures of the extra plating we did to the trac-bar mount. Installed longer 16mm grade 12.9 shoulder bolts for both to accommodate for the thicker mounting plates and gussets. Absolutely no give front to back and keep the front end in check.
We built a custom breather box and tucked it up into the passenger firewall which is tight and fits the contour for wheel clearance. Two #12 lines from the VC.
It does look silly with those temp 2.0 shocks in there and beefy towers :hehe:
Since the motor can take a beating from impact and torque we fabricated up some rear engine mounting plates. Turned some holders in the lathe to fit and welded the ear's to the trans adapter plate. The frame mounts we made to bolt on. Surprisingly it did not add to much more vibration in the cab and chassis.
Freezingsystems
Modify Everything
- Joined
- Jan 18, 2010
- Messages
- 1,130
khaoskustoms
New member
- Joined
- May 1, 2010
- Messages
- 1,707
Wow. Unreal build.
Freezingsystems
Modify Everything
- Joined
- Jan 18, 2010
- Messages
- 1,130
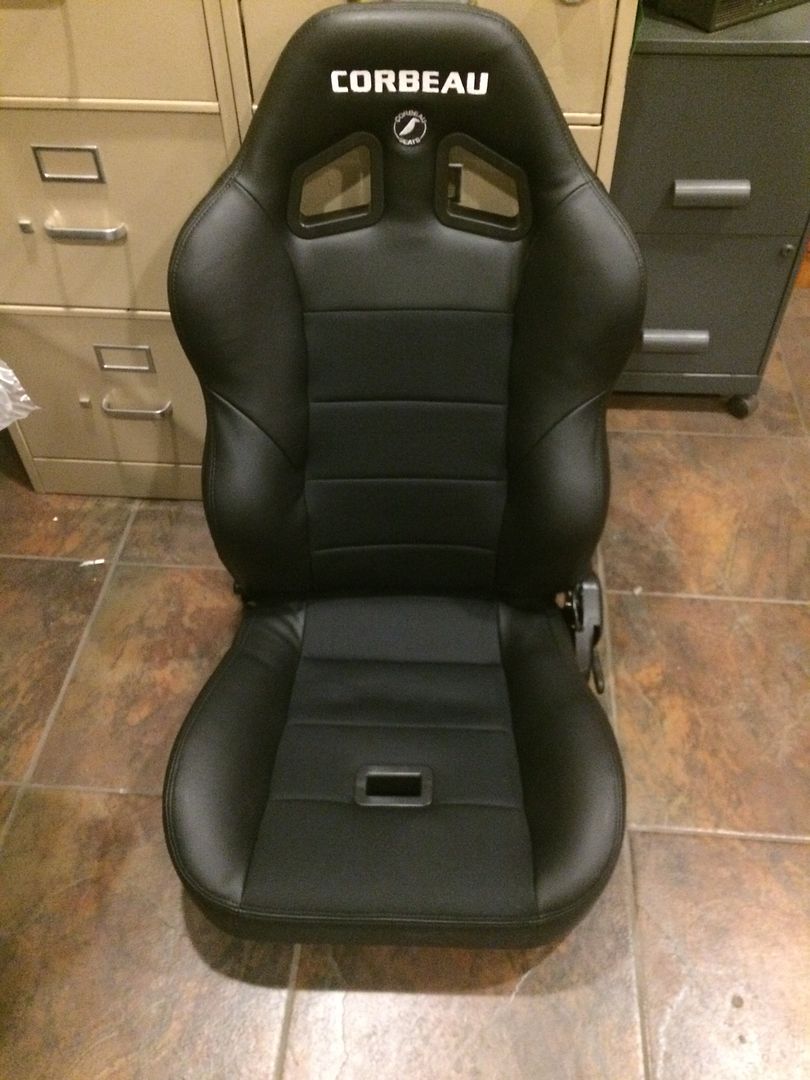
Ordered a new pair of these XRS suspension seats. They are nice I added seat heaters to the build so now my first gen has heated seats. :hehe:
 [/URL]
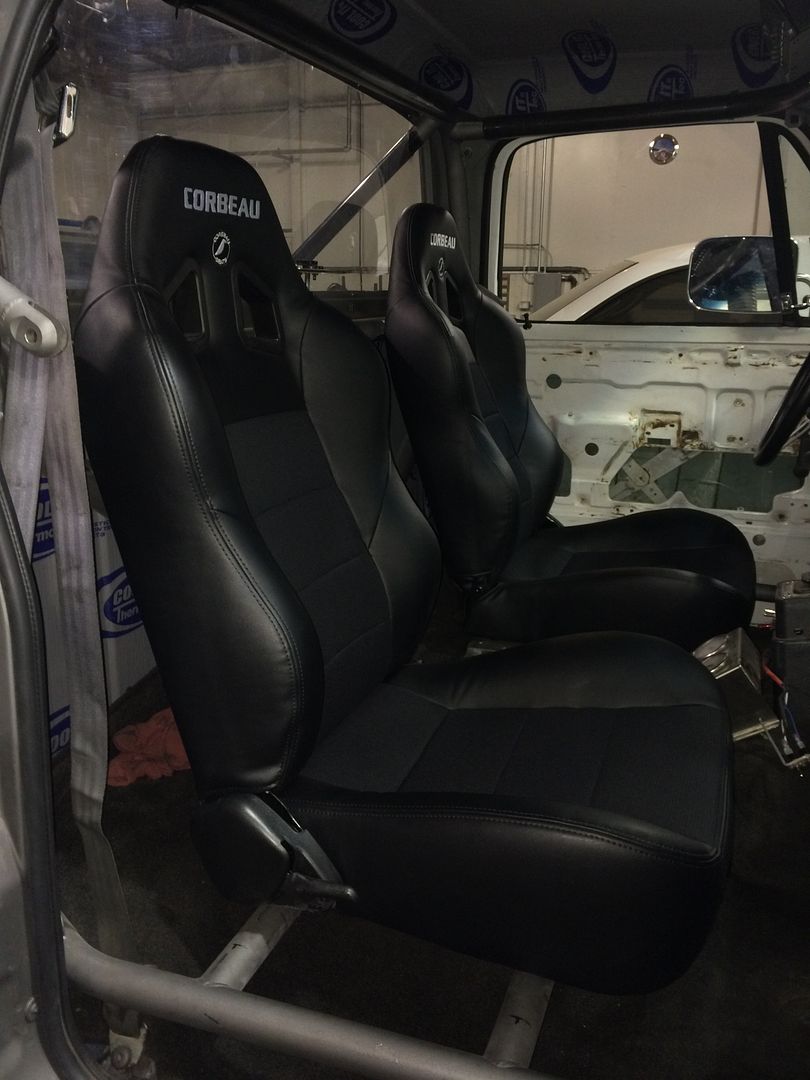
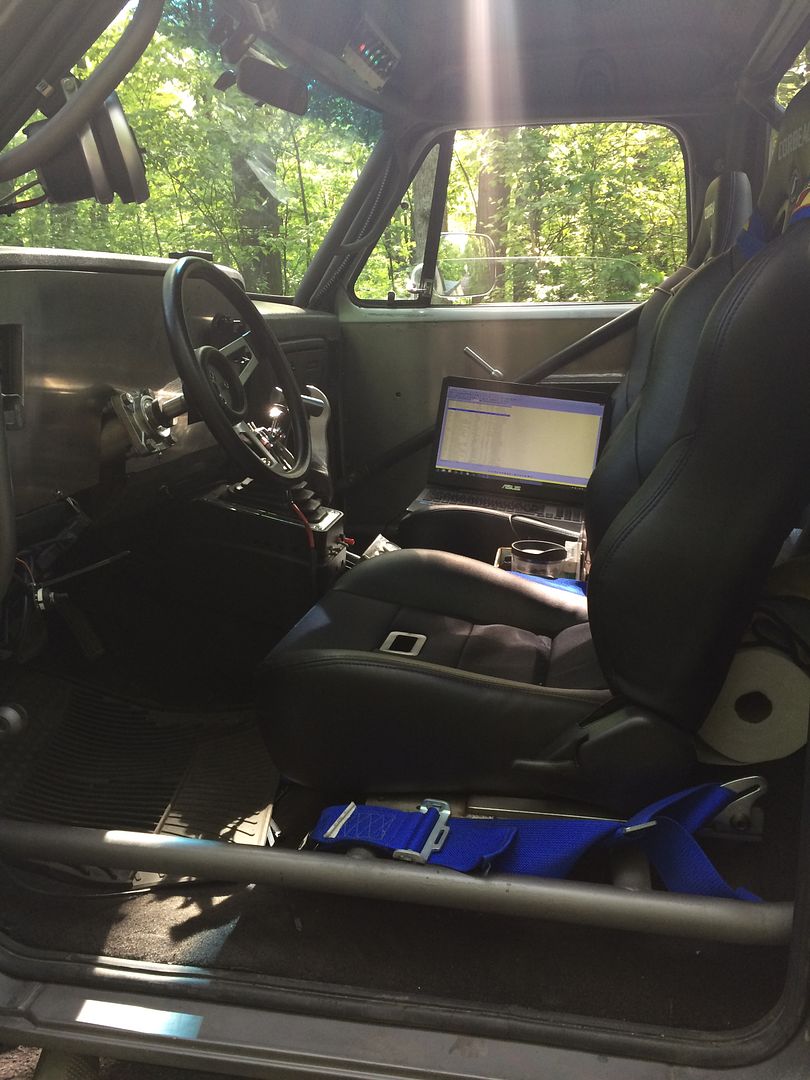
Fabricated and welded some heavy low mount seat bars to the cage and drilled the hole pattern that is under the seat with good hardware. They are very secure and comfortable. I am 6'2" and with the cage taking some space in the rear of the seat I have plenty of room to stretch my legs.
 [/URL]
 [/URL]
Had some time to make up #12 lines to my breather box.
 [/URL]
Fabricated and welded some heavy low mount seat bars to the cage and drilled the hole pattern that is under the seat with good hardware. They are very secure and comfortable. I am 6'2" and with the cage taking some space in the rear of the seat I have plenty of room to stretch my legs.
Had some time to make up #12 lines to my breather box.
Freezingsystems
Modify Everything
- Joined
- Jan 18, 2010
- Messages
- 1,130
Wow. Unreal build.
Thanks :Cheer:
Freezingsystems
Modify Everything
- Joined
- Jan 18, 2010
- Messages
- 1,130
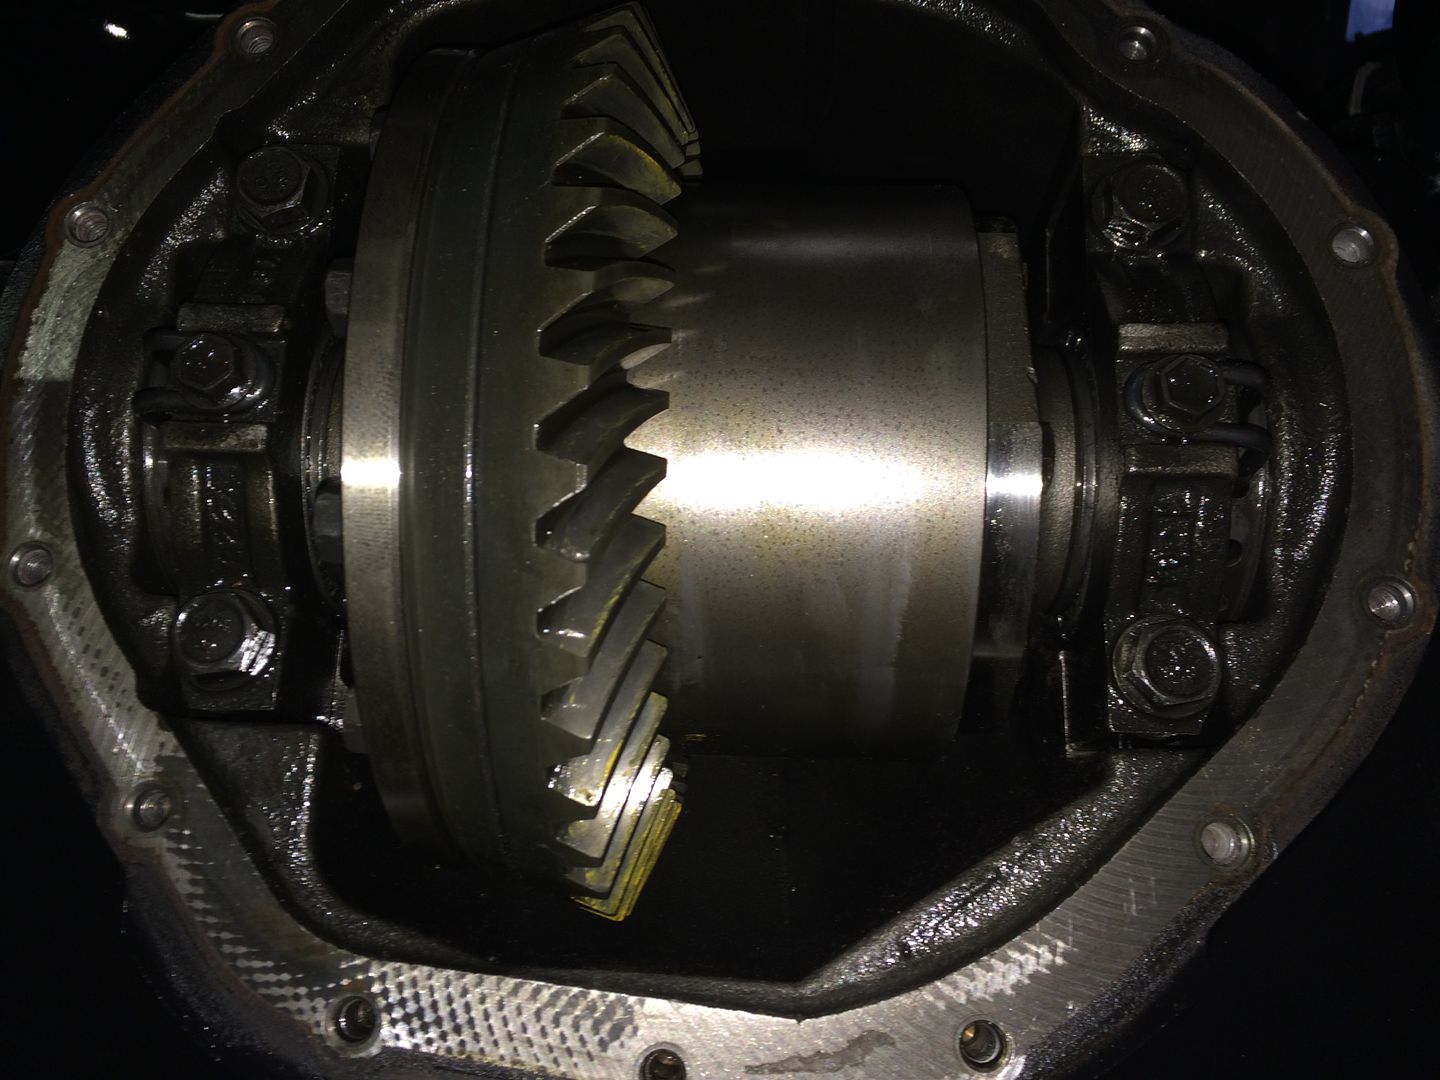
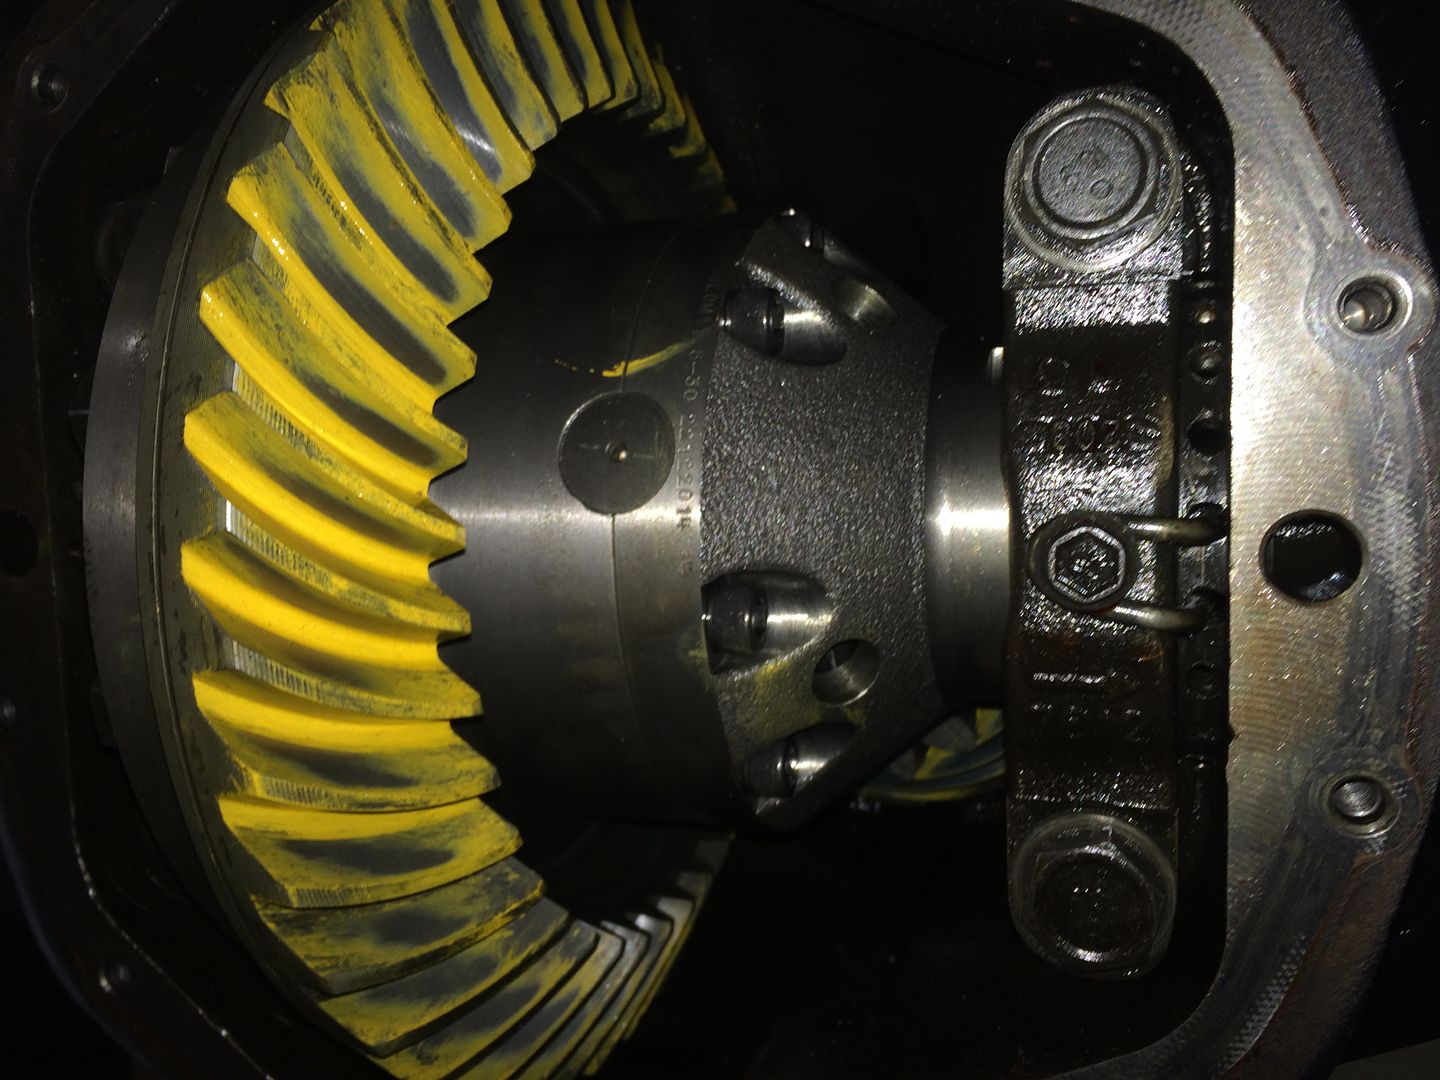
Installed my new AAM 9.25 Detroit Tru-trac for the front.
 [/URL]
 [/URL]
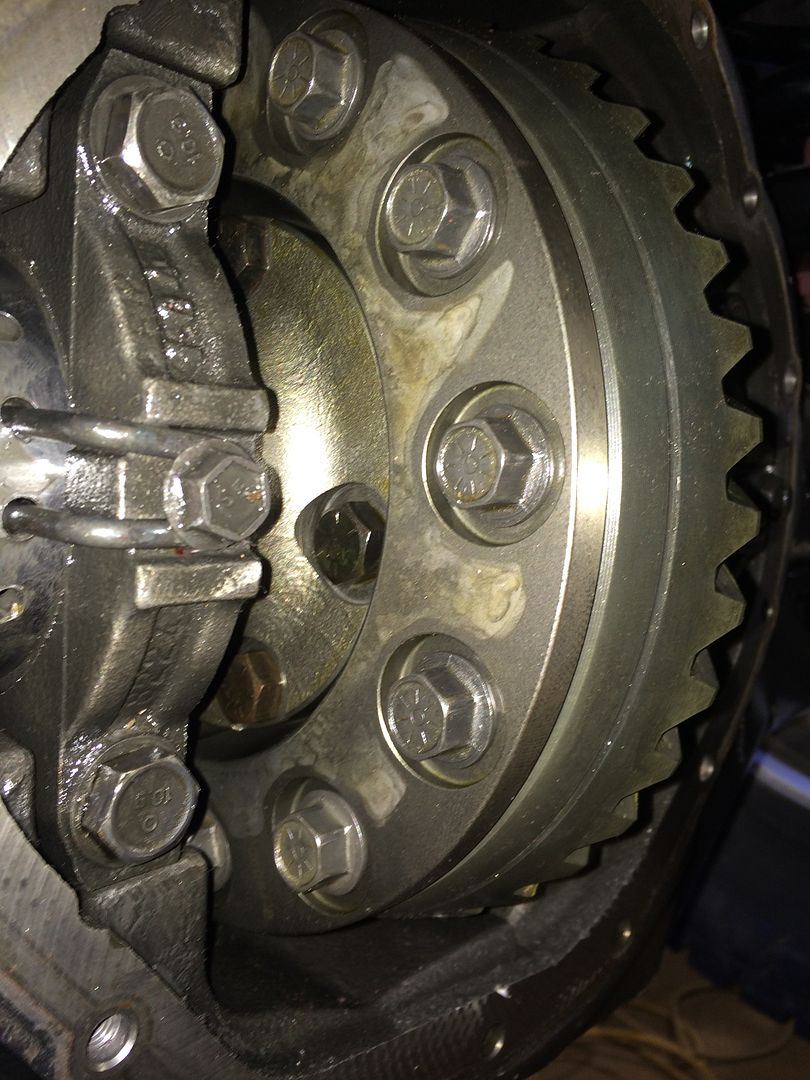
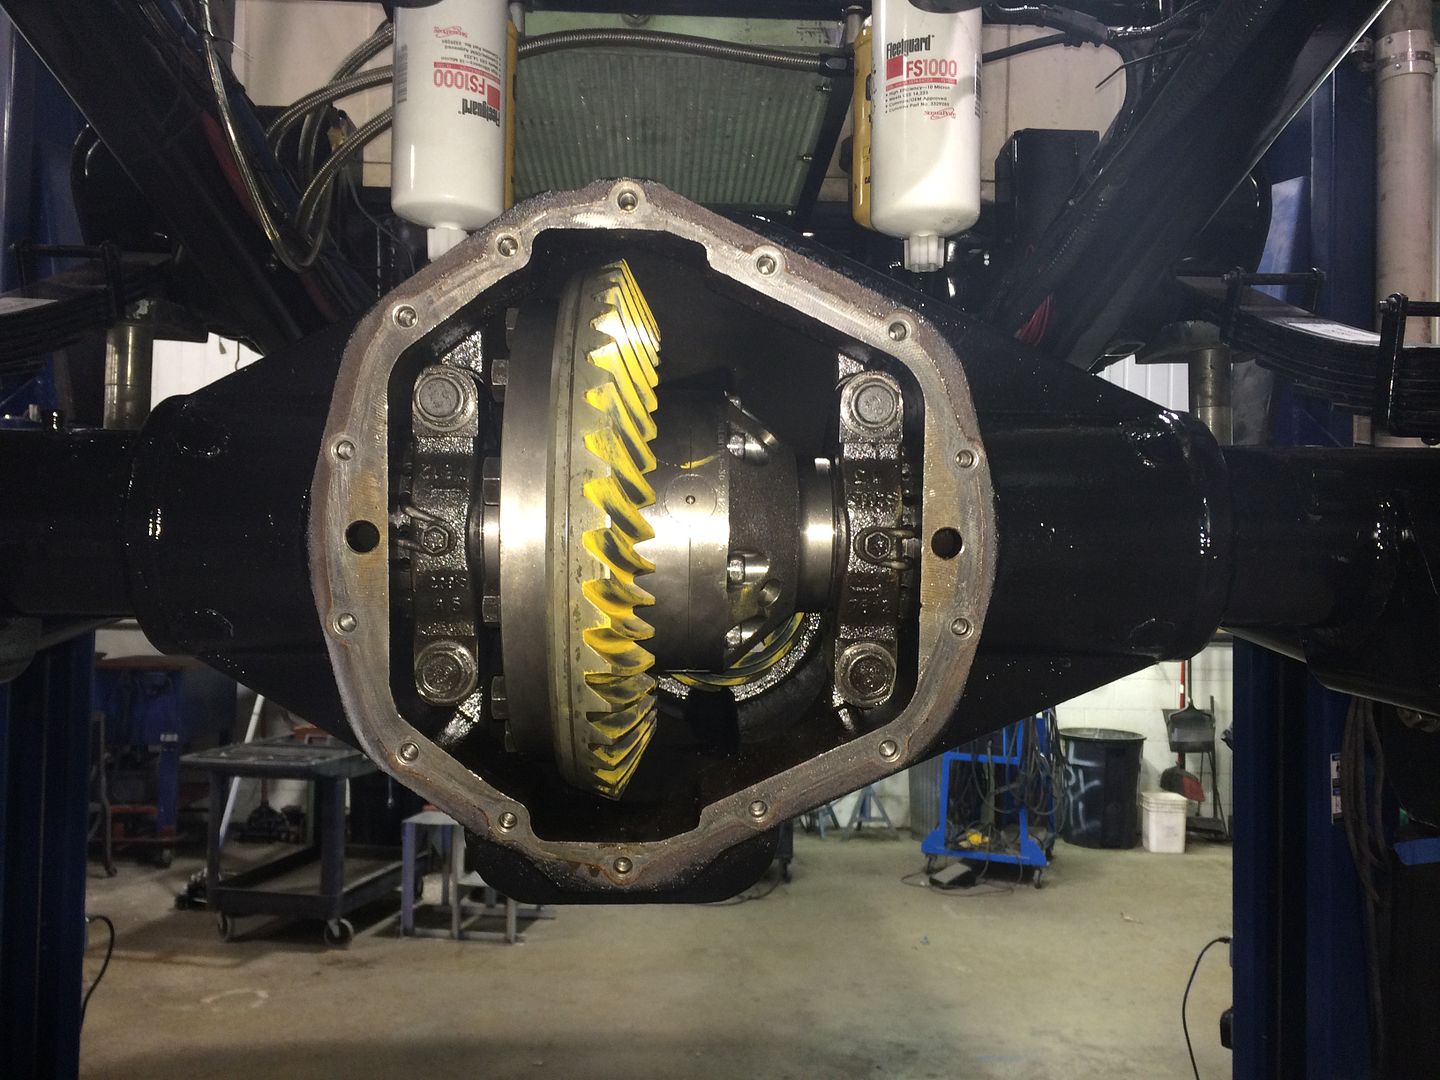
New AAM 11.5 Grizzly Locker for the rear.
 [/URL]
 [/URL]
New AAM 11.5 Grizzly Locker for the rear.