95' Junker Drag Truck

Well, I replaced the head gasket with a .020" oversize, bolted everything back together, and made a few upgrades.

First I exchanged the turbine wheel on the HE351cw to the HX40 wheel with the larger dimensions.

HE351mods1_zpsbf4d7f4f.jpg


HE351mods3_zps9a68dd0c.jpg


HE351mods5_zpsacdbec10.jpg


HE351mods4_zpsef7a85b7.jpg


HE351mods6_zps96ff57cd.jpg


I also upsized the injectors from 5x.018" to 5x.025" with the same 145* VCO style nozzle with similar needle work.

RaceInjectors2_zps5fd7ca86.jpg


RaceInjectors3_zps700b74e4.jpg


RaceInjectors4_zps6b81e545.jpg


RaceInjectors1_zpsbae3eccb.jpg


Also visible are the ARP 2000 studs that I used this go around in lieu of the head bolts. These were purchased used for a large discount over the $400+ original price. I'm not confident they will be enough if the headbolts were not enough last go around, but for the price I paid, they are worth a shot.


I also made a few changes inside the transmission to increase line pressure and raise the shift points via governor weight mods. No pictures of this work, basically put the brass weights in the lathe and started shaving them down.
 
Last edited:
I hit up the street legal drags at Las Vegas Motor Speedway this past friday night with disappointing results.

First off, with zero track prep and tons of street tire passes, traction was nowhere to be found, even with the 29.50 x 11.50 slicks. It spun really bad on both passes and the poor 1.88 and 1.86 second 60' times prove the slick conditions.

Secondly, the wastegate reference line blew off on both passes thereby keeping the wastegate closed and overspeeding the small turbo and underspooling the bigger HT4B. When I checked the gauges, I recall 85psi boost and 40psi from the HT4B. On the prior 10 second passes, the HT4B was pushing 65psi. The motor was also popping above 2800 rpm like it was running out of fuel with the bigger injectors. To make matters worse, I wasn't shifting properly and 1-2 was happening around 2400 rpm vs 3000-3100 prior and 2-3 shift was way high up near 3800 rpm whereas before it was 3100-3200 rpm.

All of these factors combined to make two despicable 12 second passes... Yuck! I hate going backward in performance. For those wondering, I broke several of my own rules by modifying too many things at once so I don't really know if any of the upgrades were beneficial and simply overshadowed by the other problems: shift points, wastegate reference line.

Timeslip7191_zps03eb430c.jpg


Timeslip7192_zps635d2bb5.jpg


So from here, I plan to go back to the smaller injectors just to remove that variable. If it's still down on power, the turbo mod and oversized gasket are the only two areas to blame and the oversized gasket is staying!
 
Time got a second Holley Black knockoff pump run in parallel!

I'm sure being on the street took you back a bit too. And it doesn't get much easier than fixing a reference line that blew off.


When's the next event?
 
I heard a rumor these compounds and the 5x.018s are going in the street truck in the somewhat near future. I got a ride in a green 2wd 12v that really wants the 5x.016s out of your street truck lol
 
Last edited:
Roll Cage Installation:
The time has arrived to increase the safety equipment in the Junker Drag Truck.

First step was to remove the back window, it didn't want to come out whole and from the pictures, it's clear it shattered. I unfortunately lost those nice Diesel Performance Converters decals in the process.

RollC1_zpsae71c5c1.jpg


RollC2_zps8e506350.jpg


RollC3_zps8b9ff159.jpg


I started using the main hoop to layout my cuts in the floor boards.
RollC4_zps29ecd97e.jpg


I made crude cuts using a 4-1/2" grinder with metal cut-off wheel, it's not pretty but it's fast and got the job done.
RollC5_zps37281986.jpg


I used a ratchet strap to hold the main hoop up while tack welding the outriggers to the frame below the cab.
RollC6_zpsd5b03865.jpg


The main hoop came down through the cab reinforcing near the cab mounts. Then I added 2"x3" outriggers.

RollC10_zps2731a72e.jpg


RollC9_zpsb56e164c.jpg


With the main hoop tacked in-place, I started removing the dash to make room for the front pillar uprights. Since this is now a 95% dedicated race vehicle, the dash will not be re-installed and therefore it was removed as quickly as possible using the crow bar and sledge hammer method:
RollC7_zpsb5ae616c.jpg


After cutting the steel supports free from the driver's side:
RollC8_zpsea9afc87.jpg


Next week will include more pictures as the roll cage installation progresses to completion.
 
Last edited:
Looking good man. What's the wall thickness on those outriggers? They look a little thin. I ran the cage pipe all the way through the outrigger so you've got more area to weld. It drastically improves the strength. Especially on thin tubing.
D84B2CD1_zpsad170b3d.jpg
 
Looking good man. What's the wall thickness on those outriggers? They look a little thin. I ran the cage pipe all the way through the outrigger so you've got more area to weld. It drastically improves the strength. Especially on thin tubing.

D84B2CD1_zpsad170b3d.jpg

Psh, shotty welds. I wouldn't trust a word you said!


jk jk and you should update your sig with times!
 
Psh, shotty welds. I wouldn't trust a word you said!


jk jk and you should update your sig with times!

My times are slow. It just sits there and looks good. :hehe:

But really if you haven't welded it yet I'd build the outriggers a little different. Having the bar go all the way through the outrigger makes it much stronger and building an outrigger like mine it's easier to weld the tops. Again there is more surface area to weld to the frame too.
 
I'd also triangular that outrigger to the frame more. If your truck ends up on its lid with any force it'll shear that outrigger right off the frame-especially since that looks like 1/8" wall.
 
I'd also triangular that outrigger to the frame more. If your truck ends up on its lid with any force it'll shear that outrigger right off the frame-especially since that looks like 1/8" wall.

I appreciate the ideas, it's a work in progress and I won't trust anything with my life that I don't feel is safe.

Did you bend the cage, or using a pre bent cage from s&w

It's a pre-bend cage from Broke Dick Racing, now I believe they go by the name Rhodes Racing or something like that. This cage was a birthday present from a couple years back, it's definitely easier to buy a kit than build one from scratch, especially for a first-time cage install.

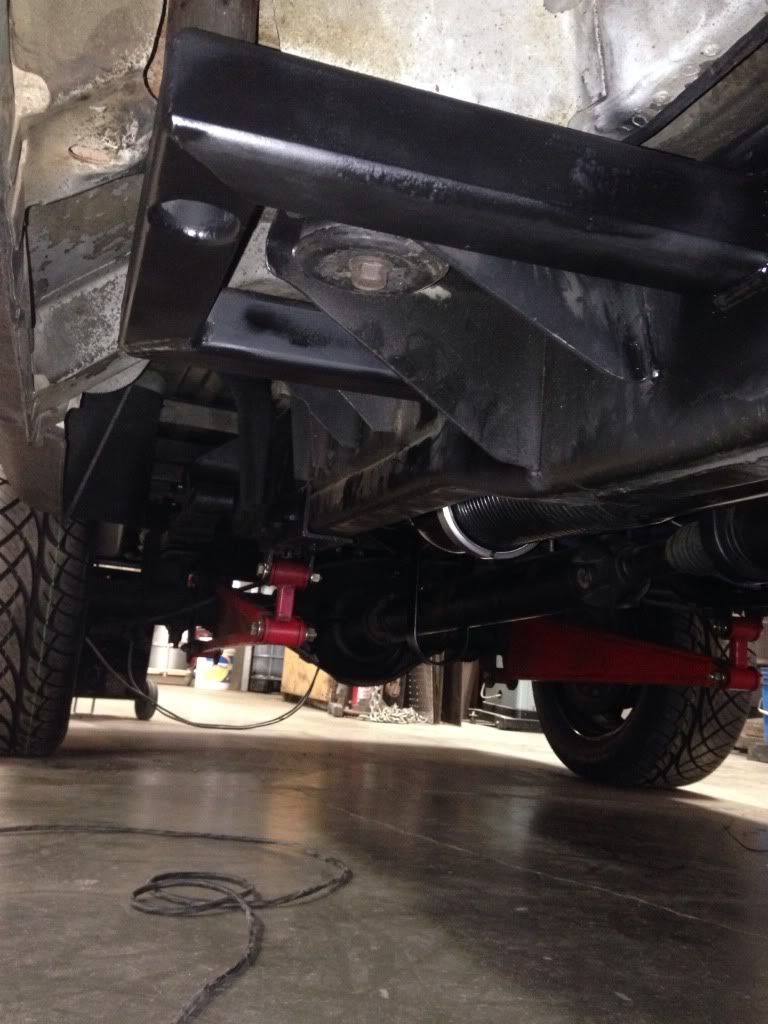
The outriggers are 1/8" wall 2"x3" rectangular tube steel. The top of the outriggers will not be welded, only the sides and the bottom. I will add gussets from the factory frame outriggers/body mounts, down to my added roll cage outriggers. This kit also came with extra bar to add sill bars to tie the main hoop at the outriggers into the front pillar bars. I haven't decided exactly how everything will end up brace/gusset wise but I'll make it SAFE!
 
Tonight the halo was cut to fit and tacked in place. I had to use a ratchet strap to shrink it down from the as shipped 52" wide outside measurement to the required 50" wide measurement to get the halo up high on the main hoop where it belongs. I'm still a fairy inexperienced fabricator so it takes a while to get everything fitted and notched correctly using a hand grinder.

RollC2_zpsfd931727.jpg


RollC3_zps079b92cc.jpg


Fit it up near the windshield to roof transition, this seems like the best location to make the pillar bars work. If I was custom bending a cage, I'd stop the halo a few inches rearward so it can be tucked up higher in the roof area. I'm average height and there is 4" from my head to the halo when seated in factory driver's seat.

RollC4_zps04478007.jpg


RollC5_zps504496cf.jpg
 
I'm not quite done yet. But instead of using the standard bracket, I incorporated the roll bar mount in to the body/frame mount already in place so that one supplements the other.


P1070512_zpsc47ed441.jpg


P1070515_zps573b1bea.jpg
 
Something I found to make it easier to fab is to use construction paper. Here is what I do:
1. Find a scrap piece of cage tubing with a clean 90 degree end cut.
2. Wrap with about a 6" or so piece of construction paper so paper overlaps at least twice. Using PVC as that is what I had laying closest to my desk.
20140812_230938_resized_zpsaa681d7d.jpg


3. Slide paper so it hangs out over end of tubing.
4. Using the construction paper, mark your notch on that piece of paper.
20140812_231059_resized_zps41a60462.jpg


5. Trim the paper until it fits the notch perfect.
20140812_231226_resized_zps67eec86f.jpg


6. Slide the paper onto the cage piece that needs notched and mark the notch.
20140812_231314_resized_zpsd8b37729.jpg


For clarity:
20140812_231323_resized_zps557de85f.jpg


7. Cut the notch to the mark and presto! Takes some of the guessing and "awe hell I'll fill it with weld" from the fab.
20140812_232357_resized_zpsa2b7ac1e.jpg
 
Back
Top