1972 Chevy K30 Longhorn Cummins Build

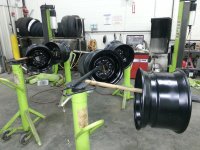
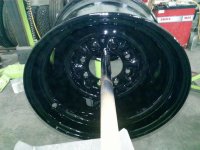
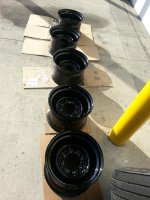
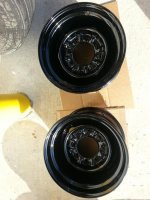
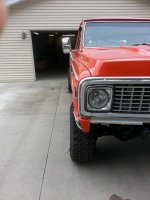
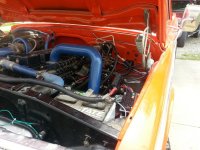
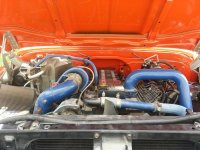
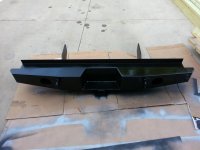
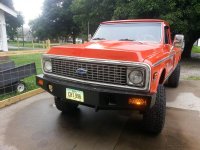
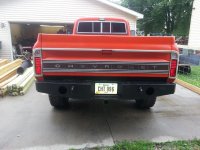
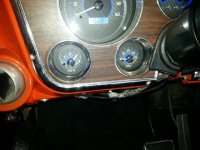
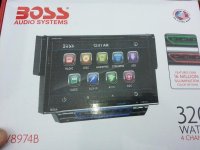
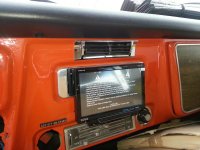
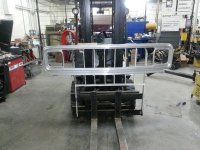
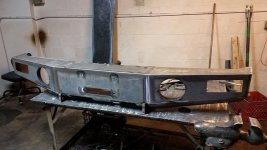
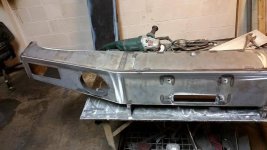
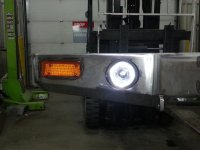
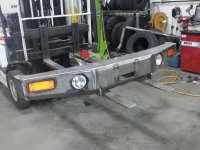
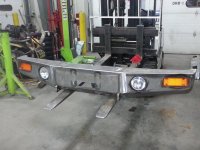
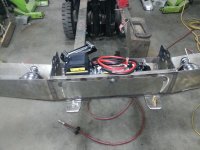
I decided I wanted a touch screen dvd/cd player with blue tooth and camera inputs. I had a hard time finding something that would fit the dash without blocking the a/c vent and a/c controls. I found one that had the least amount of negative issues and went with it. I have my grill shell partially done. What a PITA this process is. :doh: And yesterday I got an email saying my front bumper is done. When it gets here I'll install it, check for fitment and then I have to decide if I want to have it PC'd or just paint it. I'd like to be able to drive it in a few weeks. That might be a pipe dream. :hehe:
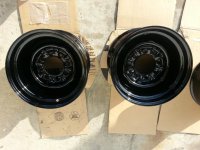
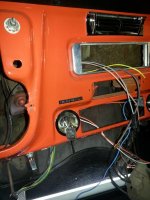
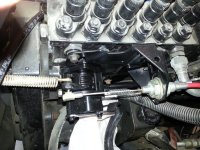
 

Attachments

  • radio.jpg
    radio.jpg
    48.8 KB · Views: 0
  • radio1.jpg
    radio1.jpg
    60.9 KB · Views: 0
  • lhgrill.jpg
    lhgrill.jpg
    78.2 KB · Views: 0
  • bumper.jpg
    bumper.jpg
    51.6 KB · Views: 0
  • bumper1.jpg
    bumper1.jpg
    52.1 KB · Views: 0
Last edited:
I've never seen one that floded down like that. I've been wanting onw for the chevelle.
 
I really like those guages. I ordered a set for my '53 Gonna have a 4500 rpm tach, and the related diesel lights. I like the ability to be able to plug into the OBDII port and have my guages operational.
 
Very nice truck DieselWrencher time to drive it some before tearing it down again. Rich

Thanks. Yeah, I'm going to try to try that this time. We'll see how it works out. Haha

I don't think he's capable of that. He's as bad as I am.

It's a disease. :hehe:

I've never seen one that floded down like that. I've been wanting onw for the chevelle.

I saw one in a search and then searched for a better one than the cheapie I found. The regular style one would not have worked because the screen would have been hit by the dash pad.

I really like those guages. I ordered a set for my '53 Gonna have a 4500 rpm tach, and the related diesel lights. I like the ability to be able to plug into the OBDII port and have my guages operational.

I should have had a 5k tach in mine. I wonder what they charge if I send it to them and have it changed? Probably not worth it now. bif
 
Lately we've had to keep getting things in line for the house deal to go through. Which, has eaten up any spare time to work on anything. I've had roughly zero extra time for any vehicle related stuff......

Last week I recieved my front bumper from James at RLC fab. I cut the turn signal mounting holes from a stock bumper and then welded them in this bumper. I also modified the brackets to use the 6" lights I have had for years and never used yet. They don't fit perfect, but will have to work. I sat my winch in the bumper to see how it looked and if it would clear the intercooler.
 

Attachments

  • lhbumpe.jpg
    lhbumpe.jpg
    46.8 KB · Views: 0
  • lhbump.jpg
    lhbump.jpg
    67.5 KB · Views: 0
  • lhbum.jpg
    lhbum.jpg
    65 KB · Views: 0
  • lhbu.jpg
    lhbu.jpg
    62.2 KB · Views: 0
  • lhb.jpg
    lhb.jpg
    97 KB · Views: 0
Then on Thursday night I was able to start test fitting the bumper. I had to cut on the lower portion of my old grill to get the bumper to go back far enough. The brackets don't go back far enough either so I will have to make some brackets and weld them on the bumper. Now that I got it on there, I think the winch will fit in there. It'll be close, but should just clear. I'm still waiting on the wheels and stuff to get sand blasted. Hopefully he hurries up. The bumper will have to go there too, before it gets PC'd. Who knows when I'll get to work on it now. We close on our house this Friday, then next week I go to training in Kansas. Then it'll be fix this and change that on the house for a couple months........
 

Attachments

  • lhbumper3.jpg
    lhbumper3.jpg
    59.4 KB · Views: 0
  • lhbumper2.jpg
    lhbumper2.jpg
    70.4 KB · Views: 0
  • lhbumper1.jpg
    lhbumper1.jpg
    71.4 KB · Views: 0
  • lhbumper.jpg
    lhbumper.jpg
    54.1 KB · Views: 0
I hope your sandblaster is faster than mine. I am going on 2.5 weeks already. If they aren't done by Friday I am taking my business elsewhere.
 
I hope your sandblaster is faster than mine. I am going on 2.5 weeks already. If they aren't done by Friday I am taking my business elsewhere.

I called him yesterday and they were done. I picked them up today and will try to get them painted tomorrow before work. These steel wheels are adding up pretty fast. Who's stupid a** idea was this anyway? LOL
 
Well, it was your idea, genius. Lol!

Yeah, I know. :pop:

I did manage to get my wheels primed and painted. This was loads of fun..... :stab:
 

Attachments

  • 16.5primed.jpg
    16.5primed.jpg
    75.2 KB · Views: 0
  • 16.5g.jpg
    16.5g.jpg
    66.3 KB · Views: 0
  • 16.5gl.jpg
    16.5gl.jpg
    41.8 KB · Views: 0
  • 16.5glo.jpg
    16.5glo.jpg
    43.3 KB · Views: 0
  • 16.5glos.jpg
    16.5glos.jpg
    66.7 KB · Views: 0
It's time to update this thread. I've gotten quite a bit done on this truck. I got the tires mounted on the wheels and put equal in them. I took the truck home to our new to us house, an dput it in the garage. I got a valve cover hydro dipped because I wanted a different look. I started installing the American Auto Wire harness and now the truck has an ignition switch again!
 

Attachments

  • 24vco.jpg
    24vco.jpg
    51 KB · Views: 0
  • lhign.jpg
    lhign.jpg
    43 KB · Views: 0
  • 72hom.jpg
    72hom.jpg
    37.8 KB · Views: 0
  • 72homep.jpg
    72homep.jpg
    38.7 KB · Views: 0
  • 72ho.jpg
    72ho.jpg
    69.4 KB · Views: 0
I baught a dodge throttle assembly and swapped over to that. I used to have an industrial pump on it so I couldn't use the dodge throttle set up. With that, I installed the throttle pressure cable for the trans, and then installed the Lokar shift cable kit. I still have to adjust it and fine tune it, but it works. I went ahead and added a secondary fuse box to power my relays. I used relays to control the vitals on this truck. It should make for a solid electrical system. I still have to finish the electrical system. I have to finish installing all my dakota digital gauges, install the trans controller, air compressor, and some other stuff. I got the valve cover installed, sanded, primed, and plasti-dipped the rear bumper. Shortened the steering shaft so I could put in my auto tilt steering column.
 

Attachments

  • LHthrottle.jpg
    LHthrottle.jpg
    93.8 KB · Views: 0
  • lhwiring.jpg
    lhwiring.jpg
    75.7 KB · Views: 0
  • LHwiringpic.jpg
    LHwiringpic.jpg
    75.3 KB · Views: 0
  • LHvc.jpg
    LHvc.jpg
    80.7 KB · Views: 0
  • LHrearbumper.jpg
    LHrearbumper.jpg
    44.6 KB · Views: 0
Last edited:
hopefully a buddy of mine sees this thread and works up his motivation to actually work on his 71.
 
I got my aluminum diff covers installed and replaced the diff fluids. I had to lenghten the bumper brackets for the front bumper. While I was doing that, I added 1/4" plate to each side to ensure strength in the area. Then I cut out the turn signal mounting holes from a stock bumper, and welded them in to this bumper so I could retain stock type turn signals. I added some LED's to my cargo light so I can have a third brake light. Here are some pics of how it is sitting right now. Front bumper is back on, dakota digital cluster in and half done. I still have a little bit to go, but it runs and moves again.
 

Attachments

  • Lhthirdbrake.jpg
    Lhthirdbrake.jpg
    27.6 KB · Views: 0
  • lhthirdbrakel.jpg
    lhthirdbrakel.jpg
    66.9 KB · Views: 0
  • lhbum.jpg
    lhbum.jpg
    65 KB · Views: 0
  • LHfrontdiff.jpg
    LHfrontdiff.jpg
    58.6 KB · Views: 0
  • LHD80.jpg
    LHD80.jpg
    60 KB · Views: 0
  • LHwiringpic.jpg
    LHwiringpic.jpg
    75.3 KB · Views: 0
  • LHfrontbumper1.jpg
    LHfrontbumper1.jpg
    76 KB · Views: 0
  • LHfrontrh.jpg
    LHfrontrh.jpg
    69.5 KB · Views: 0
  • LHrearbumper1.jpg
    LHrearbumper1.jpg
    70.6 KB · Views: 0
  • LHsideshot.jpg
    LHsideshot.jpg
    80 KB · Views: 0
  • LHdd.jpg
    LHdd.jpg
    67.8 KB · Views: 0
  • LHdd1.jpg
    LHdd1.jpg
    61.4 KB · Views: 0
  • LHinterior.jpg
    LHinterior.jpg
    65.3 KB · Views: 0
Last edited:
Looks good! You will have to drive it down here, next time you come this way.
 
Back
Top