95' Junker Drag Truck

My wife gets pretty mad when I spray outta the bowl and don't clean it up.:hehe:
 
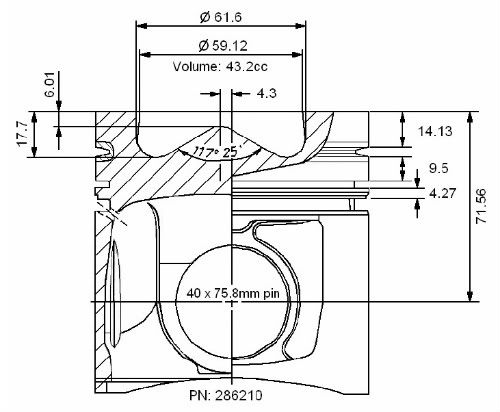
I decided to keep the "Junker" theme going, but still get a meaningful piston bowl upgrade. To accomplish that, my only real option was to pick up a cheap set of 1st generation Cummins pistons. The non/intercooled pistons from the early trucks, part number 286210, feature a 59.12mm wide bowl with a better center dome design that more closely resembles modern piston designs.

Thanks to Weston for sharing this piston diagram:
286210.jpg


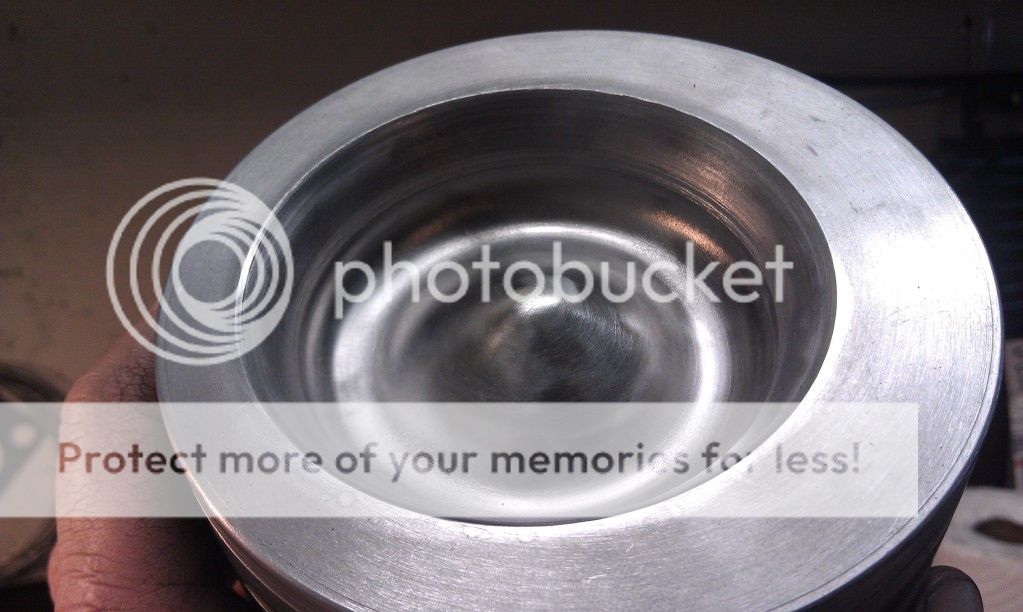
So for roughly $45 shipped to my door, I picked up a set of used non/intercooler pistons from a 91' cummins.

NAPiston3.jpg


After cutting .005" from the tops of the pistons, they cleaned right up. I also added a roughly .005" taper on the sides to both clean up the nicks and dings from shipping and allow for more piston expansion on this racing application motor build.

NAPiston2.jpg


NAPiston1.jpg


Next I'm going to open up the edges of the bowls just a little so I can maintain a decent amount of compression.
 
Last edited:
^^ Agreed, good choice man...99% positive that the 286210s raise the compression as is, so I wouldn't be too worried about what you remove from the bowl edges :Cheer:
 
Also wonder what the weight difference is between the 1st gen pistons and the emissions pieces... did you get wrist pins too? Pretty sure the 286210s run the shorter pin which would result in a nice weight reduction, I could be wrong, I haven't measured the pin in the set I have sitting on my desk.
 
The print shows the pin is 75.8mm in length, standard pin is 82.8mm in length, the bowl is 2.2cc smaller than the stock piston.
 
Yes, the pins came with them.

I will weigh them complete with pins and rings and produce pictures comparing them to stock 94-95 pistons on the scale.
 
The print shows the pin is 75.8mm in length, standard pin is 82.8mm in length, the bowl is 2.2cc smaller than the stock piston.

Guess I need to learn to read, maybe I would have picked up the listed pin length in the diagram LOL Thanks for confirming my recollections as well.

Blue, you thinking of further lightening the pins? Maybe polish and peen your rods too? Leaving the factory fasteners on the bottom end as well? I know it's a budget build, but they don't go very fast when the bottom end scatters and it seems you were bordering the safe power limits before you decided to add more air and fuel.
 
Blue, cut another .060 off those pistons so you don't have to do it later when you get a steal of a deal on a large by huge cam...
 
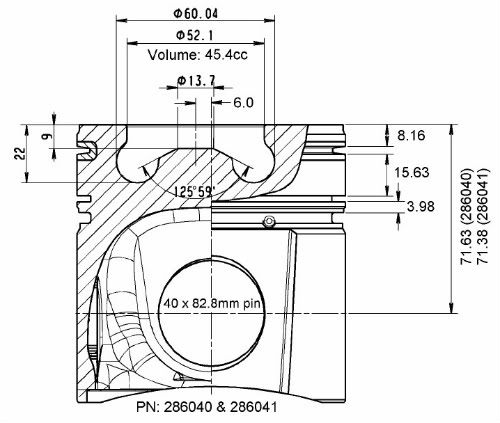
Stock piston, pin, and rings out of the 95', these are #286040 pistons with 71.63mm from center line of pin to top of the piston & 45.4 cc bowls. They weigh 1967 grams.

286040.jpg


95Piston1_zps7f163afe.jpg


Here is the 91' non intercooled used piston #286210 complete with piston, pin, and rings, it weighs 1810 grams which is exactly 157 grams less weight.

91Piston1_zps9f77c5a6.jpg


I opened up the bowls on the 7x10 mini-lathe from 59.12mm to 71.50mm with a roughly 8.5mm deep cut at a 30* angle.

Cut91Piston1_zps22bbe675.jpg


Cut91Piston5_zps160a5a5f.jpg


Cut91Piston4_zps48a54349.jpg


Cut91Piston2_zpsc6e09047.jpg


Stock 91' non/IC piston with .005" cut off the top for comparison:
Cut91Piston3_zpsdd9887f0.jpg


Cut91Piston6_zpsf71e97f8.jpg


Cut91Piston7_zps46444681.jpg


Now for a little math. Assuming the stock pistons were exactly 17.5:1 compression ratio:
+.010" headgasket or +.254mm = roughly 2.08cc's or a decrease in compression ratio of -0.626:1.

Opening up the reverse taper in the bowl to straight or opening up the 59.12mm top half to 61.4mm for 8.56mm deep = roughly 1.01cc's or a decrease in compression ratio of -0.287:1

Opening the bowl edge out to 71.50mm to a positive 30* = roughly 4.44cc's or a decrease in compression ratio of -1.157:1

Removing .005" or .127mm from the tops of the pistions = roughly 0.66 cc's or a decrease in compression ratio of -0.158:1

Going from #286040 pistons with 45.4cc bowls to 286210 pistons with 43.2cc bowls while accounting for the lost piston protrusion of roughly 0.07mm equates to a loss of 1.63cc's for a gain in compression of 0.397:1

All said and done, the compression ratio on this motor now calculates to 15.67:1 with the .010" oversized head gasket.

Or 16.21:1 with a standard thickness head gasket.
 
Blue, cut another .060 off those pistons so you don't have to do it later when you get a steal of a deal on a large by huge cam...

Valve reliefs would be better suited to keeping the compression up...

Blue, is there a burn characteristic you are trying to achieve with the 30° taper?? How much timing are you planning to run? Would the 10mm increase in bowl opening not have been enough to support more then your current timing? I'm sure there's a method to the madness, I'm just confused...


I've been consulting with a couple of different folks with much more engine/piston/power strategy experience than I have.

The goal in opening up the pistons at a 30* angle is to promote airflow into the bowl and help promote complete exhaust evacuation out of the bowl.

The fuel can be sprayed in or out of the bowl, whatever makes the most power at the drag strip as tested with trap speed. Whatever goes the fastest is what I'm going to run. I plan to perform some testing with stock 145* spray pattern injectors with follow-up passes with different injector cone angles to see if there is a noticeable pattern in power gain/loss vs. spray pattern.

I also plan to play around a bit with higher timing, maybe 30+ degrees if it continues to add noticeable power gains.

I don't plan to build a high RPM monster but I will have to continually make power in the upper RPM range if I'm going to keep the stock bottom end together as it's already making close to 1500 ft lbs and I don't think I want to push it past 1900 on the stock bottom end.
 
I also plan to play around a bit with higher timing, maybe 30+ degrees if it continues to add noticeable power gains.

Thats what I'm doing as well. I need to get my own timing kit yet, but I'm going to start it at 25ish and bump it up 2* every week until it stops making more power, or 35*, whichever comes first. Can't get too crazy now. Or I won't be able to spool off the line at a certain point and I'll have to back it down again.

When do you plan to have yours back together will? When does your track open?
 
When do you plan to have yours back together will? When does your track open?
As soon as possible, still planning to have it back together in time for NHRDA event on March 2nd that might end up cancelled due to permit issues....


BigBlue24, are you going to ceramic coat the pistons?

It's not in the current build plan. I'm not sure it would help with the intended use of this motor/cheap drag racing project.
 
I got all (6) pistons cut and cleaned up, they actually cleaned up well considering the $45 I paid for them shipped to my door.

I added a small radius at the leading edge of the bowl, sharp edges tend to overheat, erode, and create starting points for cracks.

FinishedPiston1_zps987a2e08.jpg


FinishedPiston2_zps4c4df925.jpg


FinishedPiston3_zps02432e85.jpg
 
Fantastic work on the pistons. I have learned a lot from this thread. Keep up te good work.
 
Back
Top