HTT 13ss Wastegate Cover

ehh, reading all these problems about the 13cm2 SS housing almost is making me want to wait alittle bit before i drop some coin on one. has anyone come up a soild solution for the wastegate pucks???

wes

I would go with a 14cm cast, then open up the WG hols a bit...as long as you're not spraying it, the 14cm will give you about the same performance, reliably!

Chris
 
Send it in. they'll warranty it for ya. machining issue.

HMMM... I just put mine on in Jan. I will be pulling it off next month to hopefully build a set of twins.. I wonder what they are doing to fix this issue?? Has anyone directed HTT's attn to this thread??
 
Seems pretty obvious to me?

Maybe not? Ron, you're a machinist...is that something that could be caught before it got sooted??

Chris
 
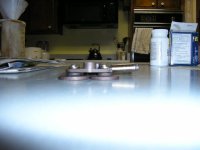
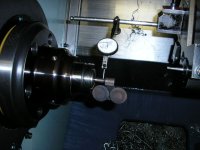
Here is what happens when you heat a shaft that is supported on one side and apply upward force on the other side.
 

Attachments

  • gate fix 009.jpg
    gate fix 009.jpg
    57 KB · Views: 86
I gently coaxed the dog legged little bugger back to proper shape. Tomorrow I beef things up a bit.
 

Attachments

  • gate fix.jpg
    gate fix.jpg
    67.7 KB · Views: 73
I gently coaxed the dog legged little bugger back to proper shape. Tomorrow I beef things up a bit.

I'm sure glad you decided to take pics of all of this.. Thanks.. It is starting to all make sense ot what is goin on.. What type of attachment is planned for the other end???
 
I'm sure glad you decided to take pics of all of this.. Thanks.. It is starting to all make sense ot what is goin on.. What type of attachment is planned for the other end???
I am going to try just making things stronger. The shaft is .359 in the bushing, but drops down to .29 out where it bent. I am going to make a sleeve to go over the shaft and weld it on at the puck side to eliminate the weak point, then bore the existing bushing and put it all back together. It's an easy fix, but I think it will work.
 
Keep the pictures coming, If I don't have to deal with customs and not having my turbo for 2 weeks that sounds good to me. I'm sure I can find a machinist at work to fix my pucks up if that is my problem. But I do like the idea of supporting the pucks on both sides. I just don't see how you would get it all together then.....
 
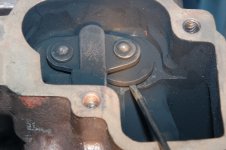
Well I pulled my turbo off this weekend. Just like I figured my puck is not sealing. If I hold the actuator tight, the top puck doesn't move, but the bottom puck has 1/16" gap and is loose. I'll be emailing HTT tonight and giving them a call tomorrow.
 

Attachments

  • DSC_3759a.JPG
    DSC_3759a.JPG
    109.9 KB · Views: 66
hmmm is this a dumb idea?

maybe get a thin piece of steal sheet puck shaped, cut it on the edges to have 4-6 flaps and bend it over the edge of the loose puck and tack it in place to seal the gap?
 
Well I pulled my turbo off this weekend. Just like I figured my puck is not sealing. If I hold the actuator tight, the top puck doesn't move, but the bottom puck has 1/16" gap and is loose. I'll be emailing HTT tonight and giving them a call tomorrow.

is that a crack on the upper left hand side or just a scratch?
 
Well I pulled my turbo off this weekend. Just like I figured my puck is not sealing. If I hold the actuator tight, the top puck doesn't move, but the bottom puck has 1/16" gap and is loose. I'll be emailing HTT tonight and giving them a call tomorrow.

Have you tried running it without the screw driver holding it open?(sorry).
 
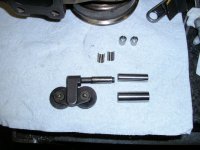
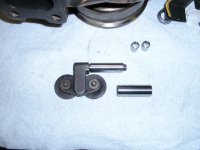
These are the parts I made to try and keep the arm from bending. The two small bushings at the top each get the tops milled off to make a pair of split bushings. The split bushing takes up the space in the undercut area where the shaft is weakest. Bushing size is .292 ID, ,356 OD X .490 long. Bushing to the right of the wastegate shaft is .356 ID, .420 OD X 1.5 long and presses over the wastegate arm after the split bushings are in place. It is then welded out on the puck end as far around as I can reach. The other bushing is to replace the bushing that presses into the housing. It is .424 ID, .519 OD X 1.45 long.
 

Attachments

  • gatefix 001.jpg
    gatefix 001.jpg
    70.6 KB · Views: 49
Last edited:
This picture shows the shaft with the split bushings in place and the sleeve pressed on over the old shaft.
 

Attachments

  • gatefix 002.jpg
    gatefix 002.jpg
    67 KB · Views: 44
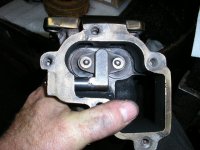
Sleeve has been welded onto shaft and installed into housing using new bushing. All that's left is to tweak the assembly so both pucks are sitting flat and weld the arm that the actuator attaches to. I'm sure there is a better way to do it, and when someone comes up with it, post it here if you wouldn't mind.
 

Attachments

  • gatefix 005.jpg
    gatefix 005.jpg
    70.1 KB · Views: 67
Back
Top